
Facebook has quickly become a favorite social network destination for marketers to launch their marketing and advertising campaigns. It has a mammoth active user base, tremendous user engagement and laser-focused target audience options.
But, many businesses fail to leverage the smart (and consistently updated) advertising technology inside Facebook. Then, they abandon the social network giant Facebook, citing the media platform’s inability to deliver a good ROI.
It’s your business loss…
In this post, I want to introduce you to an immersive experience mobile advertising product that businesses can use to showcase their products.
Introducing a powerful mobile app advertising product that social media site Facebook unleashed in February, 2016 –
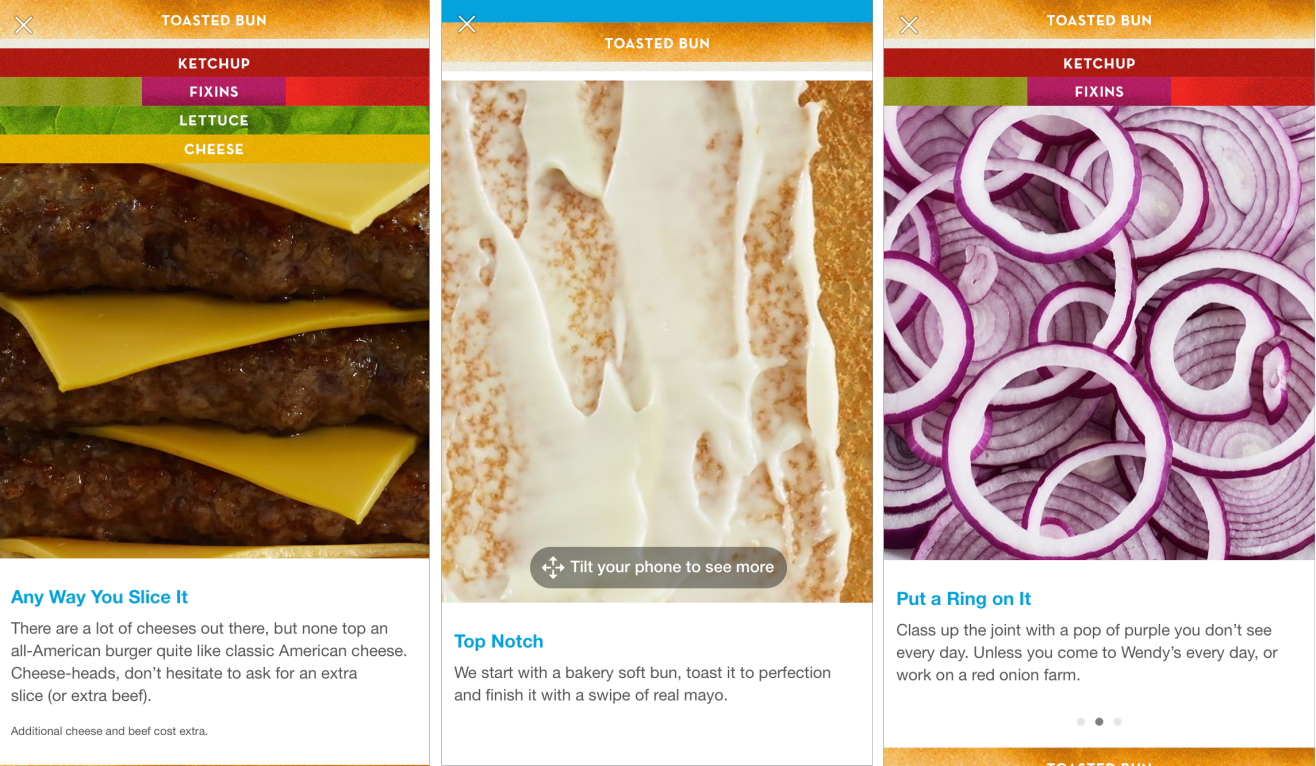
It consists of a variety of immersive experience components (videos, text, still images and CTA buttons) that together tell a story. Your target audience can swipe through the carousel of images and zoom into individual images to view finer details.
Wendy’s created a Canvas campaign, consisting of GIFs breaking down the ingredients of their cheeseburger. And, they managed to get 65 seconds of average view time. Indeed, 2.9% of the active users got to the bottom of the ad and tried Wendy’s restaurant locator, as well.
Let’s start the article by looking at the main reasons why your business should consider Canvas in your Facebook advertising. Later on, you’ll see a step-by-step breakdown of how to create your first Facebook Canvas ad experience to reach your target audience.
Top 3 reasons why your business must launch a Canvas campaign
Are you on the fence about whether this is just another shiny new advertising tool by a media site like Facebook or something valuable and worth experimenting with?
Then, hang around until you read its 3 utilities below.
1. Worried that photos and videos will slow your ad experience for the user?
Then, here’s a fact:
Content inside canvas loads instantly.
Facebook claims it’s 10 times faster than the normal mobile device website.
So, you can promote your products by creating a compelling visual journey and immersive experience for your audience without worrying about loading time issues.
Do you remember the last time that you waited for a landing page to open on your mobile device?
Yeah, me neither.
74% of mobile app users will abandon websites that don’t load in 5 seconds.
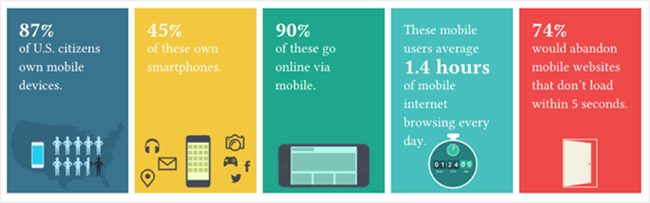
Slow loading times are one of the major factors that lead to the user bouncing off your website.
Think of all of the dollars that you wasted on social network and Facebook ads, due to such poor and slow after-click ad experiences.
With Canvas, you can bid goodbye to all of those premature window closing dollar burns.
An active user can view your ad instantaneously, once he clicks…so now, he’ll be aware of your brand offerings and is more likely to convert at a later stage.
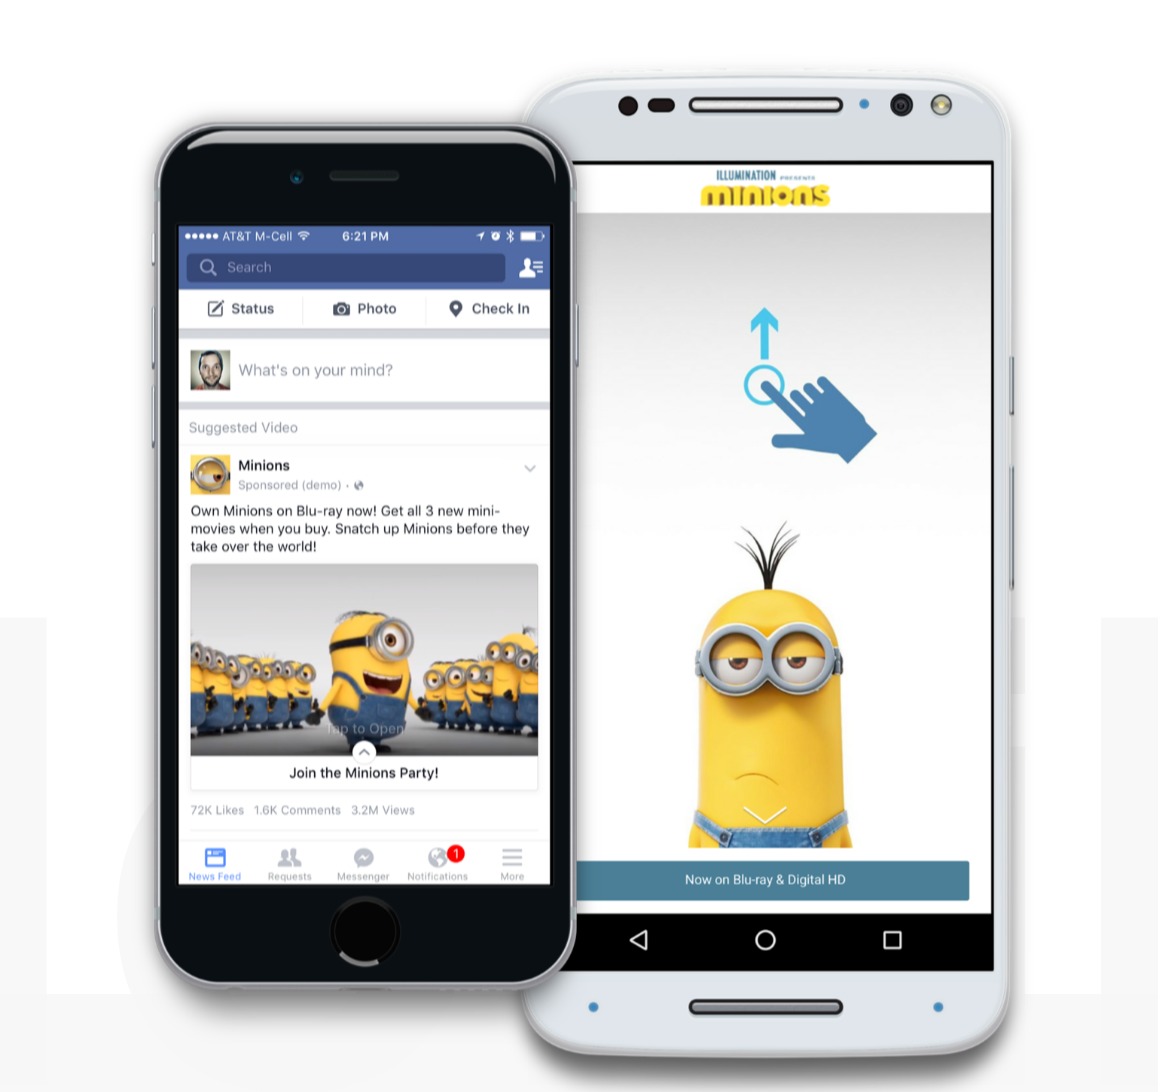
2. Unlike other types of ads that occupy real estate in the sidebar, Canvas offers a full-screen experience for consumers, within the app, once they click on the ad.
This is especially useful for the smaller screen, since mobile browsers are in a distracted mode and pop-up ads feel disruptive. Canvas captures attention and provides value to the user in a memorable, as well as interactive, manner. For example, a mobile device user will need to tilt-to-view panoramic images.
This means more engagement for your brand. Indeed, in its early testing, social network leader Facebook found that 53% of its subjects viewed at least half of their ads. The average view time is an impressive 31 seconds.
You might already know that stellar user experience and higher engagement lead to more conversions from your target audience.
3. Since their inception in 2014, the Canvas team has based itself on key design principles that take people, advertisers and agency designers into account.
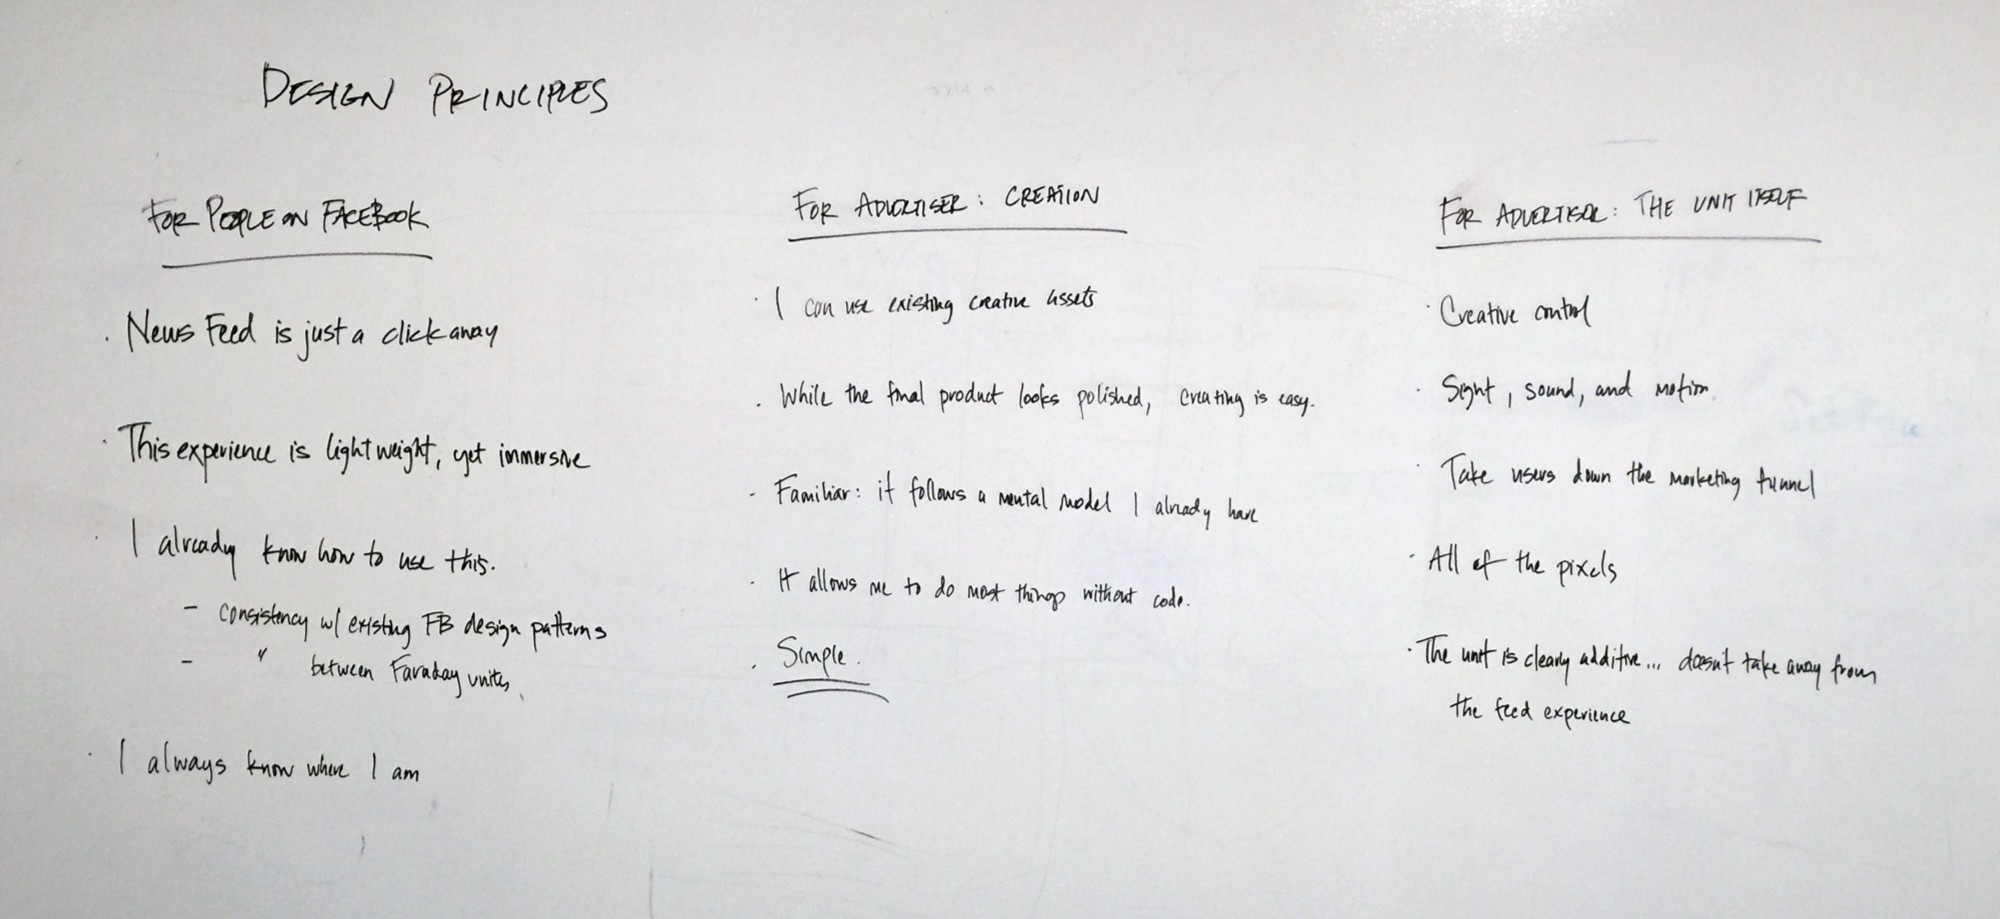
So, you’ve got full creative control over what you want to achieve with Canvas:
Demonstrate your product beautifully, tell a compelling story about your brand or even promote your movie.
But, there’s also one downside of Canvas:
You don’t get a lead capture feature inside it. But, eCommerce businesses can add product catalogs and also direct visitors to checkout pages to generate revenue.
If you’ve read this far, I’m sure that you’re intrigued by the rich Canvas experience.
Let me show you how to create your first Facebook Canvas. Here’s step #1 for making the most of the social network:
Step #1 – Create a new canvas from the publishing tools inside your page
Inside your page, you’ll find Canvas in the publishing tools at the bottom of your left sidebar.
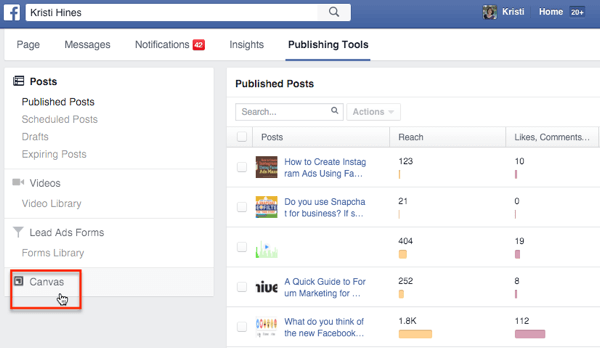
In the dashboard, you’ll see any previous Canvas campaigns that you’ve created and the option to create a new one.

Before you start creating a Canvas, it’s recommended that you visualize the kind of experience that you want to give your audience on their news feed and have all of the creative components handy.
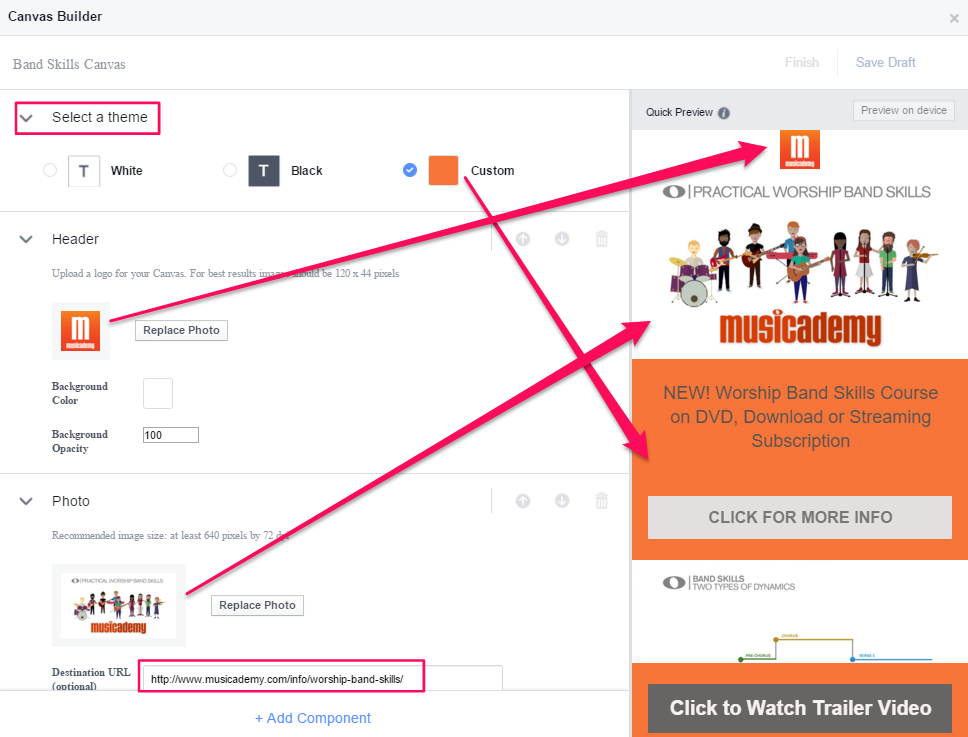
Once you click on the ‘Create’ button, you’ll be met with the Canvas Builder. Here, you can assign a name to your new Canvas (only for your personal reference and invisible to the people that will see your ad).
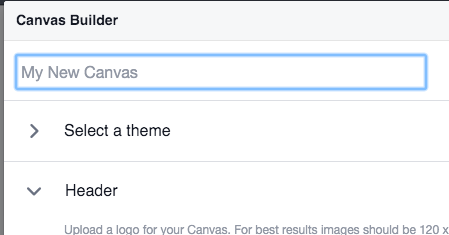
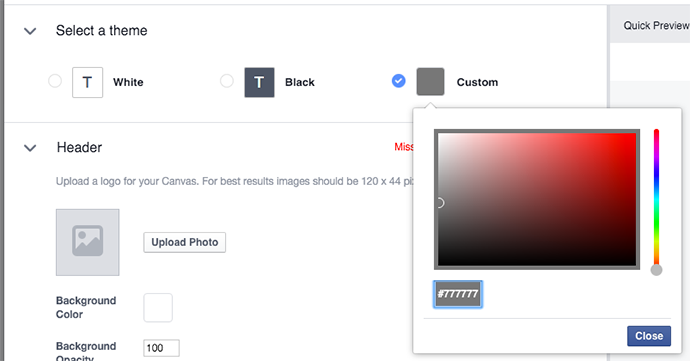
You can also choose a theme/background for your Canvas, by clicking on the ‘> Select a Theme’ button. You can choose a white, black or custom color (by entering its hex code) background. This is especially useful for the text boxes/empty spaces in your Canvas.
You can also start a Canvas creation from the Power Editor.
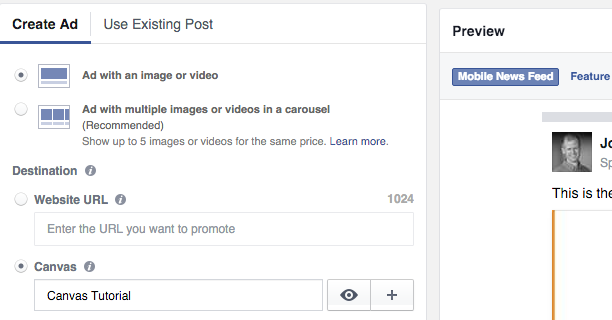
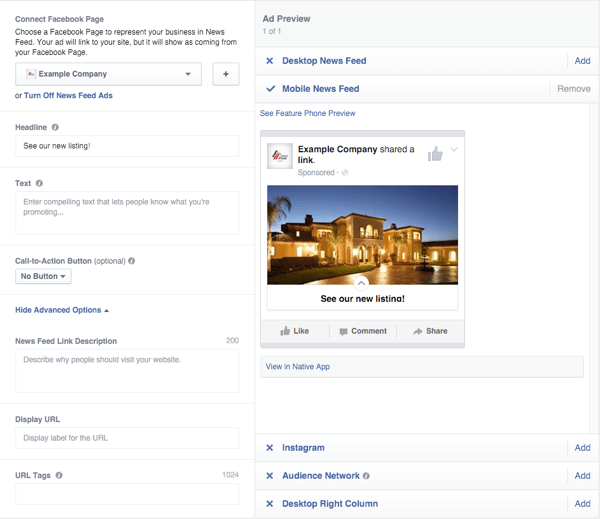
You’ll need to choose “Ad with an image or video” under “Create ad.” Then, choose “Canvas” from “Destination.”
Finally, click on the ‘+’ icon, to open the Canvas builder.
![]()
Note: You can save a canvas by clicking on ‘save draft,’ to come back later and finish creating it. But, you can’t edit a canvas that you’ve already ‘finished.’
If you want to edit a finished canvas, then your best option is to duplicate the existing one (from the actions drop down menu). Then, edit it in the new draft form.
Step #2 – Add components inside the canvas builder
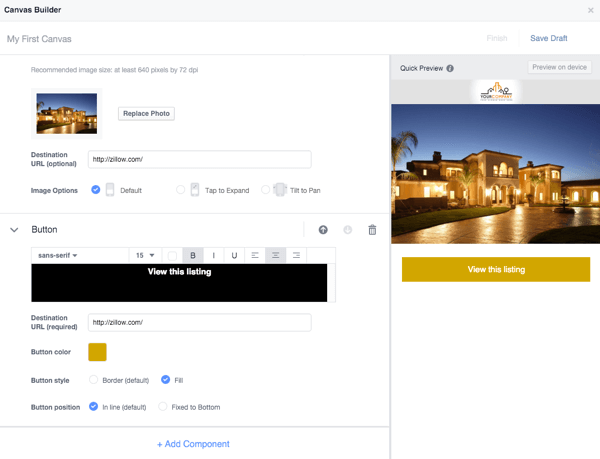
Facebook will now provide you with 3 default components: header, photo and button. But, you’re free to move these components or delete them, by using the trash can icon.
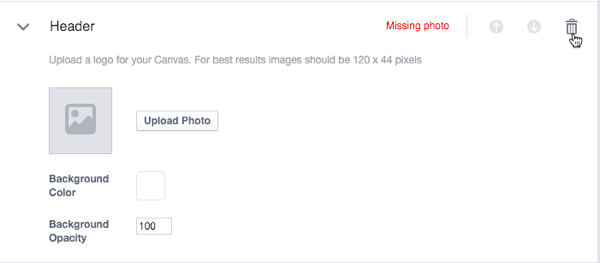
The recommended resolution for the header (that will always stay at the top of your canvas) is 120 x 44 pixels (you can use images up to 882 x 66 pixels, though). Unlike other Canvas components, you can only have one header.
Next, you’ll need to click on the “Add Component” button at the very bottom. You’ll get a selection of different types of components.

You can add as many different types of components as you want (several of the same type as well). Then, click ‘OK.’
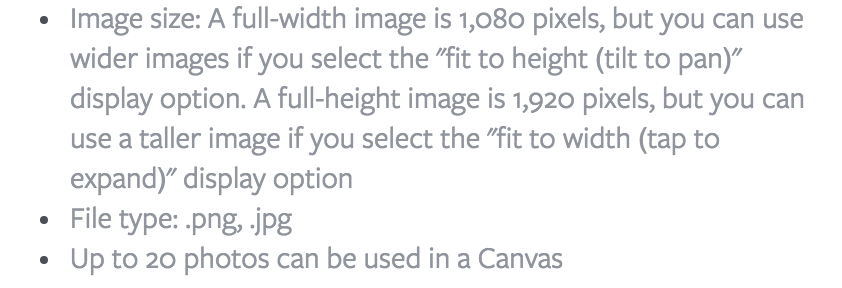
After the header, you’ll get the photo component. You can add up to 20 photos inside your Canvas. Note that images will use the full screen width by default.

Here are the other design requirements for photos.
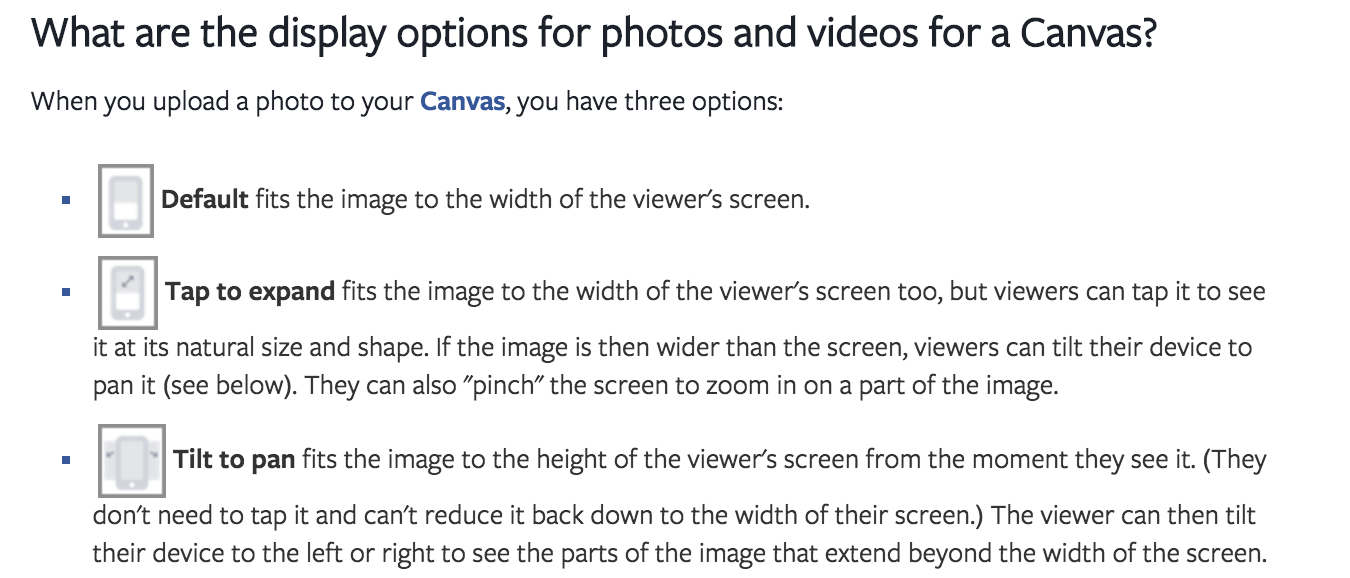
You also get the following 3 display options for your photos (as well as for videos. I’ll speak about videos, shortly): Default, Tap to expand and Tilt to pan.
When you choose the full-height image option, you can also specify a destination URL. This is the address where your target audience will land, after he clicks on your image.
Next comes the button component. It’s an opportunity to take your audience out of the social network Facebook and onto your website from the Button Link field.
The button can have up to 30 characters and a serif/sans serif font.
You can also modify:
- button’s color,
- position – either fixed at the bottom of your Canvas or a fluid CTA that moves when the user scrolls,
- style – border or fill.
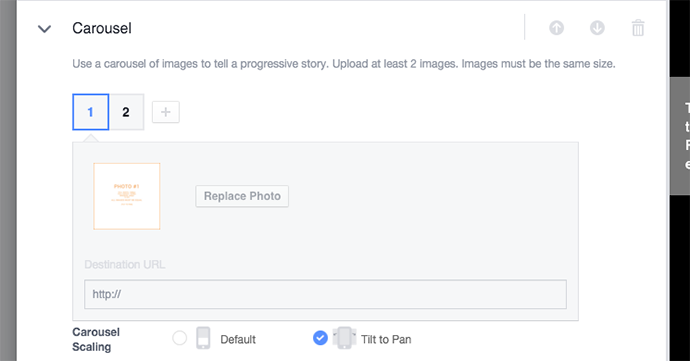
The next suggested component is a carousel – a series of cards that allow people to swipe.

You can use 2 to 10 images (of the same size) and specify destination URLs in each (unless you use the tilt to pan option for showcasing wider images). To add images, press the +Carousel scaling button.
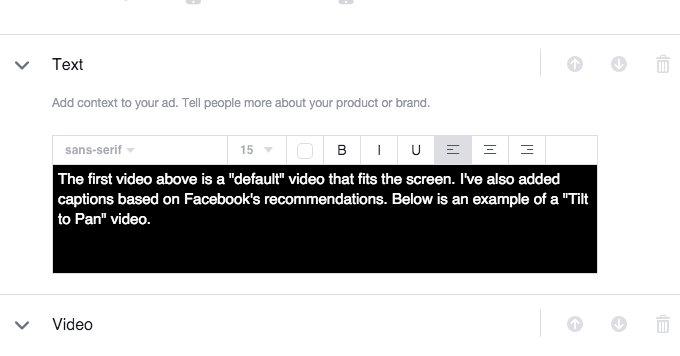
Next up is the text block component. Put simply, this is space to add text to your canvas (the limit is 500 characters) with both serif and sans serif options.
Other specifics of the text block include:
- Font size between 6 point to 72 point,
- Bold, italics and underlined (has to be applied to the whole text and not individual words),
- Left, center and right alignment.
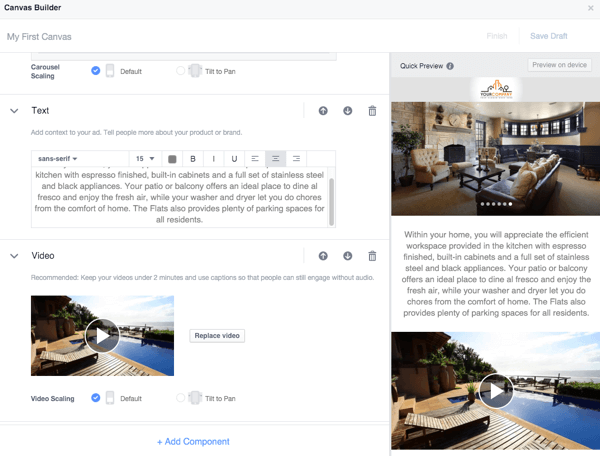
Next, you get a video component. Facebook recommends that you use portrait orientation that doesn’t occupy the full-screen. Otherwise, your landscape videos will also automatically resize themselves to play in portrait orientation (with ugly black bars on either side).

Other video requirements include:
- a minimum resolution of 720p,
- Collective run-time of all the videos, together, to be under 2 minutes
- .mp4 or .mov formats
The thumbnail will be the first frame of your video (not editable). And, Canvas Builder recommends that you add captions, for engaging the active users that have muted your video or their device.
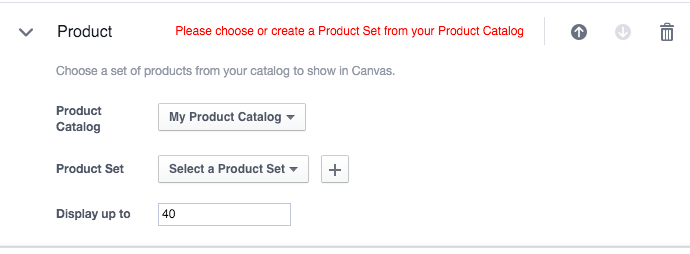
Finally, if you’ve created a product catalog for running dynamic product ads, then you can add a product set to your Canvas.

You cannot choose the order in which the products will appear, though. Facebook will dynamically display up to 40 products at a time (the ones that drive the highest sales).
Once you’ve added desirable components, it’s time to move on to the next step.
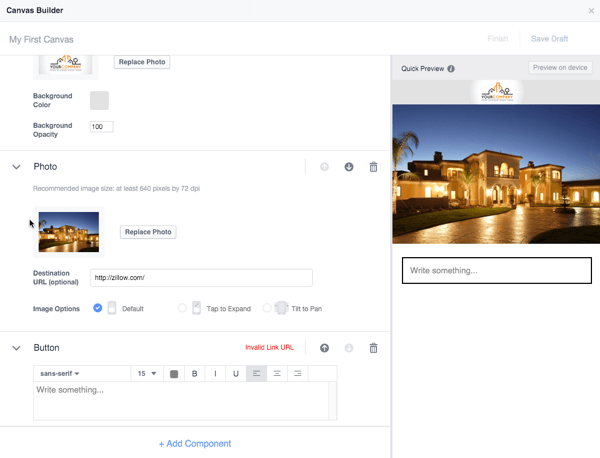
Step #3 – Preview your Canvas, rearrange components and Finish
You can save your work, so far, as a draft. But, don’t click the Finish button, yet. As I mentioned earlier, this will lock your Canvas. You might be getting a quick preview of your Canvas, so far, in the right sidebar.
You can also preview the Canvas on your smartphone or mobile device, by clicking on the ‘Preview on device’ button.

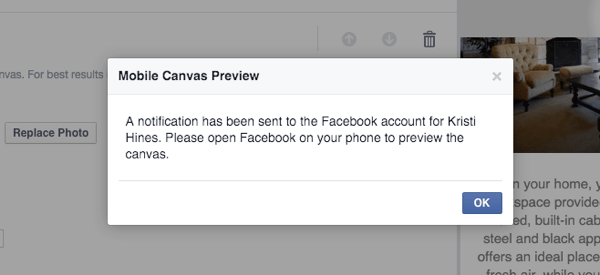
Once the Canvas is ready, you’ll get a notification to preview the Canvas in your Facebook mobile App.
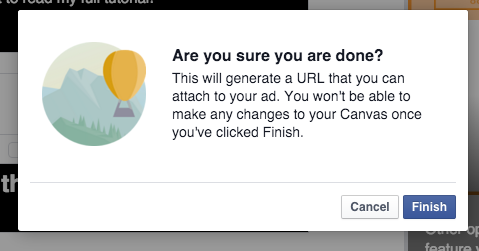
If you want, you can rearrange any components (using upwards/downwards arrows) and make modifications to your Canvas. You won’t be able to make changes once you finish.
![]()
Ensure that your text elements, logo and CTA button are rendered properly and look elegant.
If you like the overall experience of the Canvas on your mobile, then click on the ‘Finish’ button.
Step #4 – Create a new ad set and launch your ad campaign
Once, you click the Finish button, you can get a URL to your Canvas to use in a Facebook advertisement.
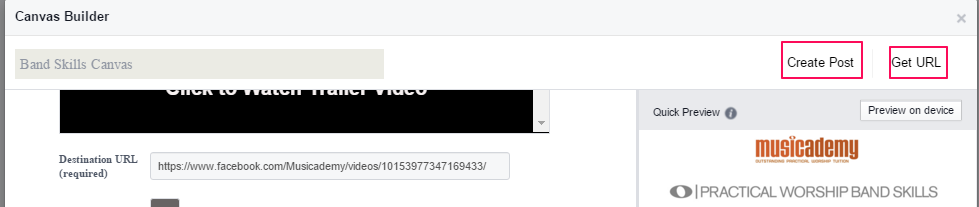
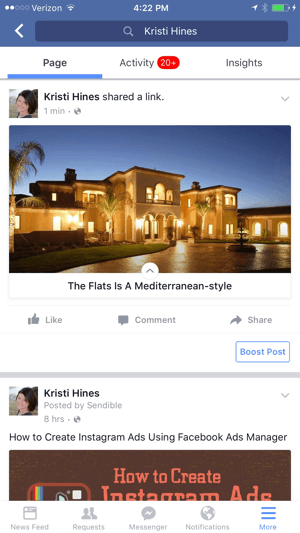
Alternatively, you can “Create Post” with your Canvas. It will be published in your timeline and on your target audiences news feed, like a regular post.
If you want to start an ad revenue campaign, then start with an objective of either getting “Clicks to Website” or “Website Conversions.” Under destination, paste the URL of your Canvas.
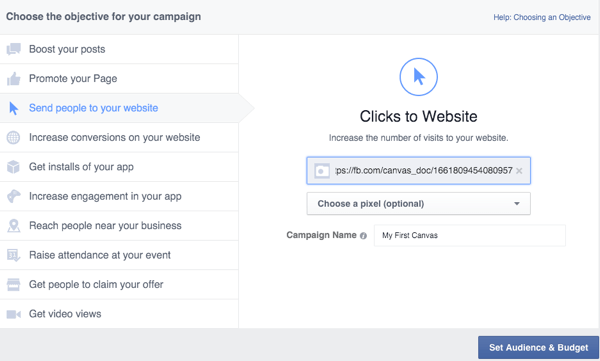
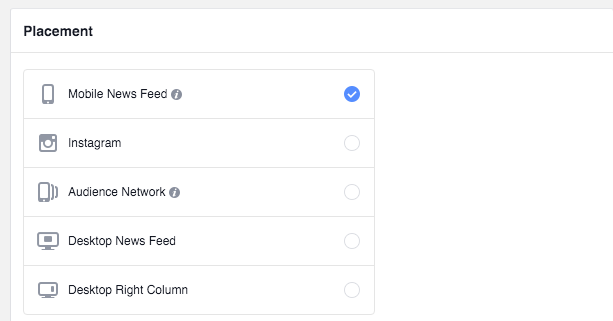
Then, choose the ad placement as “Mobile News Feed” (remember: your Canvas won’t appear on desktops).
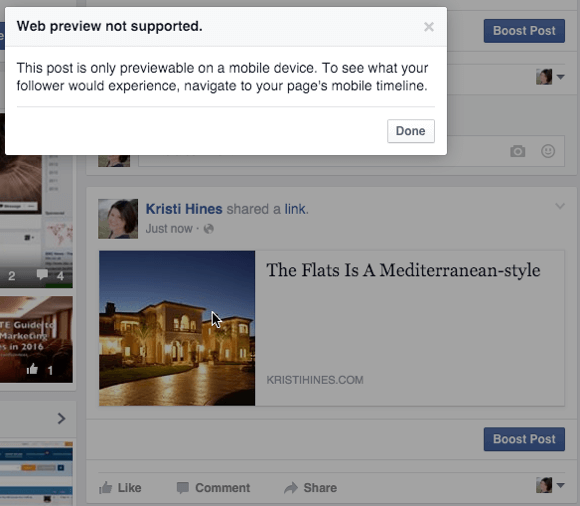
When someone clicks on your Canvas from a desktop, they get the following message.
For your ad, choose “Canvas,” under ‘Destination.’ Then, choose the Canvas you finished previously. Set your audience and budget as usual.
You’ll also need to add a headline (that appears below the thumbnail of your canvas), text (that appears above the ad) and a thumbnail image.
Again, you can preview the ad, to see how it will look to your target audience and active users.
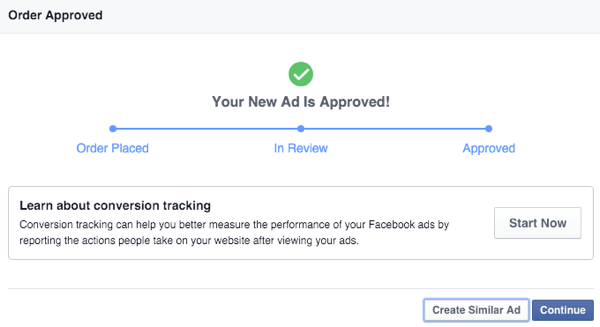
Once you’re set, place the order.
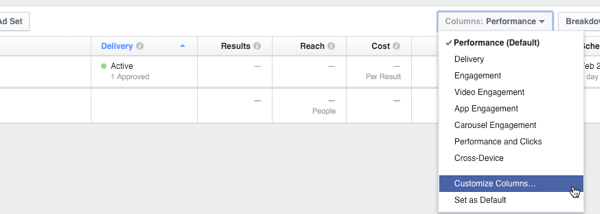
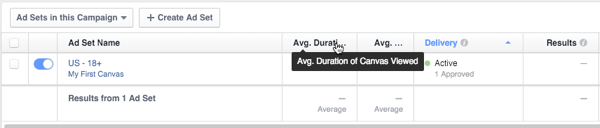
Step #5 – Add canvas ads metrics and get analytics data inside Ads Manager Insights
Besides the usual metrics, you can “customize columns” and measure more specific metrics that are related to your Canvas.
Choose the two metrics, ‘Average duration of Canvas viewed’ and ‘Average % of Canvas Viewed,’ to get an idea of the engagement that you’re getting.
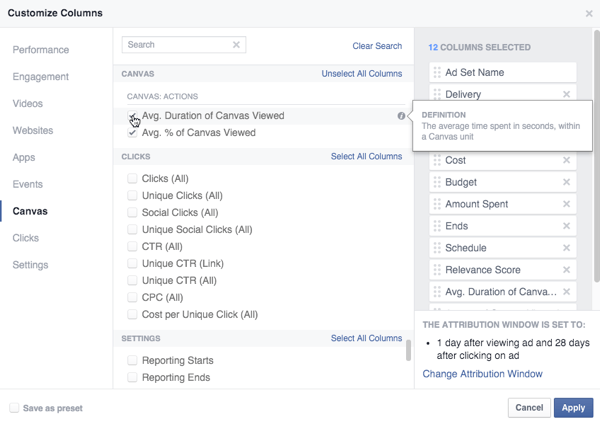
You can rearrange your columns to see Canvas metrics first. Then, monitor them, inside your Ad Manager Insights.
Once you start seeing good interaction with your storytelling, you can consider pairing your Canvas with a landing page. This ensures that you get a chance to convert those warm visitors and also make up for the loss of any lead generation form inside Canvas.
Conclusion
Facebook Canvas is an incredible storytelling opportunity for brands. It isn’t available to every marketer, though (only Power Editor users). You can place a request to access the Canvas Builder inside Power Editor, by completing this form.
If you already have access to the Canvas Builder, then I recommend that you experiment with the immersive experience opportunity to reel in your active users.
If you feel confused about any aspect of the Canvas Builder, then please don’t hesitate to ask me in the comments below. I’ll do my best to answer your queries.
Comments (5)