Dashboard by Josh Lorg
There are a lot of nifty project management tools out there.
But you already have access to a tool that you might not fully understand how to use.
And it can do wonders for the way you approach your job and the way that you achieve your marketing goals.
I’m talking about the good old-fashioned spreadsheet.
Not the paper version, of course, it’s 2017!
I’m talking about Microsoft Excel; and its free, online cousin Google Sheets.
There are three major ways that you can use Excel or Google Sheets to organize your marketing efforts.
- First, it can be a simple and effective project management tool.
- Second, it can serve as your client database or CRM.
- Finally, it can organize your prospects like a lite version of Salesforce.
Sound too good to be true? Read on.
The difference between Excel and Google Sheets
Excel has been around for a long time and is actually an advanced statistics tool for analyzing data. Using Excel formulas looks a lot like the database language SQL.
You can process large data sets quickly and develop financial models.
Google Sheets is much less robust in terms of statistical analysis, but the function and format are essentially the same.
Plus Google Sheets is free!
Since it’s in the cloud, multiple people can work on the same Sheet at the same time and every change is automatically saved and immediately available to everyone.
If you’re online all the time this is super convenient.
For this post, I’m going to use Google Sheets since the techniques I’m going to show you don’t require heavy statistical analysis.
And with Google Sheets being free, you can get started and create your Sheets along with me right now.
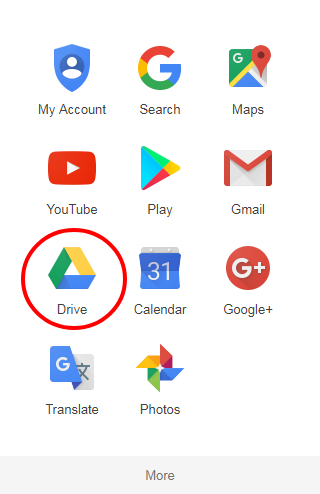
If you’ve never used Google Sheets before, you need a Gmail account. Go into your Gmail and you’ll see a little icon of boxes on the top right.

When you click you will get a menu that appears. Click on the Drive icon.
You will arrive at a new URL that is similar to your mail.google.com address but it’s drive.google.com.
Click on the blue New button on the top left.

Then click the Sheets option.
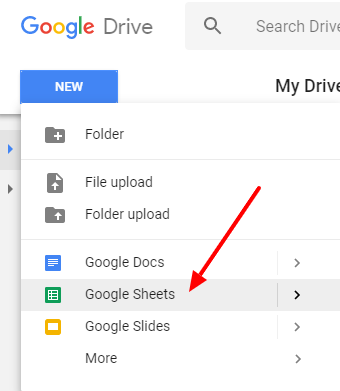
You’re ready to go, let’s jump in!
Google Sheets as a Project Management Tool
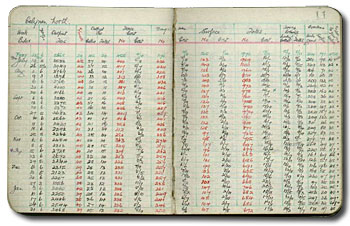
About a hundred years ago there was a guy named Henry Gantt. Gantt was an organizational expert who developed something called (surprise!) Gantt planning.
Gantt planning is a sort of cascading reverse planning to help teams put together the tasks required to complete a project over a desired period of time.
It looks like this:
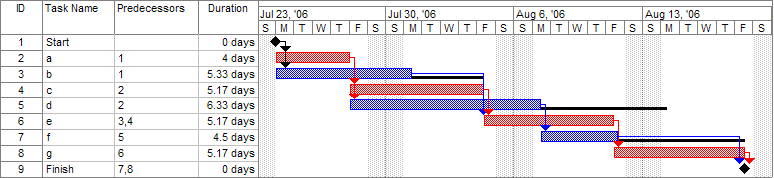
Advanced programs like Microsoft Project are based on this type of planning. You may have come across software like this if you’ve ever worked in project management.
But you as a marketer probably don’t need such a heavy program to manage your planning. And if you’re in a startup you probably don’t want to pay a hefty price tag for it either.
That’s where Google Sheets comes in.
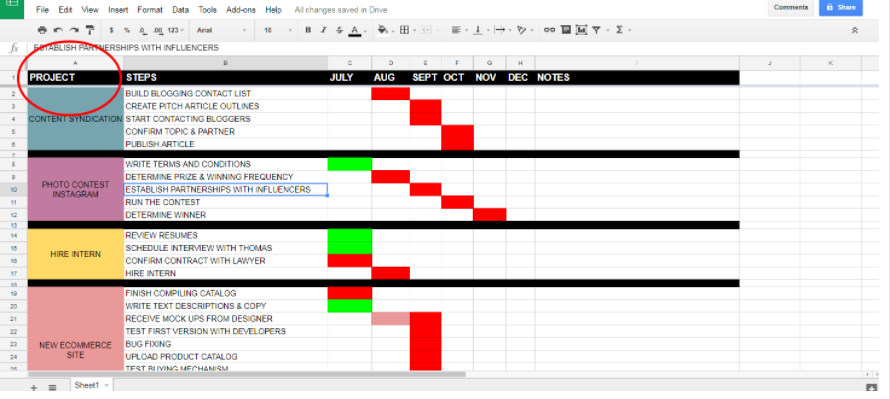
You can make a cascading reverse planning in Google Sheets.
It might look like this:

As you can see, it follows the Gantt style.
Here’s how you set it up:
Step 1: Create the project on the left
This should be the overview of the project, not the specific tasks that need to be completed. In the example, I’ve created things like Content Syndication and New E-commerce Website.
Step 2: Break each project into concrete steps
Think of the steps like a staircase.
In this case, the staircase should descend naturally until it reaches the bottom which is the end of the project.
One of the secrets to project management is to continually break tasks up until they become super manageable and easier to complete.
In fact, one of the things that cause procrastination is the feeling that you can’t complete a project.
Keep slicing up tasks until each step – no matter how small – is listed. It will do wonders for your productivity by keeping you from getting stuck.
For example, let’s look at the Instagram photo contest project. A bad way to think of a step is “come up with the contest rules and prize.” It might seem like a logical part of the project but it’s actually multiple steps.
A better way is to break up the steps into concrete actions like “write terms and conditions,” “determine prize and frequency,” and “create promotional materials.”

You could even go further and break up things like “create promotional materials” into multiple steps such as “define graphic chart,” “select background images,” “draft copy,” etc.
Everyone has their own balance between the size of a task and how specific they need it to be to complete it.
The great thing about Google Sheets is that it’s really easy to add steps.
Once you have the above format in place, you can add a step of validating the terms and conditions with a lawyer. In the planning that will come right after you write the terms and conditions.
Right click on the “determine prize” cell that’s below the “write terms and conditions cell.” Then click Insert Row.
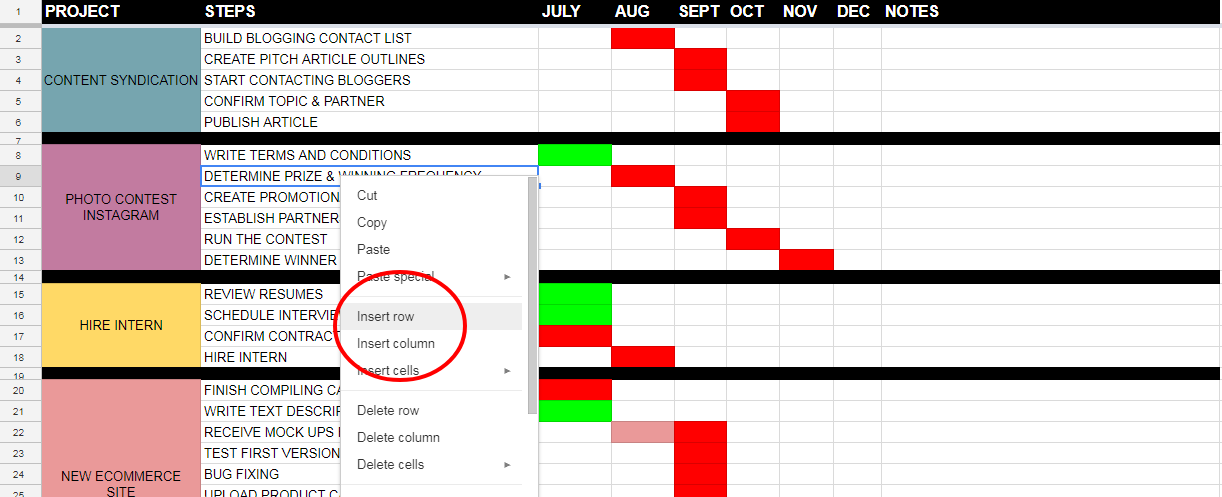
A row is added above the cell that you clicked (Google Sheets is formatted so it always adds a row above), and the project box automatically expands to accommodate it.
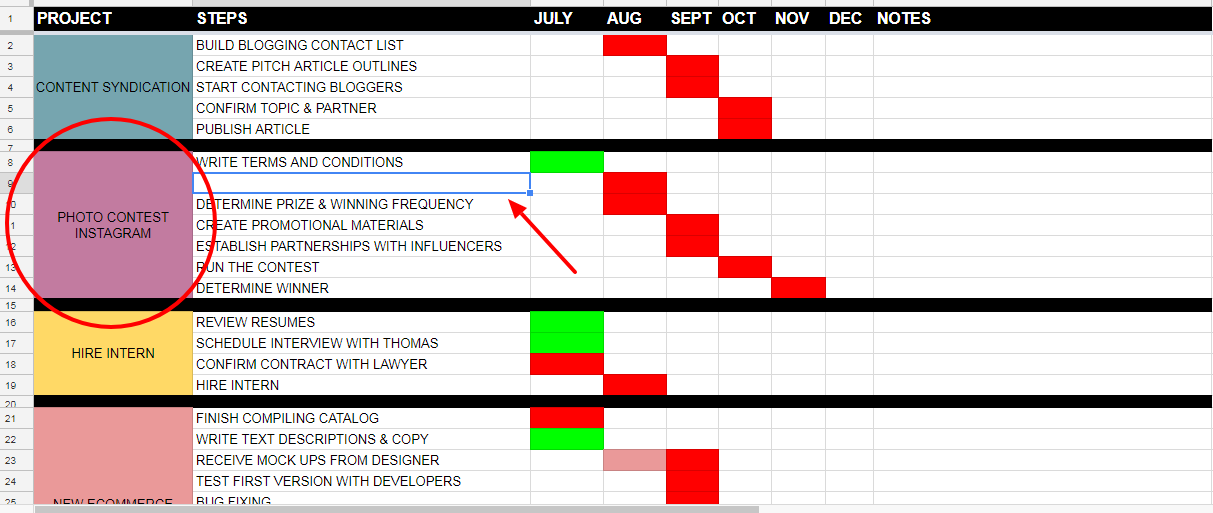
Then add in the step!
Step 3: Build out your reverse planning
To do this you need to start from the end. When do you want each project to be completed?
Sometimes a project has a clear due date. In other cases, a project can be open-ended. Even if it doesn’t have a hard deadline you should make sure to have an end date.
After you’ve established the end date work backward. In my example, I’ve organized by months but you can organize by weeks or even days.
Like a staircase, each step should follow the previous step. It makes sense. During a project, the steps often depend on each other.
Be realistic in your planning. Don’t over- or underestimate. Figure out what the key dates are and build around that.
Step 4. Use colors to make things easy to understand
I like to have each step in red so that I know immediately that it’s not completed. As soon as I finish something I switch it to green.

Once the entire project is green I know that it’s done!
And since it’s a planning calendar each time a month passes, I like to put that month in gray so that I know where I am.
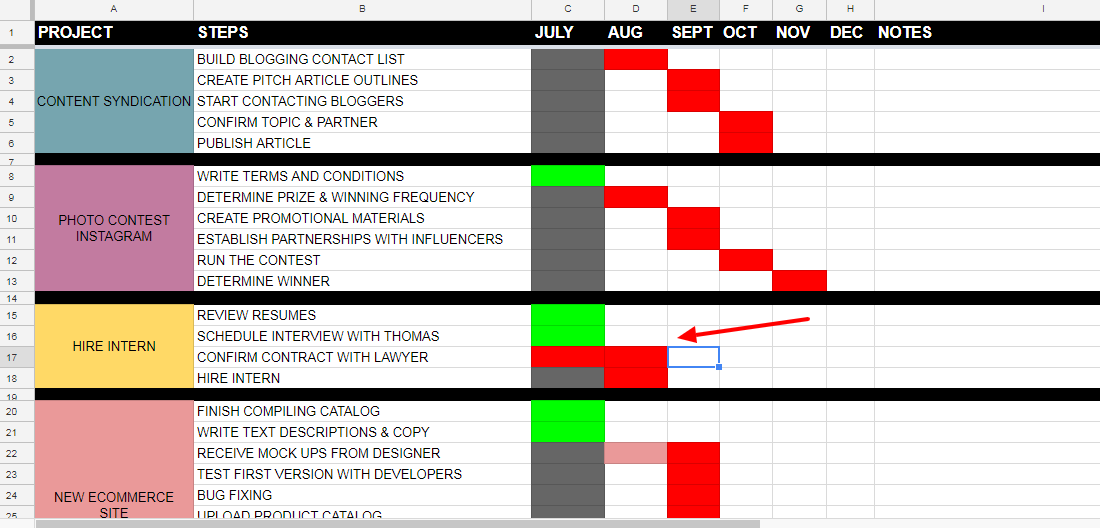
Any steps that I wasn’t able to complete I move over to the current month and reevaluate the project. Maybe I need to adjust the end date or maybe I need to adjust a different project to make room for the steps I need to complete more urgently.
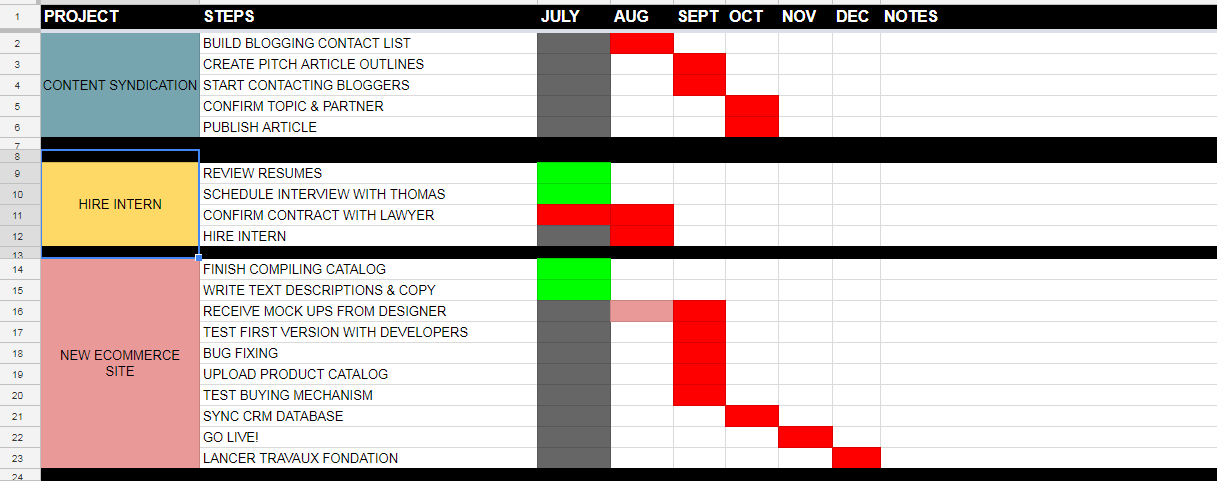
Step 5: Delete the project when you’re done
Few things feel better than accomplishment!
When you’ve checked the last step off of your project planning, all you need to do is right click on the project name and click delete rows.
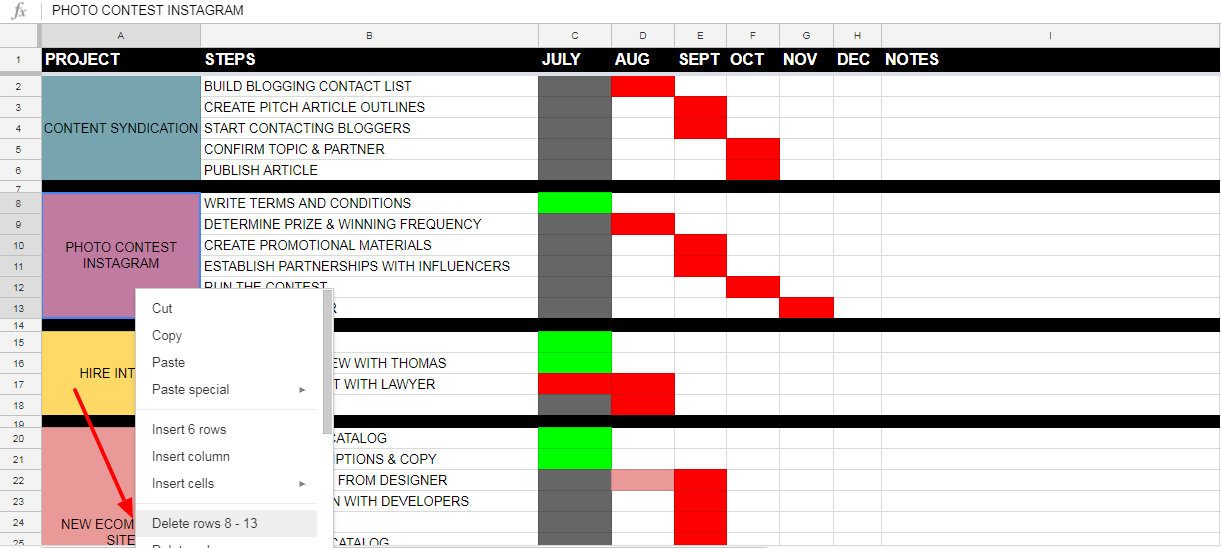
And poof! The project is removed from your planning.
Google Sheets as your CRM database
The common statistic that gets thrown around is that it costs five times as much to attract a new customer as it does to retain a current customer.
I’ve written all about Why Your Customer Acquisition Costs Will Destroy Your Business (and How to Prevent it).
No matter the size of your business, you need to be managing the relationship with your customers.
In the digital marketing world, this is called CRM: Customer Relationship Management.
Because the classic use of a spreadsheet is to hold data, Google Sheets can serve as your CRM database.
Here’s how you do that:
Step 1. Upload your data
Google provides all kinds of ways to upload data. You can convert Excel spreadsheets, upload CSV (comma separated value) file, even link in fresh data from Google Forms.
Step 2. Define your data architecture
To create a useful database you need to figure out the data architecture.
Data architecture is just a fancy word for how the data is structured. In Google Sheets, this means simply: what types of data do you have?
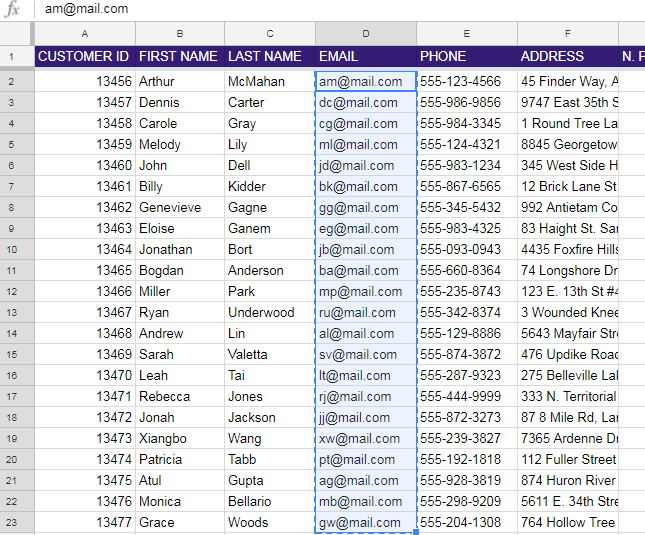
In the most conventional sense, this is the top row that defines what each type of data each column contains.
Most client databases include basic information like name, email address, and last purchase date. You can go further and add information like the number of purchases, the total amount of purchases, and whether or not they left a review.

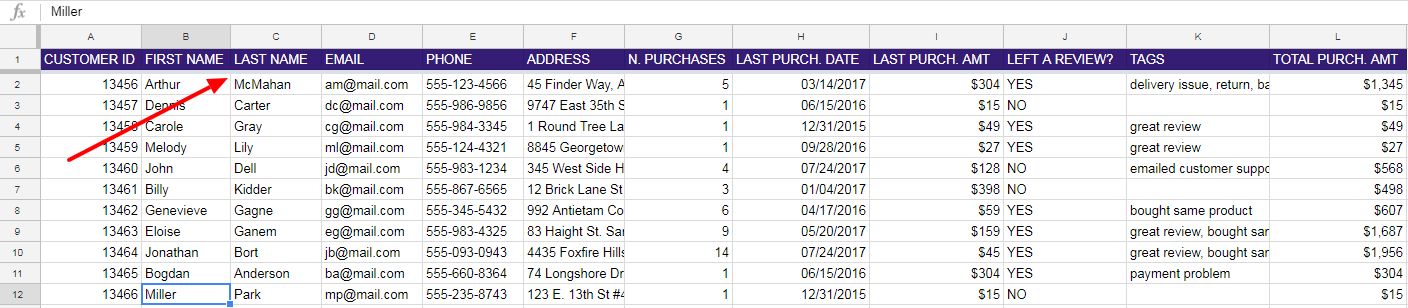
There are two basics that you must absolutely follow. The first is to make sure that each customer has a unique key. In most cases, this is the Customer ID number.
The reason for that is that people can have the same name. The Customer ID keeps those values separated which becomes particularly important when you’re filtering your data.
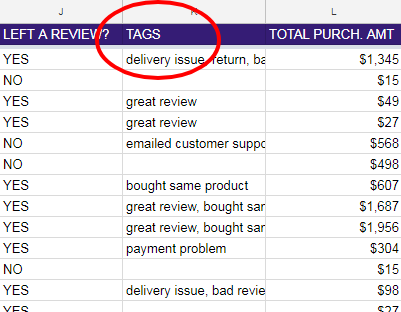
The second basic is to add tags. Tags are little notes that you add to each customer.
Tags can be focused on things that happened, like if someone returned a product or wrote a bad review. Or it can be a tag for a behavior, like someone always ordering the same product or someone who spends a lot of money.
A quick way to add tags in Google Sheets is just to have a tags column and to create a list of tags that are appropriate for your business.
The tags become crucial in the final step when we get to personalization.
Step 3. Filter your database to gain insights
The filter function is the central feature of Google Sheets when it comes to understanding your data.
Once you have everything uploaded – especially when you have a lot of customers – you can spend days scrolling around looking for examples.
The filter is there to help you out.
You can filter any column that you want.
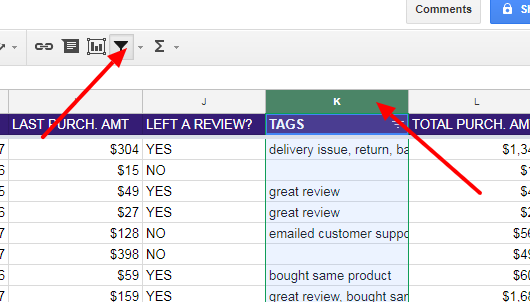
First, click the box with the column letter that you want to filter.
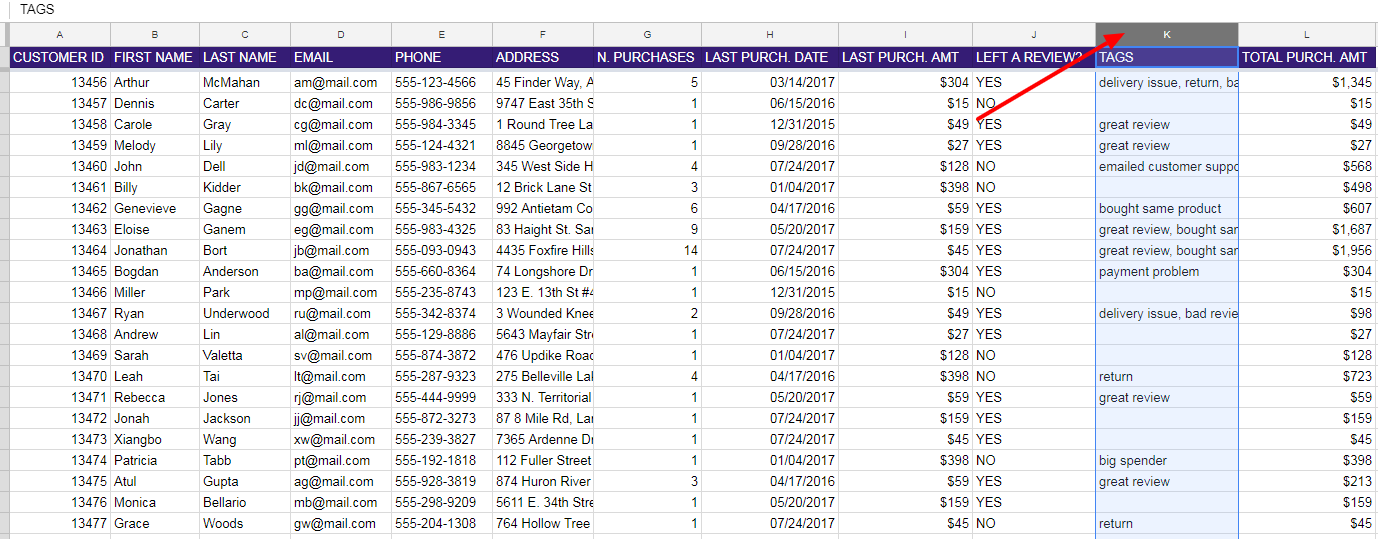
Then click the filter button above in the toolbar.
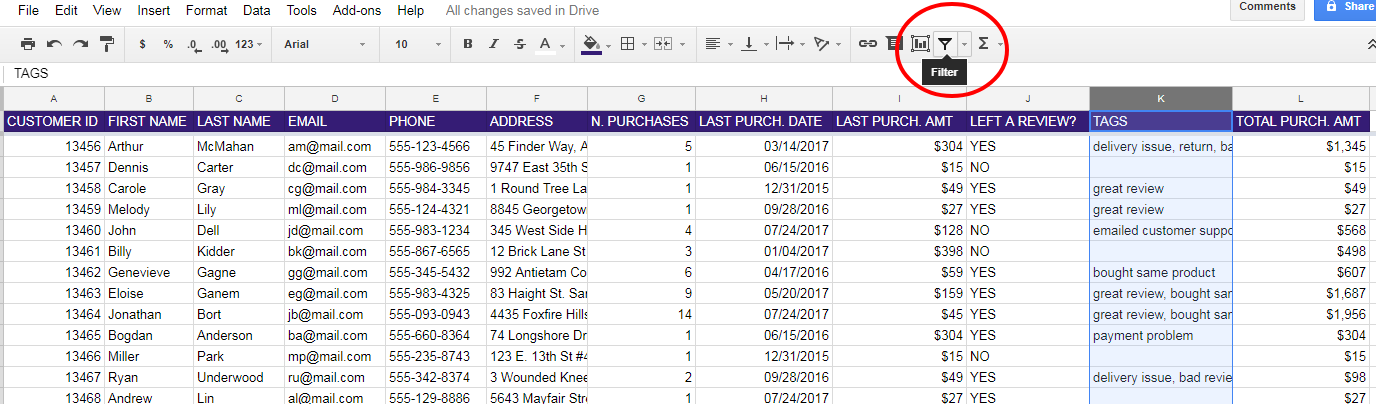
The box containing the letter above the column will turn green and a small filter icon will appear.
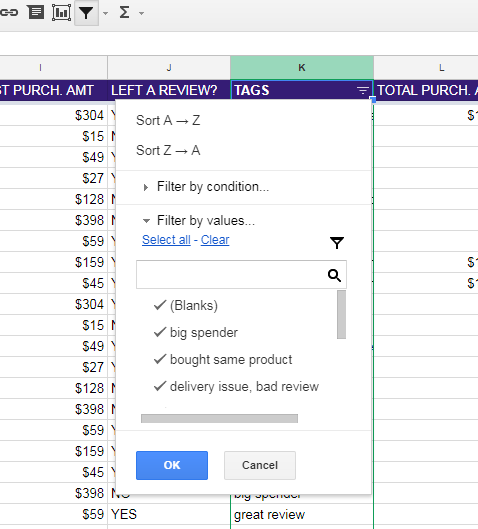
Click this filter icon and you will see three different ways to filter.
- Sort your database in ascending or descending order
- Filter by condition
- Filter by values
The sort option is good when you have numerical values. For example, if you want to see your biggest spenders, you can filter the column Total Purchase Amount and it will arrange the spreadsheet with the people who have spent the most at the top.
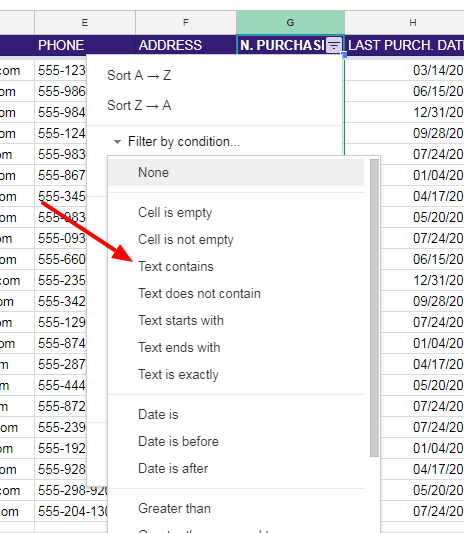
Where things really get interesting is in the filter by condition option.
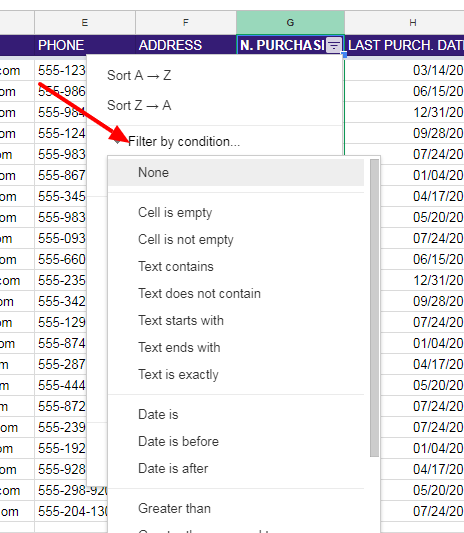
This is where you have all kinds of options for treating your data. You can work specifically with dates, numerical values, and text.
For example, if I want to only see my customers who have made more than 3 purchases I click the greater than option and enter the value 3.

My spreadsheet is filtered so I only see people with four or more purchases.

Then I can analyze the other values and start to see if there are any interesting things I see, like maybe where people are from or if they have left a review or not.
Where it really gets interesting is when you create tags for each person.
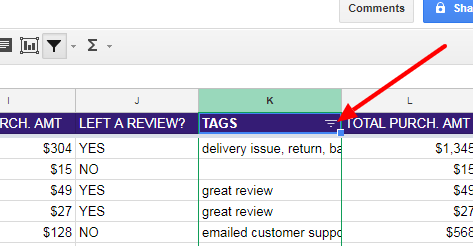
Let’s say I only want to see people who I have tagged that have left a bad review on my website.
Click on the top of the column where the letter is, then click the filter button.
Then click the little filter button at the top of the column.
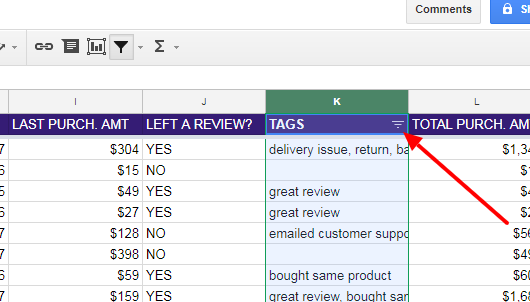
Then select Filter by Condition and select the option Text Contains. Enter in what you used to tag the behavior, in this case, I type in “bad review.”
This is the view that I get, only my customers who have left a bad review.

Immediately I see that the people who have left a bad review are also tagged with “delivery issue.” The two are almost certainly correlated.
There are endless ways of filtering your data. What’s important is that the data that you are entering in your Google Sheet is useful to you and your objectives.
It doesn’t make sense to add in things like hair color unless you are a hair salon.
The point of being able to filter is to draw conclusions about your business, but what good are conclusions if you can’t act on them?
Step 4. Personalize your communication with your customers
A common misconception today is that “personalization” in digital means putting someone’s name on the subject of an email automatically.
While this can be considered a form of personalization the real meaning is much broader. Personalization means segmenting your customers (or audiences) and addressing them in a more personal way.
If we continue with the examples above, why would you want to see only the people who left bad reviews?
There are many potential actions you can take:
- Send them a customized survey asking them to explain in detail what went wrong
- Send them an apology message explaining that you will do better next time
- Send them a physical gift to their address as a way to make amends
The same logic applies to filtering for your top customers.
- You could send them a personalized message thanking them for being one of your top customers.
- You could send them a special discount code to reward their loyalty
- You could encourage them to share with their friends in exchange for a token gift
In fact, this last bullet point is an extremely powerful marketing mechanism. I advise you to read my article How to Get Your Customers to Market Your Business for You for extra ideas.
A particularly powerful personalization revolves around the last purchase date. You can filter for people who haven’t bought anything in the past 6 months and send them a special offer to bring them back.
Most communication happens today via email, and filtering your Google Sheet makes it easy to export a customized list of email addresses that you can then upload to MailChimp, Gmail or your email service provider.
It’s as simple as highlighting the email addresses and then copy (Ctrl + C).
Then paste directly into the recipient’s part of your email provider.
For many of us working in startups, you might not have a large client database. You might not even have any clients at all!
If you don’t have any contacts, watch my video How to Grow Your Email List Fast as a way to get started!
Google Sheets can also act as your prospect and outreach contacts sheet so you can manage your sales and marketing efforts.
Google Sheets as your Prospect and Outreach Contacts Sheet
If part of your marketing objectives requires reaching out to a lot of people – say all the music bloggers in NYC – you can use Google Sheets as a way to organize your contact list.
It might be tedious but having an organized contact list is the difference between those who succeed at creating partnerships and driving sales and those who do not.
Step 1. Set up your Google Sheet
Just like with the CRM database you need to define the information that you want to have in your contact list.
Unlike a CRM database where customers fill in their own information in order to sign up for something or make a purchase, you will have to go out and fill in the details on your contact sheet.
If you’re doing email outreach you probably don’t need to have a column for phone numbers.
If you’re doing sales prospecting you will definitely want to have a phone number column.
Here’s an example of data architecture for a fake B2B business doing sales outreach.
I haven’t included a physical address since it’s rarely a way of communicating with people these days. However if you are going to send a physical marketing brochure you will want to have a physical address column in your Google Sheets too.
Step 2. Prospect
You will have to fill in your data. That means going to websites, Linkedin, asking friends, really using any sort of information and resource at your disposal to get your list together.
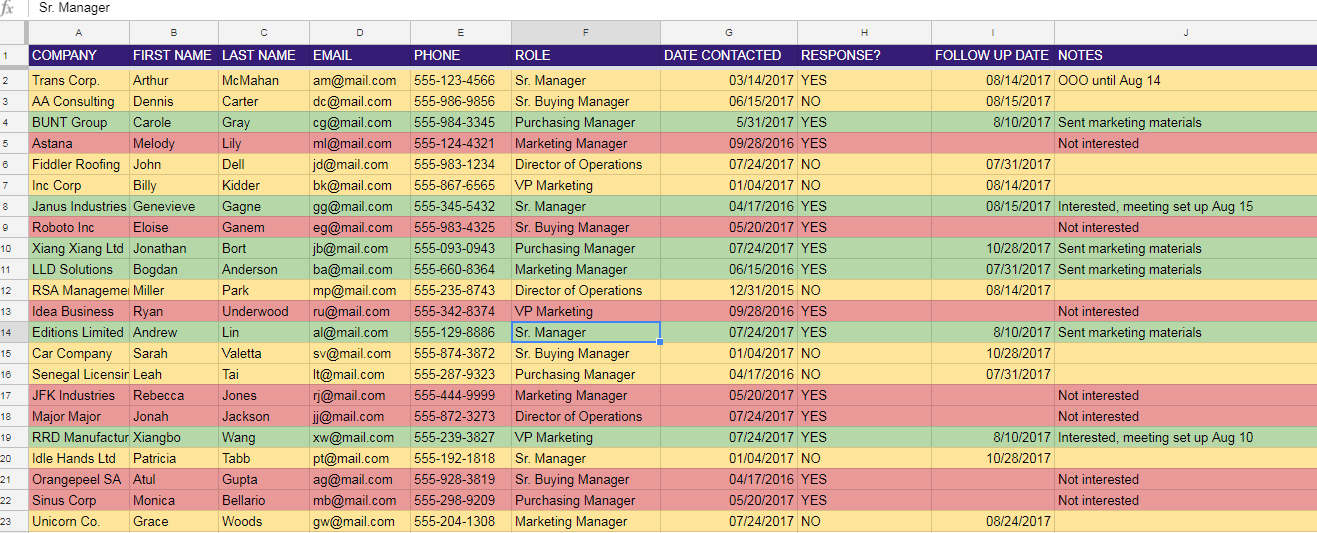
An ideal list is nice and complete like this:
But the reality is that a list will always have gaps and holes in it.
Information about people and companies is hard to come by.
In order to find information, you have to get clever.
Look at things like press releases, sales materials, announcements and company blogs. Usually, the people who are putting information out are the ones who would like to be contacted even if they are not the contact you are looking for.
Get in touch with them and ask!
There is also the possibility of buying contact lists. Purchasing a contact list can save you a lot of time when it comes to prospecting as the information is already there and sorted.
Be careful. Not all lists are reliable. In today’s job market people change roles and companies all the time. A list that might be complete could rapidly become obsolete.
In today’s job market, people change roles and companies all the time. A list that might be complete could rapidly become obsolete.
Step 3. Contact and keep your Google Sheet up to date.
I use a color-coded system so that I can immediately tell which of my prospects are developing and which ones are not interested.
- Green is for contacts that I’ve gotten in touch with and who are or might be interested
- Yellow is for people I’ve contacted but who haven’t responded yet.
- Red is for contacts that I’ve gotten in touch with but who are not interested.
You can use whatever color system works best for you.
The important thing is that every time you complete an action, like sending an email or making a call, you mark it down in your Sheet.
This way you have all of your latest information at your fingertips and you can prioritize without worrying about forgetting anything.
A trick that I use is to always add a follow-up date (unless a prospect has said they aren’t interested).
If I send an email on the 7th, I automatically add a follow-up date for the 14th.

Then, I use the filtering technique that I mentioned earlier.
If today is the 14th, I can filter to only see the people I need to follow up with today.

That way I never miss a follow up with a potential prospect!
I also make sure to add in other contacts for each company so that I don’t have all of my hopes resting on one person (who may or may not be the right person to contact).
Conclusion
The impressive thing is that all of this can be done in the same place, and you could use Google Sheets (or Excel) to do all three!
The added advantage of Google Sheets is the collaborative nature. You can share with your coworkers and everyone can contribute to prospecting. You can also see who has contacted whom and when.
There is also a Google Drive Chrome Extension that lets you edit your sheet when you are offline (however your collaborators won’t be able to see the changes).
Once you get the basic techniques and the importance of properly organizing your data, there are almost no limits to the way that it can help you organize your marketing efforts.
Have you ever used Google Sheets or Excel to organize your marketing efforts like the examples I gave above? If so, how was your experience?
Comments (46)