
Visual content is the currency of sharing on social media. Text-only updates can only convey so much and get so far. Here are 3 stats that prove the worth of visual marketing.
First, 66% of all social media posts are or include visual content.
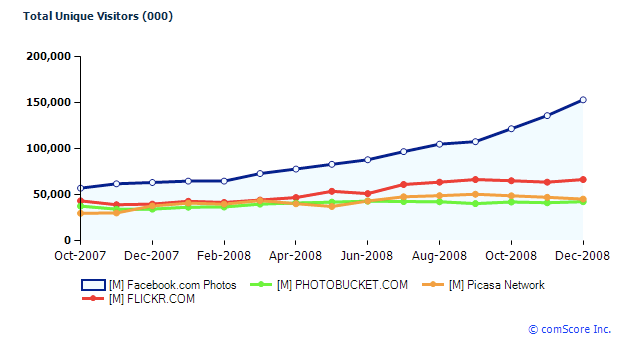
Second, forget social networks known for their visual content, like Instagram and Pinterest, that allow photo sharing. In 2013, Facebook became the largest photo sharing website, with its users uploading 350 million photos every day.
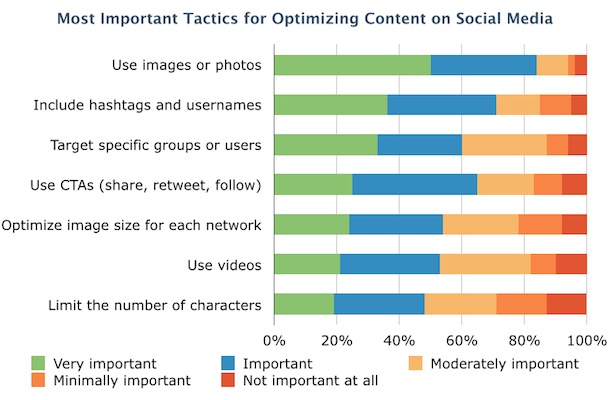
Third, use of images was rated as the most important social media optimization tactic, in a 2014 survey by Adobe and Software Advice.
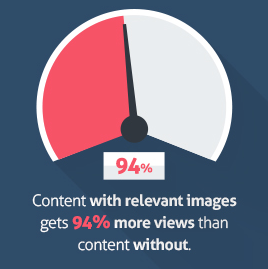
And, it’s not just limited to social networks…Content with relevant visual content also gets 94% more views than a content strategy without it. Even social media platforms now focus on visual marketing in their redesigns.
It’s clear:
Social network users love to interact with visual content. But, there’s one challenge many marketers might face in creating social media graphics and incorporating visuals into their content strategy…
Creating social media graphics and general web design images that are compelling, on a shoe-string budget, without hiring any external help like graphic designers or professional photo editors.
About 5 years ago, small business owners could have said this was a serious problem. They might have needed to wrestle with Photoshop and other graphic design editing tools.
Now, we’ve got a wide range of amazing image editing tools, online photo editors and photo editing apps that allow us to craft stunning graphics for our content strategy in a flash.
In this blog post, I’ll introduce you to 10 awesome image editing tools featuring a wide range of editing options.
Ready to find your creative side and become the only graphic designer you’ll ever need?
Let’s go.
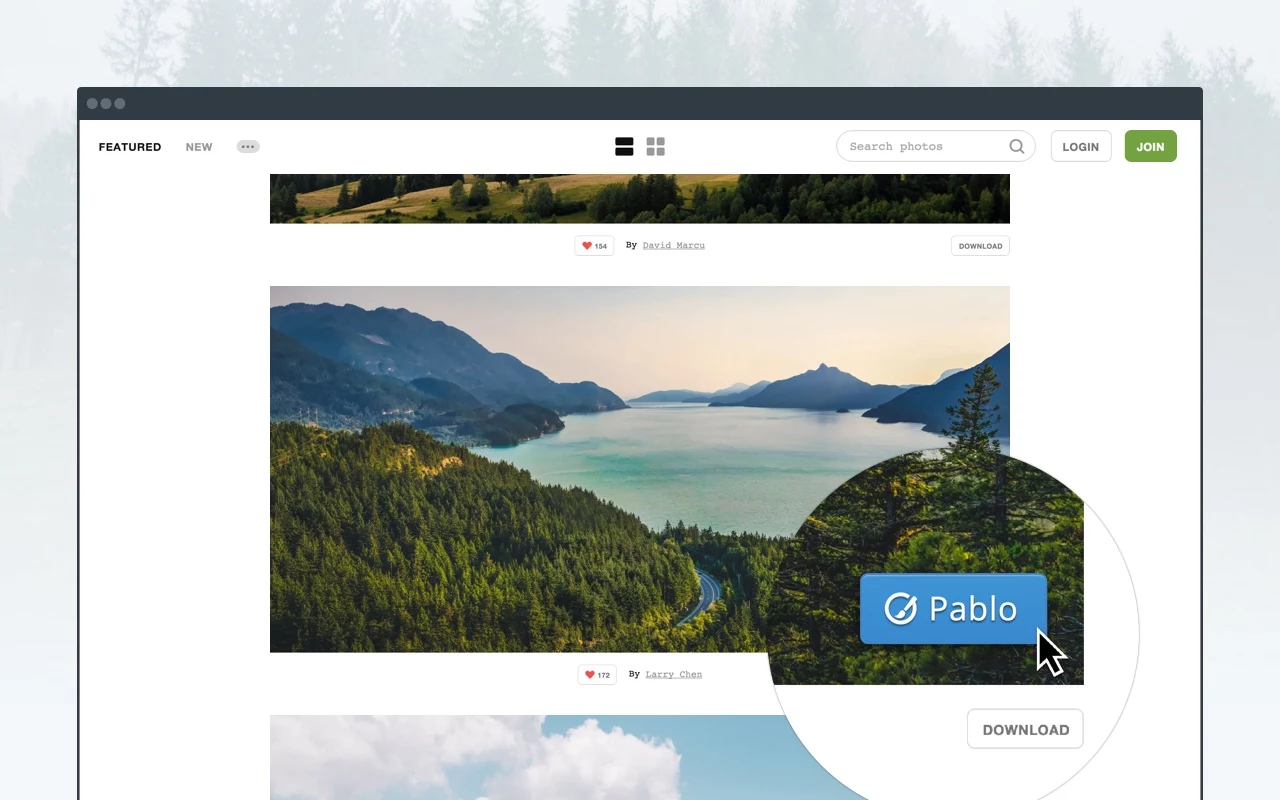
1. Pablo
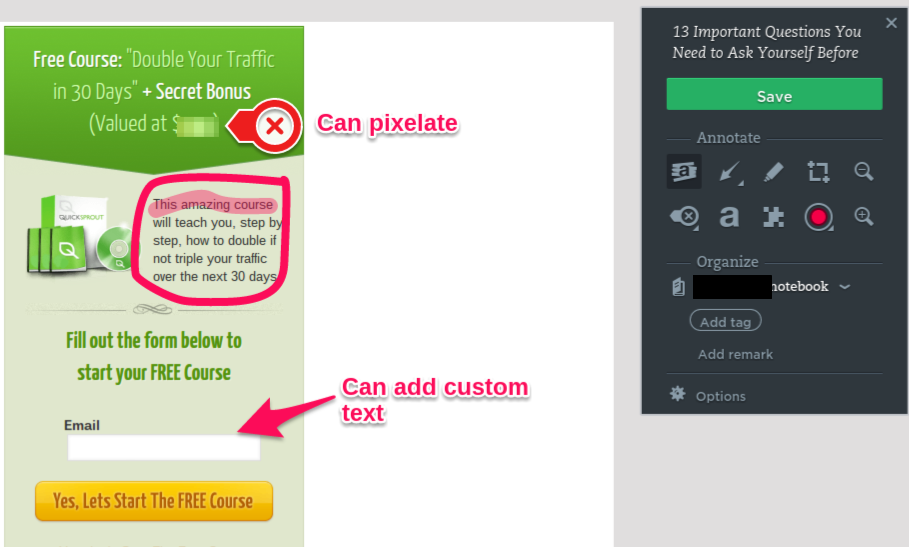
This is a free online photo editor by the brilliant Buffer team. With it, you can craft social media-friendly images super fast.
You’re given access to 25+ stylish fonts, 600k+ searchable images and a variety of sizes to suit different social media platforms.
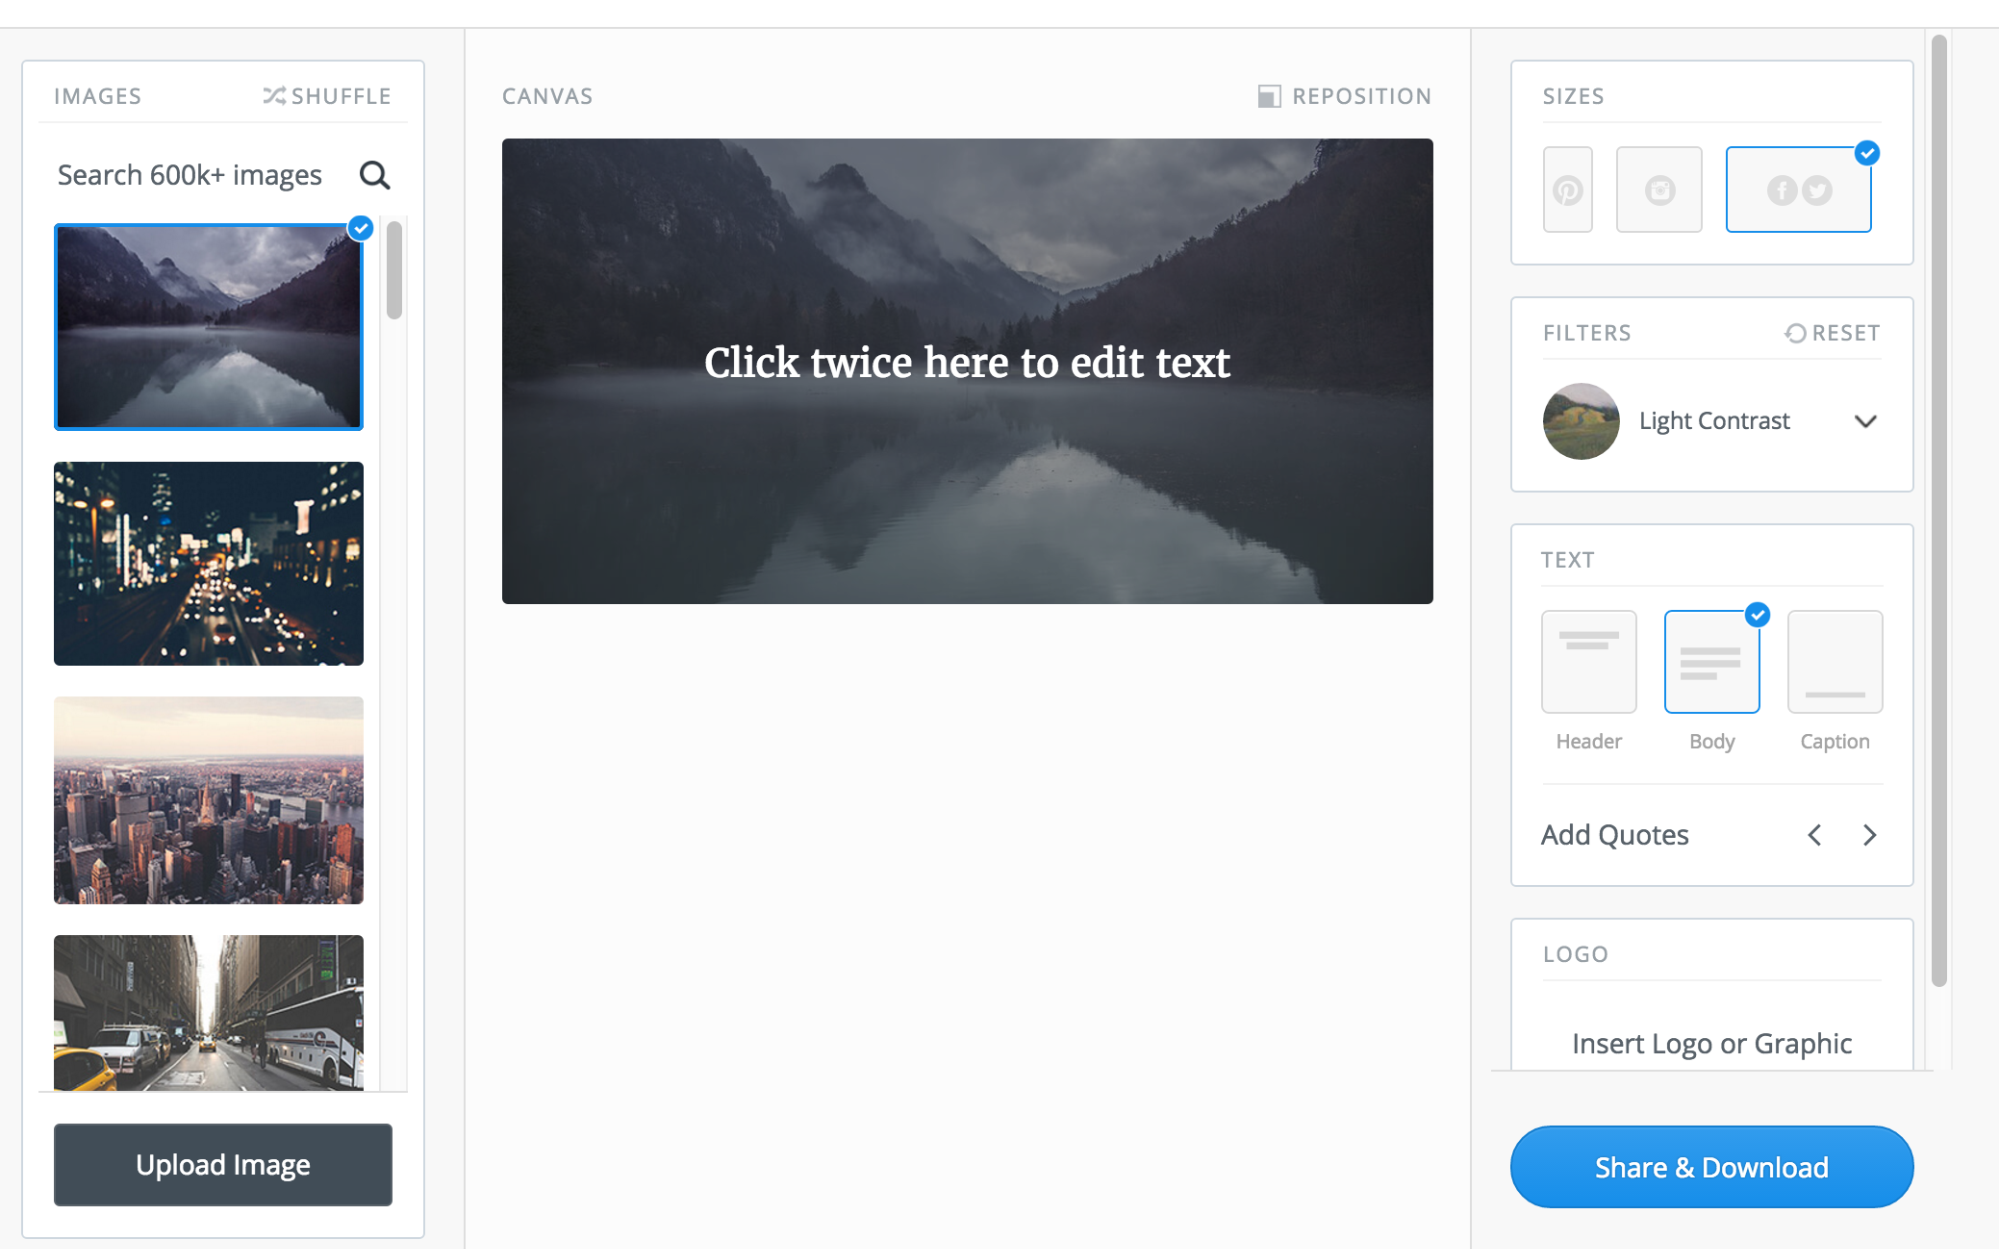
You can choose from a range of templates and filters and also upload your own image/logo and add text overlay and quotes.
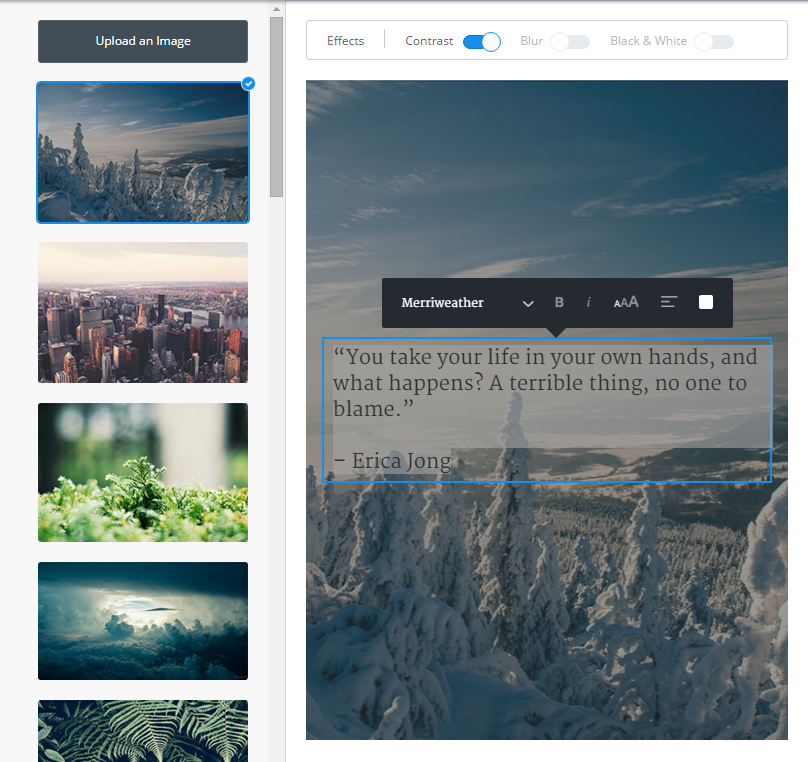
Once you’re done, the photo editor tool allows sharing on social media platforms, adding the post to your Buffer queue and downloading the graphic.
If you’re surfing the web and like a particular quote/image, then Pablo also has a Chrome extension that you can download here. Once you hover over an image, you’ll see a Pablo icon in the bottom right corner. Clicking on this icon will open the Pablo dashboard, in a new window.
The best part is that you can access all of these features without even logging in. Here’s a quick 30-second tutorial for Pablo 2.0, released by Buffer in October, 2015.
2. Canva
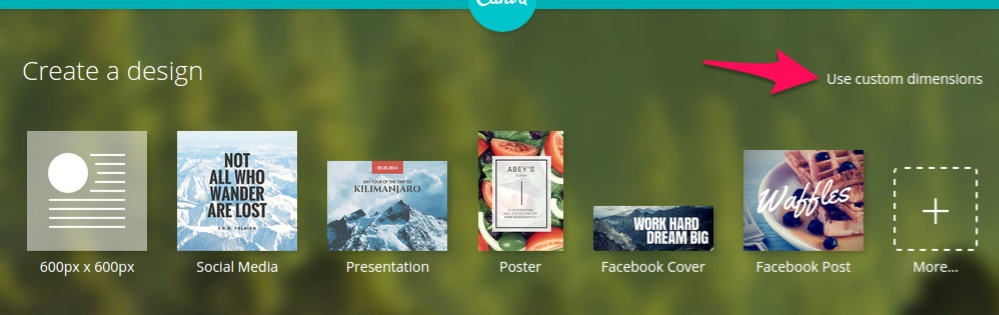
The next visual marketing tool I would recommend adding to your armory is Canva. It’s another simple drag-and-drop tool for amateur web designers with complete customization options.
It has a range of templates, even beyond social media. You can craft blog graphics, cards, posters, presentations and other types of images.

And, if you want to design an image with custom dimensions, Canva also allows you to manually enter the height and width. It’s useful for designing your blog images to match your exact blog width.
Again, the tool allows you to search for images, through its search tab (in the sidebar). But, you can also use its shapes, frames, icons, charts and more.
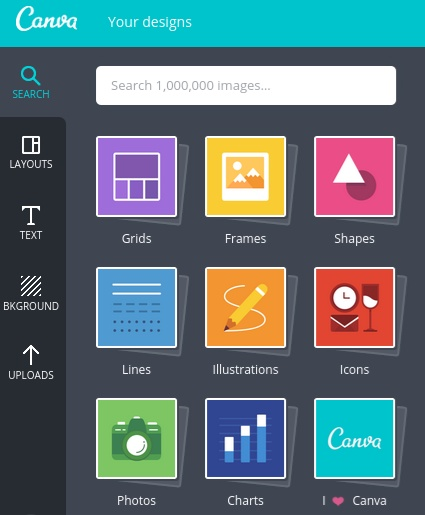
Canva also allows you to add your own text, upload your own backgrounds and even purchase photos (typically for $1) within the platform.
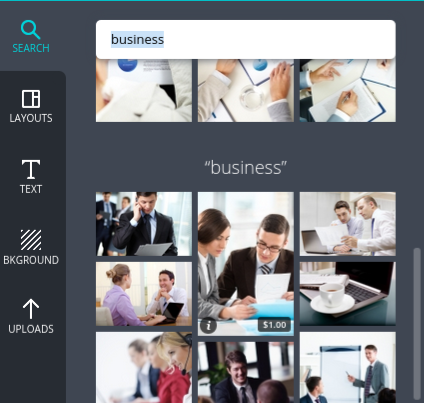
On picking an element from the sidebar, you’ll see it on the right side of the canvas. Then, it’s easy to change the color/size of your image with simple drag and drops.

It’s possible to create professional images, like the one below, in 5 minutes with Canva.
I show more nifty ways of using the image editing tool for designing custom images here.
Overall, it’s a great image editing tool that allows a bit more customization and functionalities, beyond just social media templates (unlike Pablo).
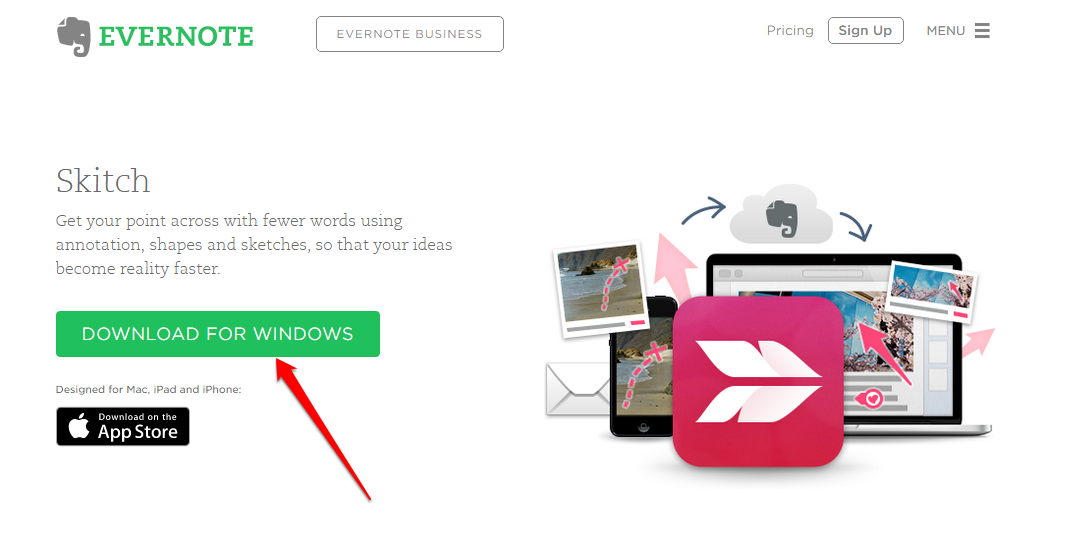
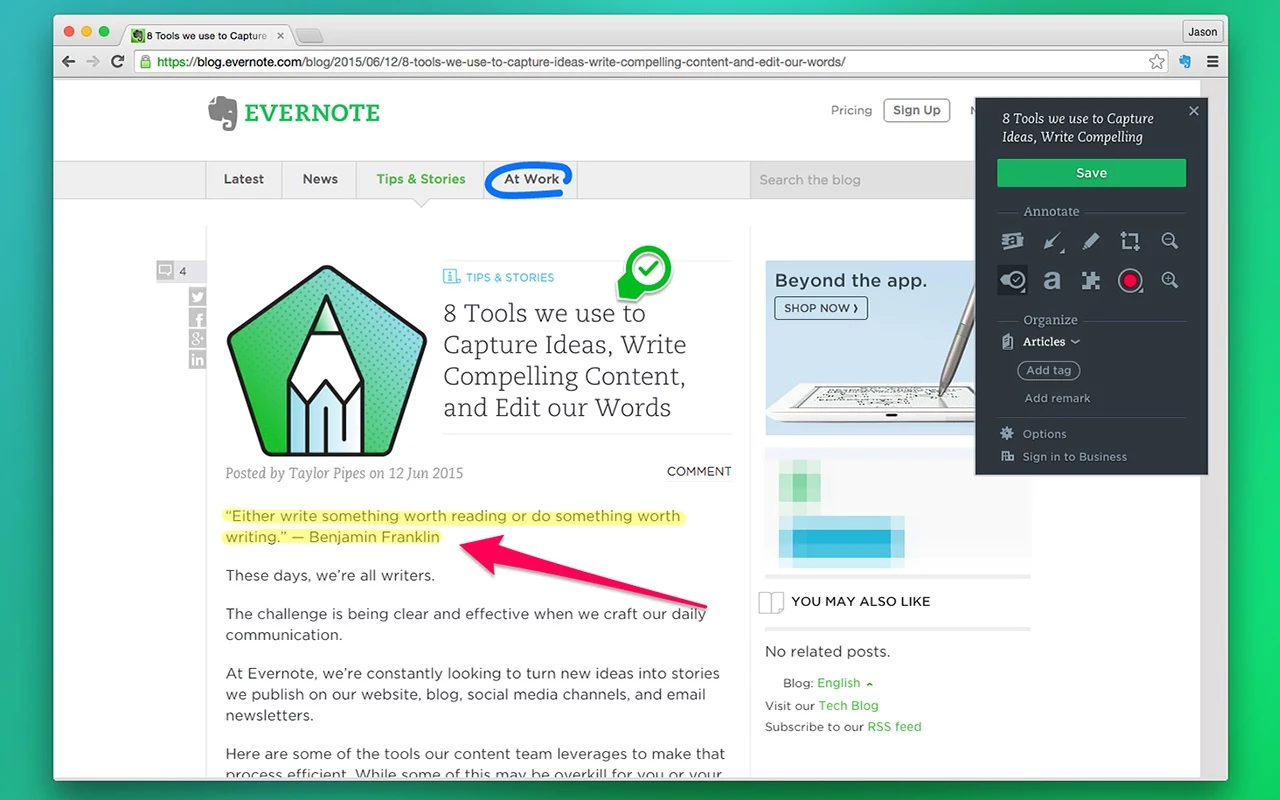
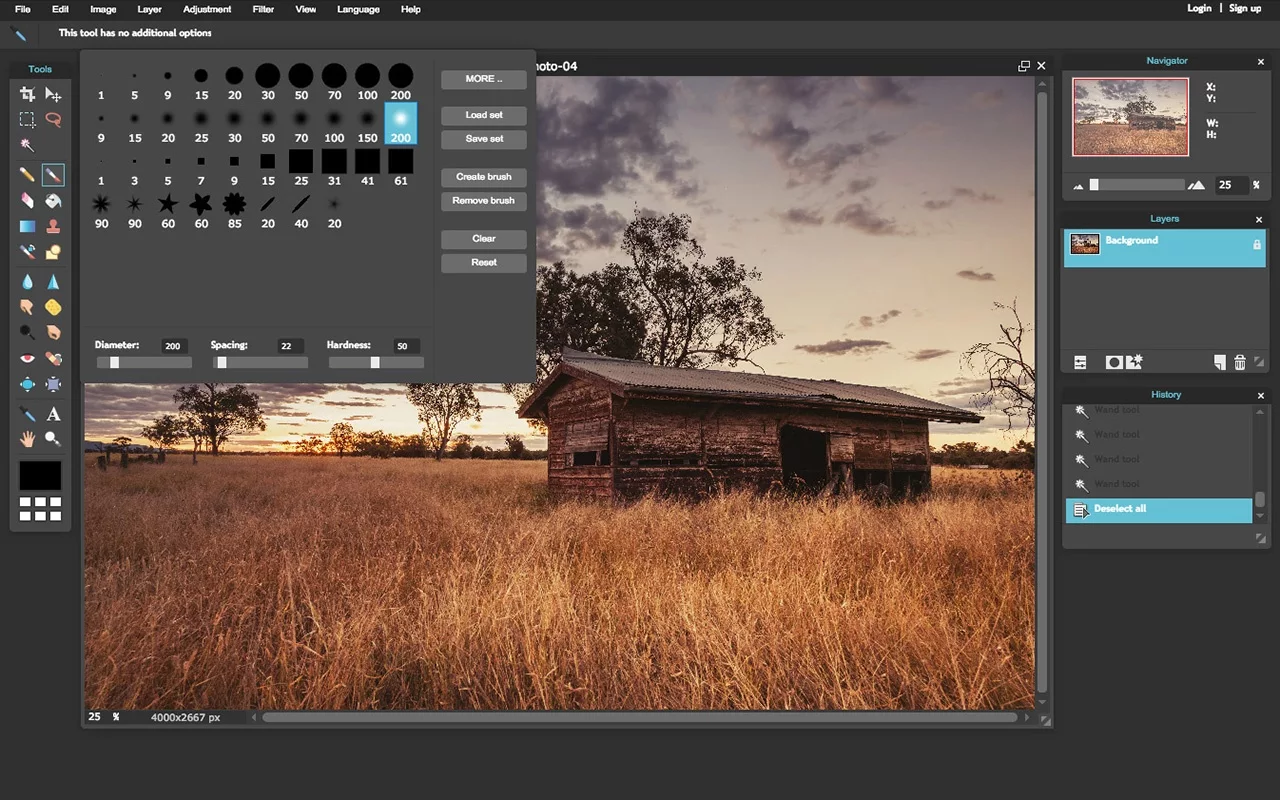
3. Skitch
Want to focus your audience’s attention on the specific aspect of an image? Or, would you like to take screenshots or make specific photo collages in a how-to tutorial that you’re writing?
Then, Skitch is the perfect photo editing app.
It can mark-up your photos, snap webpages and make notes on them, as well as allowing you to annotate PDFs. I use Skitch regularly for many of my blog posts.
The photo editing app is free to download and use (it’s also called Evernote Web Clipper, and available from the app store).
The image editing tool also allows you to pixelate elements from your images. And, it has a few annotation features that come up in the right sidebar.
The tool also has a browser extension that you can download from here and access across all of your devices.
If you want help getting started with the photo editing app, Evernote has a knowledge base of short tutorials for all devices. Here are the Mac tutorials.
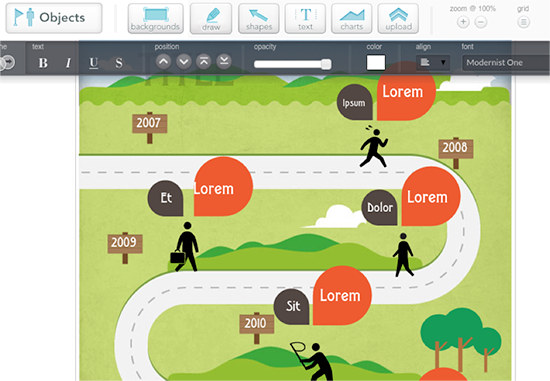
4. Easel.ly
I’ve mentioned the effectiveness of infographics numerous times on my blogs. The demand for infographics has jumped tremendously, in the last few years.
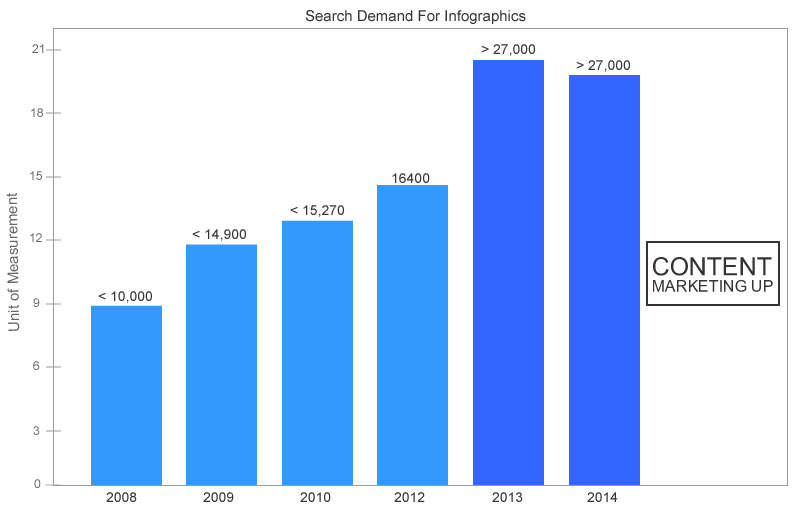
They are a great way to convey complex information to your audience, in an easy-to-digest and visually appealing manner.
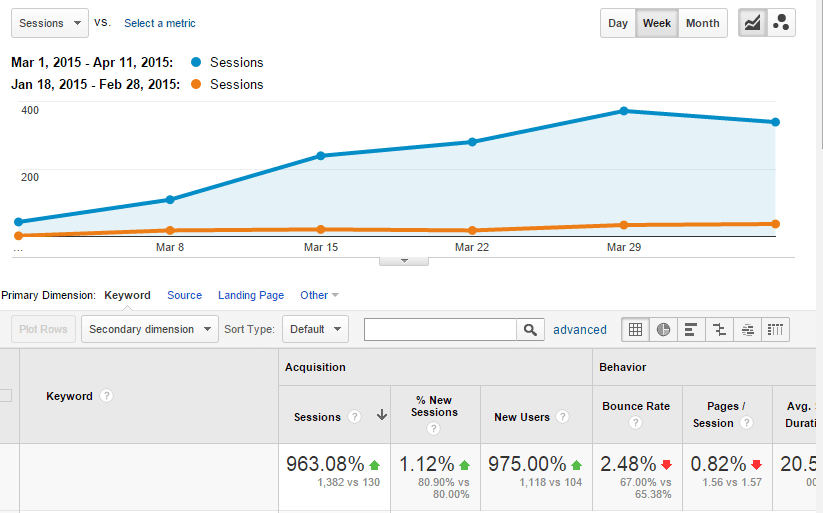
I’ve leveraged infographics to ramp up the traffic numbers on all my blogs. At KISSMetrics, I generated over 300,000 visitors a month using them. They are also a great resource to generate contextual backlinks as part of your visual marketing strategy.
The foundation of the guestographic method, by Brian Dean, is based on them.
Why should you care?
Because it can boost your organic traffic by over 900% in 6 weeks.
Alright…
Now that you feel pumped to create infographics, there’s one MAJOR challenge you’ll need to overcome…
Designing skills.
Crafting visually appealing infographics will require much more than research, data and compelling content.
If you’re design-challenged, like me, then you might opt to hire a professional web designer. But, even one infographic might set you back $500.
If you’re on a tight budget, an easier solution is using a simple drag and drop tool, like Easel.ly.
Here’s a short video introduction of the tool.
Sure, you might not be able to create the highest quality graphics. But, fairly decent ones are easy to design with the thousands of templates that they provide.
It has over 300,000 users that have crafted over 4 million graphics. After creating a free account, here’s a sample of the templates that you’ll get.
You can customize the template as needed – adding text, icons, objects, charts and the like. Easel.ly can help you design a decent quality infographic within 30 minutes.
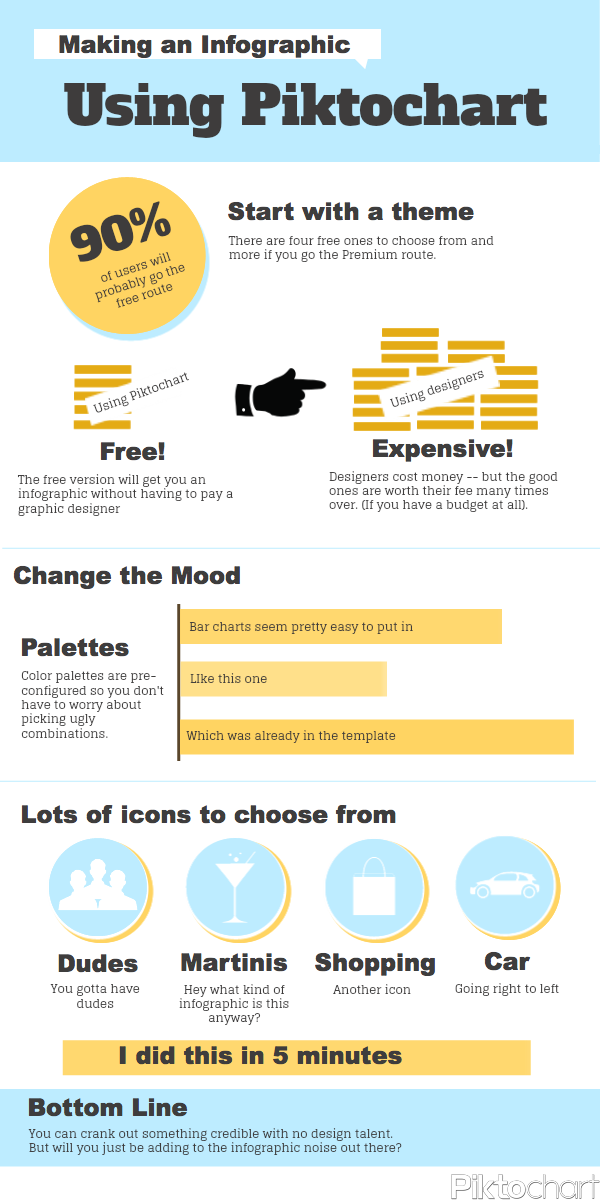
Alternative: Piktochart
This is another handy infographic creation tool with pre-made templates. It allows you to export graphics in HTML format and embed them on your website. Here’s an infographic, summarizing how to use Piktochart to create an infographic (created in about 7 minutes).
5. Over
The smaller screen has become an inherent part of our daily lives. And, we’re well past the mobile screen tipping point.
So, it’s essential to introduce you to a mobile application that turns your mobile device into a full-fledged design studio.
Meet Over…
Over is an photo editing app for mobile devices, available on both Google play and the App Store, with robust image editing features. It allows you to customize colors, fonts and add text overlays. You can even install a new font, as long as you’ve got the license for using it on other computers.
If you’re a serious Instagram marketer, then the app can come in very handy. You can transform your inspirational and thought-provoking quotes into appealing social media images.
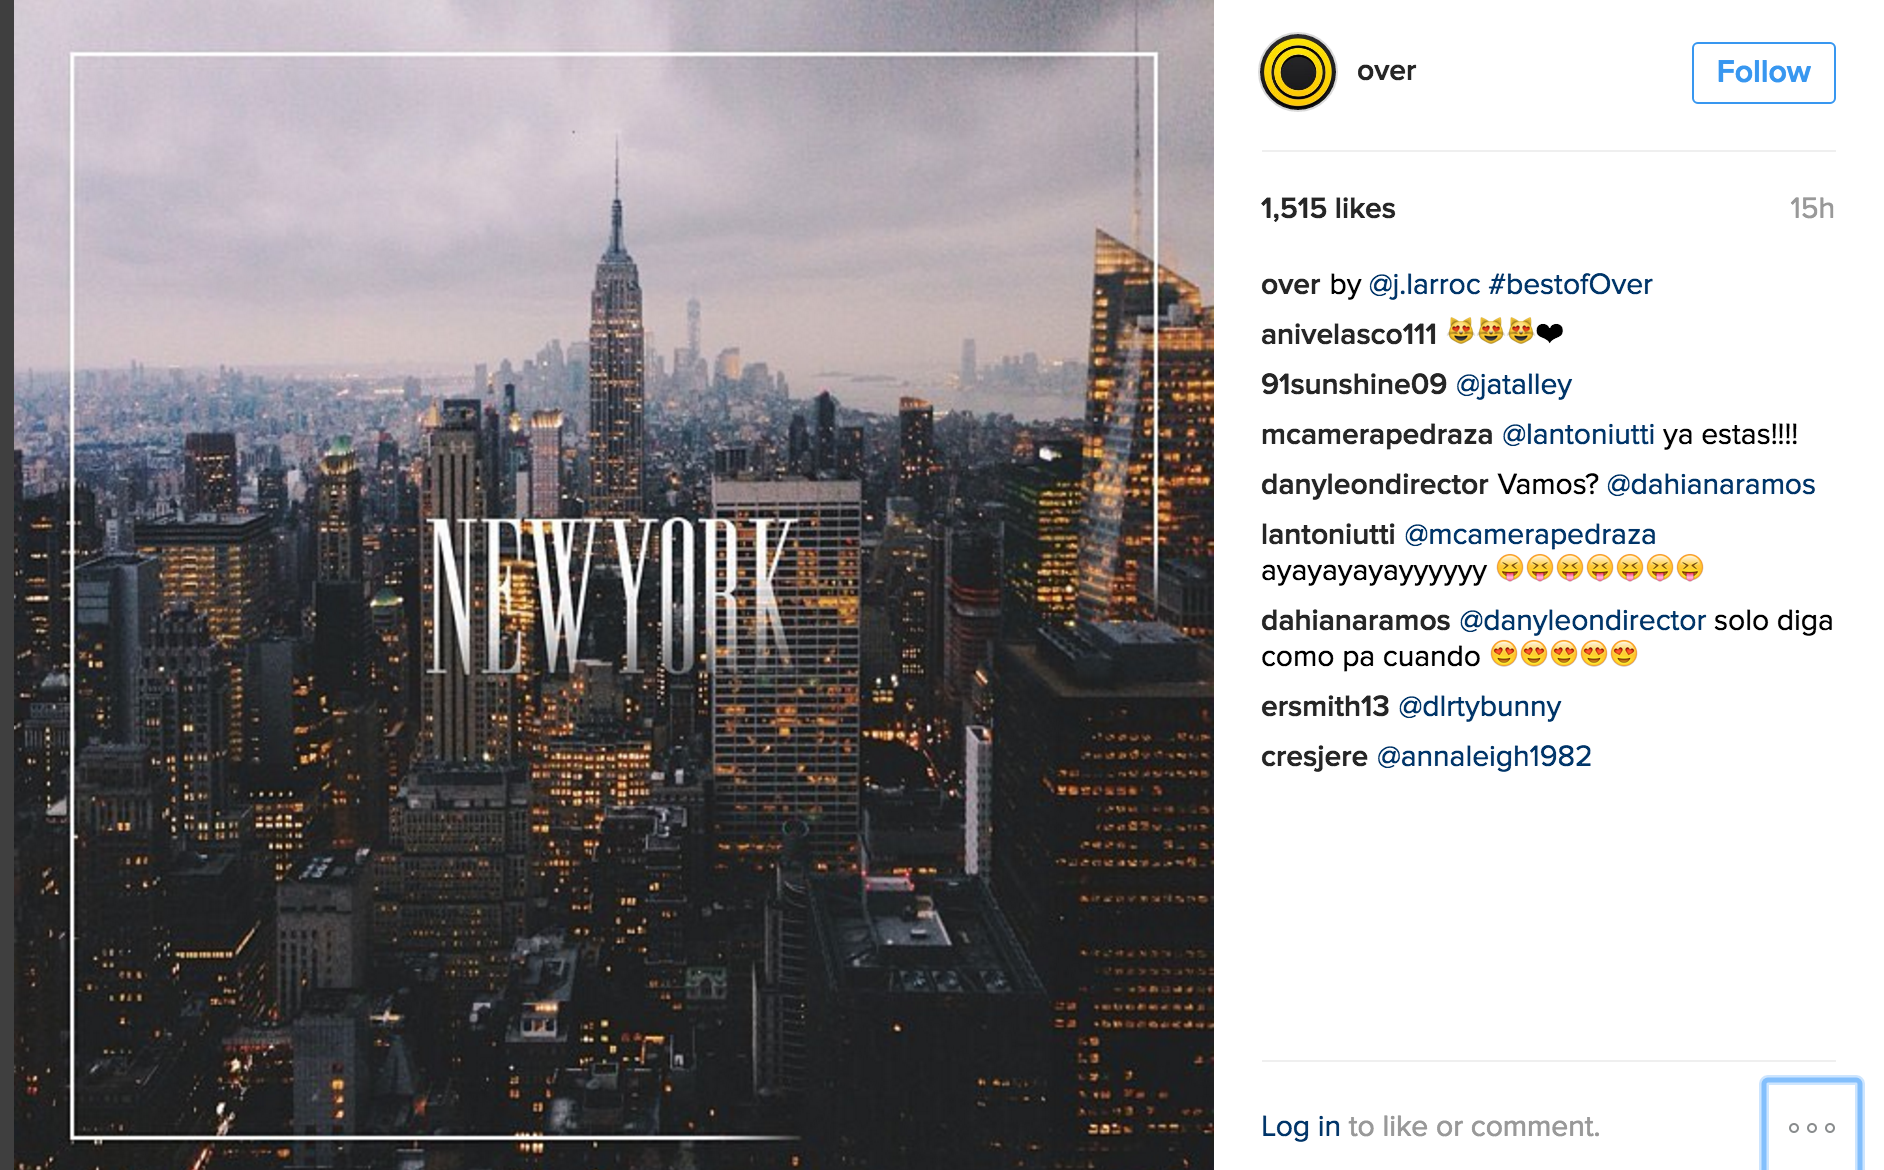
Here’s an example photo from the Over Instagram profile.
Over recently released their third version. Here’s a video walkthrough of its powerful features.
6. Pixlr
The Pixlr editor is a family of image editing tools. It has a web app, a mobile app (both Android and iOS) and a desktop tool to “make every moment beautiful, wherever you go.”
It allows you to upload your own image and add effects, layers, filters, text and borders on them. Its interface is similar to other popular photo editing tools, like Photoshop and Gimp. You’ll also see many features, from common desktop graphic design applications.
The plus point of the Pixlr editor is that it’s fairly intuitive and easy-to-use (drop-down scroll) for the set of advanced editing functionalities.
If you find its advanced image editing features intimidating, you can explore a few tutorials here.
If you’re only looking for a quick polish of your image, then use Pixlr Express for one-click fun changes.
7. Smush.it
While blog posts need to have visuals, to get more shares on social media…
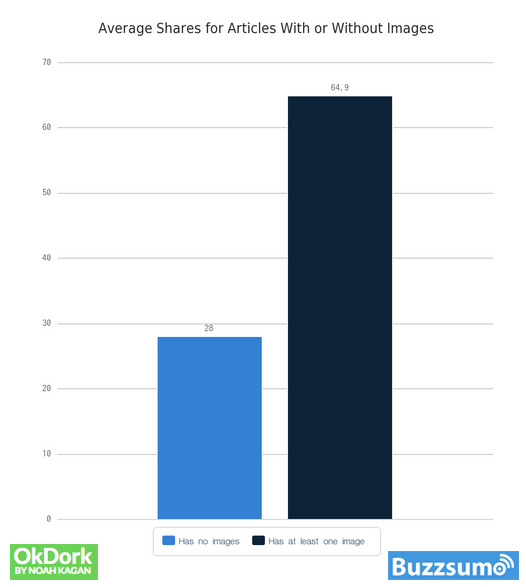
More images also equate to higher site file sizes and increase the page load time.
And, guess what slower speed brings with it?
That’s right…
Lower user satisfaction and a certain decrease in your sales.
Even a 1 second delay in page response can result in a 7% reduction in conversions. Which is a social media marketing failure.
Obviously, we don’t want that. That’s where image optimization comes into the picture.
WP Smush is a WordPress-based plugin you can use as a simple web design aid to scale down and compress your images – without compromising their quality.
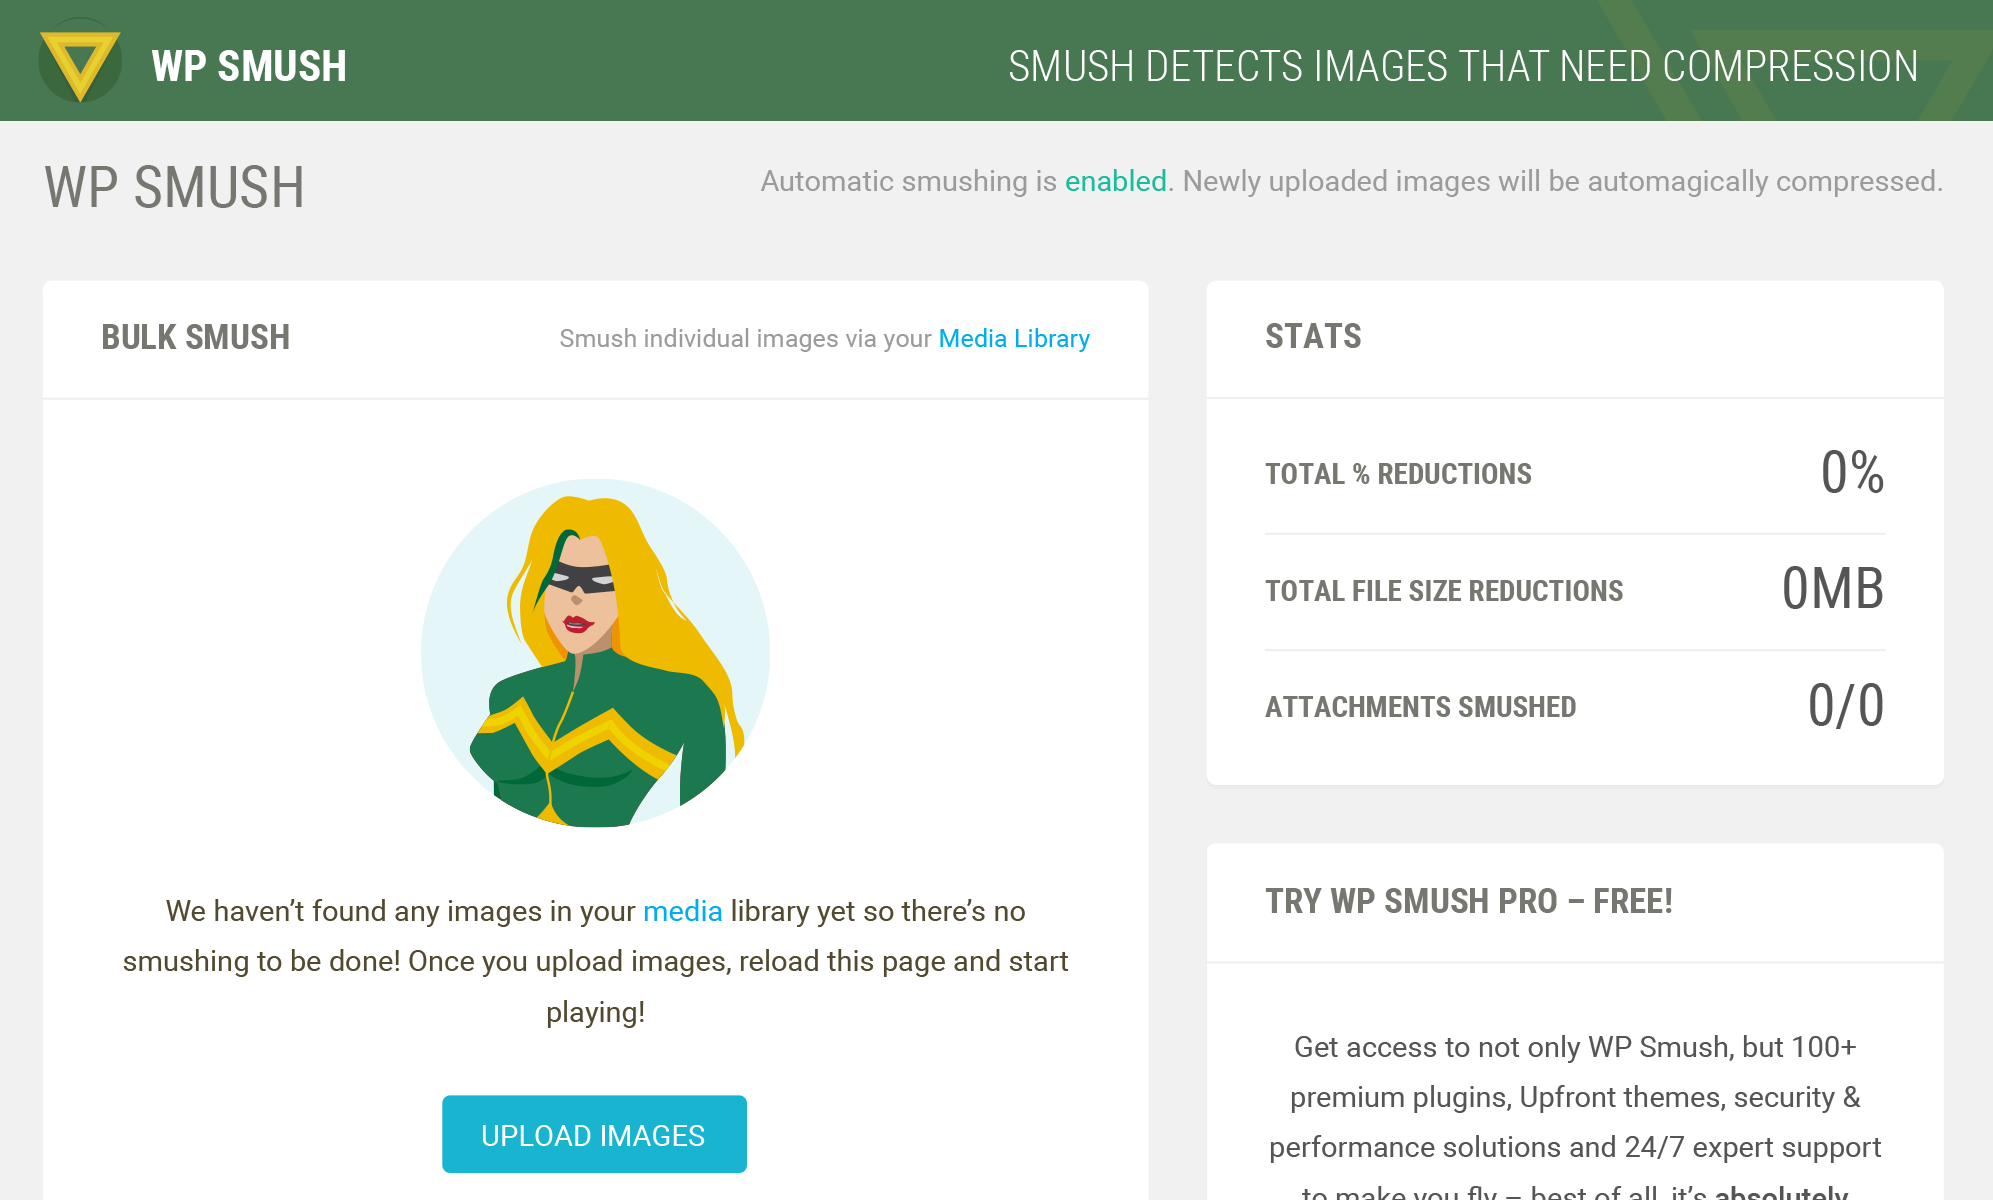
So, how does the plugin whip its magic wand?
When you upload an image, it scans the image, cuts the unnecessary data and scales it. You just need to set up automatic smush.
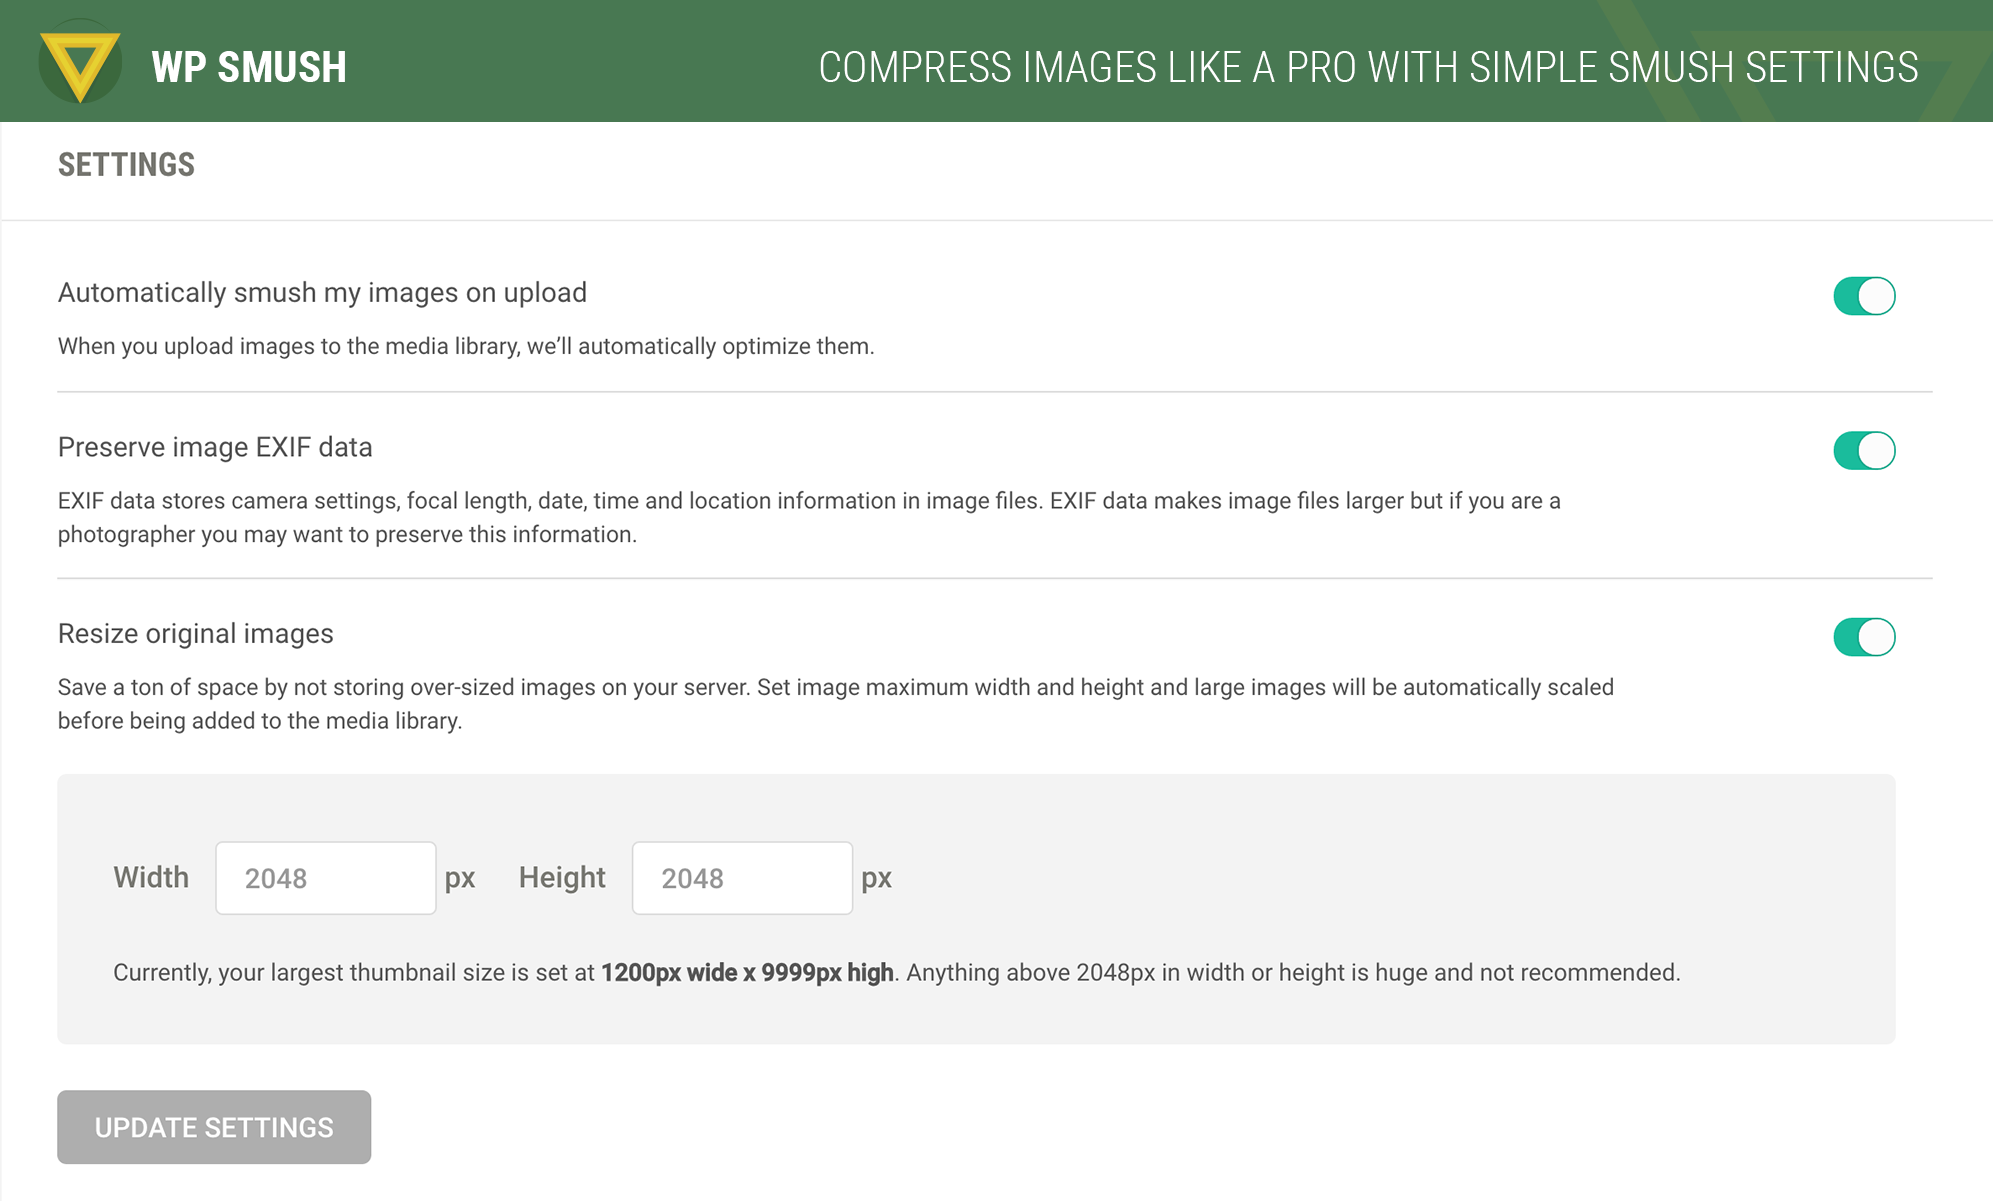
And, what about the already existing images?
It has a bulk optimization feature to smash all of your WordPress media library images in a single run (50 attachments at a time).
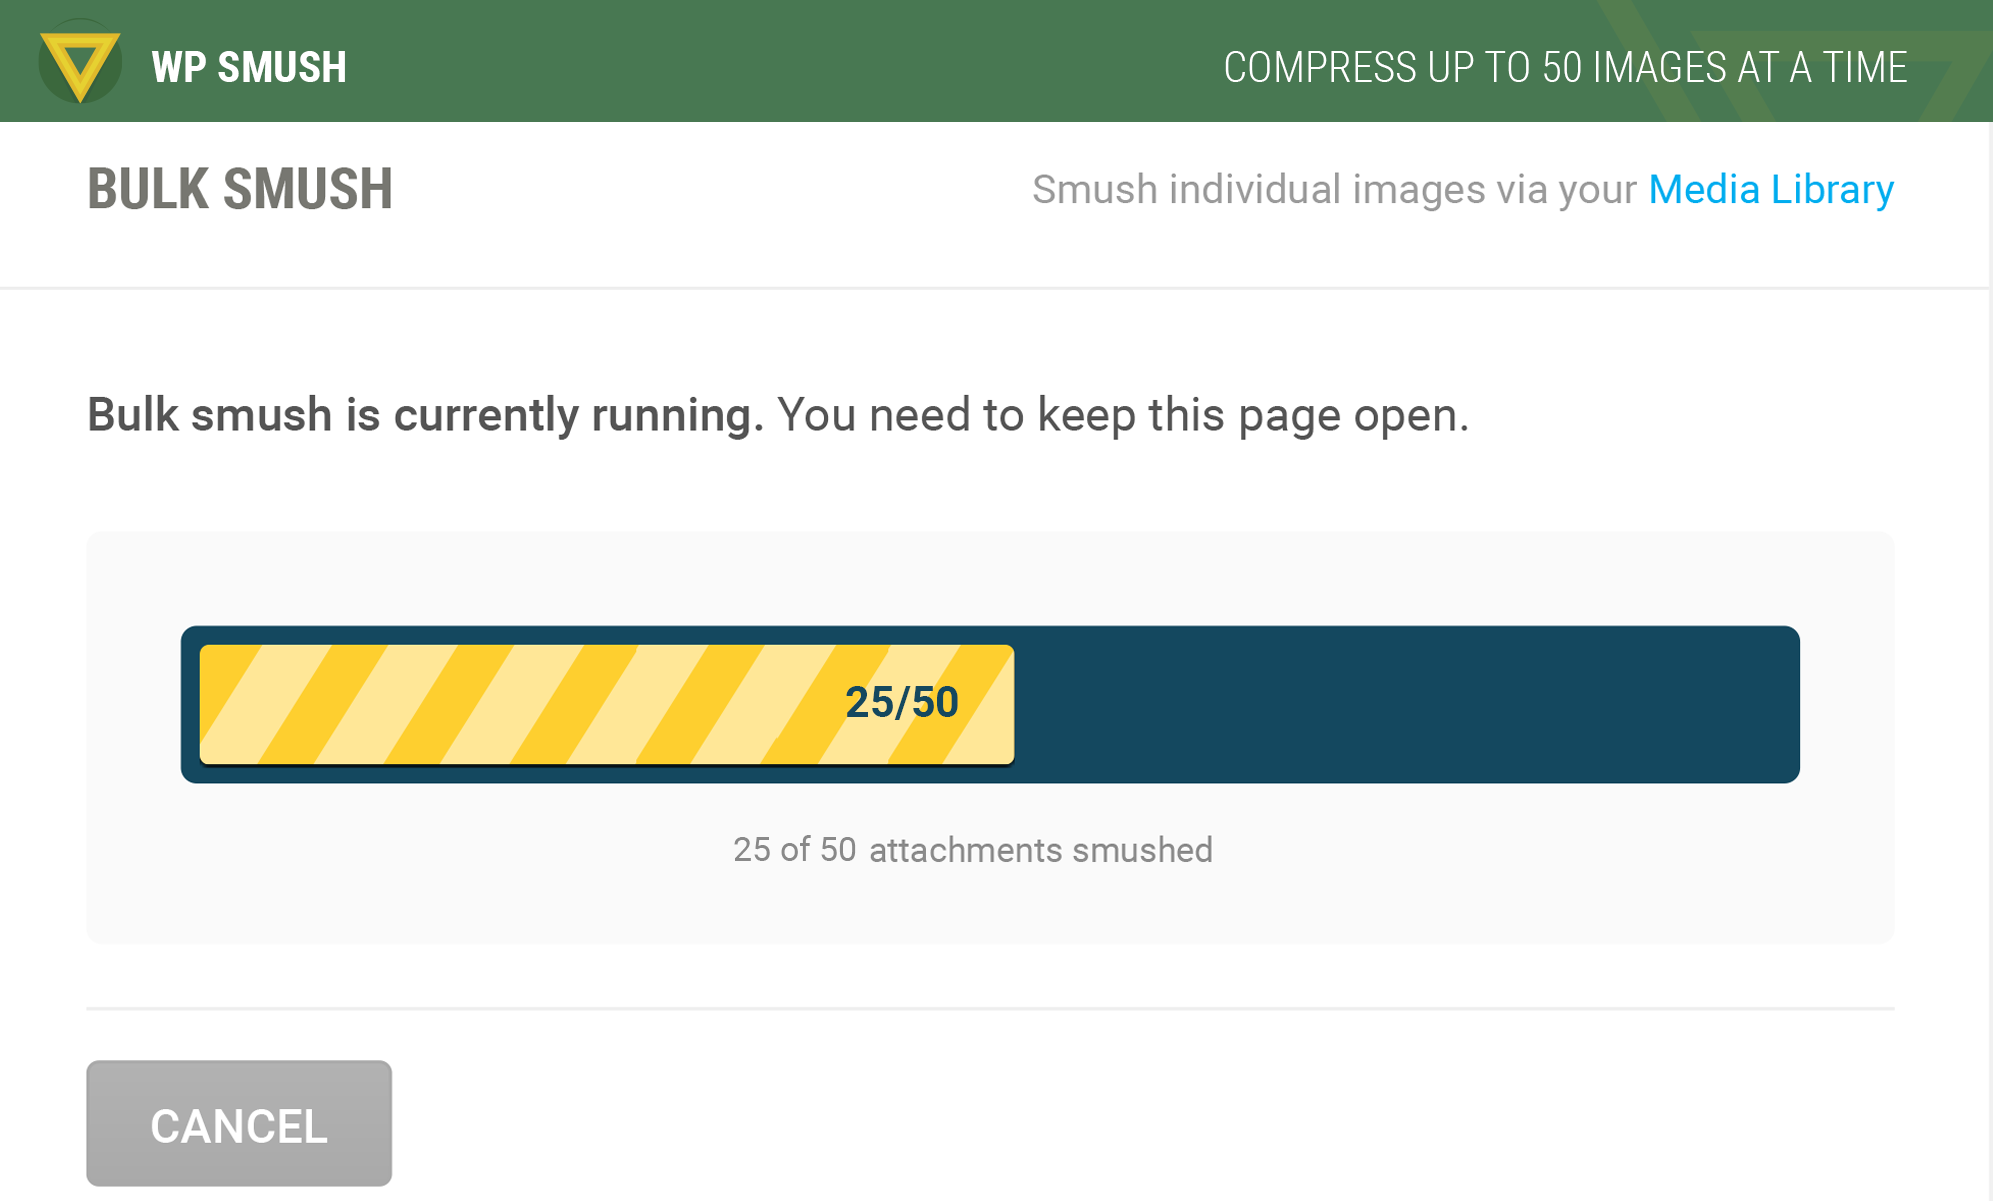
If you’re really worried about losing quality, the plugin also allows you to store a backup of your un-smushed images for restoring later.
Alternative: EWWW Image optimizer plugin does the same thing for WordPress websites.
If you aren’t on WordPress, you can try the free image optimizer tool here.
8. The Noun Project
I’ve already shared how some of the above simple tools allow you to integrate icons inside your visual content. But, I want to give you a separate library for searching icons – The Noun Project. It allows you to search for a keyword and returns little icons that are free to use.
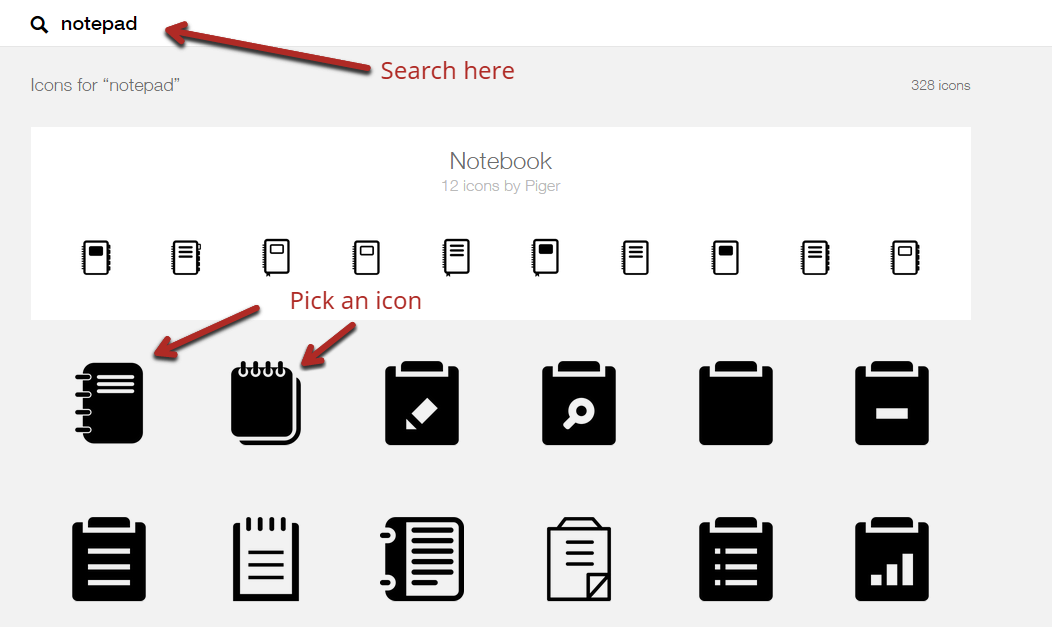
You’ll need to attribute the icons with the free version or buy a monthly subscription at $9.99 and use as many icons as you like. If you’re looking to buy just one icon, then it will cost you $1.99.
Most people discount icons and go for full-fledged images. But, icons are heavily underused. If you’ve read my advanced internet marketing guides, you’ll notice that I’ve spilled them across the content.
9. Pattern Library
Do you want a repeating pattern as a background for a social media post?
Then, Pattern Library is a great photo collage resource for free and colorful backgrounds shared by talented designers.
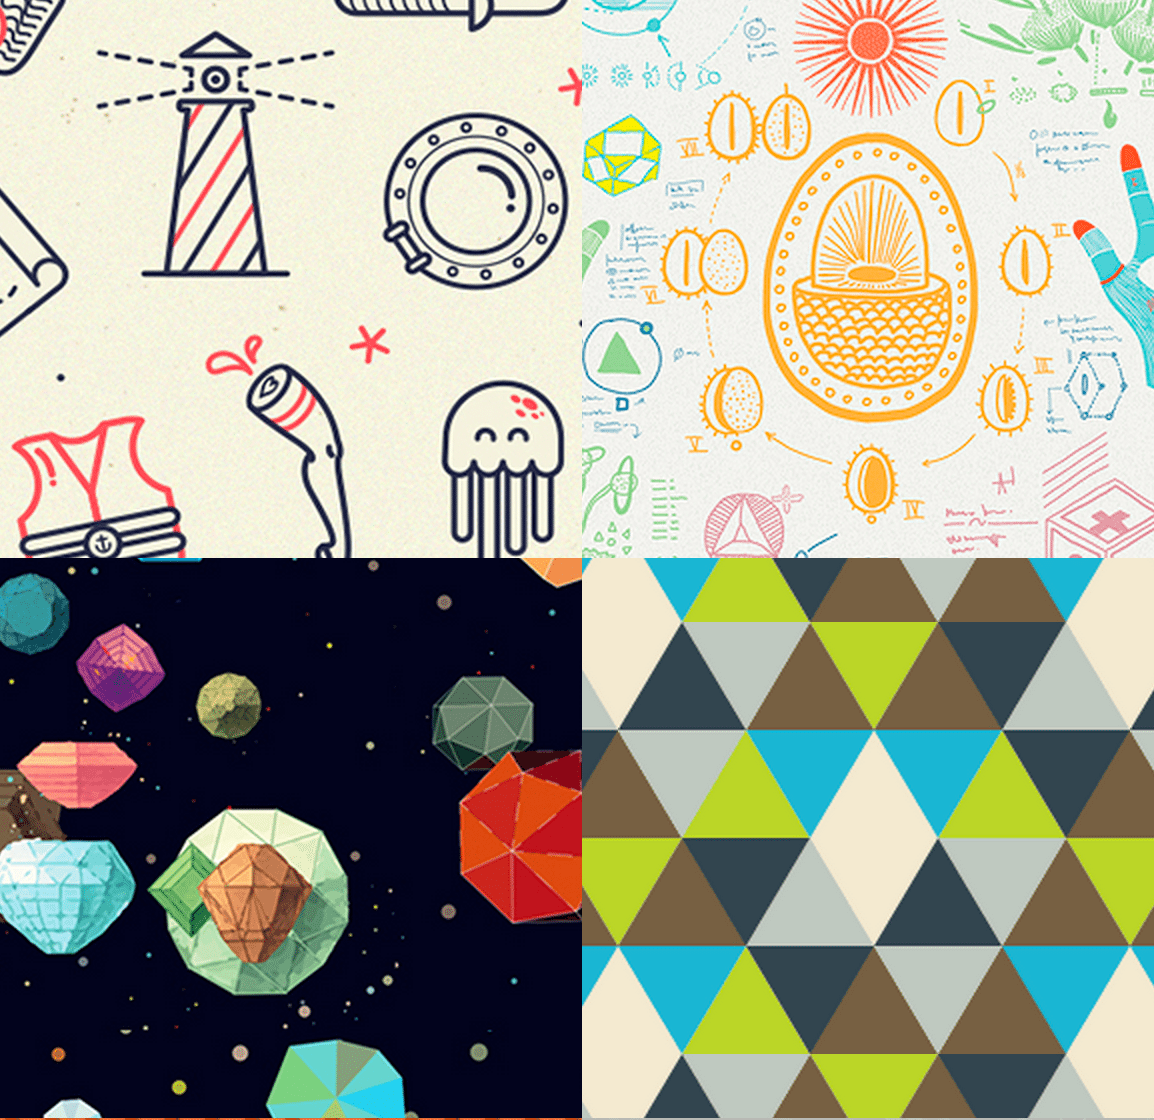
Since they are repeating patterns, you can tile, photo collage and expand the photos to any size.
If you’re a web designer, the library even accepts contributions.
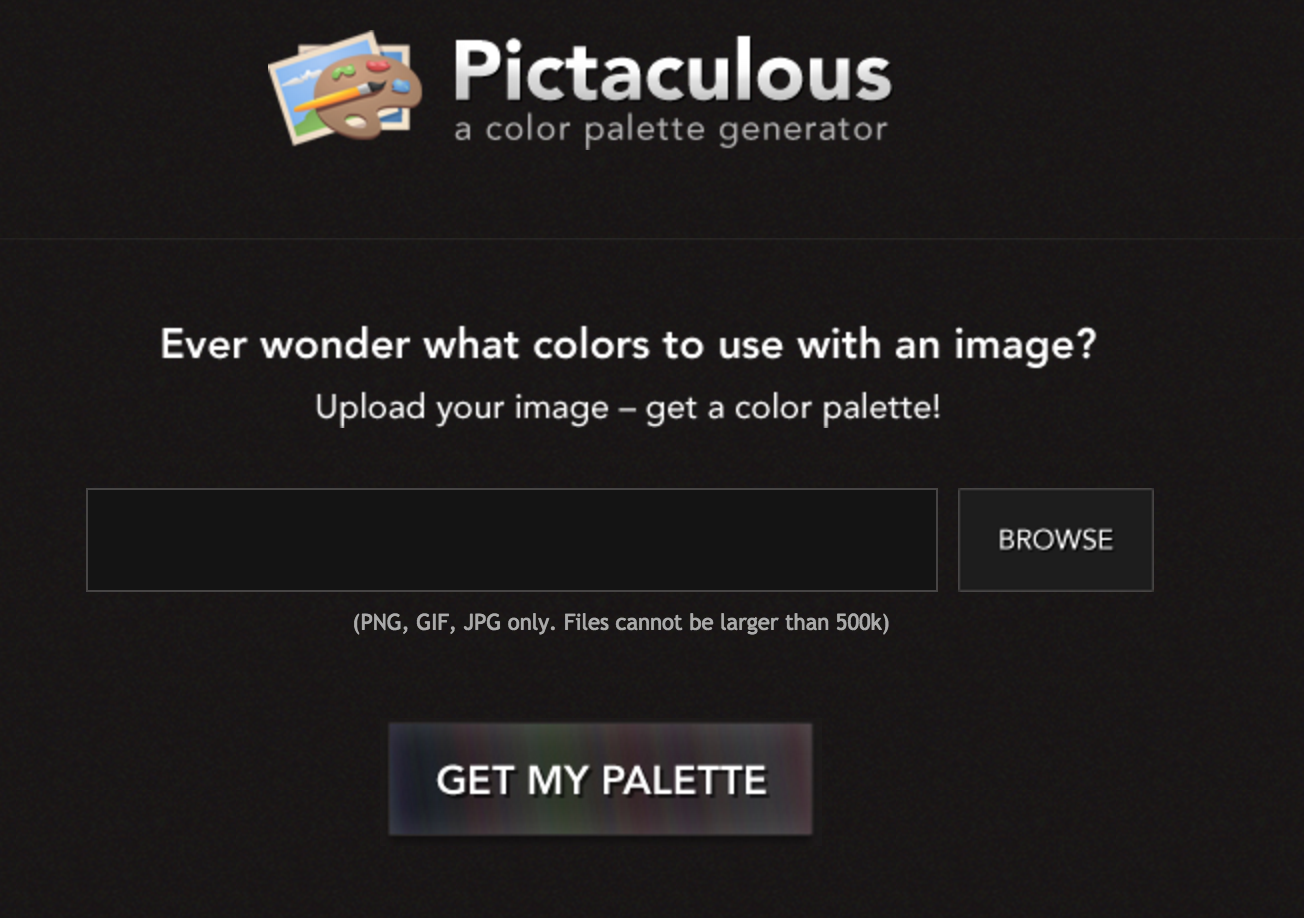
10. Pictaculous
Sharing images on social media is one thing. But, if you’re also willing to understand a bit about color suitability for your social media marketing efforts, then Pictaculous is the tool for you.
The tool was created by the cool folks at MailChimp. It allows you to upload an image and tells you the colors that you should use for the background, text, icon and frames.
The tool generates a color palette, after studying your image. Here are the results it showed for the cover image of my LinkedIn Ads blog post.
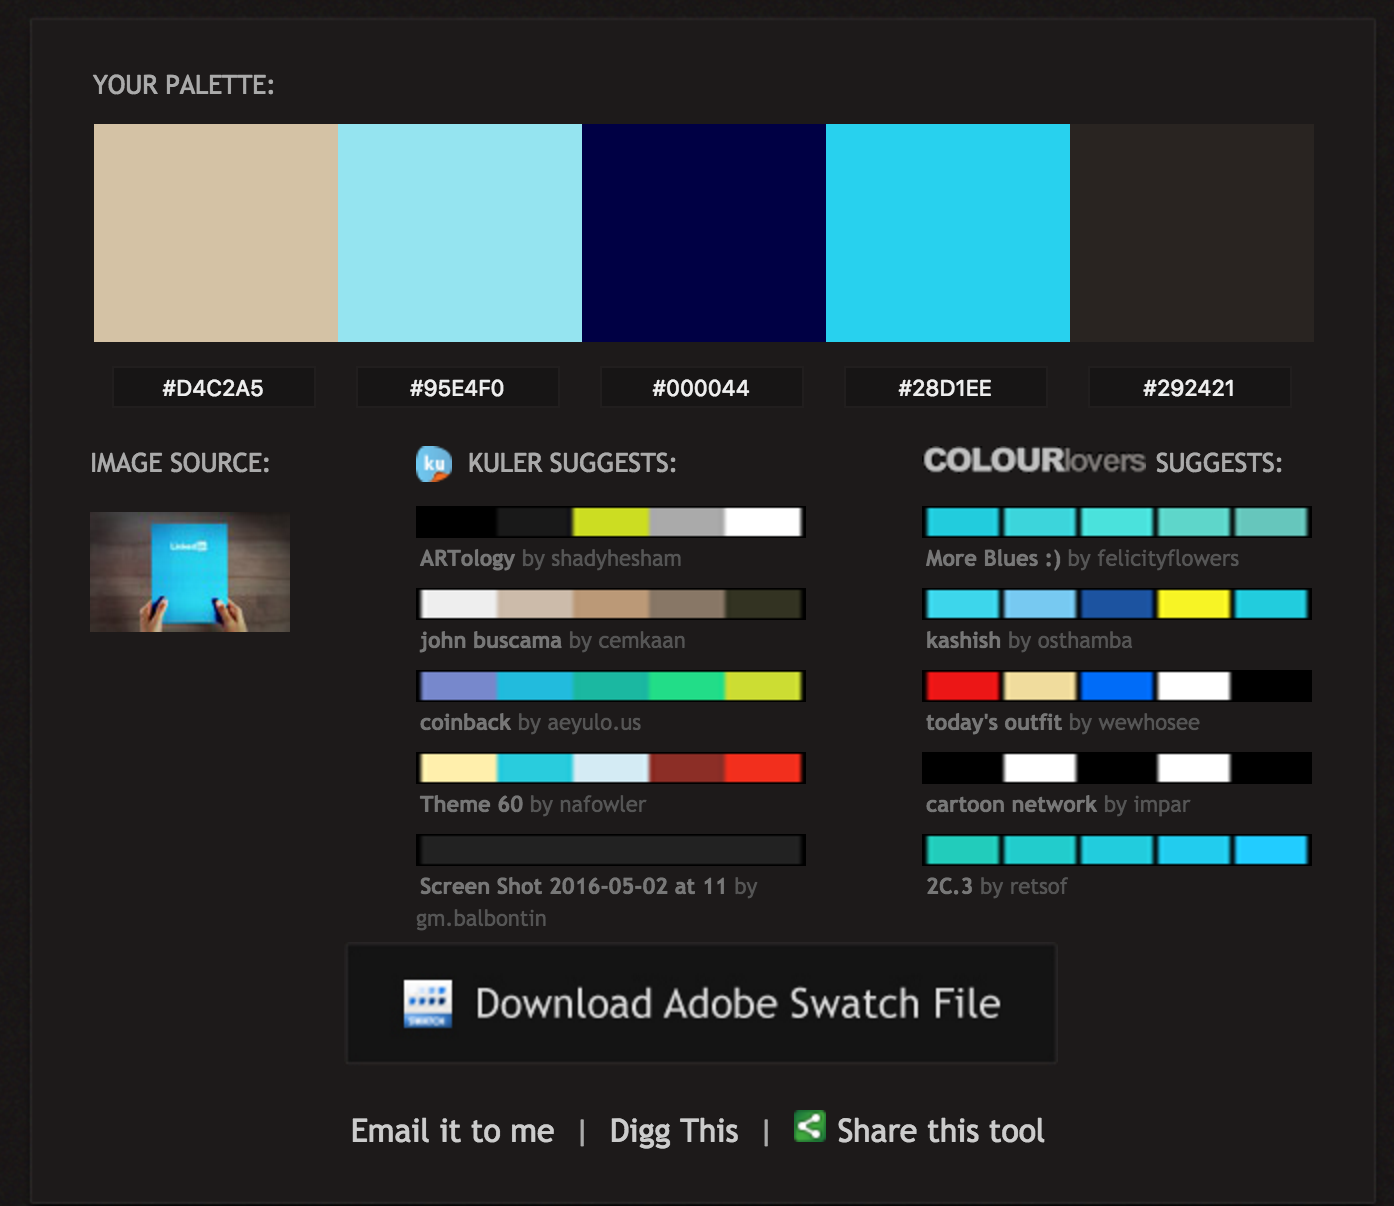
You can email the suggestion to yourself or download the Adobe Swatch File.
Conclusion
Creating social media graphics and stunning web design imags was rather difficult 5 years ago. You had to beat your head against the wall while trying to learn feature-rich definitely not simple tools, like Photoshop, for designing graphics.
Not any more. I’ve covered 10 tools in this blog post that are easy to use. You can publish your first design within half an hour (or less). And, with social media marketing efforts getting increasingly visual, creating social media graphics to effectively, and impressively, share your message is the least that you could do.
Are there any other tools that you regularly use in designing graphics for social media? I would love to hear about them in the comments below.
Comments (96)