
A picture is worth 1,000 words.
And that’s a good thing because words alone won’t cut it anymore.
And they certainly won’t keep your audience interested for long.
In fact, research by Microsoft found that we now have shorter attention spans than goldfish.
The average attention span in 2000 was just 12 seconds. But the study found that the average attention span has now fallen to 8 seconds.
This means that our jobs as marketers are getting more and more difficult.
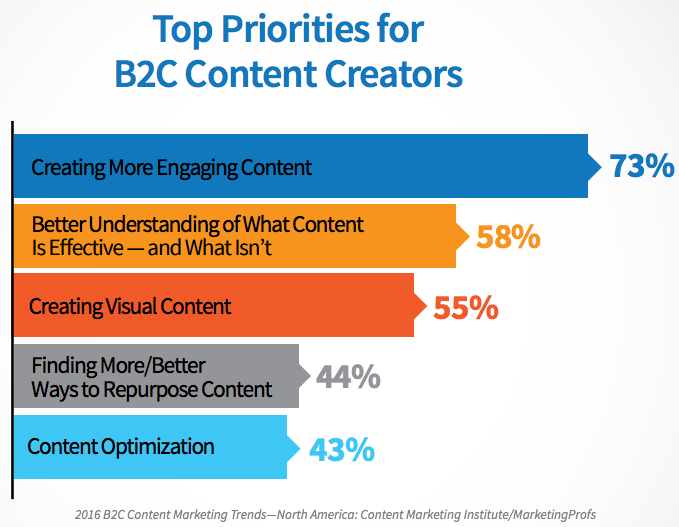
It’s no wonder that 73% of content creators say their top priority is creating more engaging content.
We need to grab people’s attention fast and then hold onto it long enough to develop a relationship with them.
One great way to do this? Use visuals.
Our brains process visuals way faster than text — 60,000 times faster, in fact.
That’s not a typo. 60,000 times faster.
And if that isn’t enough, people retain information better with visual aids, too.
When people hear information, they’re likely to remember only 10% of that information three days later.
However, if a relevant image is paired with that same information, people retain 65% of the information three days later.
That’s a massive difference!
This is why I always try to pack my blog posts with images and visual aids.
But 71% of marketers spend fewer than five hours a week making visuals.
So it seems that many marketers aren’t yet harnessing the potential of visual content.
Still, visual content is starting to get the attention from marketers that it deserves.
According to Social Media Examiner, marketers rate visual content as the second most important type of content after blogging.
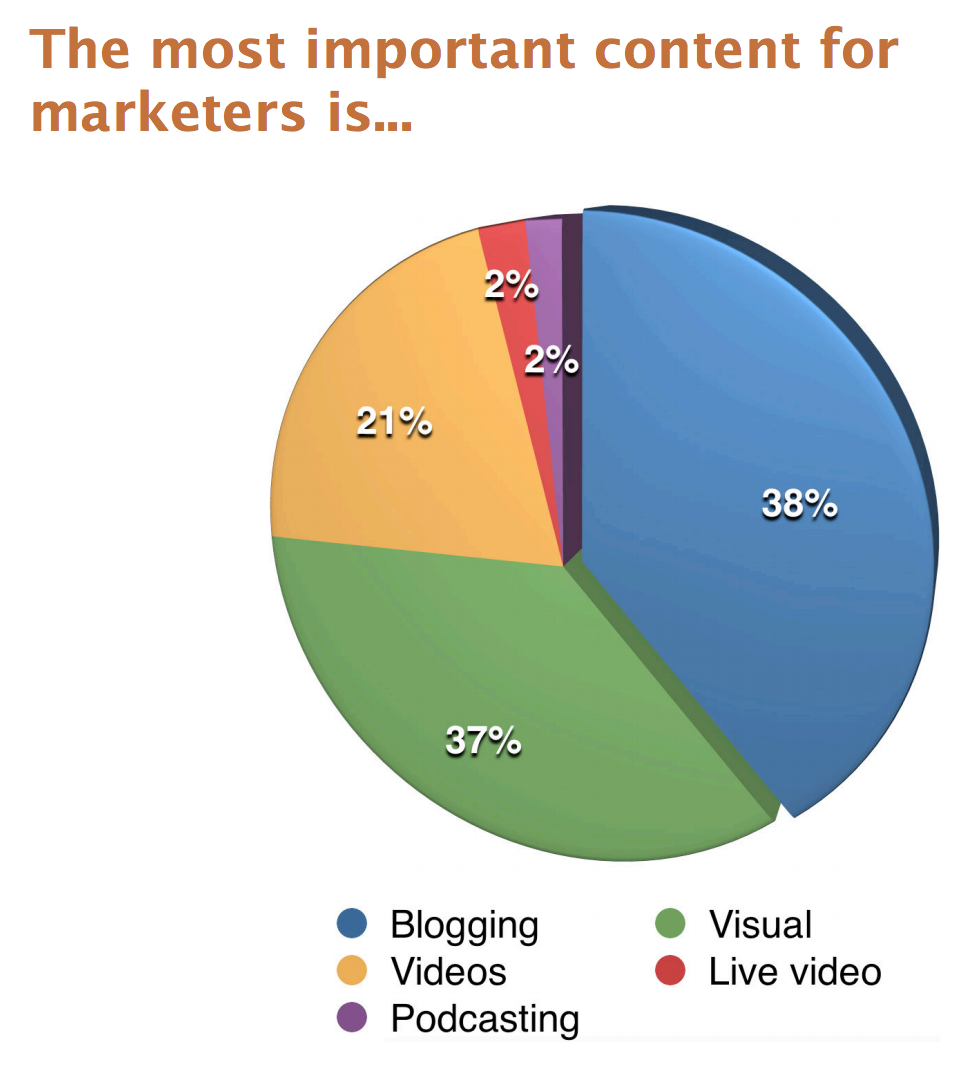
The most important content for marketers was blogging at 38%.
But this is a significant drop from 45% in 2015. Visual marketing was close behind at 37%, up from 34% in 2015.
So marketers perceive visual marketing as becoming more and more important.
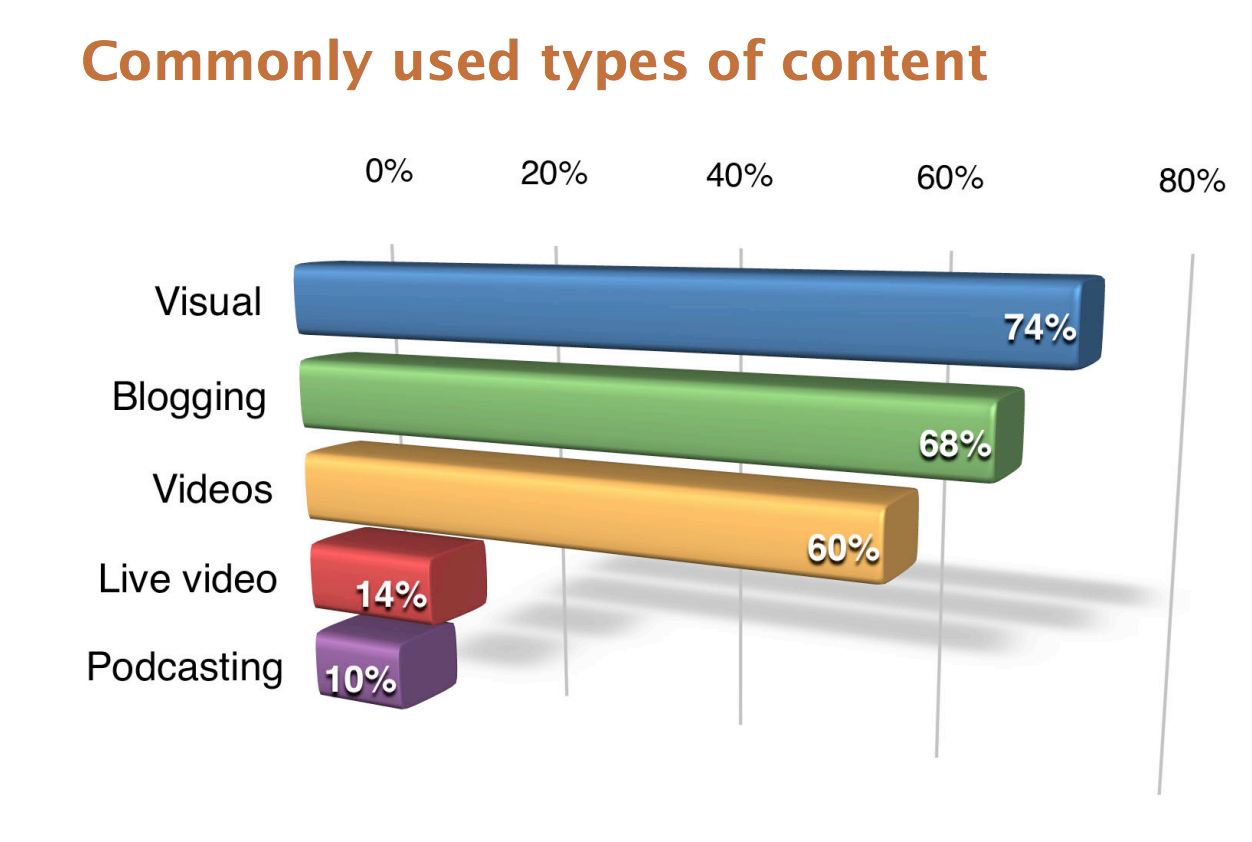
The 2016 Social Media Examiner Report also found that 74% of marketers use visual assets in their social media marketing, up from 71% in 2015.
And 31.7% of marketers said that visual content is integral to their 2017 marketing strategy.
Add to that the 35.5% who predicted that they would spend more than a third of their entire budget on visual content.
Visual content is the future. And it’s time we jumped on board.
So let’s dive into a few tips on how to create visual content to include in your marketing strategy.
Avoid generic stock images
First things first: Avoid generic stock images whenever you can.
Sure, we all use them from time to time. But they should be the dash of salt — not the pasta sauce.
Some businesses are still using them as the main ingredient, though: When asked what kind of visuals they used the most, 35% of marketers said stock photos.
If you rely on stock images, you risk boring your audience.
That said, stock images can be useful when applied appropriately.
As a general rule, don’t use an image just for the sake of it.
And if you do use a stock image, make sure you use it in context.
For example, Rob Howard used this picture of a woman taking a walk in the woods for his article about how creative geniuses take walks.
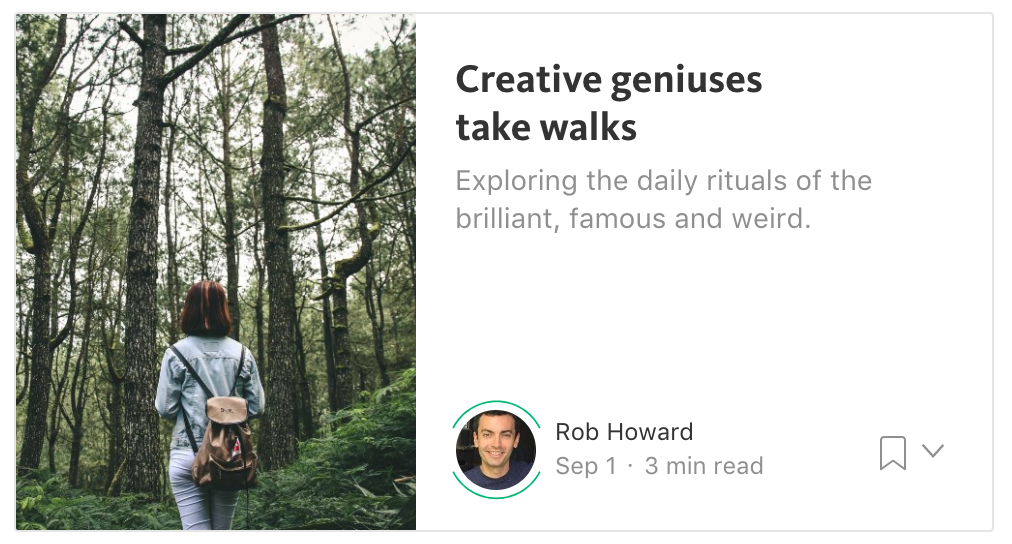
The image makes sense and adds to the article by drawing the reader in.
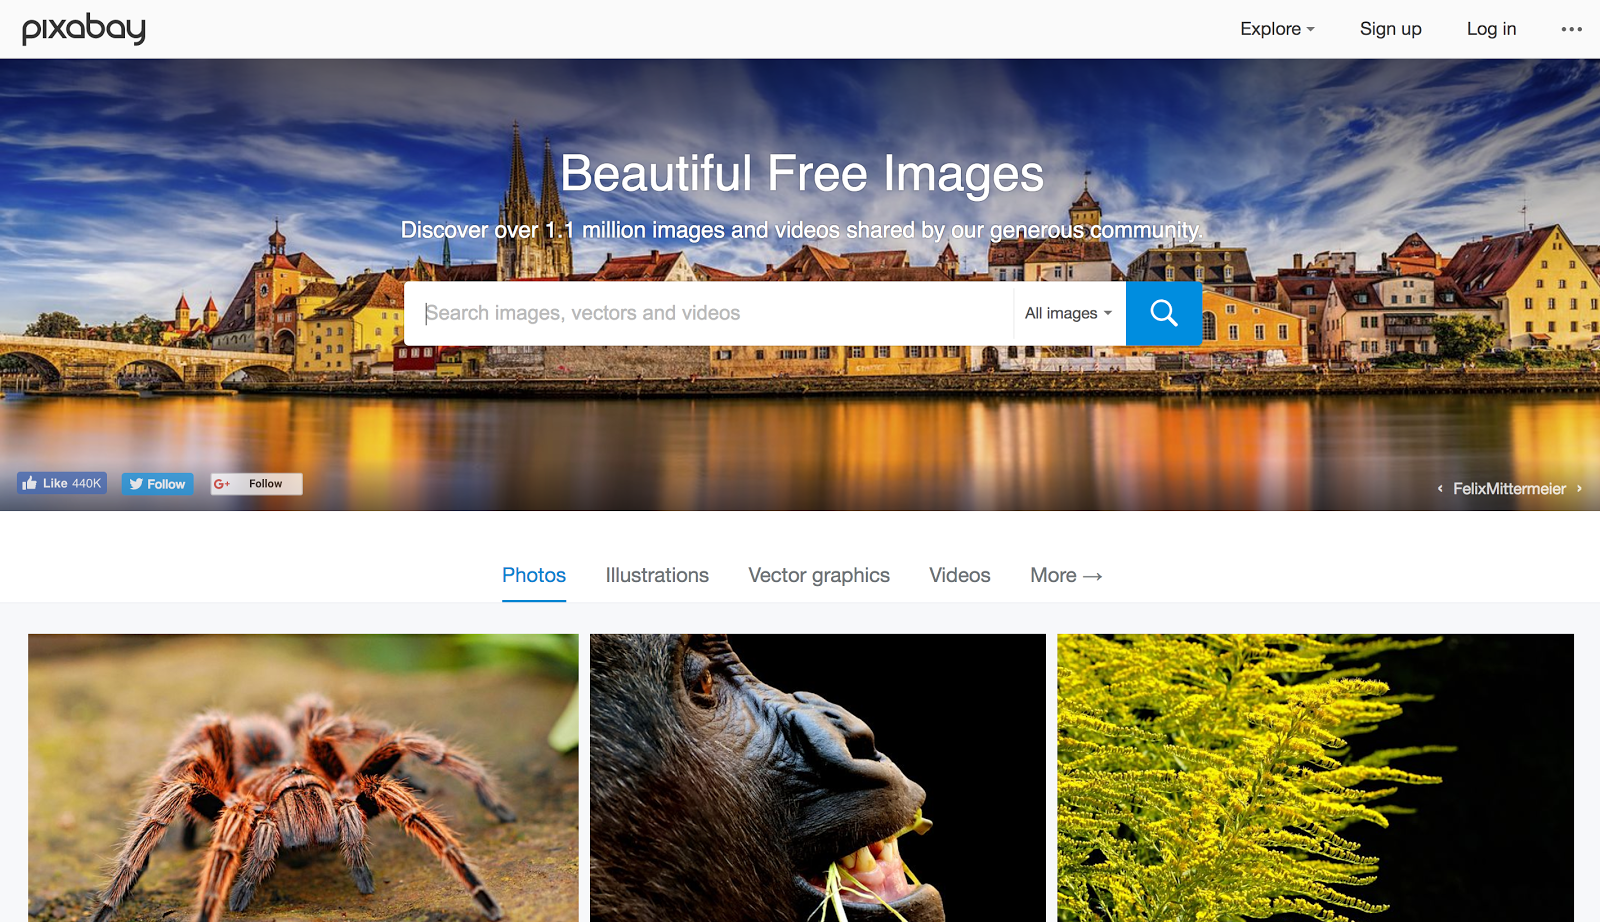
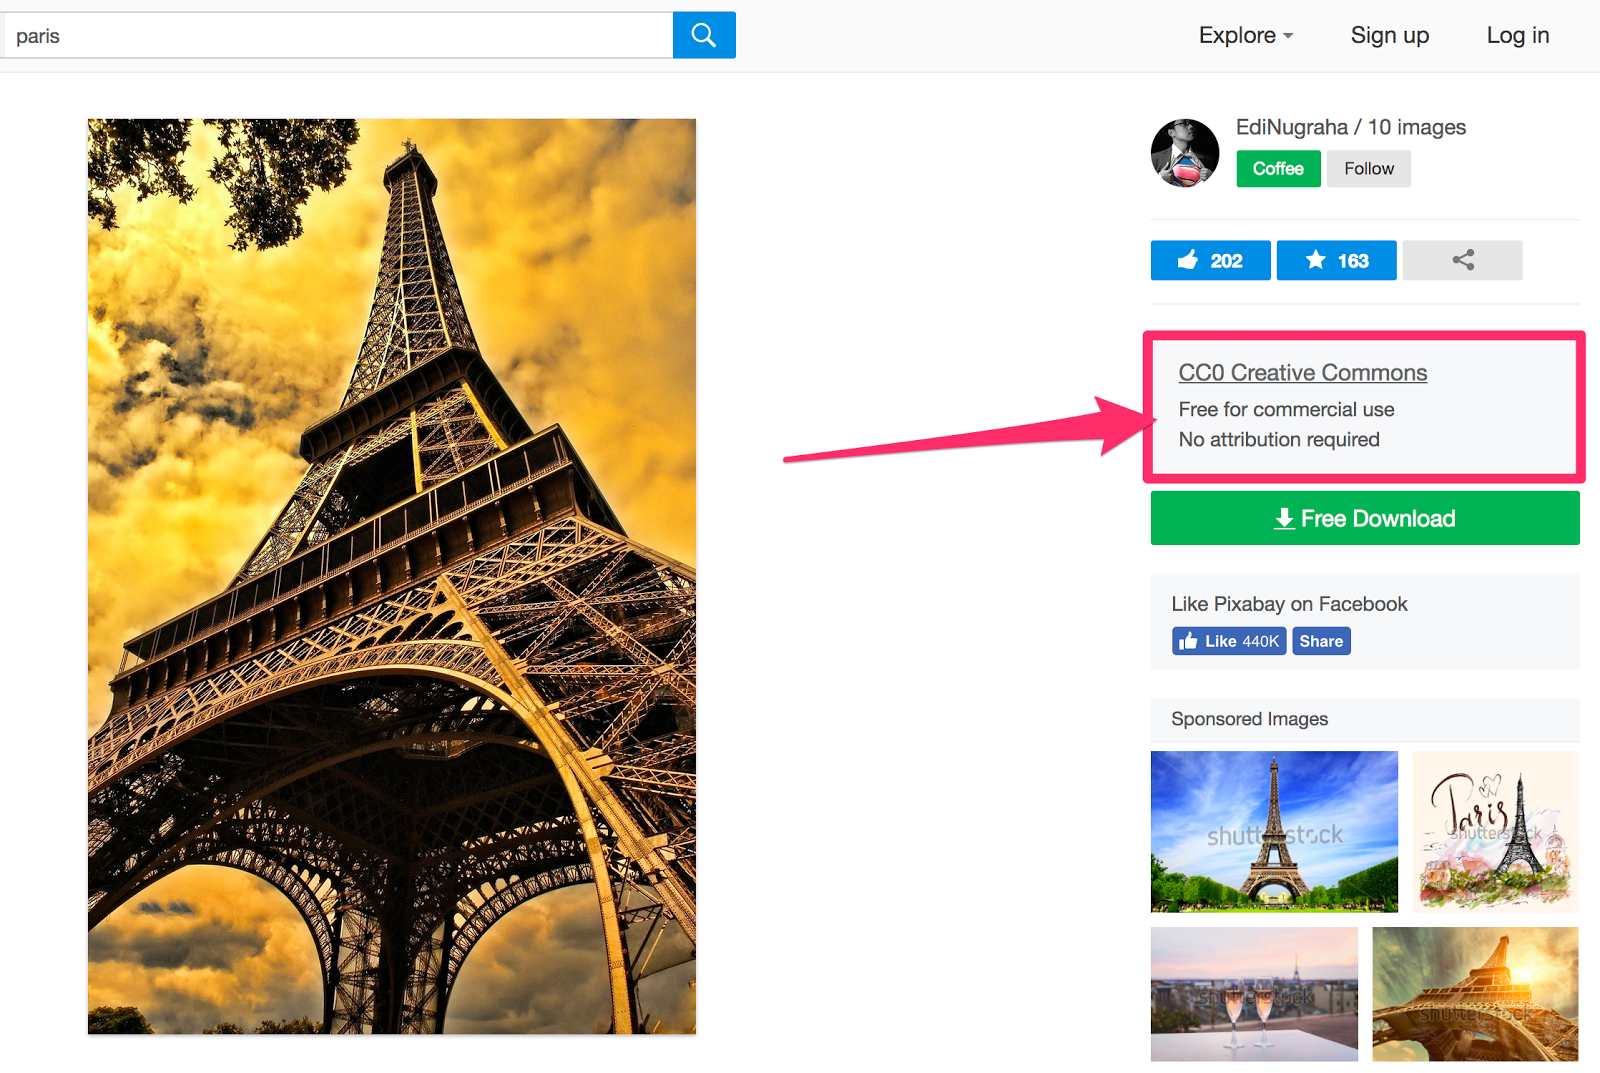
Pixabay is a good place to find quality, free commercially-licensed images.
Once you’ve searched the Pixabay library and found an image you like, be sure to check the licensing information.
This is located on the right-hand side of the image window.
Another great place to find quality stock images is Unsplash.
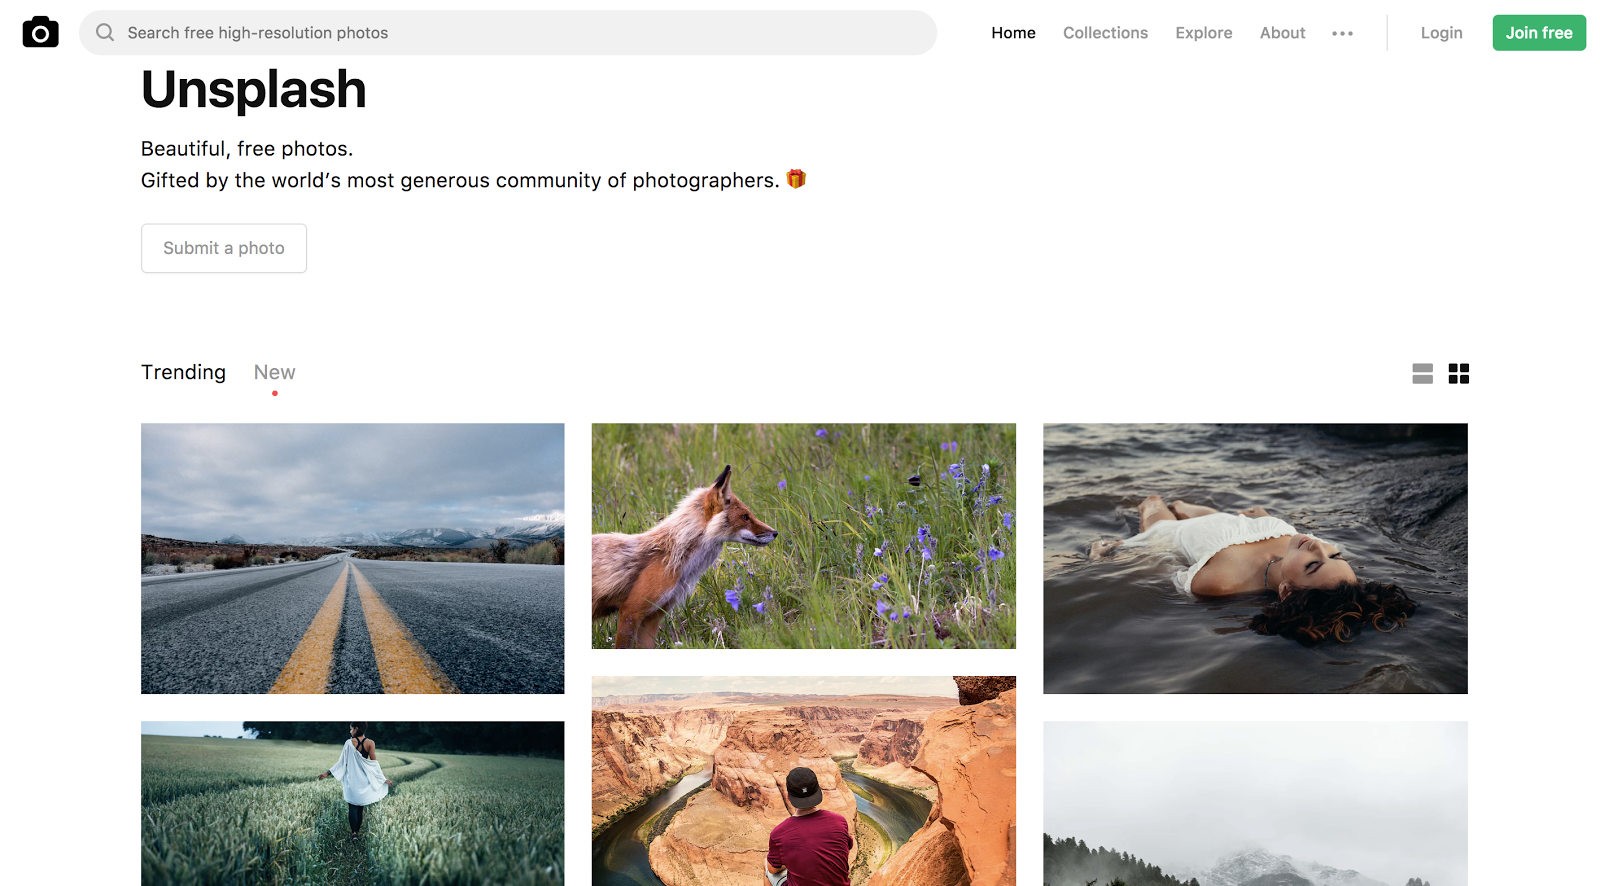
All of the images on Unsplash are free for commercial use with no attribution required, although Unsplash does encourage attribution if possible.
So add the odd stock image to your content strategy to improve the reader’s experience.
Just be sure the image is there for a reason.
Create your own images
Ideally, you’ll want to create your own images whenever you can.
It might seem like you need specialist-level knowledge or a ton of complicated programs like Photoshop and Adobe InDesign to create high-quality visual content.
Obviously, those things help, but there are easier ways to create basic visual content that still looks professional.
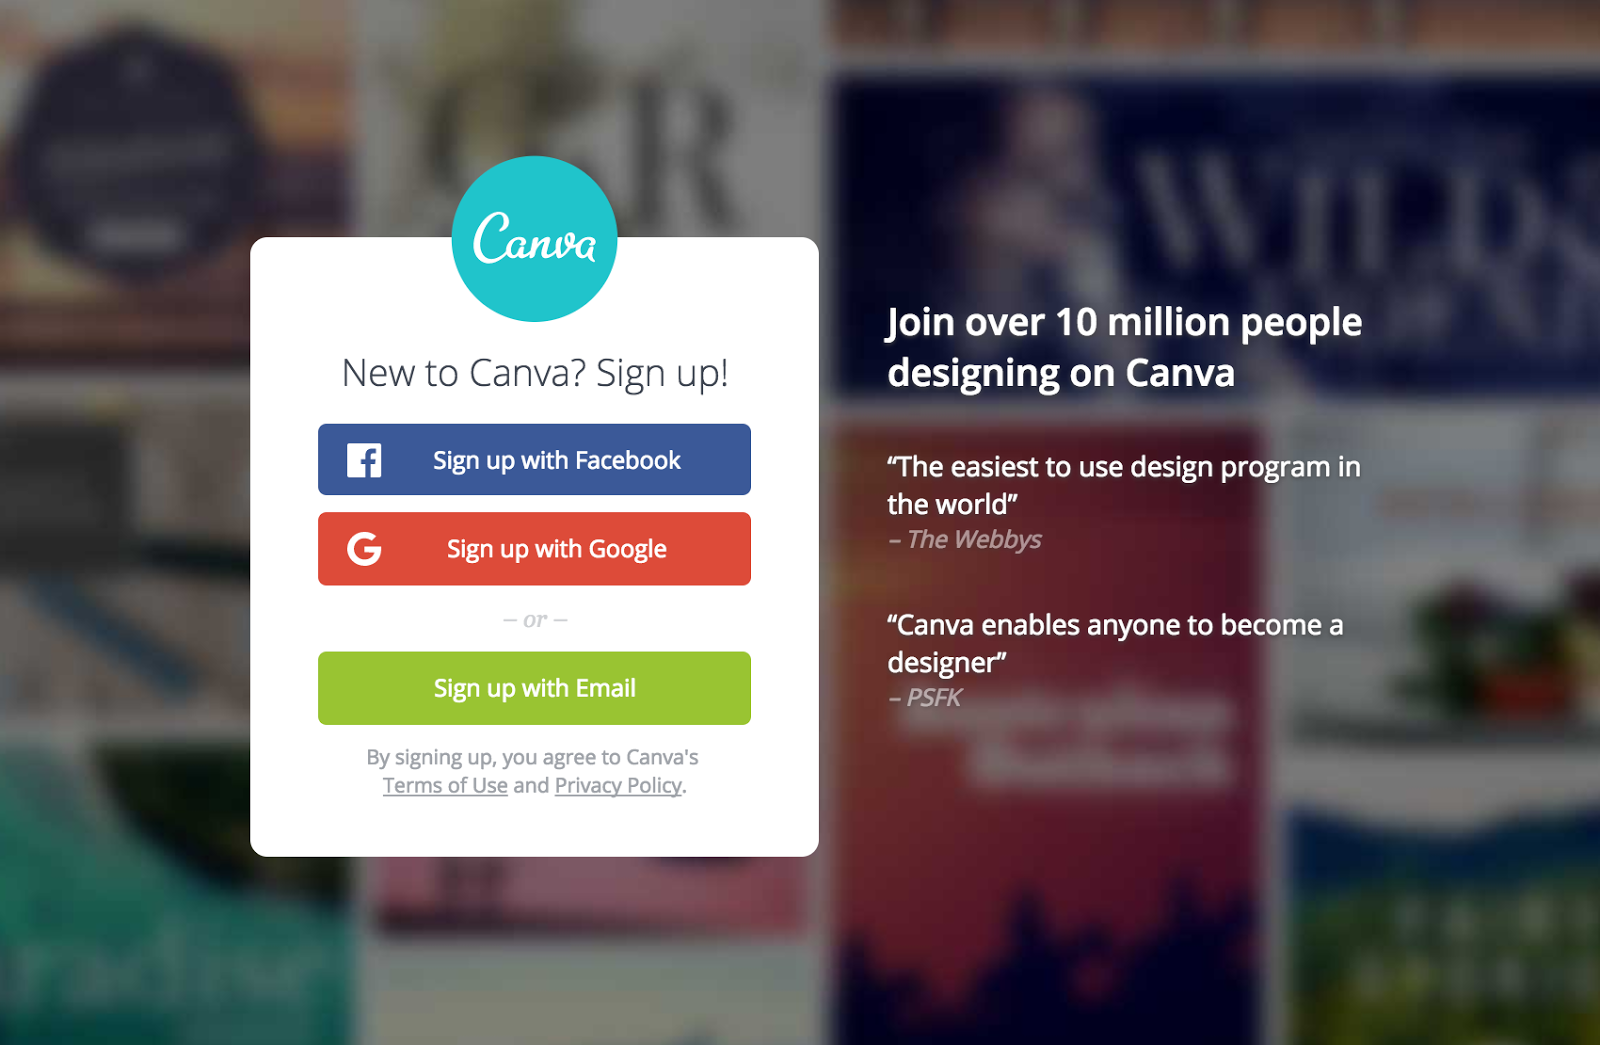
Canva is a free online graphic design interface. It has tons of templates for every type of visual content you might need to create, from fliers and CD covers to resumes and postcards.
It also boasts a comprehensive stock image library and image filters.
The best thing, though? It’s simple to use.
Let’s run through how to create a graphic on Canva.
Start with the end goal in mind.
It’s always good to get some inspiration from other graphics related to your niche.
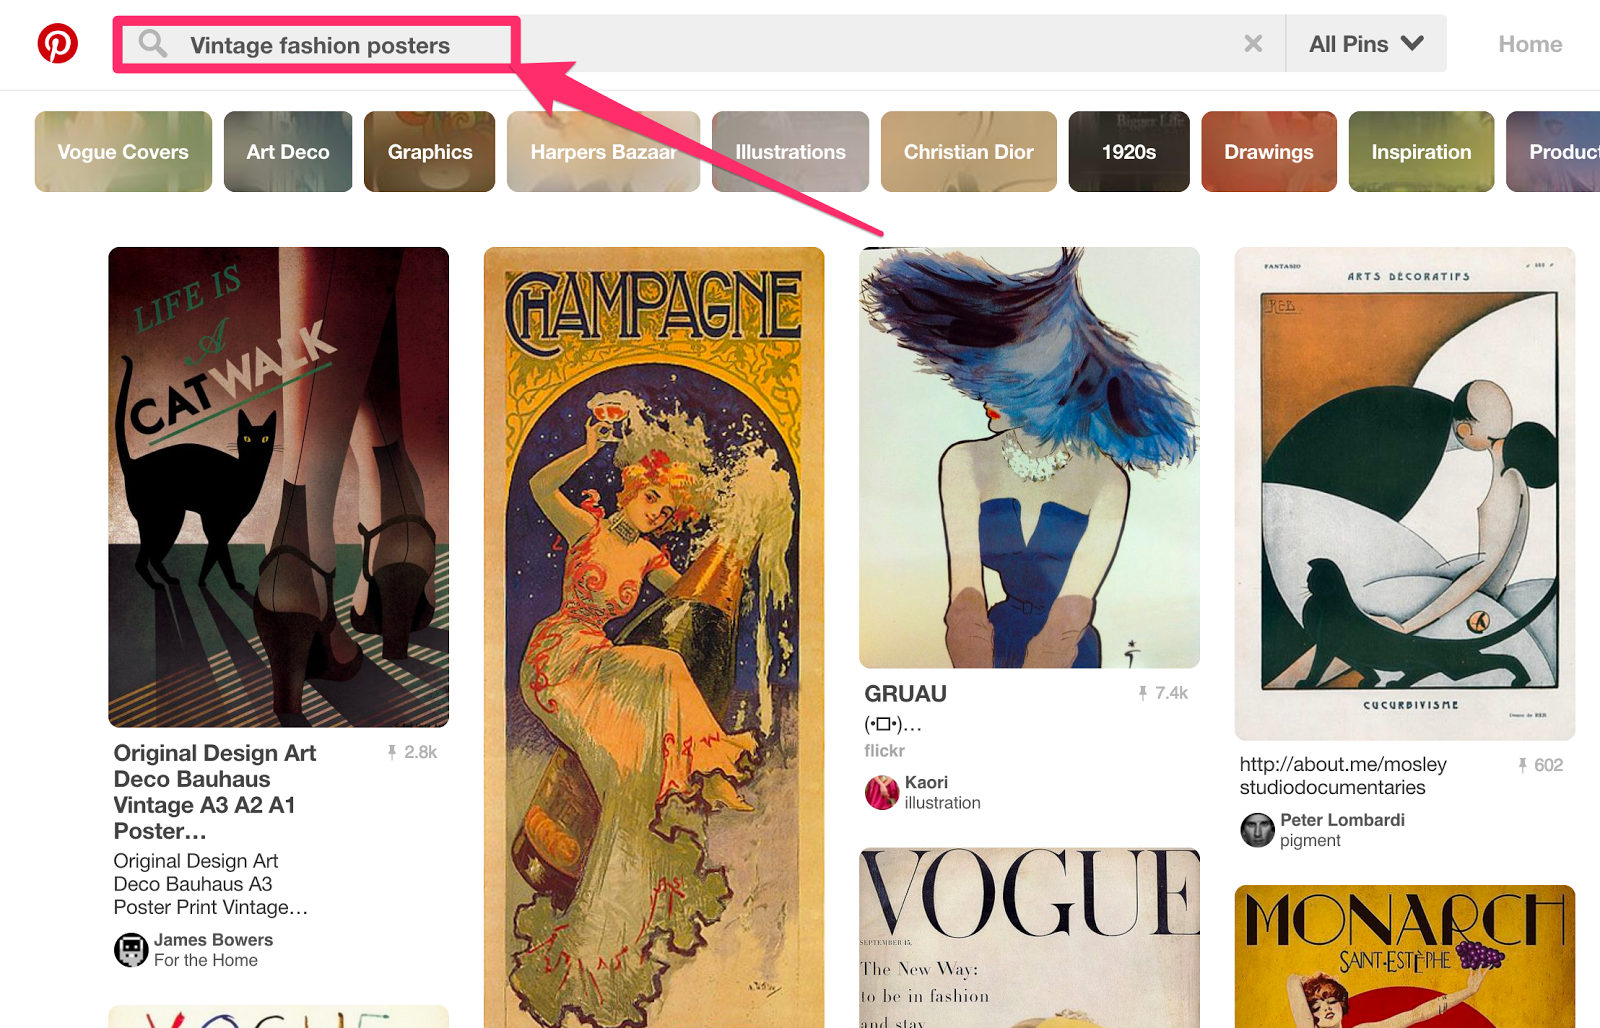
I recommend using Pinterest to find some images similar to what you’d like to create.
Here, I’ve searched for “vintage fashion posters.”
Get some ideas of what you want to create. Then head over to Canva and browse the templates.
On the left-hand side, you’ll see a long list of all of the templates available, but if you don’t find a good match, try searching.
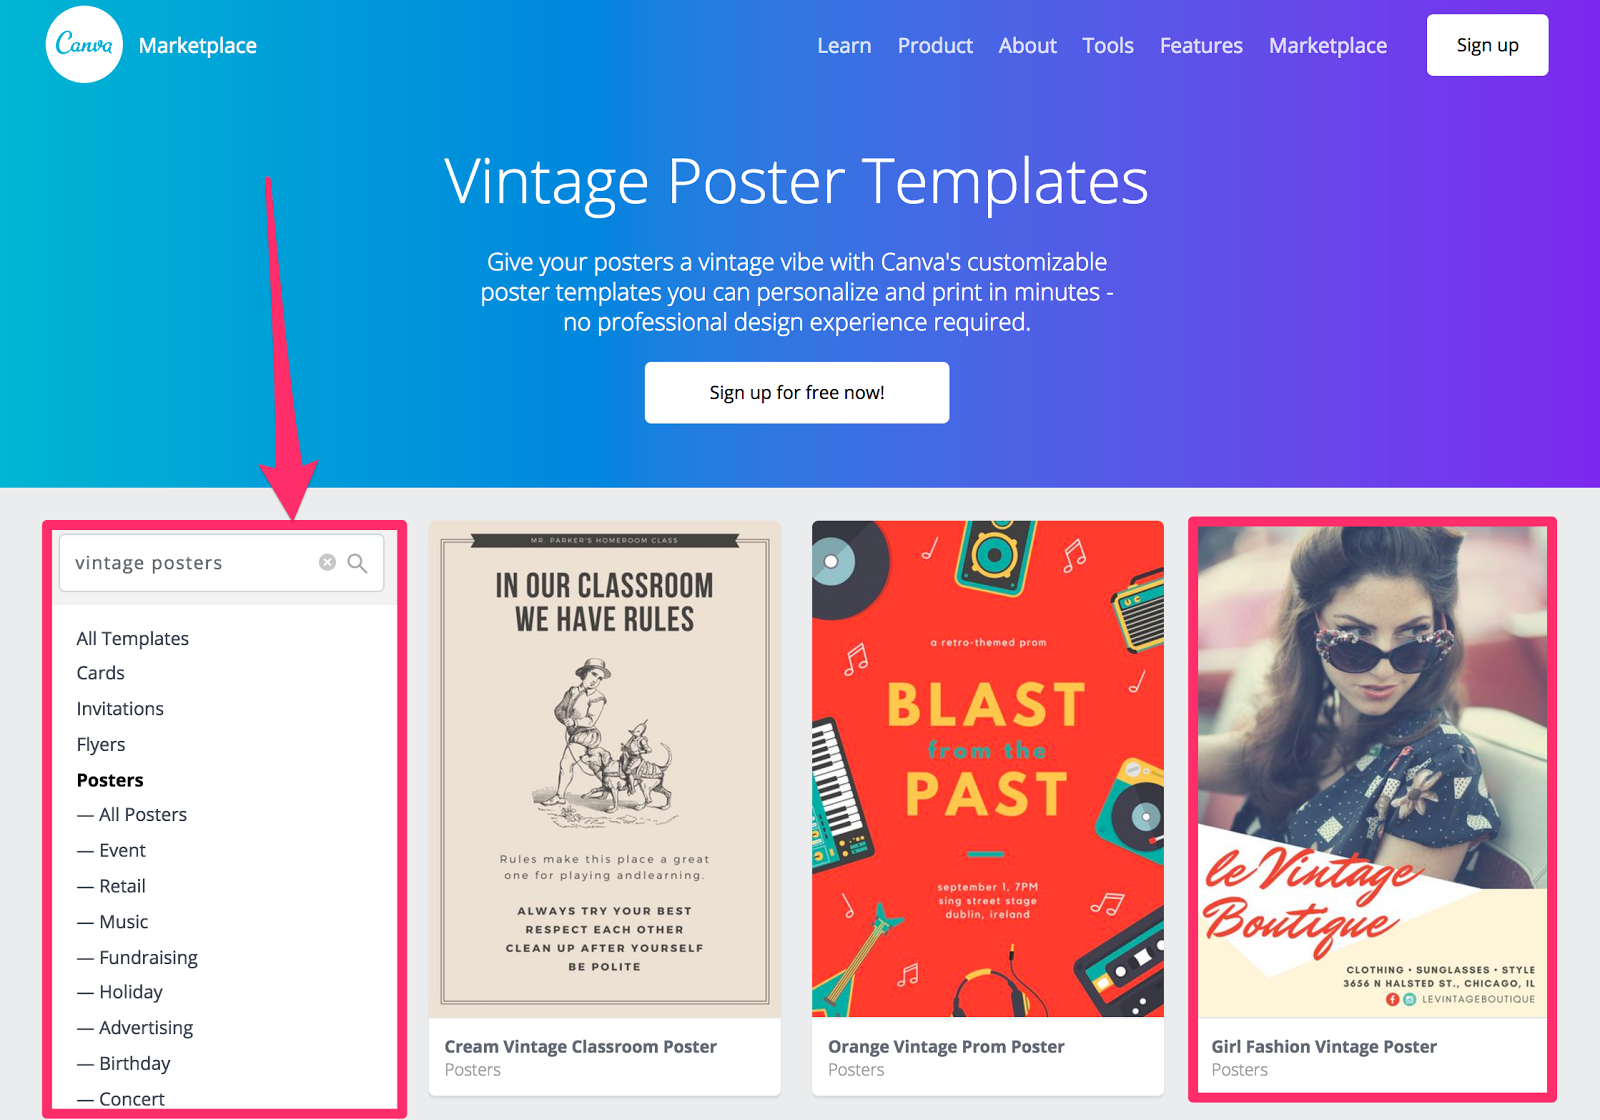
Once you’ve found a template that looks like a good fit, click on it and it’ll take you to the template’s page.
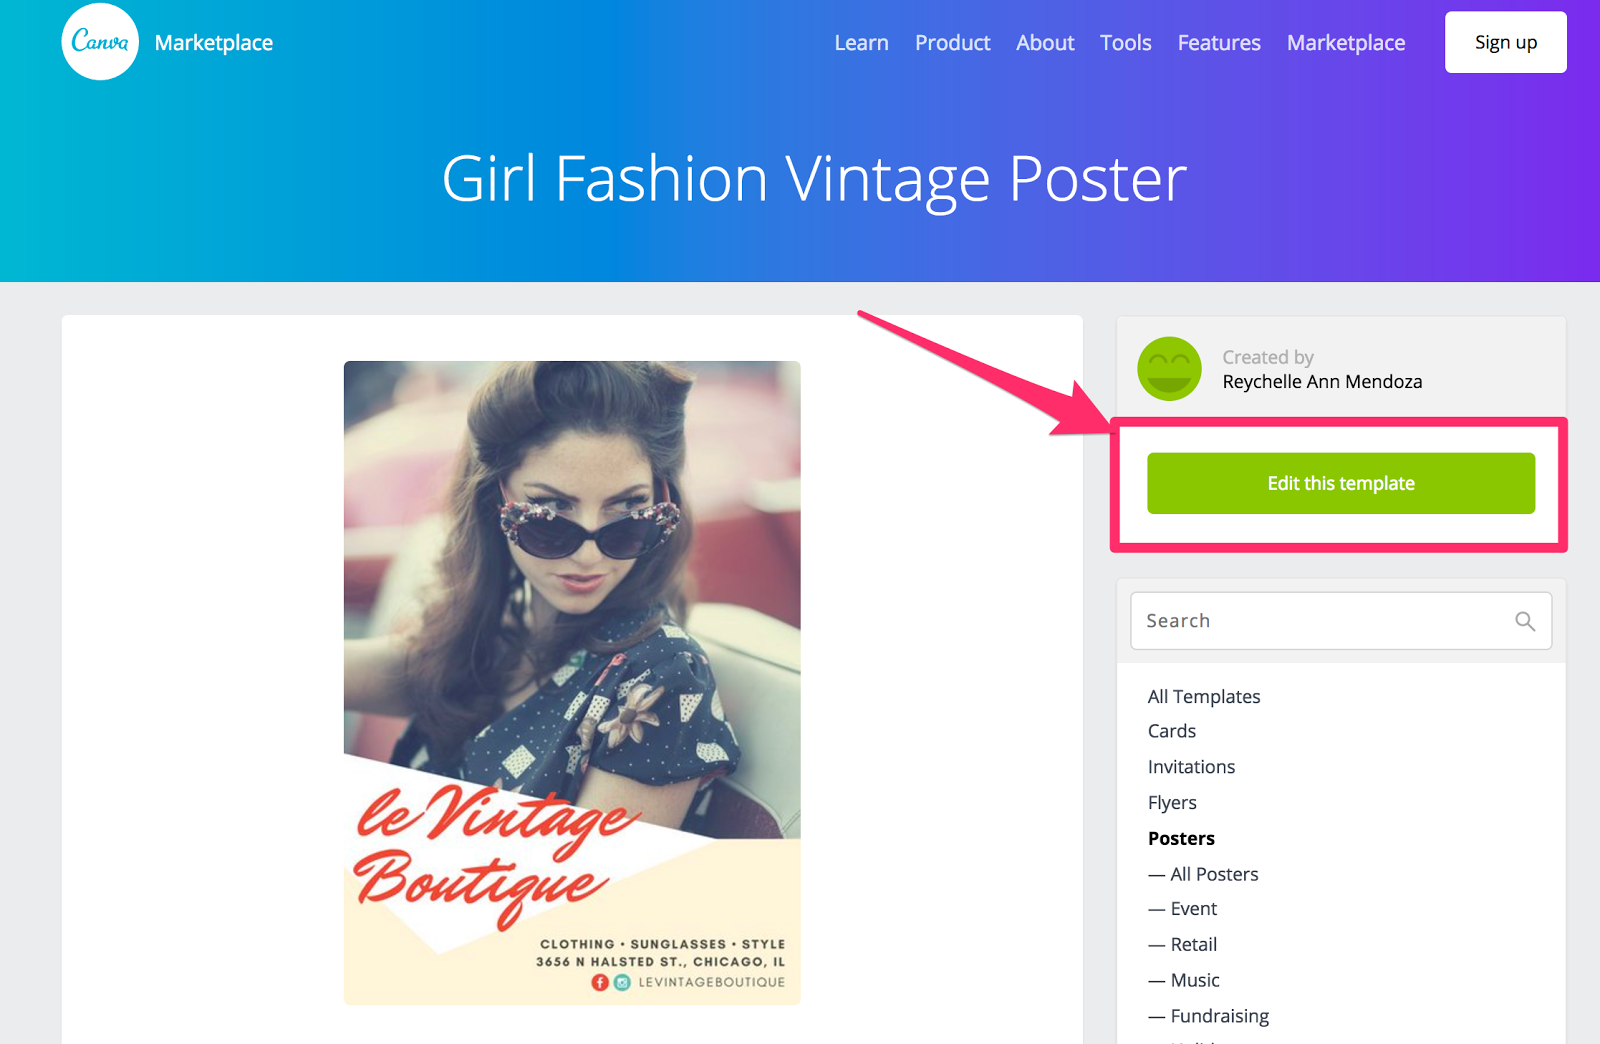
If it’s the template for you, go ahead and click “Edit the template.”
Next, use the image search to find an image you like for your design.
Here, I’ve searched “vintage model” and simply inserted one of the pictures I found.
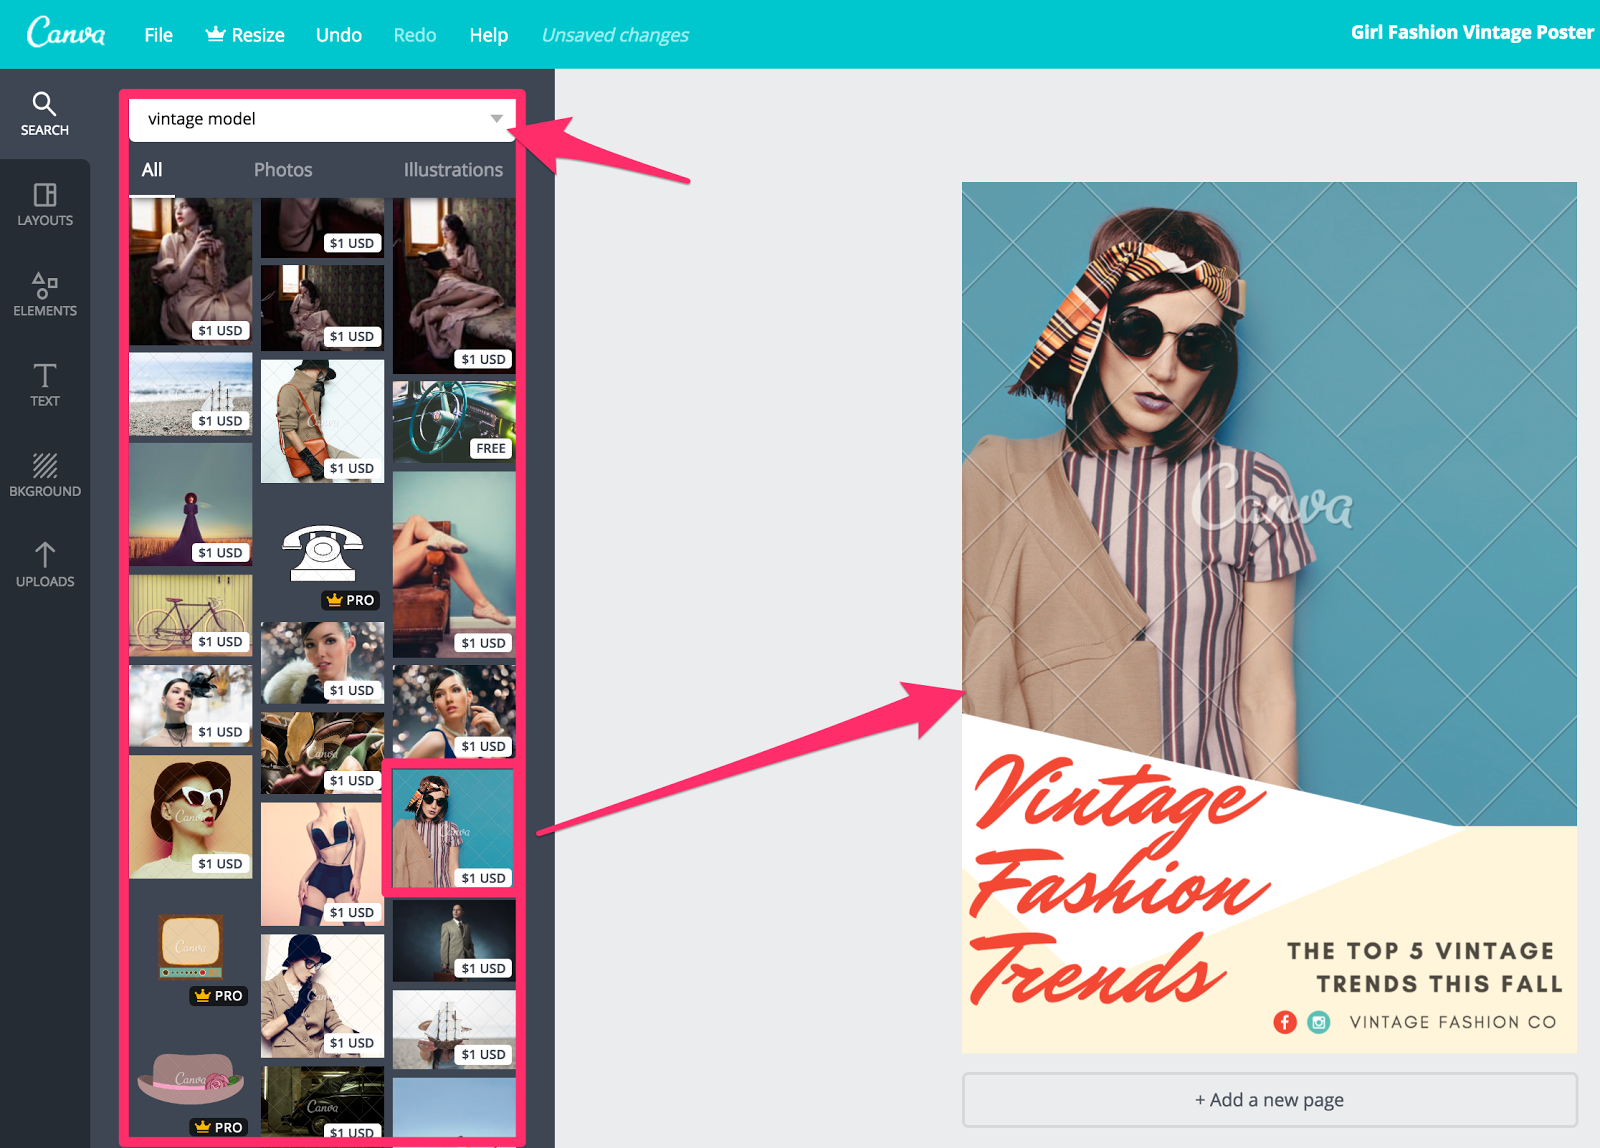
If you’d like to adjust the look of the image, simply use one of Canva’s built-in filters.
Just click “Filter,” find one you like, and then adjust its intensity.

Next, you’ll need to choose an appropriate font.
Highlight the text you want to change and click the drop-down font menu, then find your font.
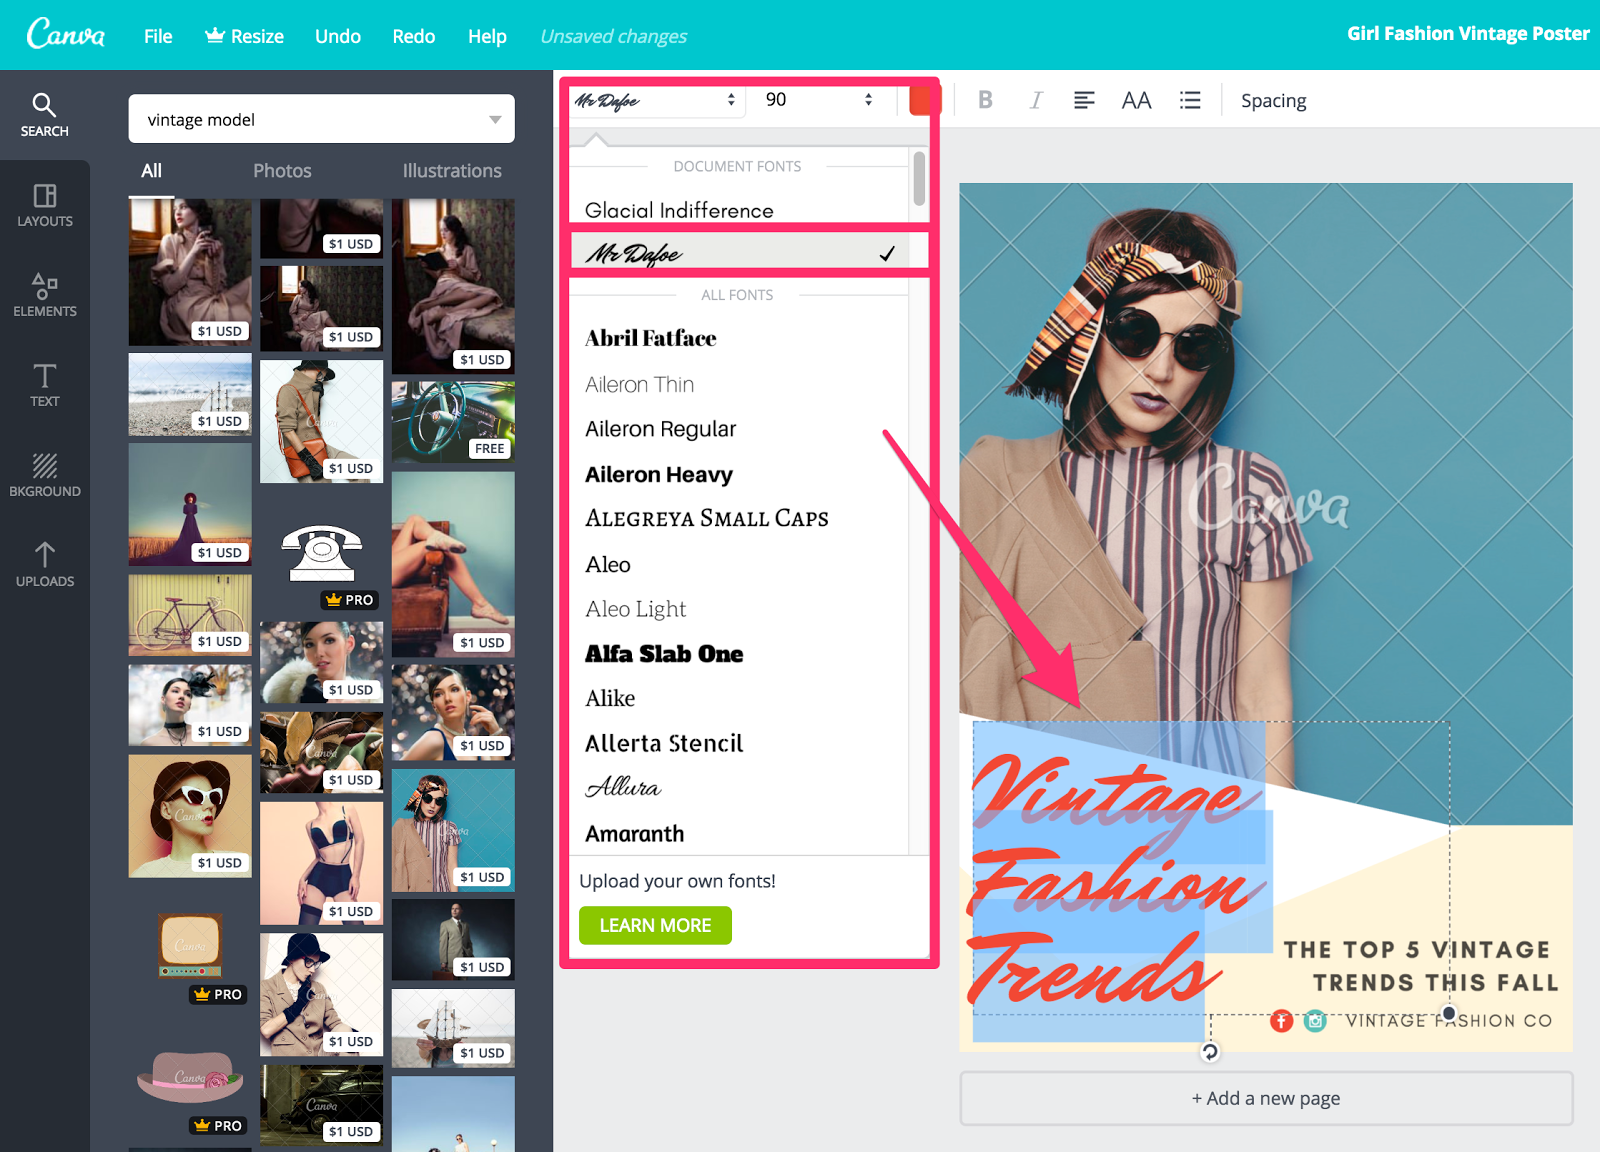
You can continue to change and edit all of the elements of your design by clicking on each one.
And, if you’d like to improve your design skills, Canva offers plenty of free resources to get you going.
Head to their Design School to complete one of their interactive courses.
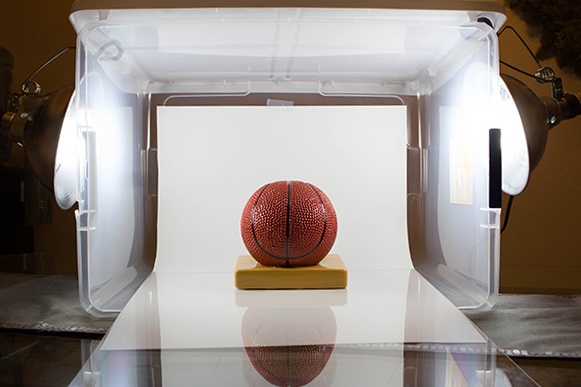
Alternatively, you can create your own professional photo studio for very little money.
BigCommerce made their own photobooth for $50 by using a white poster board, a clear plastic container, two lights, two light clamps, and a small piece of plexiglass.
Creating your own images will give you the opportunity to tailor your visual content to the needs of your audience.
It also gives you the opportunity to develop your brand’s visual identity.
Create infographics
It’s hard not to love a good infographic.
They were also the B2B content marketing tactic with the biggest increase in use from 2015 to 2016, up from 50% to 58%.
And 41.5% of marketers said that infographics had the highest engagement.
Don’t be overwhelmed by infographics. You don’t need a four-year degree in design to create one.
Canva to the rescue once again.
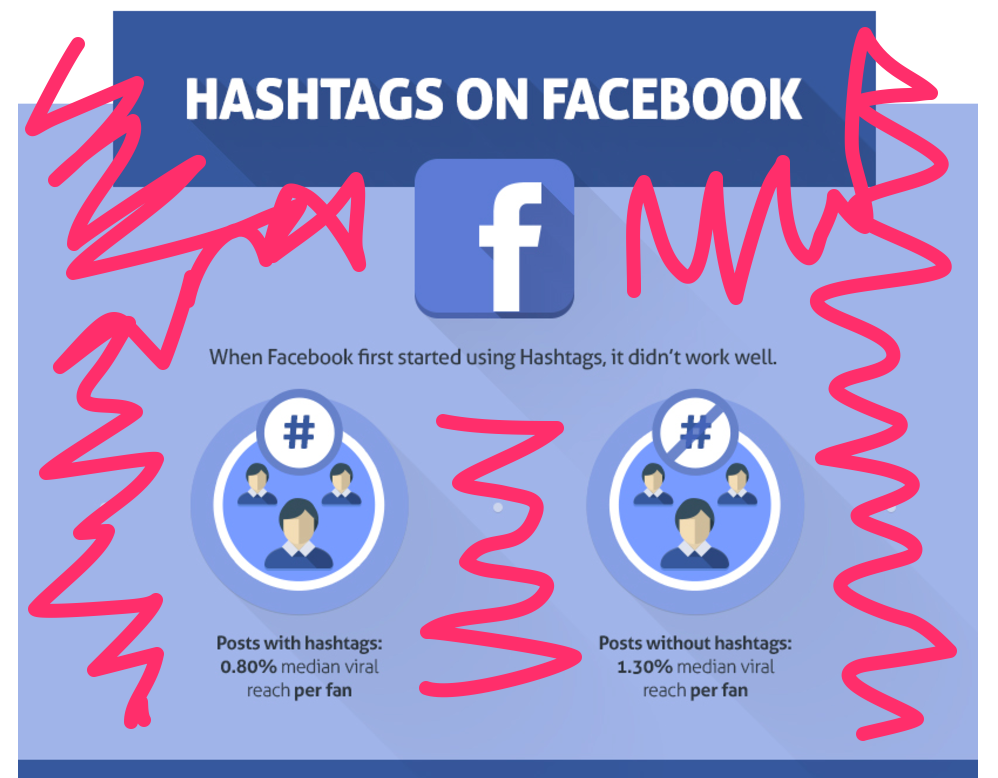
When creating your infographic, make sure you use plenty of white space.
And white space doesn’t have to be white. It’s just the name given to the free space around the content.
The reason for white space is simple: to give the viewers’ eyes a rest while making it easier for them to consume the content.
In this example, I’ve scribbled over the infographic to show how almost half of it has been left as white space.
The whole idea of an infographic is to take difficult concepts or mountains of data and make them easily digestible.
So try to convey as much of the information as possible visually.
You can also use visual cues to make it easier for the reader to absorb the information.
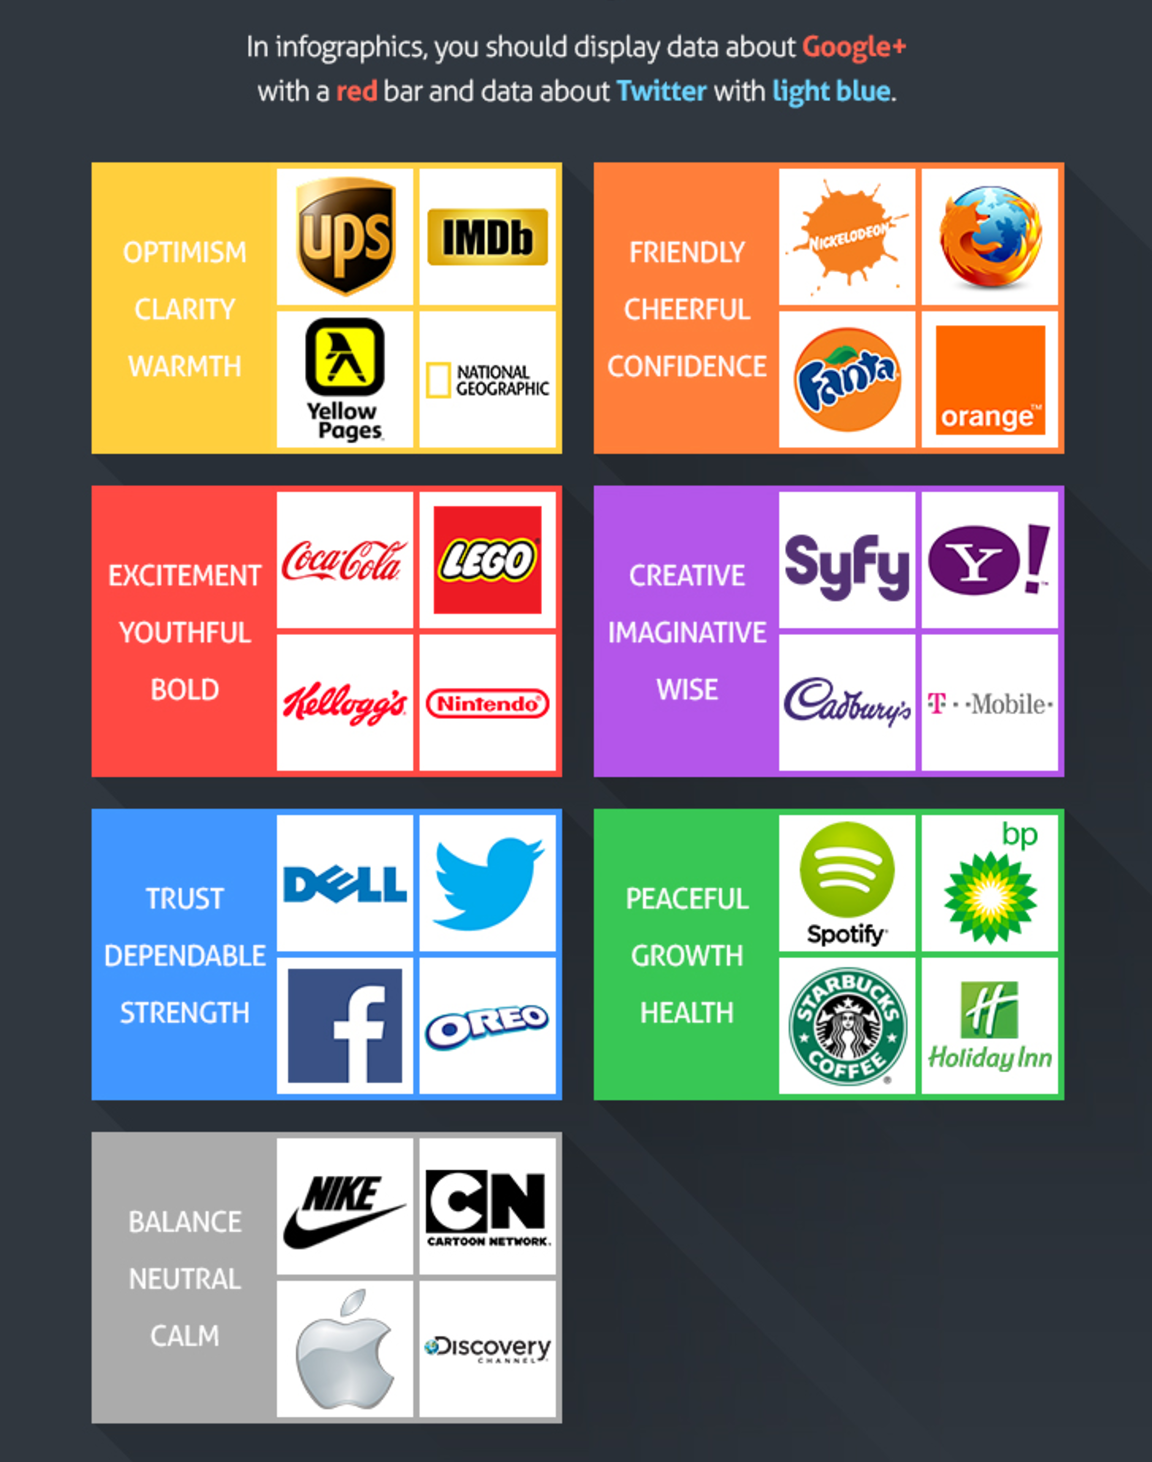
For instance, when mentioning another company, you can use their brand colors.
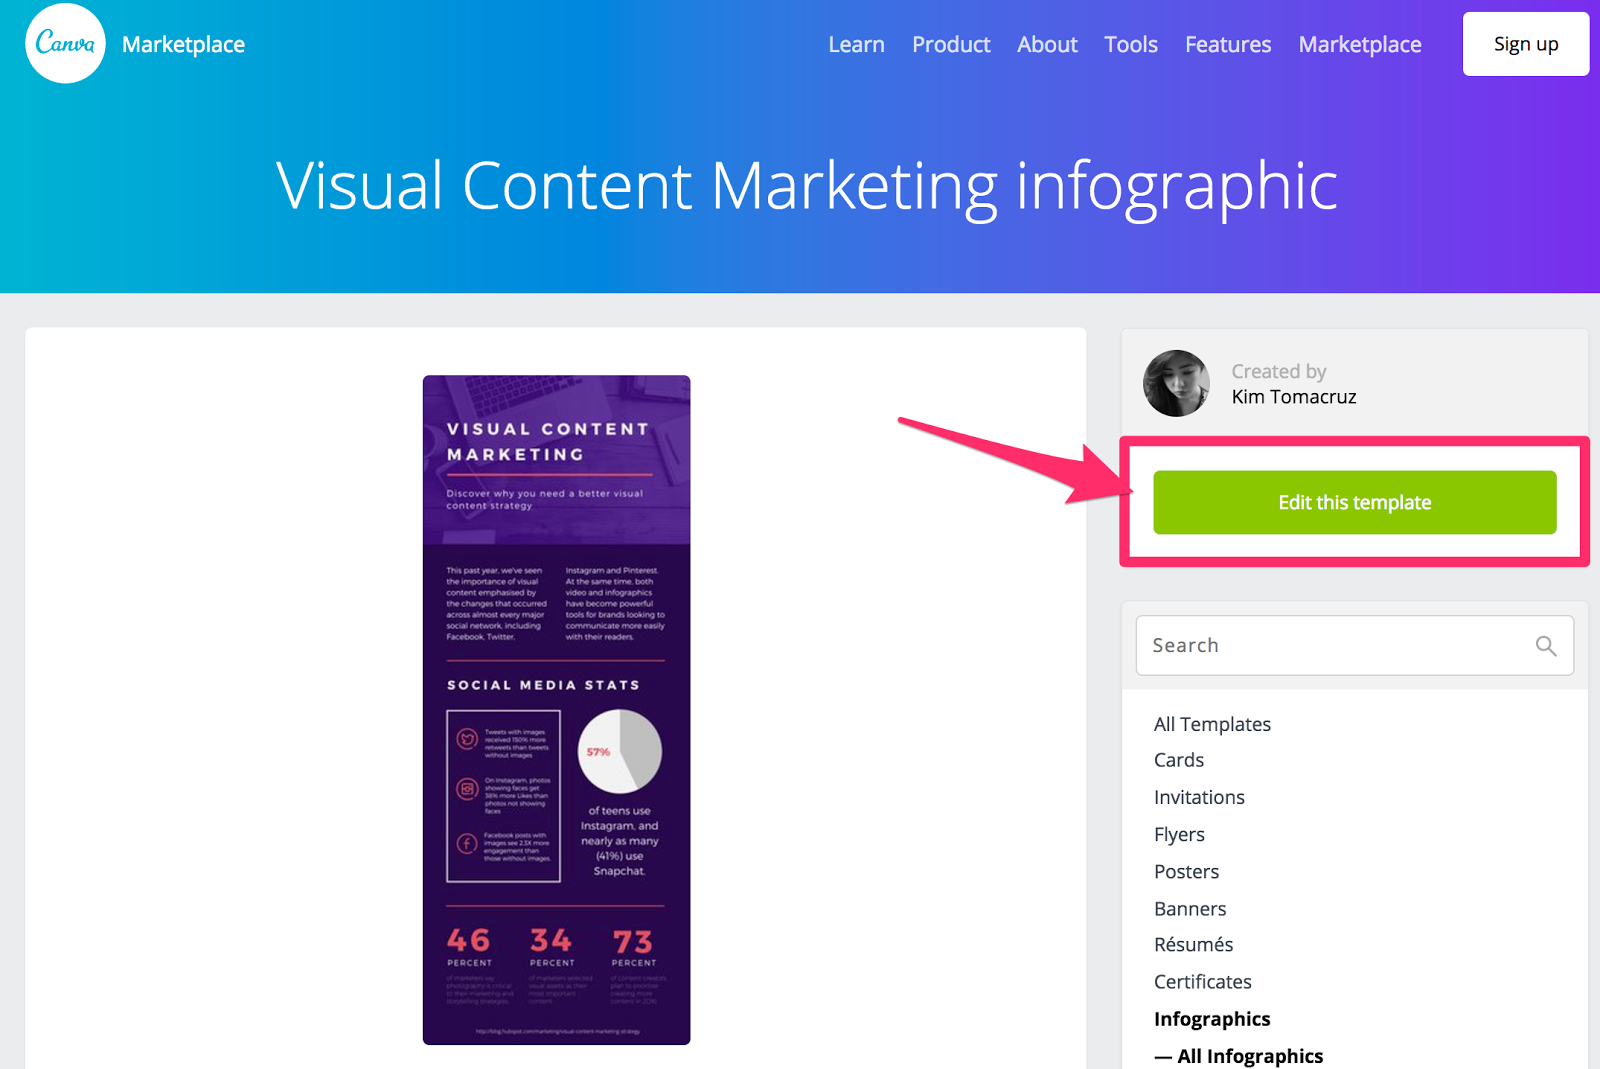
To start creating your infographic, head to Canva again and browse the infographic templates.
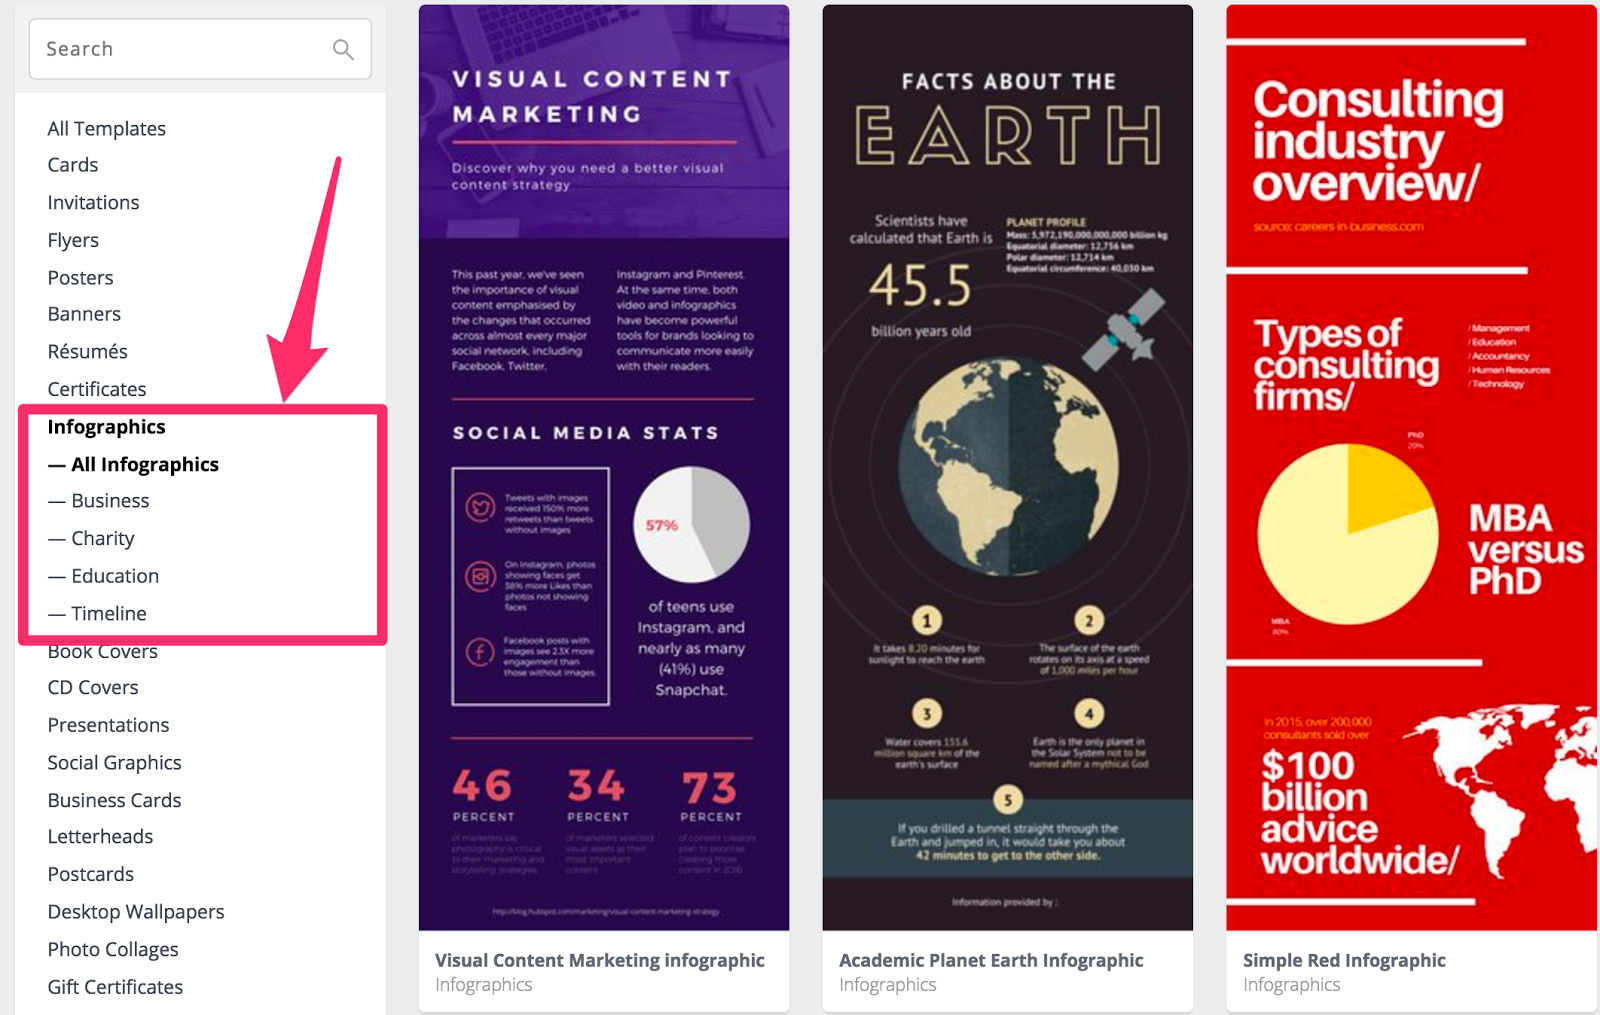
When you find one you like, click on it and then click “Edit the template.”
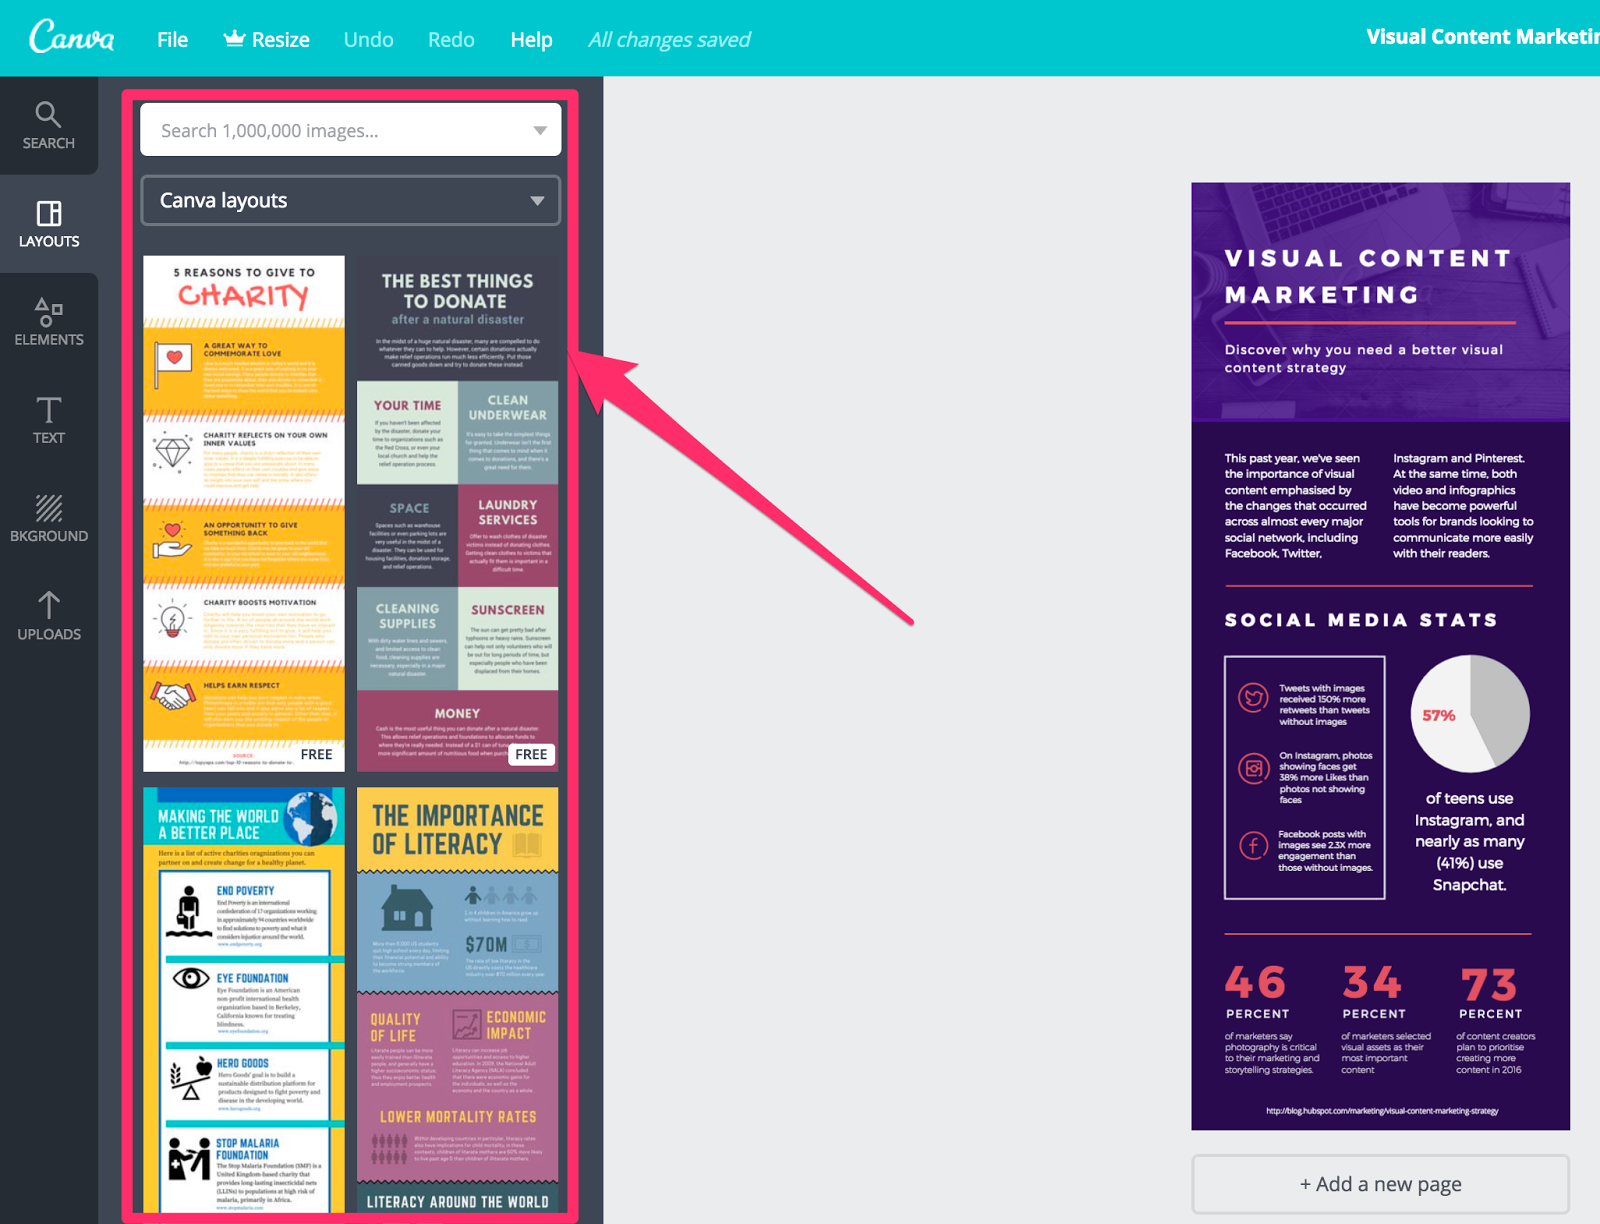
You can always change your infographic template in the Canva editor if it isn’t quite right.
Next, click on the design element you want to edit.
In this example, I’ve clicked on the pie-chart element and am presented with controls to update the chart with my information.
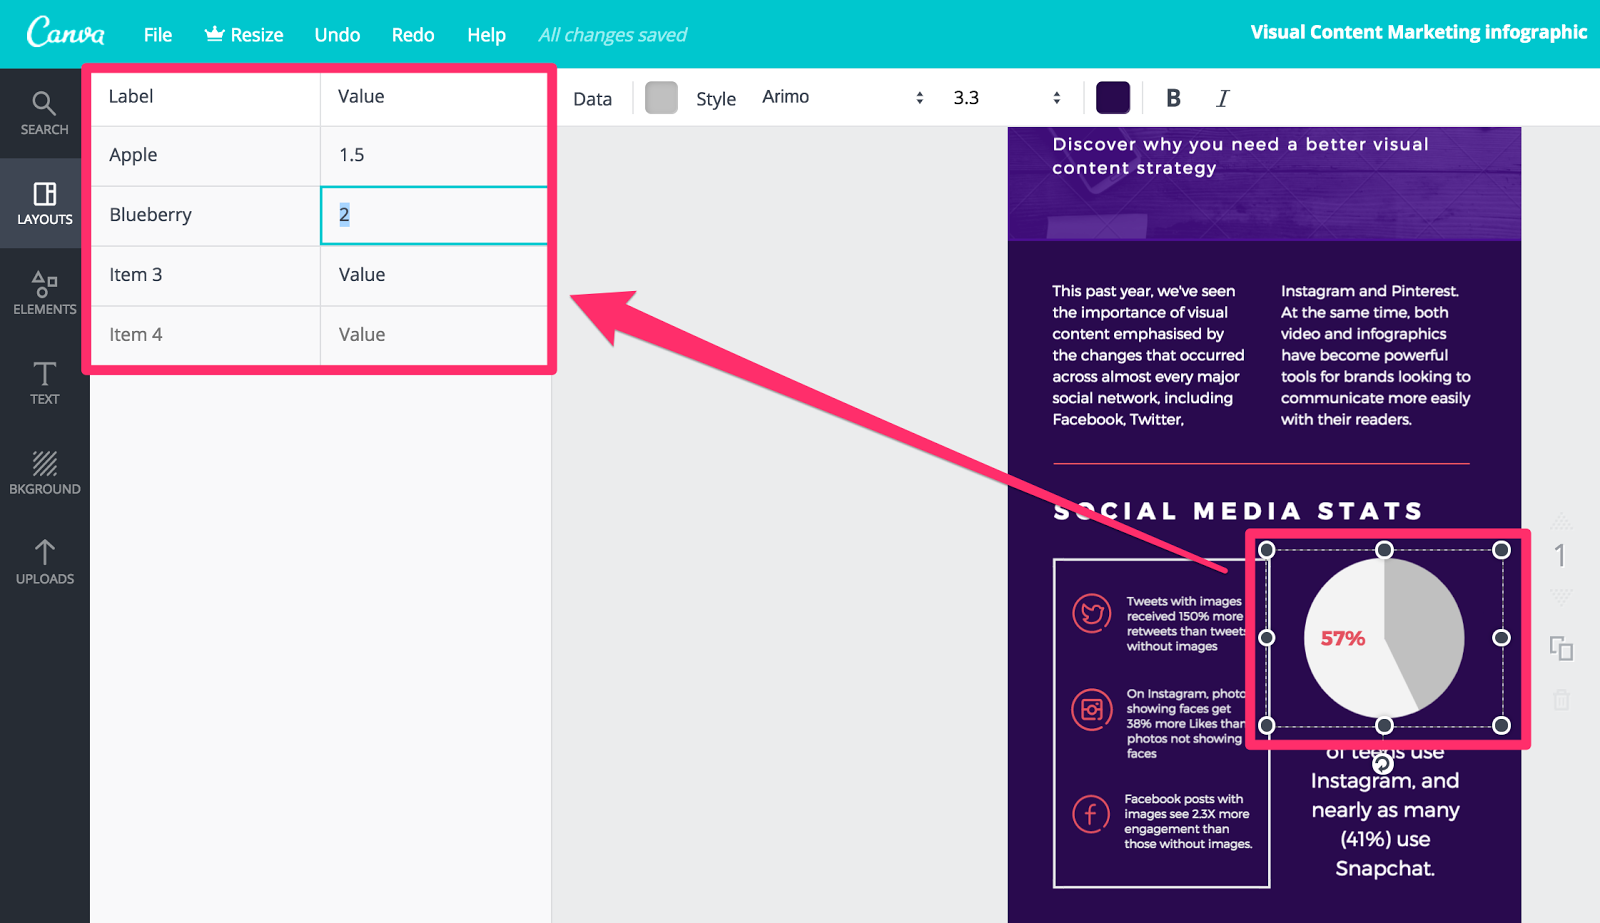
If you need a different element, click the “Elements” icon on the left-hand side.
Canva will show you nine different types of elements, from shapes and frames to icons and graphs.
Add the element you need and then click it to begin editing.

Infographics let you convey a large amount of information very quickly.
So try creating one for your audience to improve your visual content strategy.
Include screenshots in your blog content
OK, you might have already noticed: I’m big on screenshots.
Screenshots are a great way to break up large, sleep-inducing blocks of text, while also helping your readers better understand what you’re trying to explain.
If you’re a regular reader of this blog, you already know this.
And you might have heard the old expression: “Show, don’t tell.”
In blog posts, I like to do both.
So if there’s something you can show visually, then do it.
Your readers will thank you for it.
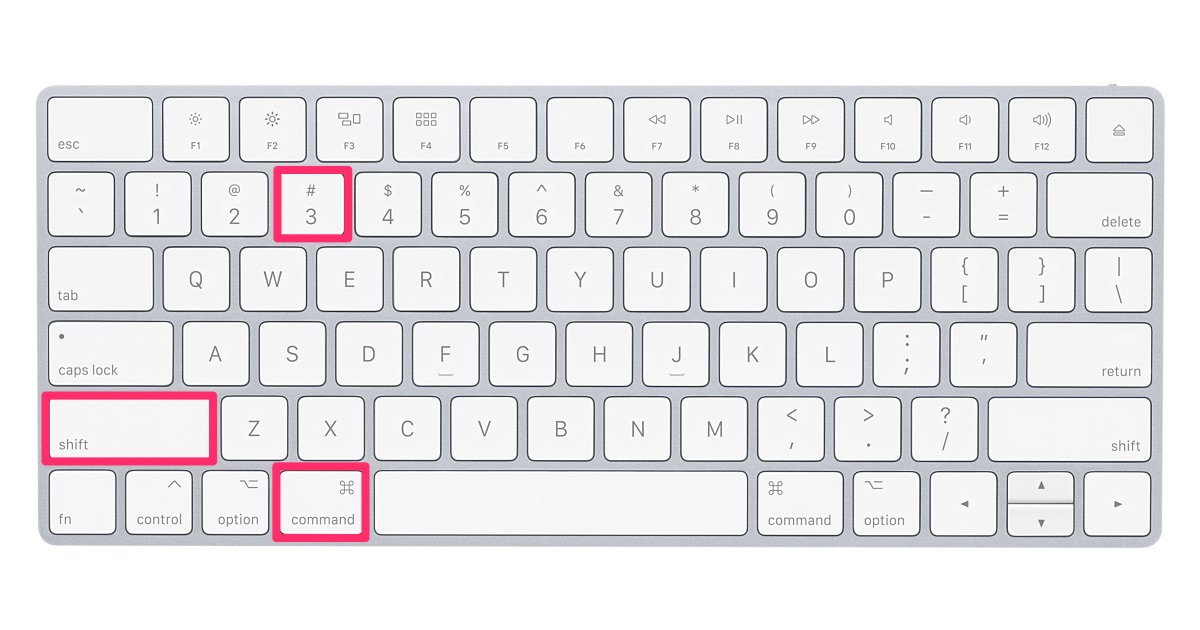
To take a fullscreen screenshot on a Mac, just hit the Command, Shift, and number 3 keys at the same time.
To take a crosshair screenshot, hit the Command, Shift, and number 4 keys at the same time.
Then, simply select the part of the screen you want to capture with your mouse or touchpad and let go.
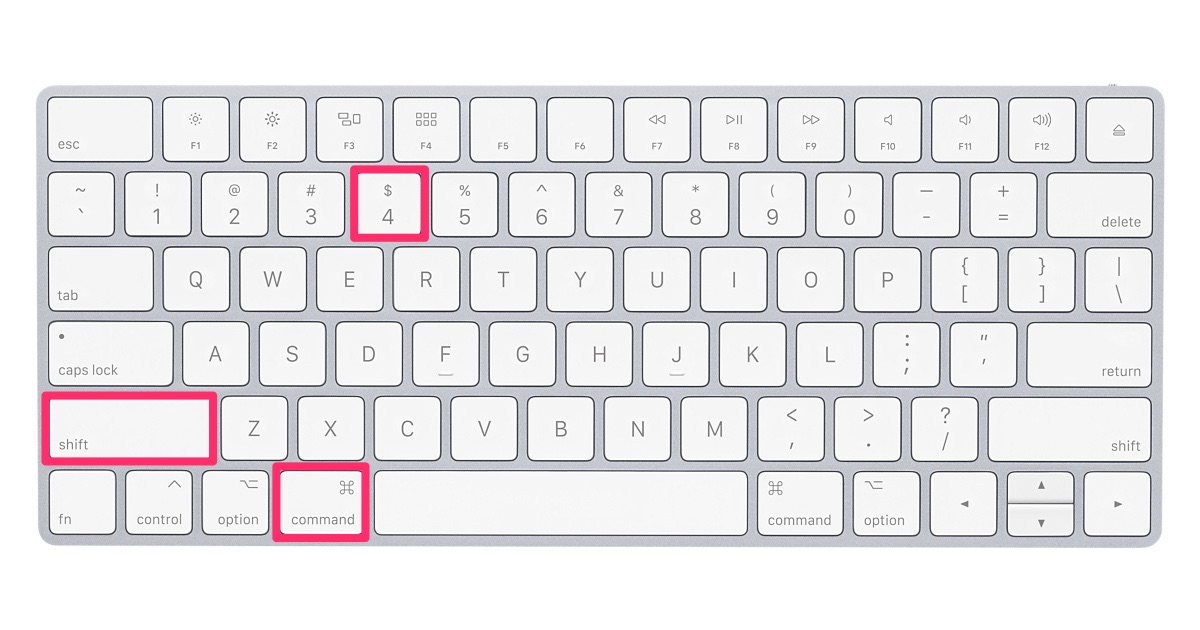
In both cases, you should hear a camera-shutter sound and the screenshots should appear on your desktop.
To take a fullscreen screenshot on Windows, hit the Windows and Print Screen keys at the same time.
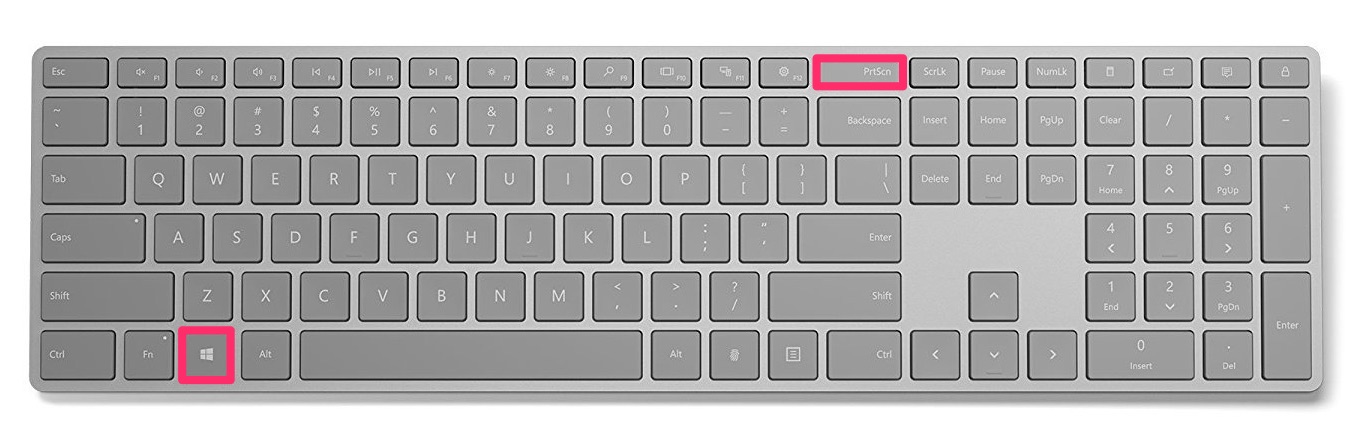
Alternatively, to capture just one of the windows that you have open, click your chosen window and then hit the Alt and Print Screen keys at the same time.
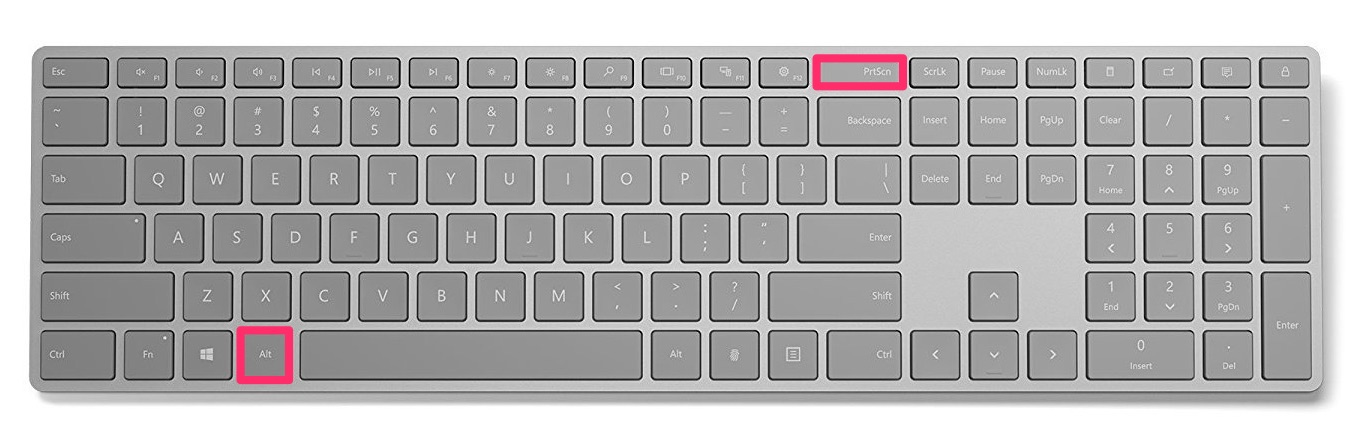
On Windows, there isn’t an indicator to let you know if the screenshot has been taken, but you can check to see if it’s turned up in your Pictures folder.
If the Screenshots folder does not exist already, Windows will create one for you.
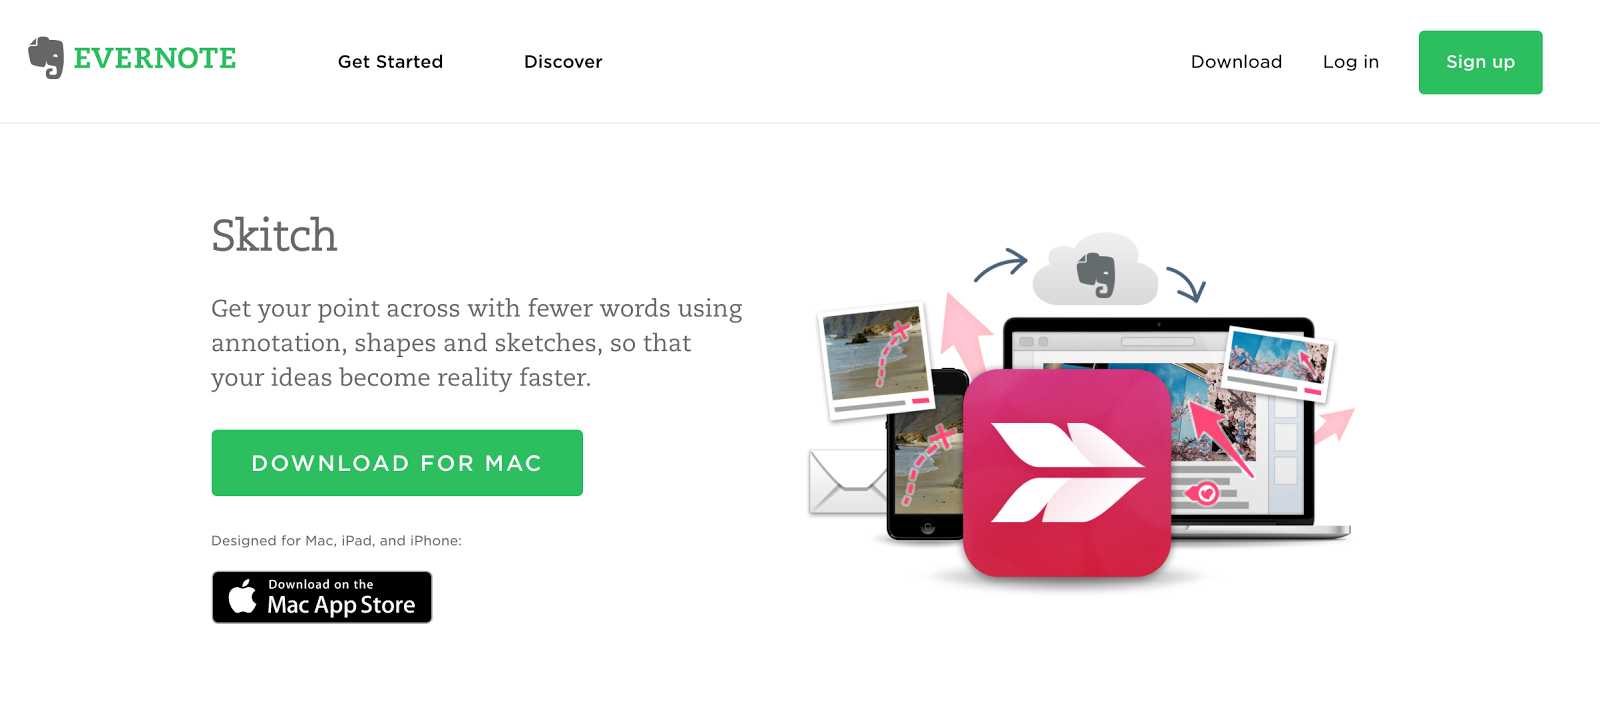
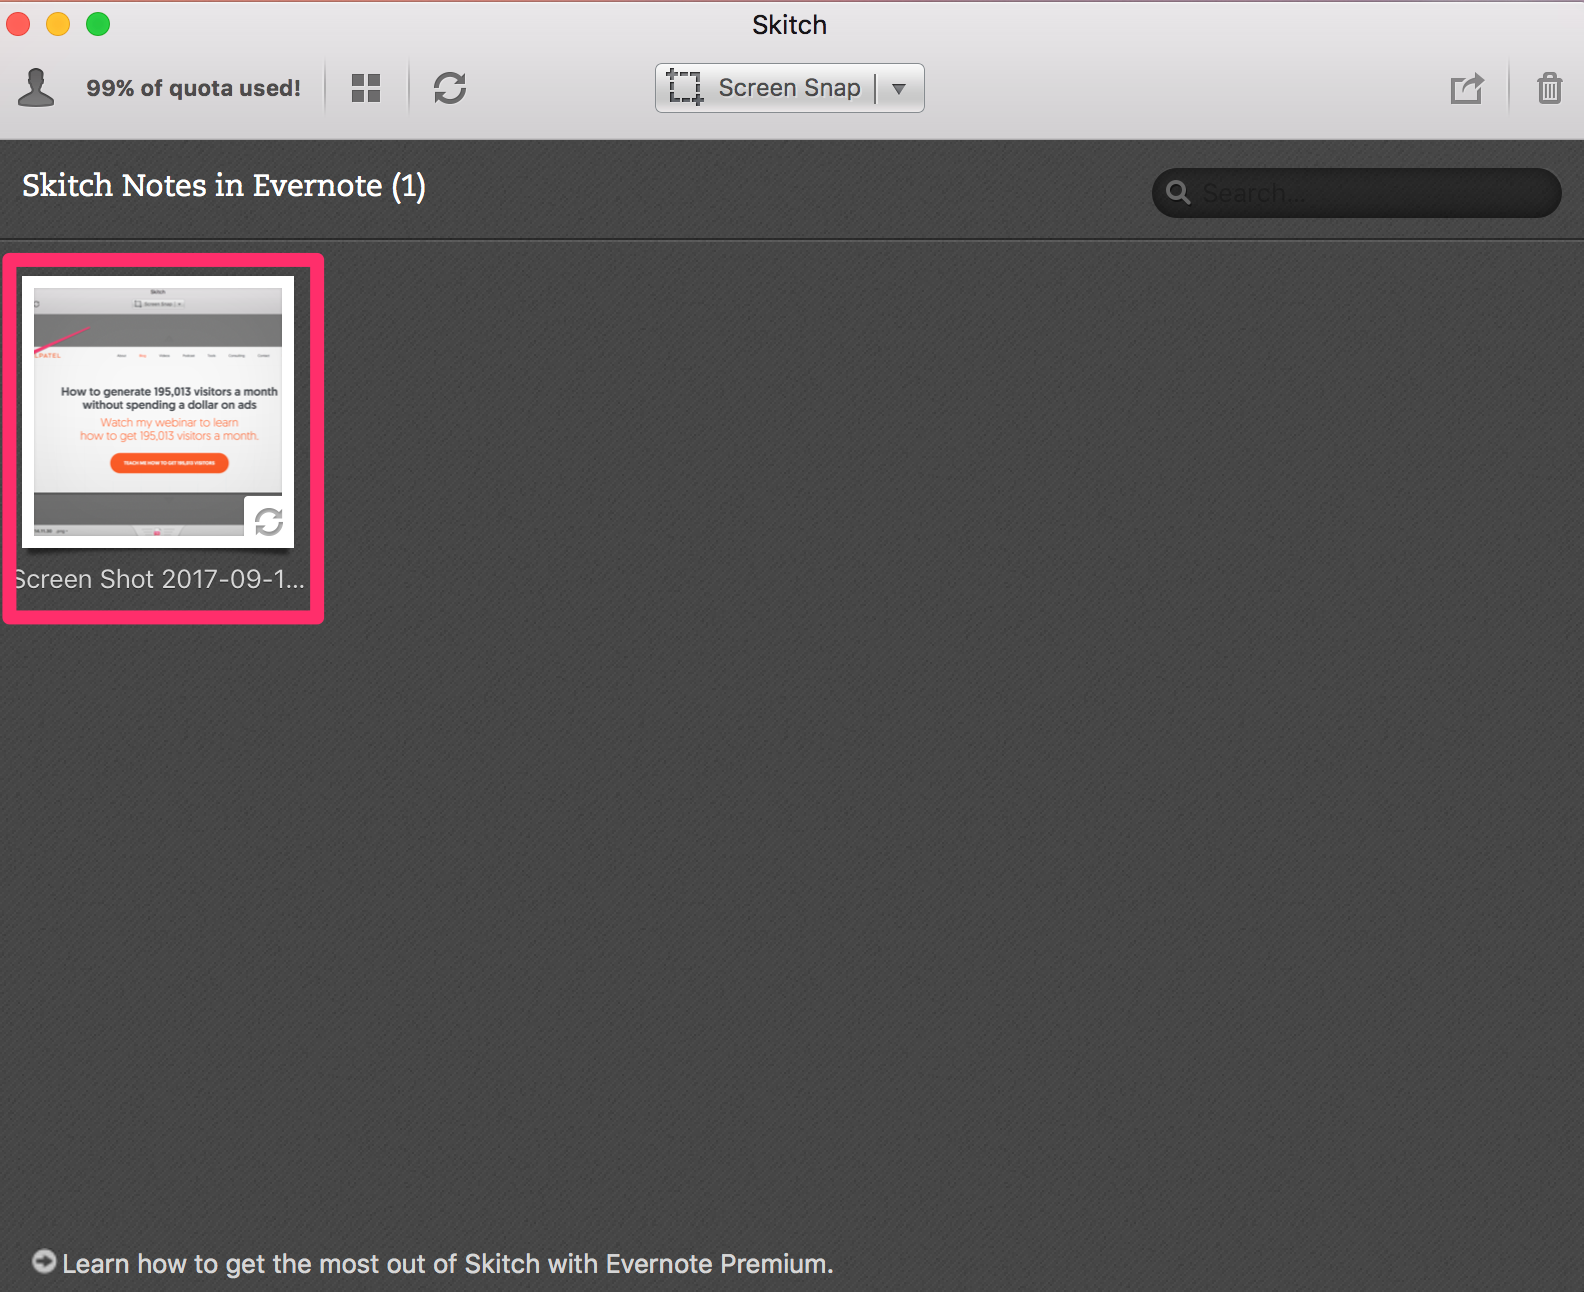
Another option is to take screenshots using Skitch.
Skitch is a screenshot and annotation app built for use with Evernote.
It’s the app I use to capture and annotate all of the images on this blog.
Head over to the site and download it.
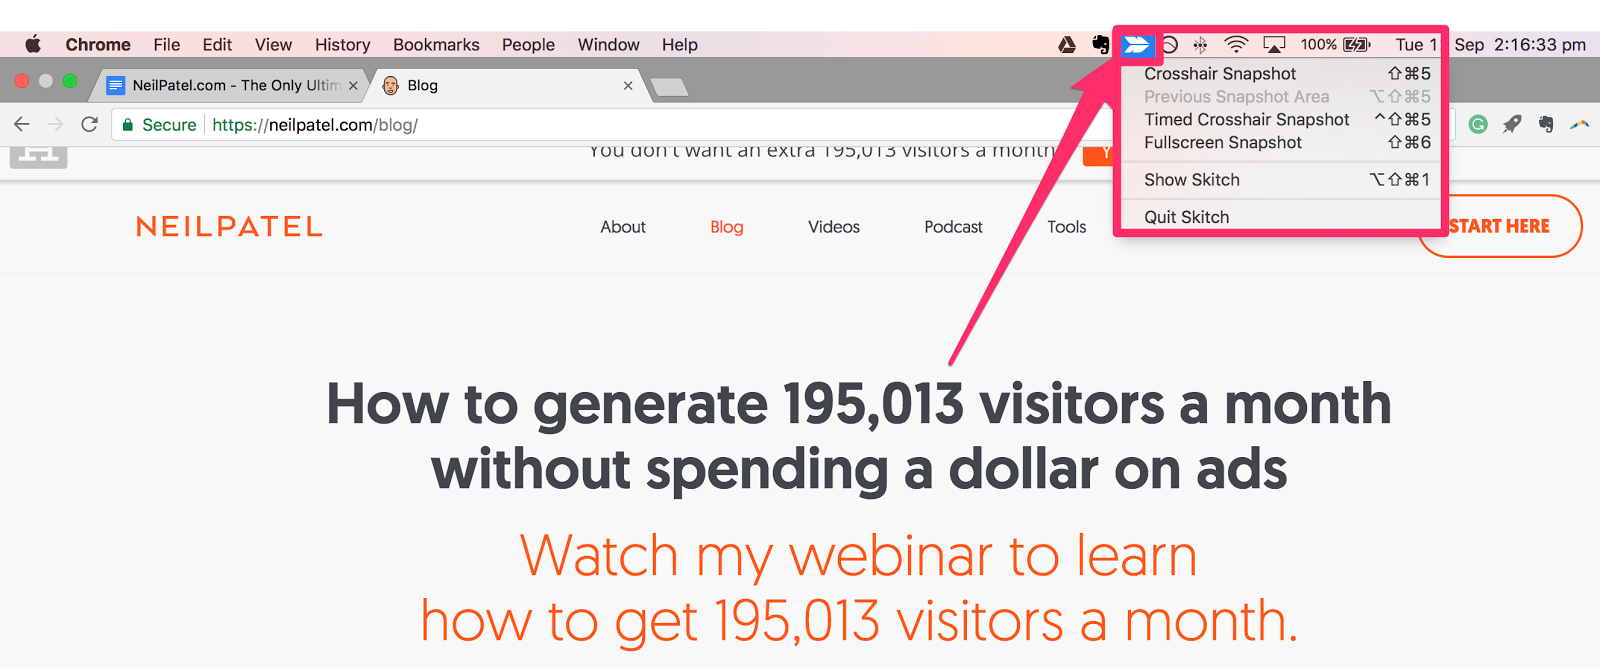
Once installed, you should see a little icon appear in your top bar.
You can click on that to see various screen-capture options.
Click “Crosshair Snapshot” to take a screenshot.
This will bring up a little “X” on your mouse pointer.
Click the upper left-hand side of the area you want to screenshot and drag to highlight the section of your screen you want to capture.
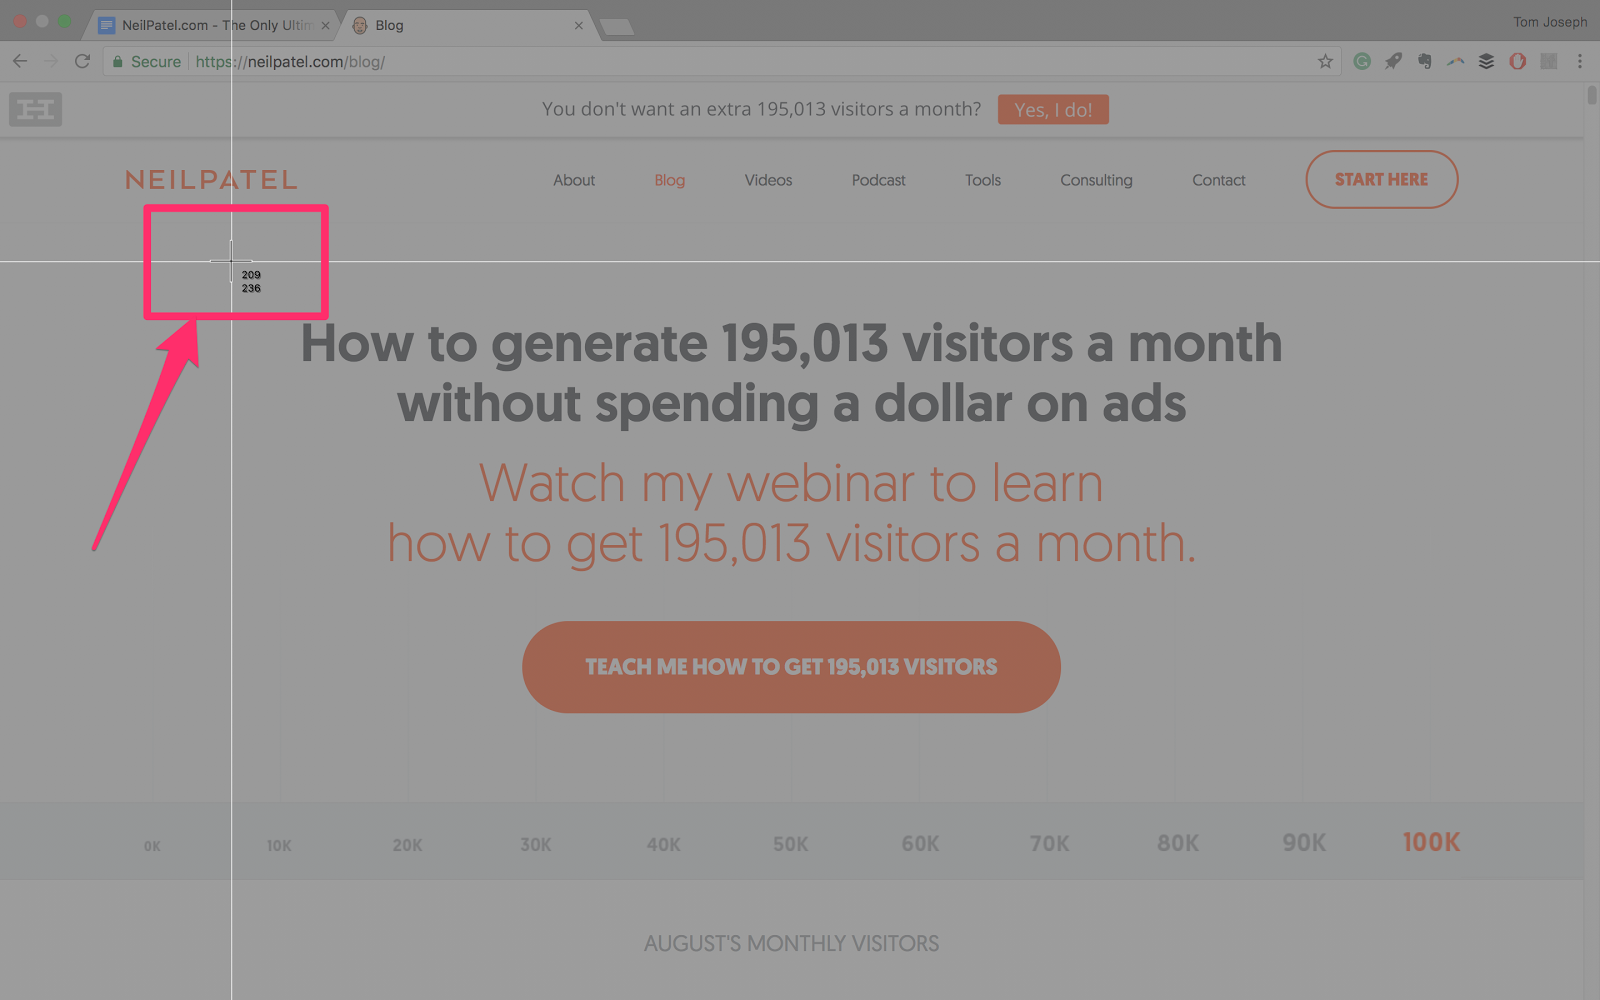
Once highlighted, let go of your mouse-click, and the area will be captured and opened up in the Skitch app.
Here’s where the fun begins.
Double-click on your image to open up the image annotator.
Here, Skitch has a few simple options that allow you to annotate your screenshot.
On the left-hand side are your edit options. Most of them should be familiar — the crop tool, the shape tool, the arrow pointer, add text, etc.
Try to call out those parts of your image you want to draw attention to.
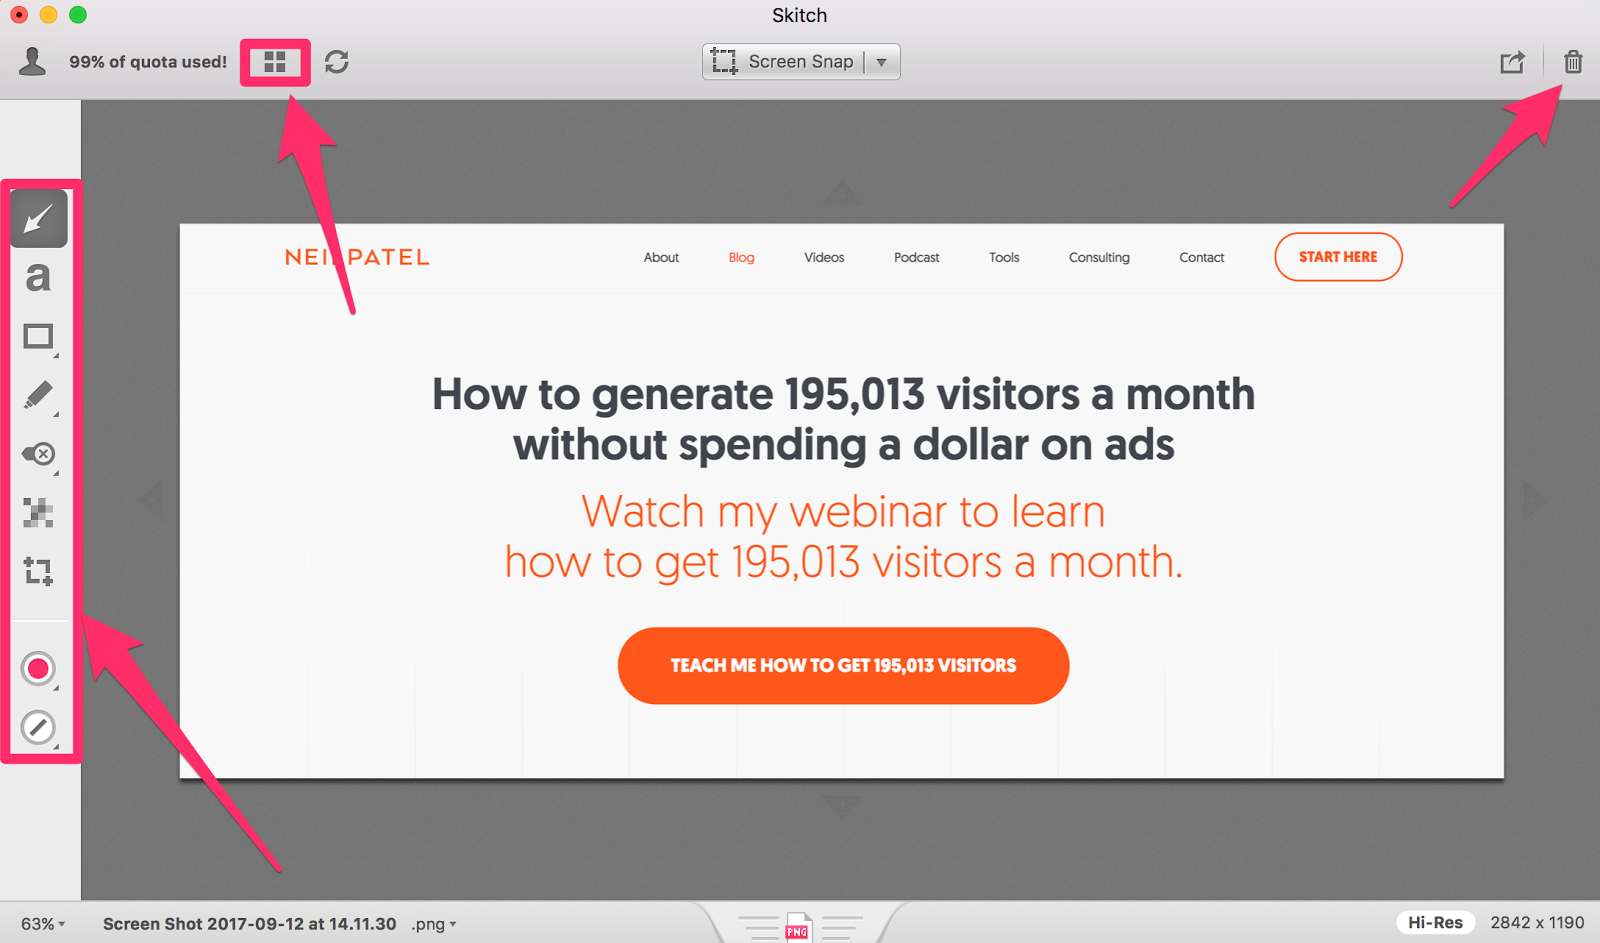
At the top left, you can click the icon showing four squares to navigate back to your image library. And in the top right, you can delete your image if it’s no longer needed.
Use screenshots to illustrate the processes you are trying to communicate to your readers.
By doing so, you’ll make it far easier for them to follow along and take action on what they learn.
Use memes
Now, on to the section you’ve all been waiting for: memes.
Wired said, “The term ‘meme’ was first coined by Richard Dawkins in 1976 to ascribe an idea the capacity to replicate itself into different meanings from person to person.”
Since then, the term has been hijacked by the Internet to describe humorous GIFs and captioned images.
Let’s dig into specifics, though.
A meme can be anything really—a still image, a GIF, or even just a phrase that spreads.
Here’s a popular meme that spread from The Lord of The Rings movies. The original line spoken by the actor Sean Bean is, “One does not simply walk into Mordor.”

Since then, the internet has added many of their own endings. A quick search online will come up with thousands of, “One does not simply… [insert funny remark here].”
However, a GIF is simply a looping animation. Here’s an example of a GIF that isn’t a meme.

And here’s an example of a meme that is also a GIF.

I doubt many marketers imagined that memes would play a significant role in marketing when they first appeared.
But memes are a quirky form of popular entertainment.
And when the average person spends more than 100 minutes per day on social media, you can be sure that memes are well worth using in your marketing campaign.
Smart brands are jumping on the meme trend and using them to bond with customers.
So ditch the old “in-your-face” ads and opt to entertain your customers with memes.
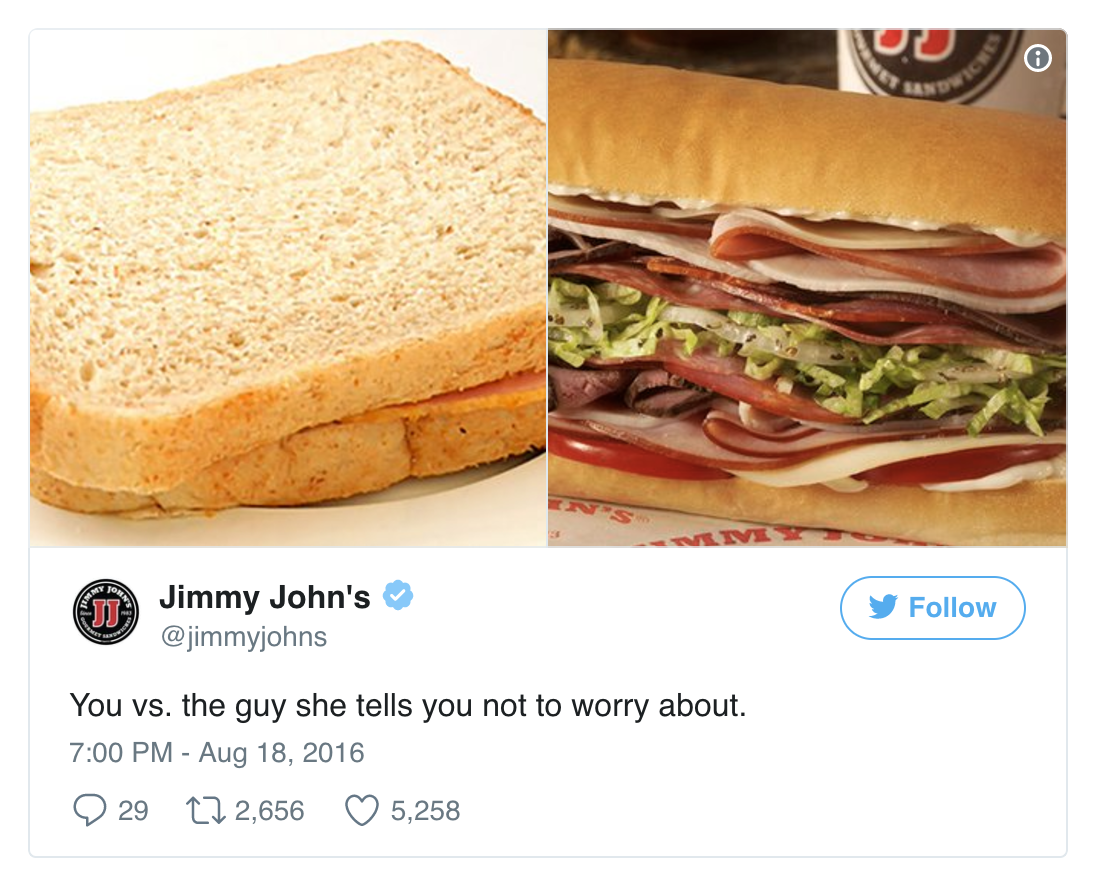
In this example highlighted by HootSuite, Jimmy John’s uses a meme to champion their sandwiches.
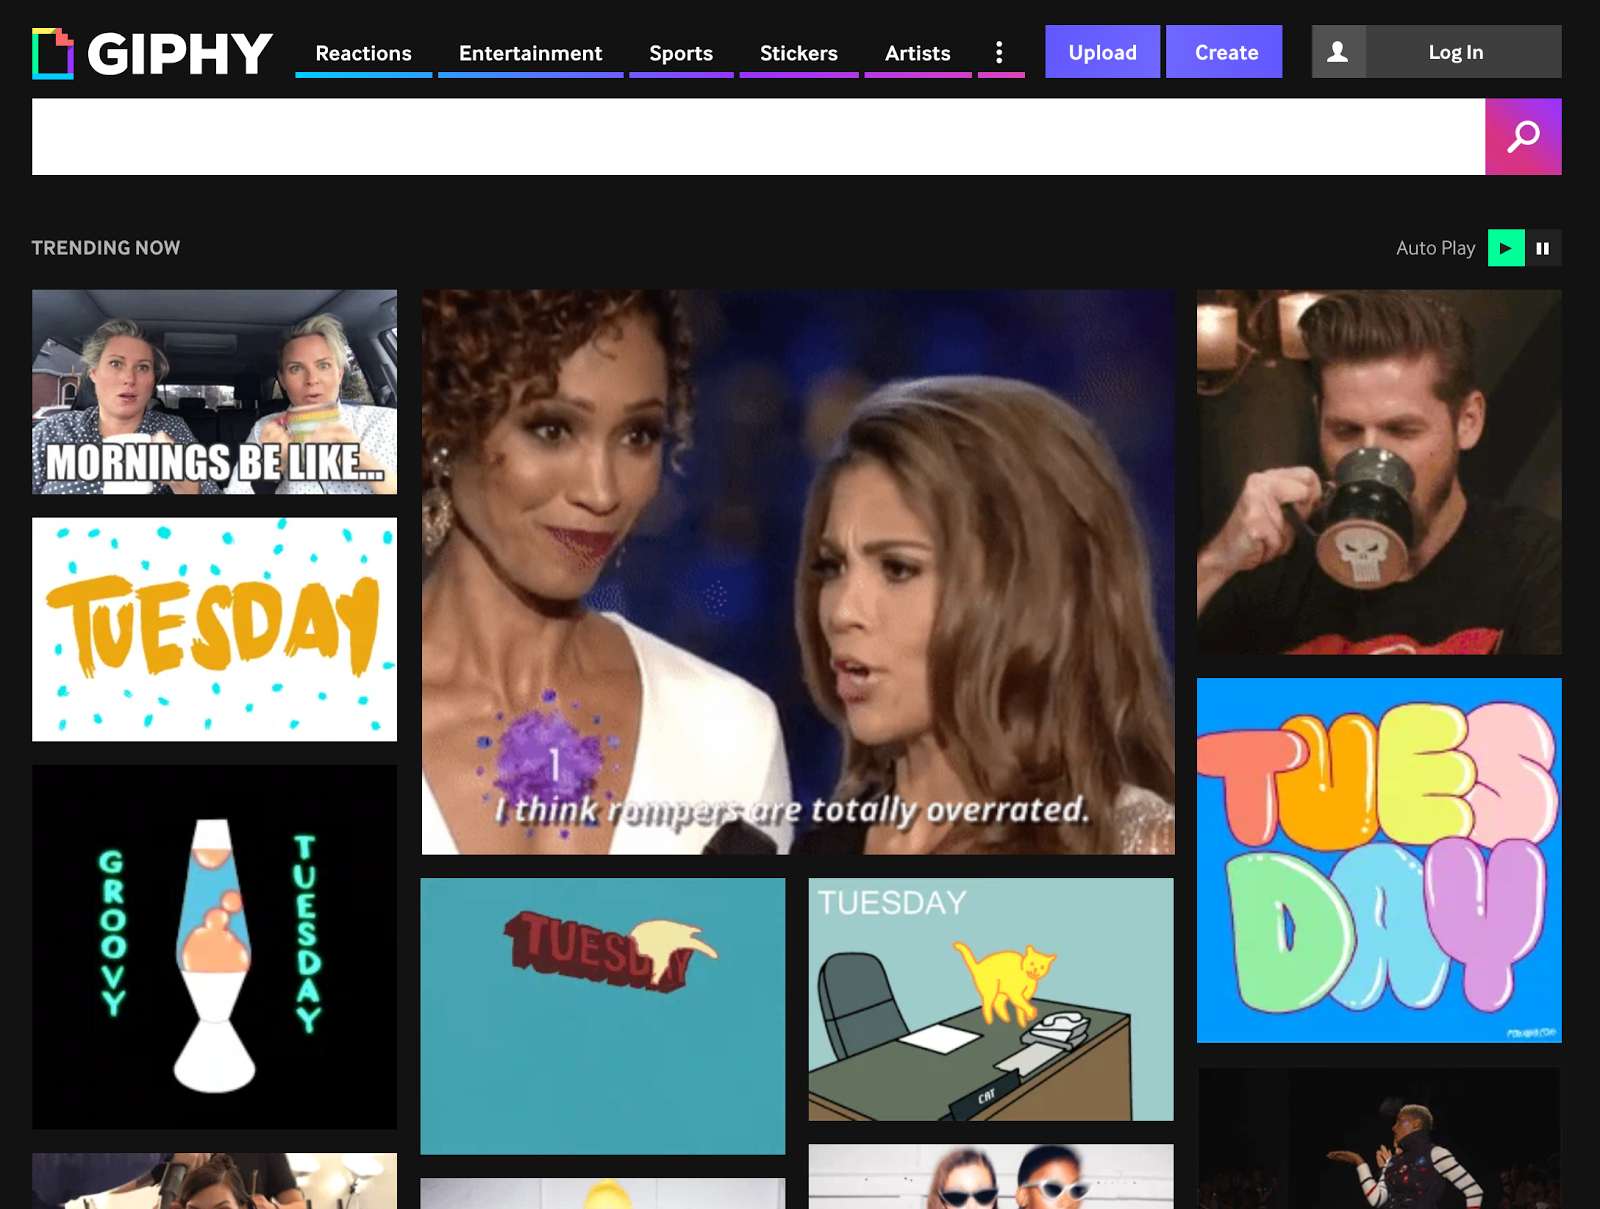
To search existing memes and GIFs, head to Giphy.
But maybe set a timer so you don’t lose half of your day to scrolling in fits of giggles.
If you’d like to create your own meme, check out Meme Generator. They have tons of hilarious images ready to caption.
When creating and using memes, don’t take yourself too seriously. Memes work because they’re silly. Show your human side to your customers and have fun.
And don’t try to make your meme appeal to everyone. Niche memes can spread quickly and have a stronger impact.
Beware of inauthenticity. It can be spotted a mile away and will almost certainly hurt your brand.
Make sure whoever creates the meme is a part of the target audience themselves.
Lastly, be timely and capitalize on trends. Pop culture evolves quickly, so try to strike while the iron is hot.
By using memes effectively, you’ll be able to connect with your audience and develop your brand.
But even if that doesn’t happen, it’s still fun.

Make videos
18+ year-olds watch more YouTube during prime-time hours than any cable TV channel.
And 50% of YouTube subscribers between the ages of 18 and 34 would put everything on hold so that they could watch a new video from their top channel.
So it’s safe to say that video is important.
But that’s not all.
According to Cisco Forecast, video will represent 82% of all consumer-based Internet traffic by 2021.
And 51% of all video plays are on mobile devices.
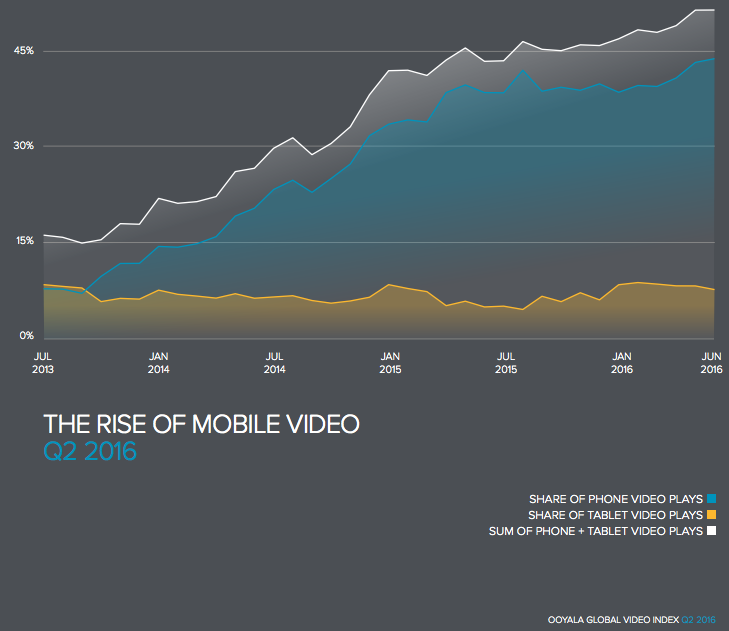
Still, people like videos to be short.
Videos that are fewer than five minutes long account for 55% of total video-consumption time on smartphones.
Like all content, the type and style will vary depending on your aims and target audience.
But video content has a particularly wide scope of potential, from daily vlogging YouTube stars to how-to video animations of a SaaS tool.
Still, I’m going to share some tools you might find useful when starting to create video content.
If resources are limited and you don’t already have a camera, you can try using a smartphone. Most smart cameras are more than adequate these days.
One of the best films at the Sundance Film Festival in 2015 was actually shot using an iPhone 5s.
For editing, Mac users can jump right in with iMovie.
Windows users will want to check out Windows Movie Maker or Shotcut, which Tech Radar calls the best free alternative to Windows Movie Maker.
If you don’t want to create your own video, look into creating (or commissioning) a whiteboard video.
You can use a tool like VideoScribe to create your own. Alternatively, sites like Fiverr and Upwork are great places to find freelancers to make your whiteboard video.
Bonus: Create slide decks
Creating presentations for SlideShare is a great way for B2B companies to share visual content.
These simple decks have an added interactive element, allowing the user to click through at their own pace.
Here’s an example of a SlideShare I created for one of my webinars.
To make a SlideShare, you can use Windows PowerPoint or Google Slides (which is free).
Let’s run through the basics of setting up your Slideshare presentation.
Head to the Google Slides website and click “Go to Google Slides.”
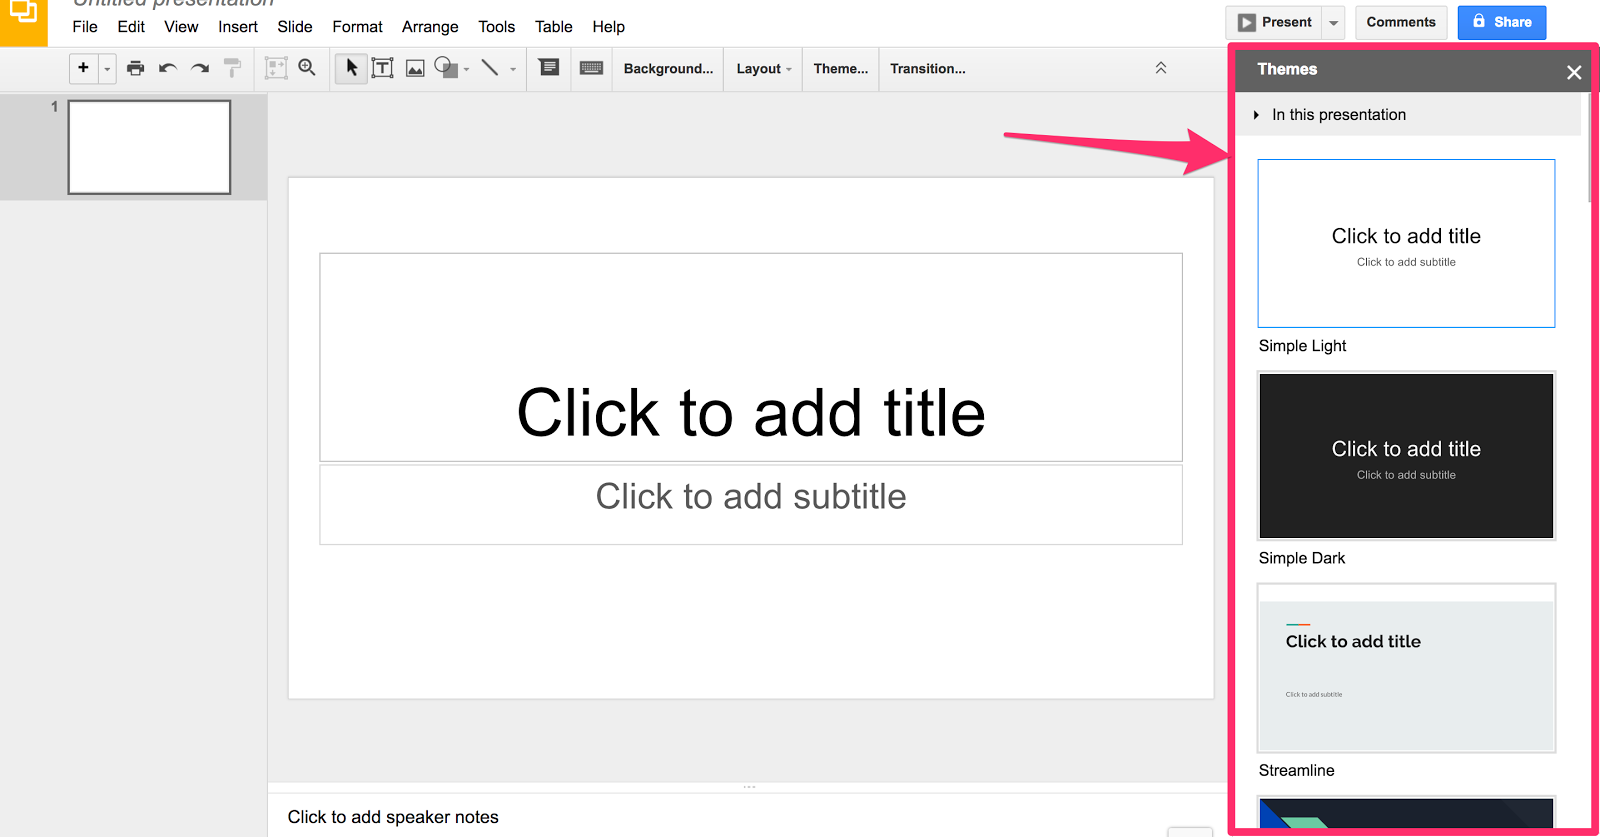
Click the big red “+” in the bottom right-hand corner to open up a new presentation.
On the right-hand side of the window, there are different themes you can choose from.
Select the one that fits your brand image the best.
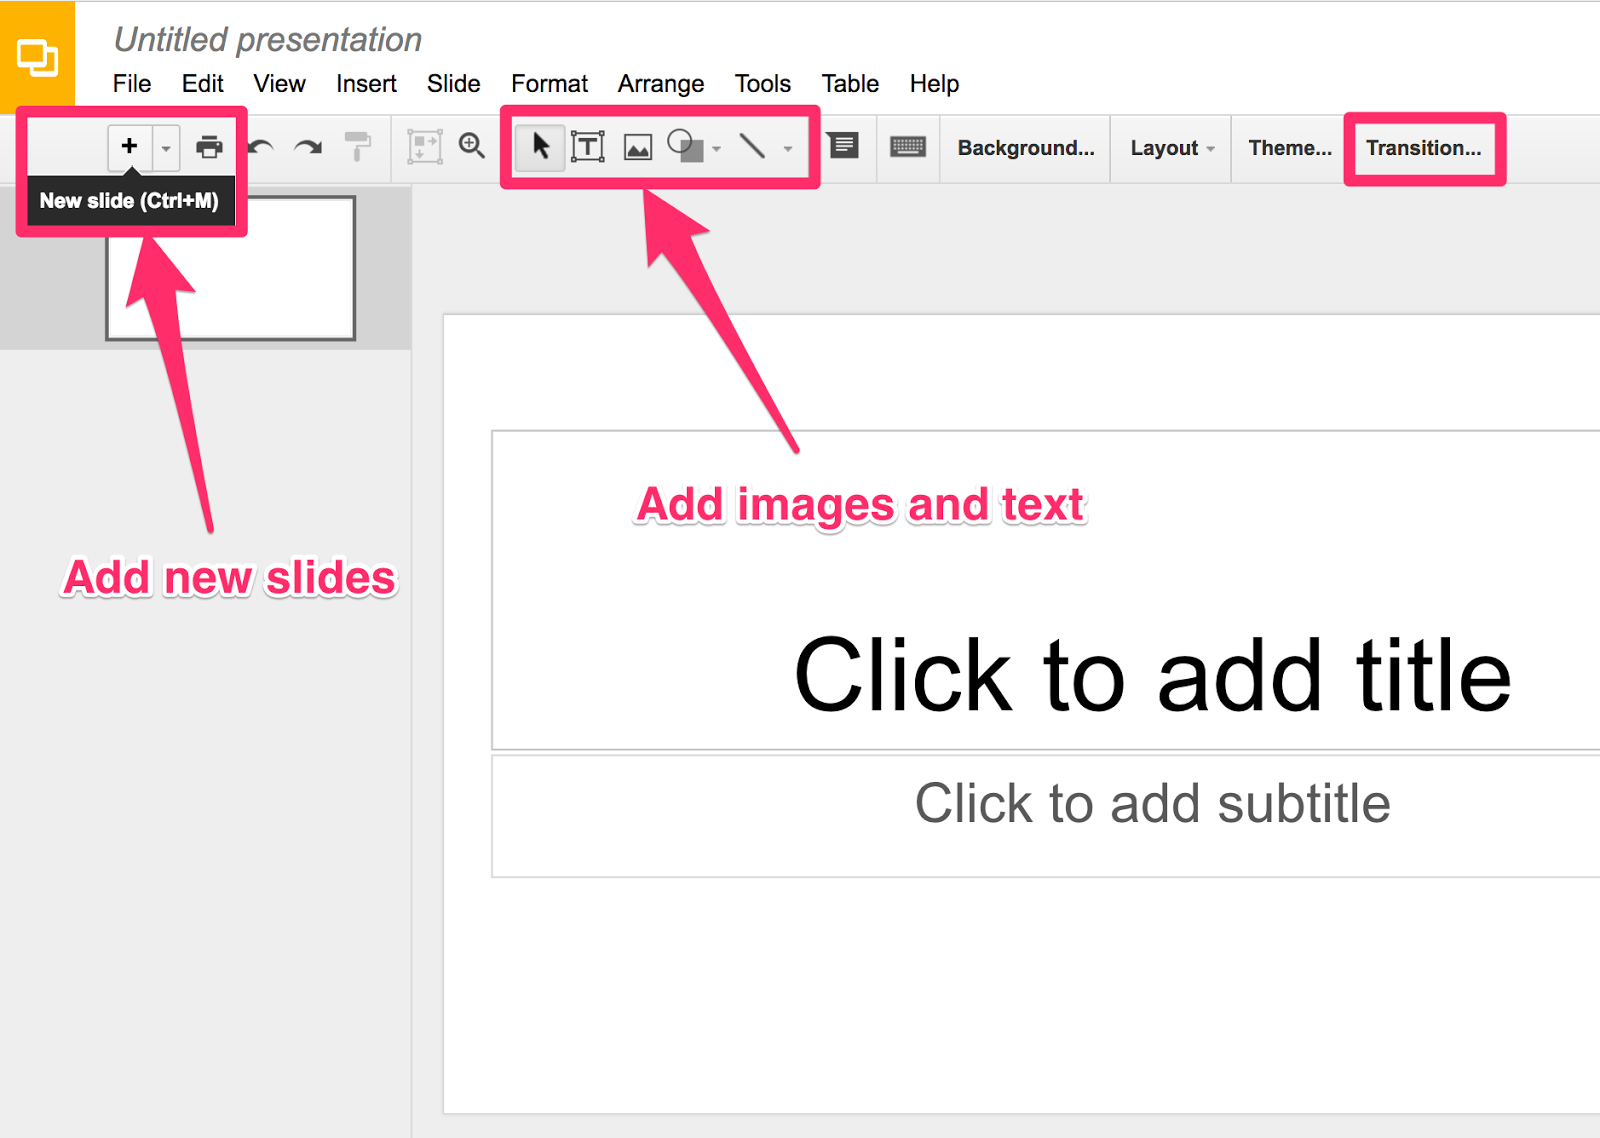
Next, you can use the icons on the top bar to add elements to your slides. And the “+”’ button on the top left-hand side of the screen to add new slides.
If you’re a B2B company, try creating a Slideshare presentation to engage your target audience.
Conclusion
With attention spans dwindling, you need to use every tool available to grab your audience’s interest long enough to build a relationship.
And visual content is not only absorbed quicker, but it helps people retain more information.
So pack your blog posts with images and jump on the visual-content wagon.
First, remember to use stock images sparingly. Get creative with making your own by using a simple tool like Canva.
Then show your audience what you mean with screenshots and explain more by annotating them.
And don’t forget about memes to entertain your readers.
Explain difficult concepts with appealing infographics. Or make a video.
Finally, don’t forget about SlideShare presentations that add an interactive element to your visual content.
Combine these tips and not only will your readers engage more with your content, but they’ll also remember it better.
A picture really is worth a thousand words.
So good luck!

How do you use visuals in your marketing efforts?
Comments (10)