
Len Smith was making a good living as a copywriter in England. He had written a book and had consistent work pulling in at least $120,000 a year.
But then Udemy contacted him.
They wanted to turn his book, How to Be a Copywriter and Earn Money from Home, into an online course. He developed the course (along with a string of others) and started earning an additional $2-4k every month.
When Smith started adding a little more time to promotion, his course income jumped to $6,500 a month.
It takes Smith about 40 hours to make a course initially, but after that, he spends only ten hours a week on its maintenance and marketing.
His latest course “Copywriting Secrets — How To Write Copy That Sells,” earned $3,000 in just two days.
Simply put: You can make a lot of money with online courses in a short amount of time.
I’m going to show you exactly how to do that in this article.
But first, it’s important to understand why people are buying online courses as soon as they go live.
Why You Can Build a Big Business from Online Courses
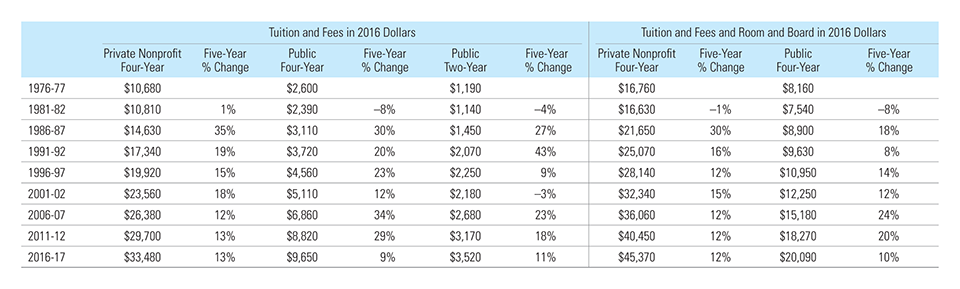
The sticker price for higher education is going up, without aid coming in to match it.
A new study found that college tuition and costs are rising more quickly than financial aid. The average cost of tuition and fees at a private institution is $31,231 a year, which has resulted in a 13% increase over just the last five years.
Unfortunately, it’s showing no signs of slowing down.
Check this out:
Recently, student loan debt has reportedly increased by $77 billion, bringing the United States’ total to a whopping $1.16 trillion.
That’s a lot of money. And it’s a big pill to swallow for young people right out of high school or even adults just trying to keep up with continuing education.
Thankfully, there’s one convenient solution.
This solution lets you learn anytime, anywhere. You can even do it in your own living room.
And it’s inexpensive. So you don’t have to mortgage the next thirty years of your life with student loan debt.
The high price tag of college tuition has motivated people to look for other alternatives. So as a result, the online education industry is expected to grow past $241 billion by 2022.
“The worldwide e-Learning market continues to witness rapid developments which are driving adoption among the academic and business sectors. Robust growth in the online learning market is driven by increasing accessibility and cost-effectiveness of learning and training initiatives.”
Here’s what that means in plain English:
- Our ability to deliver sophisticated, interactive instruction has never been better.
- Our ability to communicate complex theories, practically through video, is getting better.
- And our ability to sit in pajamas on the living room couch while streaming live video and interacting with each lesson module is getting better, too.
There are courses on every topic you can imagine, spanning math to design and general business that people are willingly signing up for every single day.
What does that mean for you?
Sharing your skills through online courses is one of the best ways to make some major bank right now.
I’m going to show you exactly how to do that in the rest of this article. But first, check out how much some of these other entrepreneurs are pulling in with online courses.
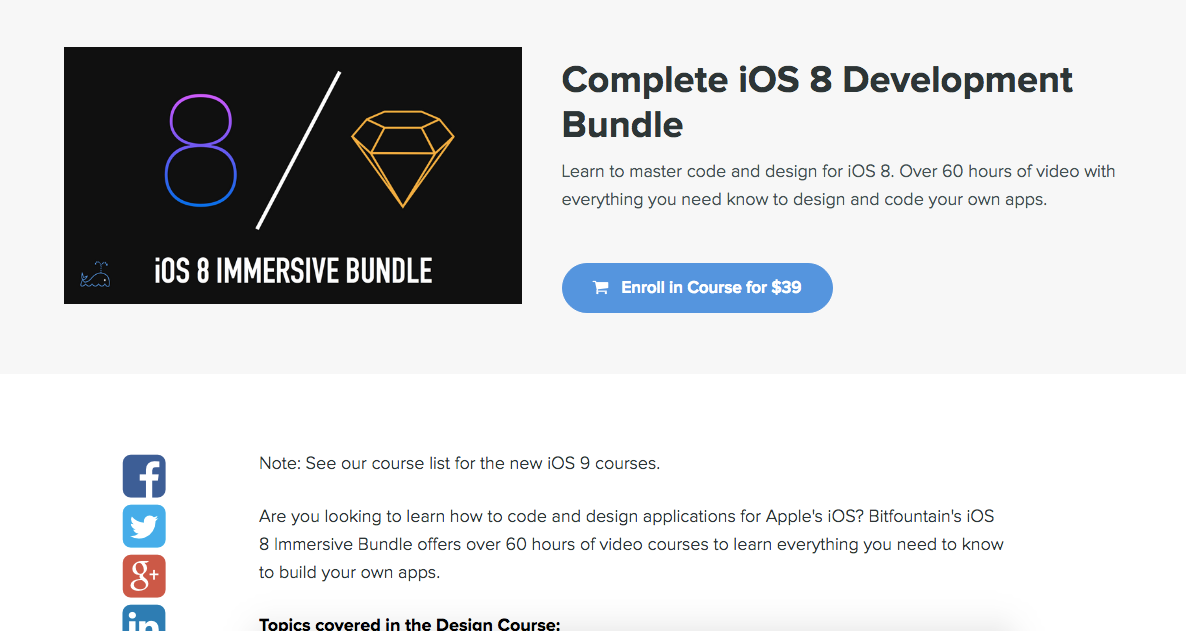
Take John Omar and Eliot Arntz. At just 27 years old, the pair joined forces to create an online course on iOS 7 app development. They took three months and about $1,000 to make it.
“The first week was crazy,” Omar said. “We literally emailed every person we knew in tech — from Eliot’s GA students to people who came to an iOS meetup we hosted, telling them that we built a course that would take absolute beginners and turn them into junior developers in about three months of learning.”
They initially required a $99 fee to sign-up for the class. In the first month the class went live, Omar and Arntz made $40,000. Not a bad ROI right out of the gate!
After a few months, growth stabilized and then stalled, so the team did something drastic– offering the class for free ahead of the launch of Apple’s iOS 8. Subscribers came in from all over, and their program was on every site from Reddit to Product Hunt. All of this new publicity generated 60,000 sign-ups to their email list in just two days.
Then, when iOS8 came out, they put out an email with the course for $89 and quickly brought in a cool $700,000.
Or what about Rob Percival, whose programming courses have earned him more than $1 million in less than a year? His 30-hour course on coding and web development took about three months to create. He posted it to Udemy, originally for free, and got 4,000 students to sign-up.
Then, he put the price back to its full amount of $199. He brought in $15,000 of revenue in the first month. In the month of August, that number grew to $50,000. And when he released his second course on Swift (Apple’s programming language), he brought in $200,000 in the first month.
You know what my favorite part of this story is? Check this out:
Percival was a former high school math teacher! He was probably making a tiny fraction of this at his day job before. Then all of a sudden he’s pulling in millions a year.
These were monthly numbers he has never seen before in his entire life.
Rob was the stereotypical overnight success (who’d been plugging away for years). But he’s still a regular guy. If he can do it, so can you.
Here are the three biggest tips Rob would give new entrepreneurs, like you, about replicating his massive success with online courses (via Business Insider):
- Figure out what topics are in demand by looking at which courses are selling well already,
- Make sure your version stands out among the crowd (“The feedback with the web development course was that it was fun — not going into a load of detail about server info they don’t need, but focusing on what they need and building stuff”),
- And finally, tackle a big topic.
All of that sounds great, right?!
So what’s preventing you from creating and selling a new online course right now?
The short answer is that there’s a ton of details to figure out first.
For example, should you start with an existing online course tool like Udemy or Kajabi?
Or should you try to manually piece something together with a bunch of different independent software products like WordPress and WooCommerce?
Then there’s the problem of somehow getting people to buy your course (safely, from different countries, with different payment options), and then delivering that course to them (while still restricting access for people who haven’t purchased).
What about continuing to market to these customers after the fact? That way you could upsell them other products or even services to keep working together.
See: It spirals quickly!
Creating and selling an online course suddenly becomes daunting once you start peeling back all of the layers.
Unfortunately, that’s why people often stop right here, at the ‘dream’ stage. Getting your new course from ‘idea’ to ‘live’ seems so complicated and difficult.
So if this all sounds familiar, don’t worry. You’re not alone.
I’m also going to show you, right now, how to overcome all of these challenges.
In the next section below, we’re going to cover the nuts and bolts of creating your first online course. It’s actually a lot of fun when you do it right!
We’ll use Kajabi for this example because it’s the perfect all-in-one tool that combines beautiful design and advanced features while still being user-friendly.
So enough small talk. Let’s dive in.
How to Setup Your First Course on Kajabi
Here’s how to get started building out your first course on Kajabi.
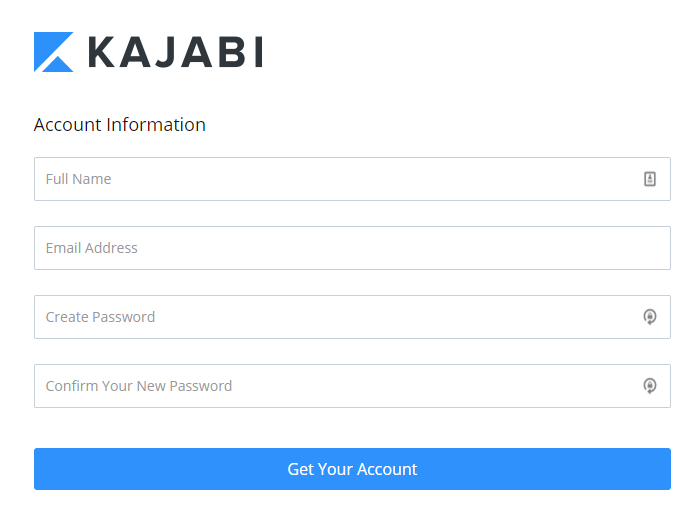
First, go to Kajabi.com and click on the “Free Trial” button in the upper-right hand corner.
From there, enter your desired account information including full name, email, and password. For example, my password is… just kidding. 🙂
Then click “Get Your Account” to sign up when ready.
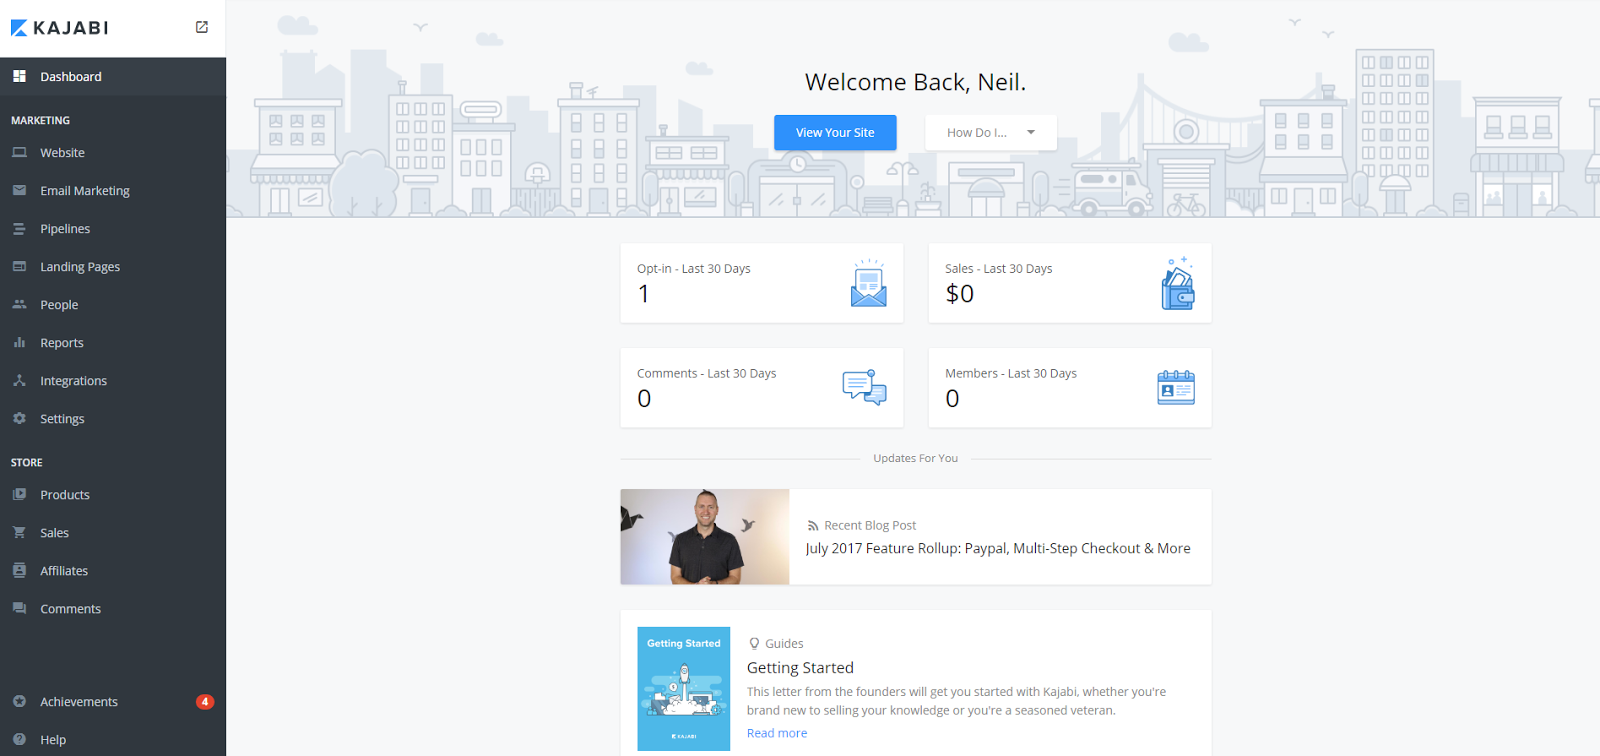
You’ll have to verify your email after the account setup. So take care of that quickly before clicking on the confirmation link and eventually coming back to your brand spanking new account dashboard. Here’s what that looks like:
Still with me so far? Good.
If you’re going to sell an online course, you first need a place to send people. You’re going to need a website, or at the very least, a compelling sales landing page that transforms visitors into buyers.
Here’s how to get started building one on Kajabi.
From your account dashboard, look in the left-hand menu under “Marketing” for both “Website” and “Landing Pages.”
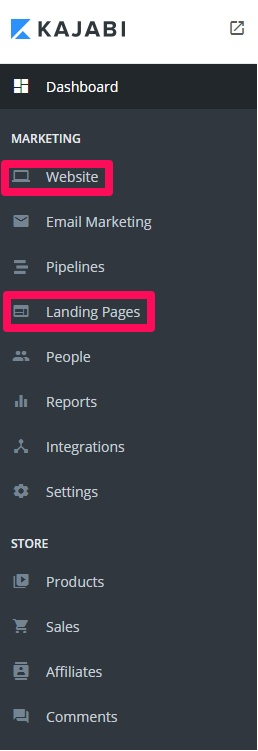
Let’s start with landing pages first. These are the standalone pages we’ll use to market and sell your online course. 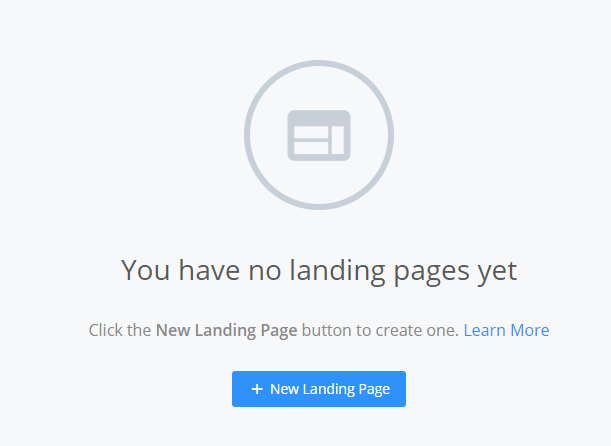
Once you’re in the landing page section, click “+ New Landing Page.”
The best part is that you don’t have to create a design from scratch. Kajabi already comes pre-loaded with beautiful, sales-ready templates to choose from. So simply browse through their list and find the one you like.
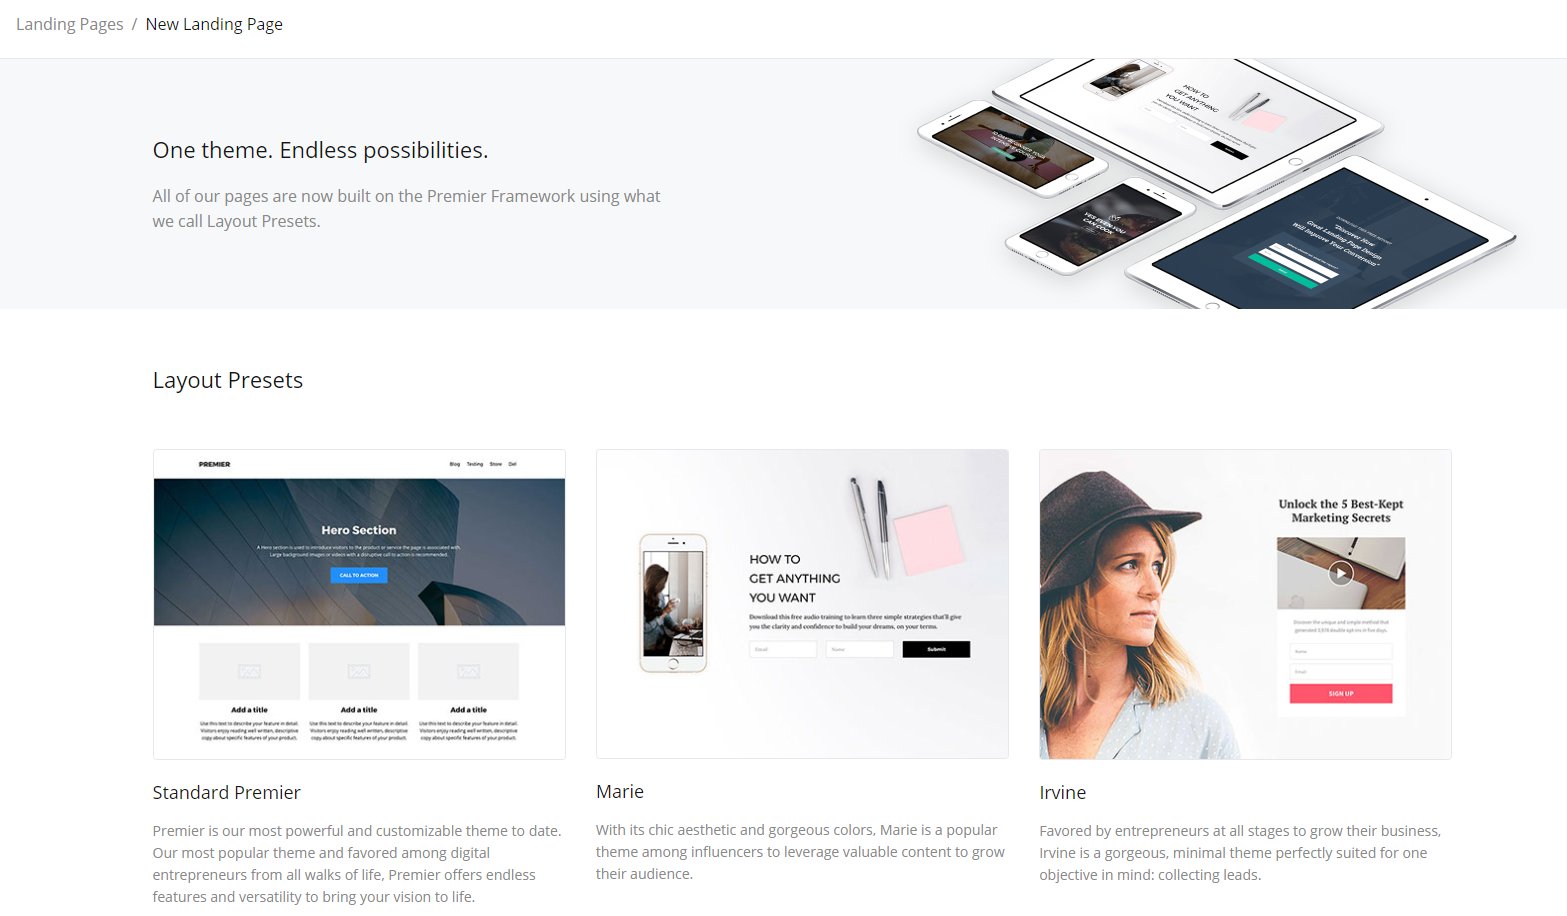
If you want to see what they look like before committing, simply click through the templates to preview their features, use cases, and more. Like this one:
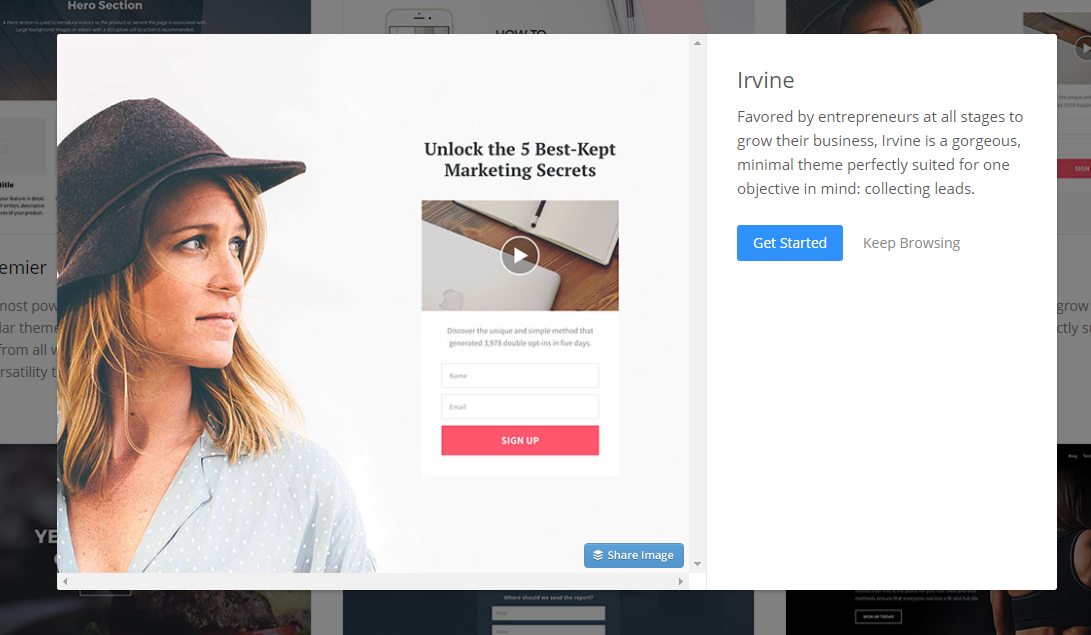
The Irvine Template (above) is often picked by users who want to collect new business leads. It’s simple and streamlined. So that might be a perfect option if you’re going the B2B route.
Select the theme that works best for you, and then hit “get started.” After a few seconds…
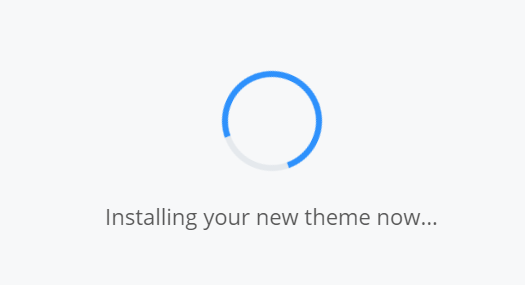
Your theme will be installed and you’re ready to go!
Next, you’ll be directed to your customized dashboard to start editing. This page will show you your website/theme, along with the editing tools you need to change the page in real-time.
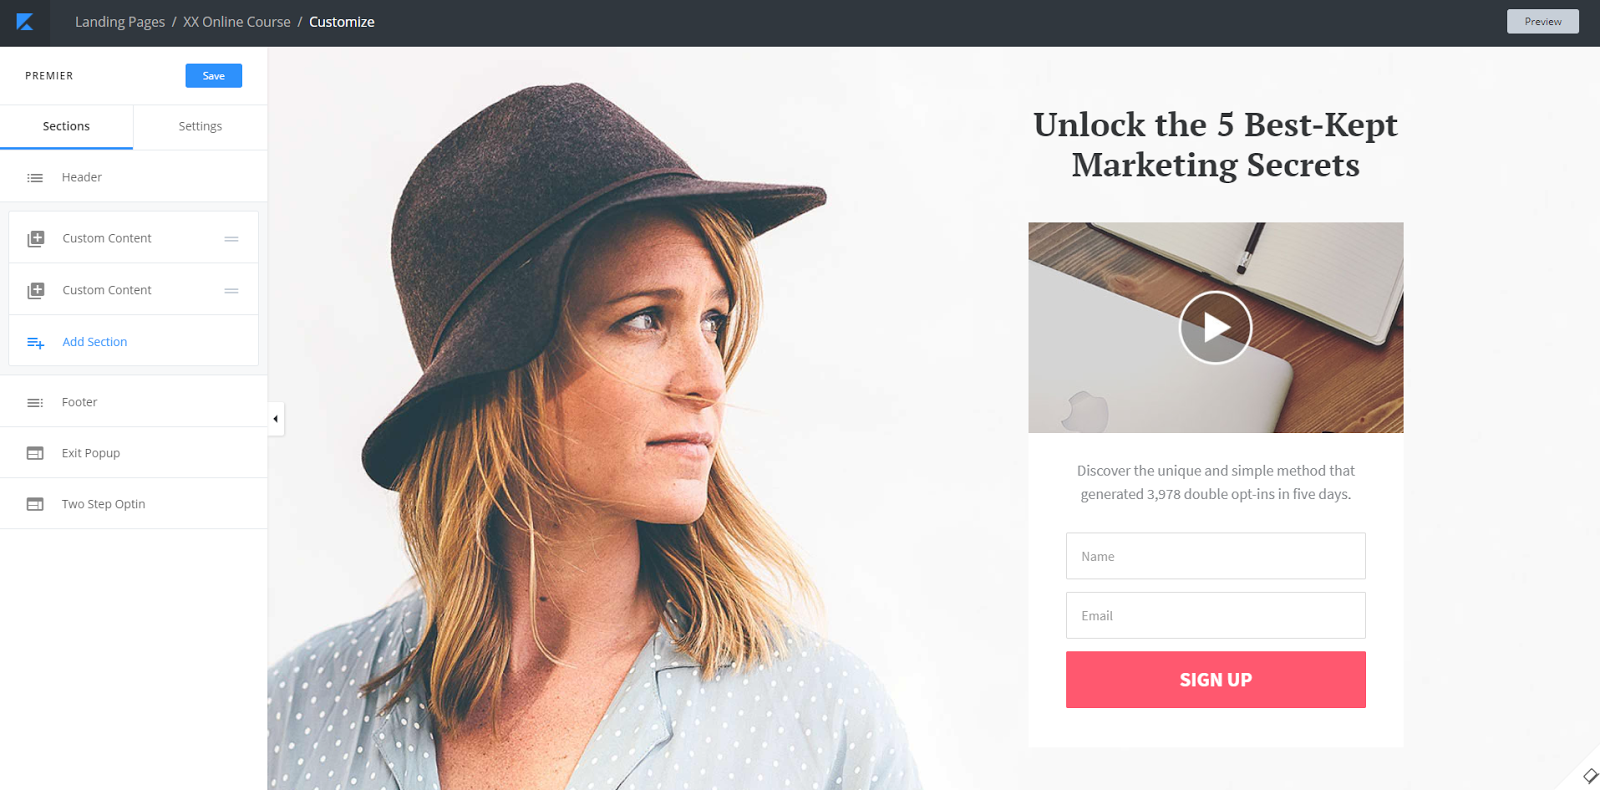
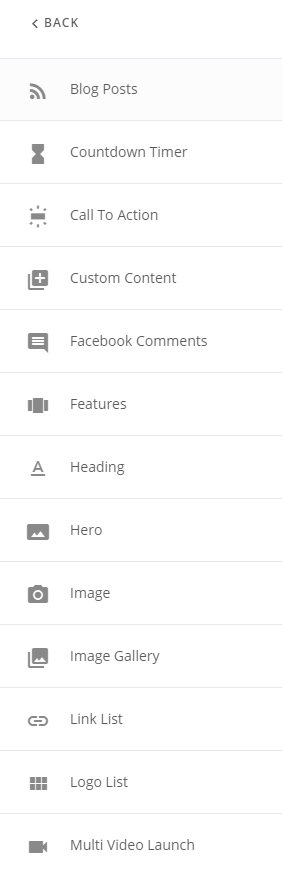
You can setup your online course’s landing page here and can drag and drop whatever elements you want onto the page.
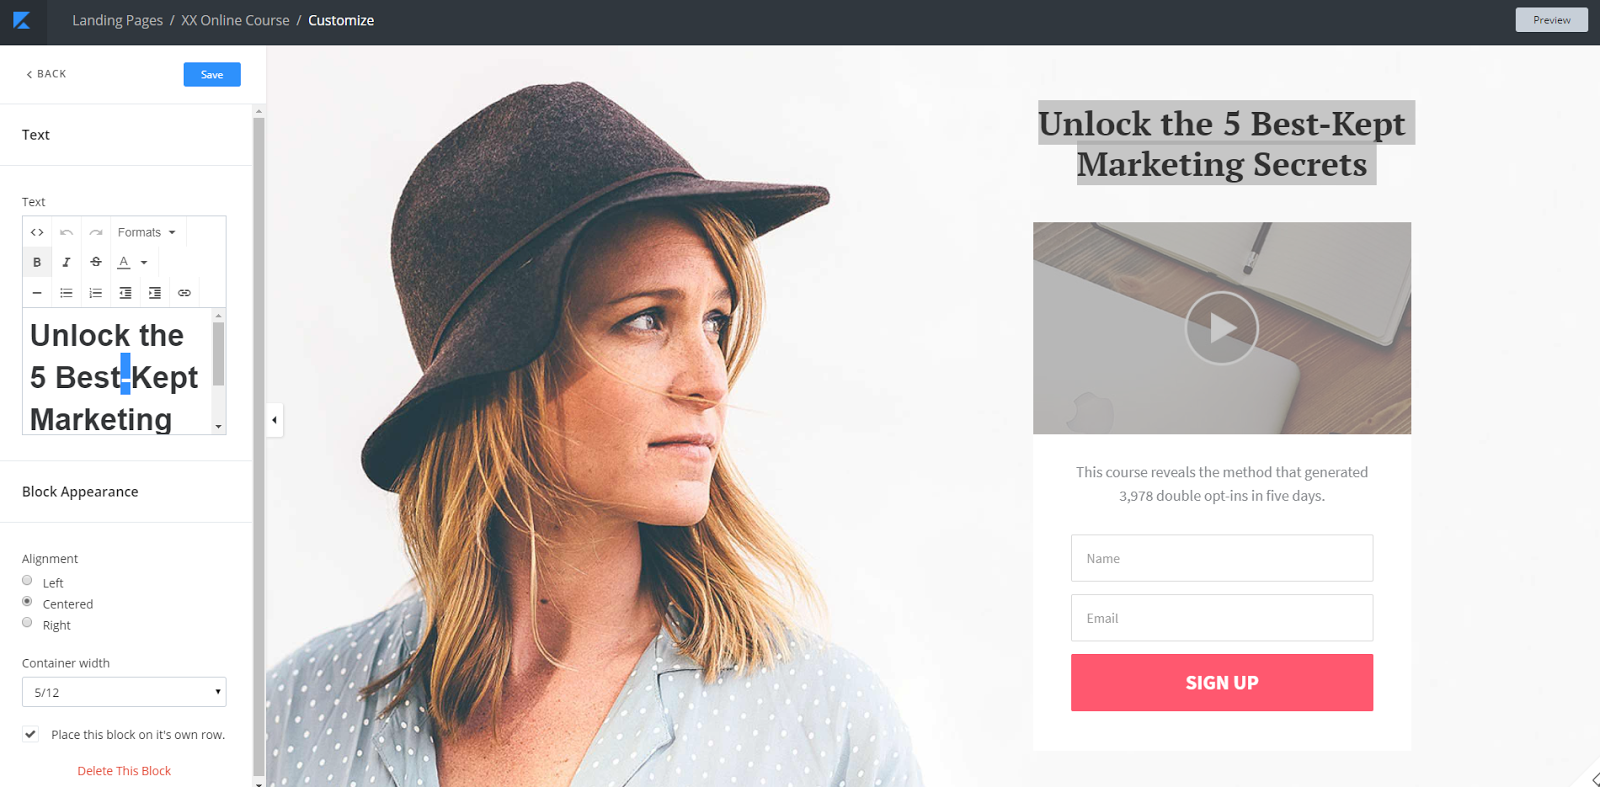
You can also add anything from images to CTAs to testimonials:
Easy, right?!
Of course, a new landing page is only as good as the product it’s advertising.
Products can come in many different forms, from ebooks to membership sites to online courses and more.
We’re covering how to build an online course in this article because it’s one of the best ways to monetize your content today. (And you can also build them in Kajabi fast, too.)
Start by clicking products on the left-hand side menu:

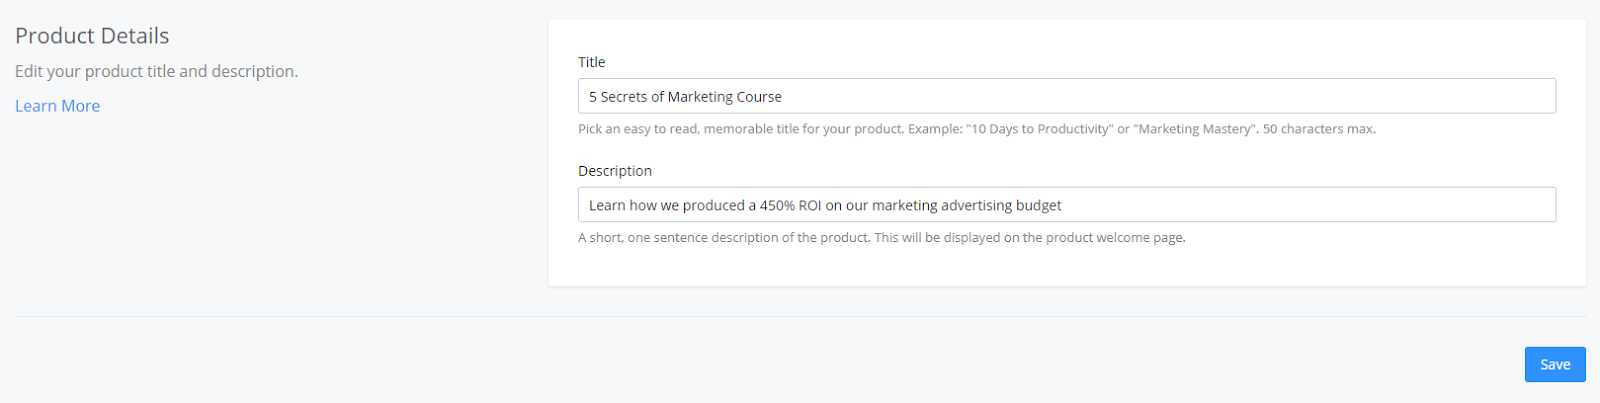
Then start by creating your product title and description. Don’t worry about this step for now if you’re still in course creation mode. Just fill in a placeholder, and you can come back to change it later.
The next step is to add branding, like a product thumbnail image, so people can see what they’re getting.
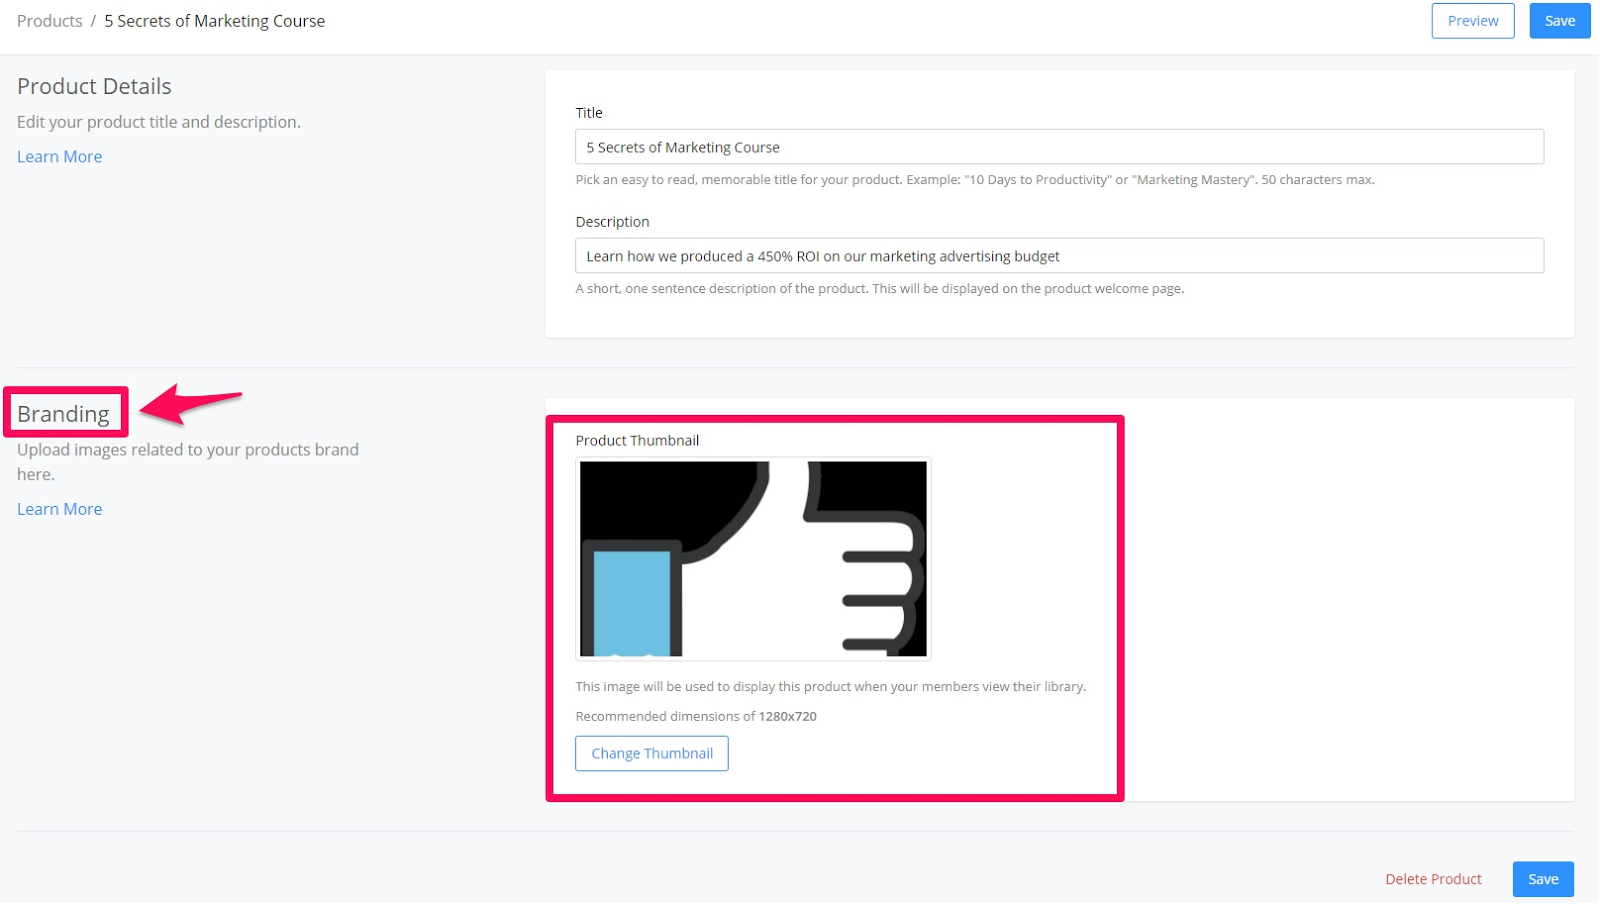
Here’s what we’ve got so far after a few seconds. It’s pretty basic because we haven’t filled in a ton of information just yet, but you can already see how it’s taking shape:
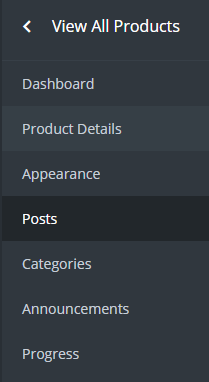
Next, we can create new posts and add more details to fill out this course page a little more. Think of Posts as individual lessons and Categories as a way to group your lessons into modules.
You can find these options under the Products tab in the left-hand side menu.
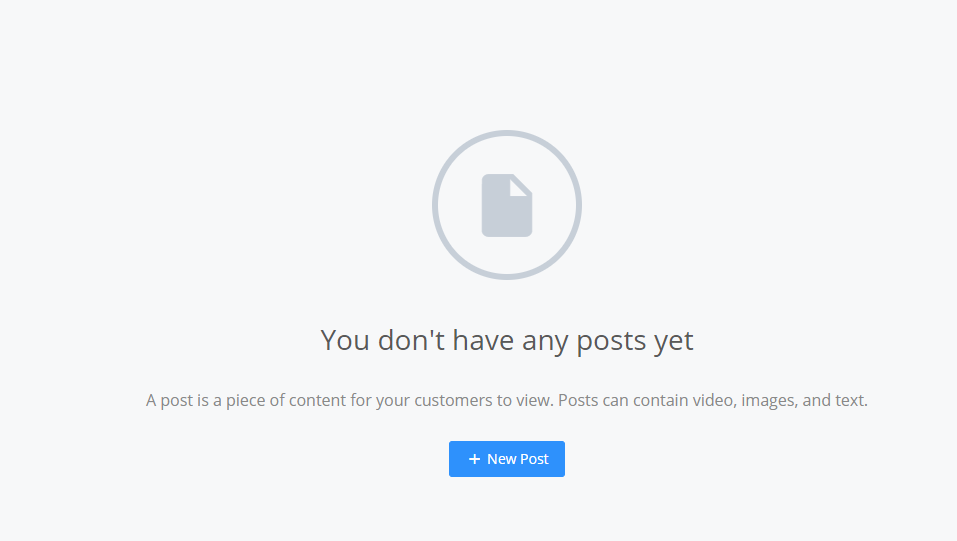
Once again, creating these new content pages is incredibly easy. Just click the “+ New Post” and you’re off and rolling!
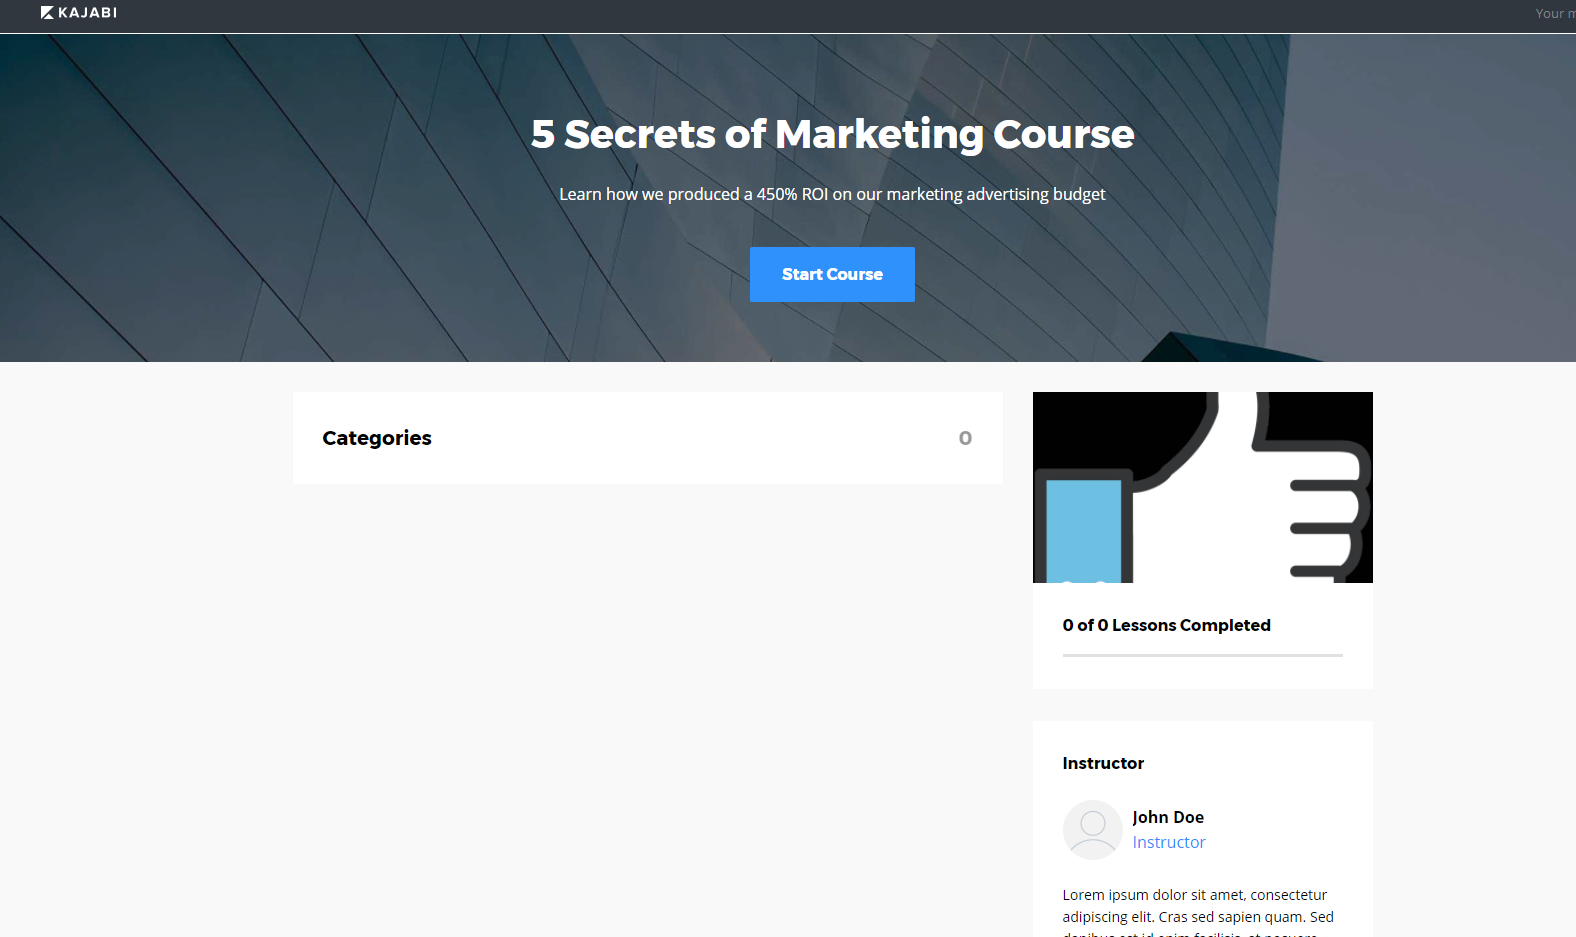
Here’s what the course online will start to look like when you begin adding new posts.
The content and course information will be on the left-hand side, while the outline will be on the right (so people can quickly jump from one lesson to another).
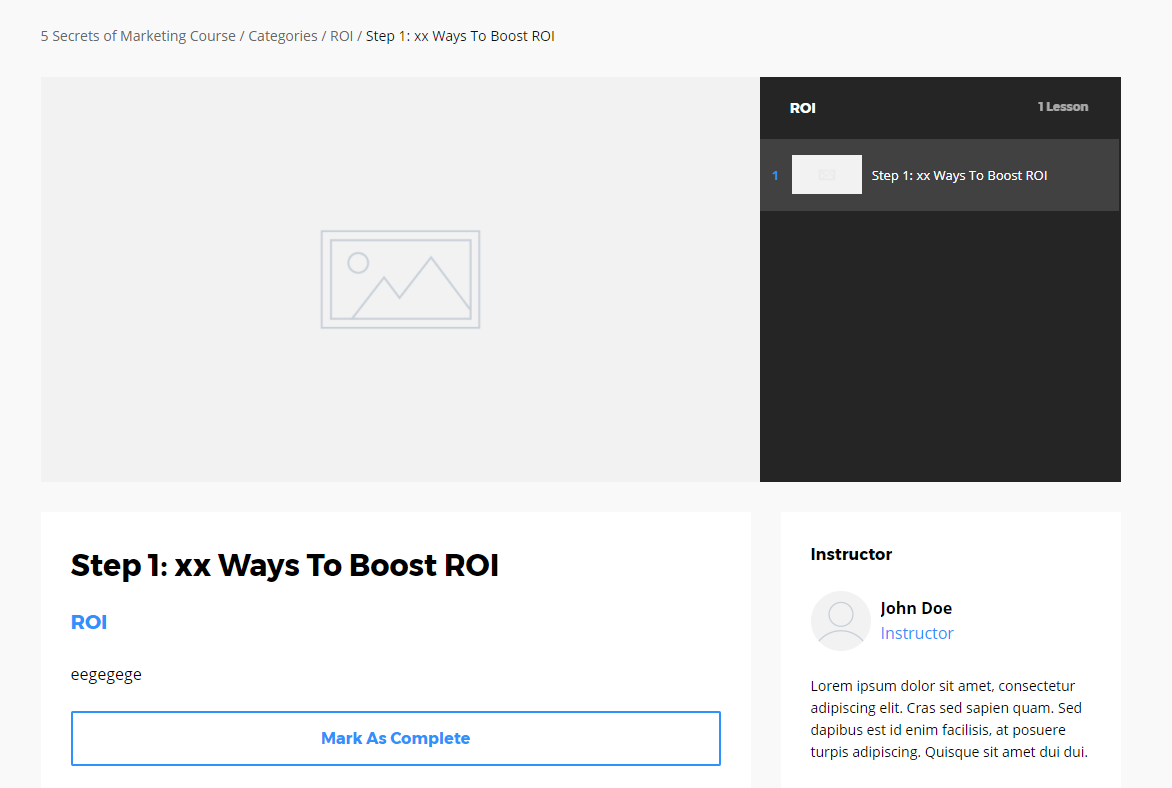
People can even mark each lesson “Complete” when they finish so that it’s easy to keep track of where they are and what they still need to learn.
So far we’ve created both a new landing page to sell our product and the initial stages of the online course product itself.
Next up, we’ll dive into pipelines.
Pipelines are a unique Kajabi feature that will help you completely automate all of your marketing with just a few simple clicks.
The best way to get started is to choose a ‘Pipeline Blueprint.’ These are proven, done-for-you marketing templates that already bring together the essential tools you’ll need. So literally within seconds, you’ll have an entire system that captures leads, sells your online course, and even conducts a full-blown product launch.
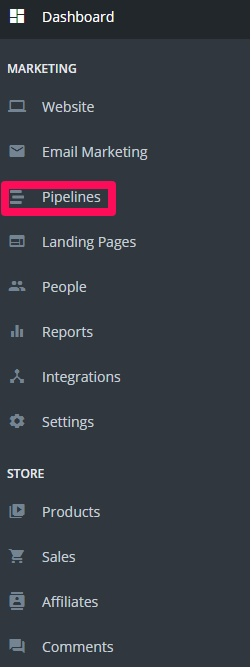
These Pipelines will be under the Marketing tab in your Dashboard Menu:
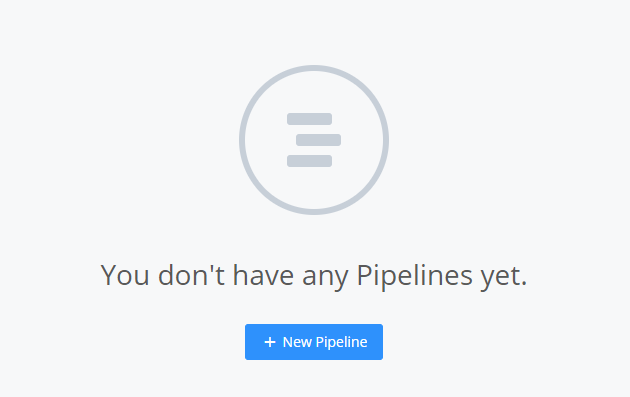
Once again, click the “+ New Pipeline” button to get started.
You can create your own from scratch, but I recommend you select from one of these pre-built options, instead. They’re already helpfully organized by your objective:
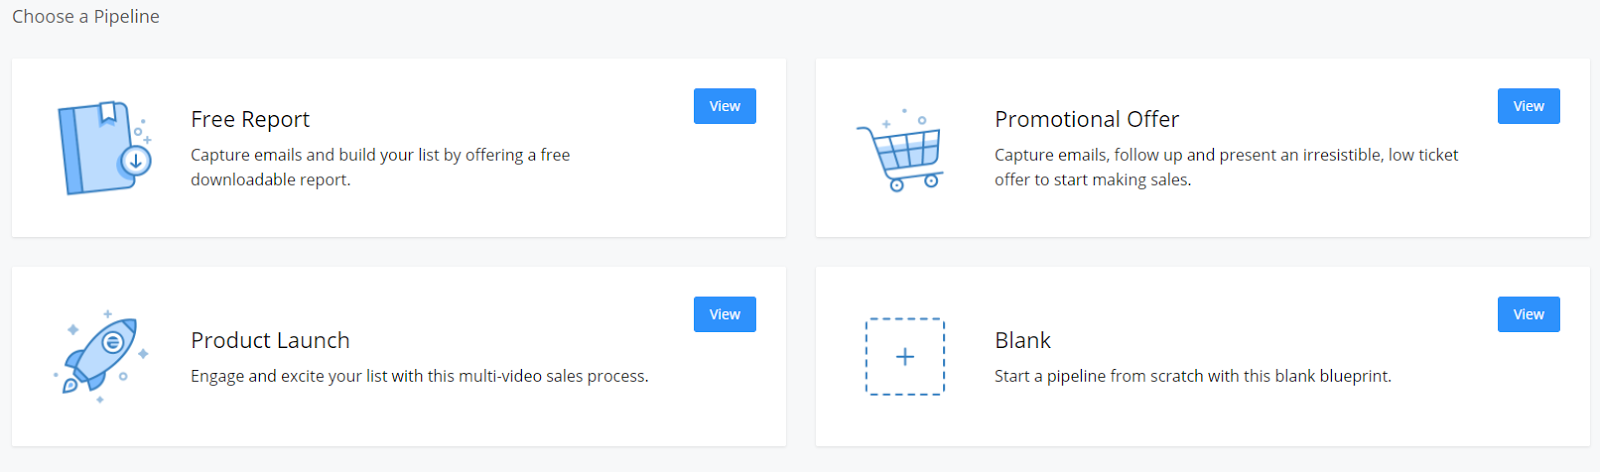
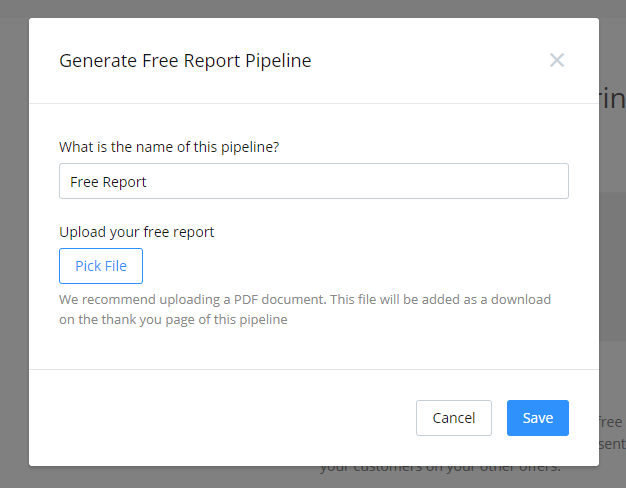
For instance, you can select the “Free Report” one:
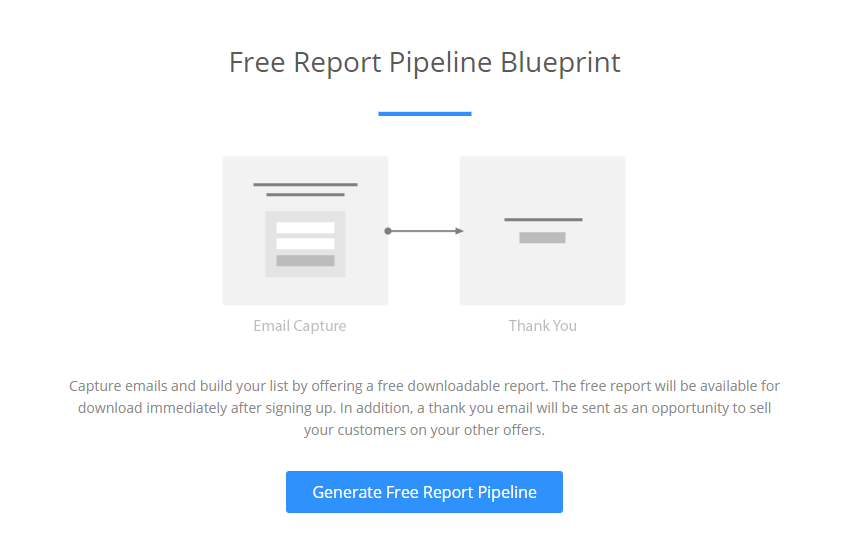
You’ll get step by step guides on what the free report pipeline does and then walked through the process of building it out for the first time.
On Kajabi, a free report pipeline helps you build a list of interested prospects.
It’s also a good way to get your feet wet with online entrepreneurship and begin to build your following even before you’ve created or sold a product.
Users sign up and are then given a download option immediately to help you convert a high percentage of new page visitors. You can then drive traffic to this pipeline using a variety of tactics, including:
Here are a few tips when you’re creating quick reports:
- Use a PDF: PDFs are the most credible document type for a new business report. Although it sounds obvious, don’t use Word or Pages for your reports. There are plenty of free pdf converters out there to choose from if you’re not sure how to do it already.
- Make it consumable: Reports should grab attention and should create a conversion. You will lose people if you put too much information into them. Make the report impactful, but don’t make them do all the work.
- You don’t have to use video: People like to watch videos about something, rather than reading about that something. But, more people than ever before are surfing the web on their mobile device. A whopping 66% of emails are read on the phone. This means people are seeing your stuff for the first time while they are on the go. They might even be at work. And you can’t just sit down and view a video at work– the boss is watching.
So, the report gives them the info they need, lets them read it when convenient, and is the easiest to create so you can start driving conversions ASAP.
Now that you’re on board with the free report, it’s time to upload it.
Once again, Kajabi makes this process easy. You simply upload the report like uploading any other document.
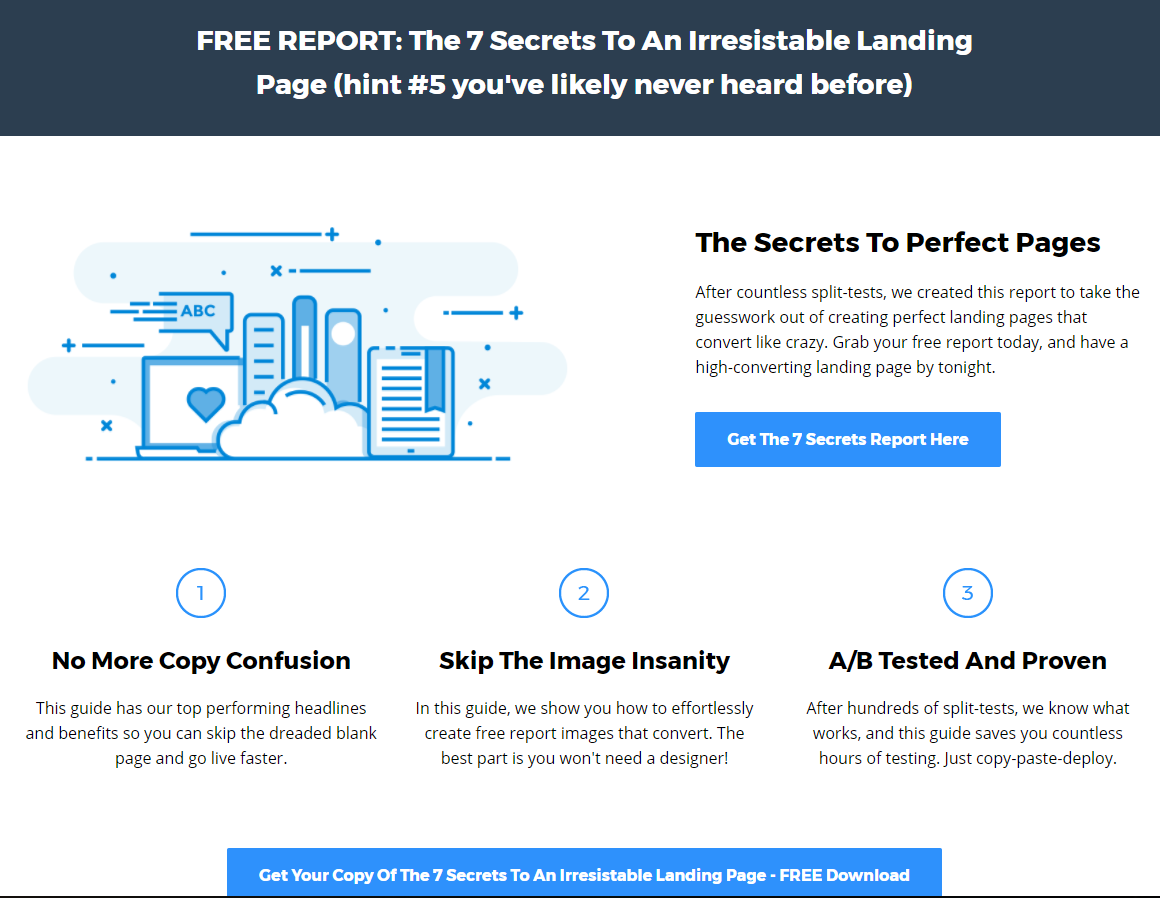
Here’s what it should look like after you successfully upload the doc:

Nice, right? Let’s zoom in to see how this opt-in page is already taking shape.
When they click the CTA (and they will), here’s the lightbox feature that will ask for their name and email:
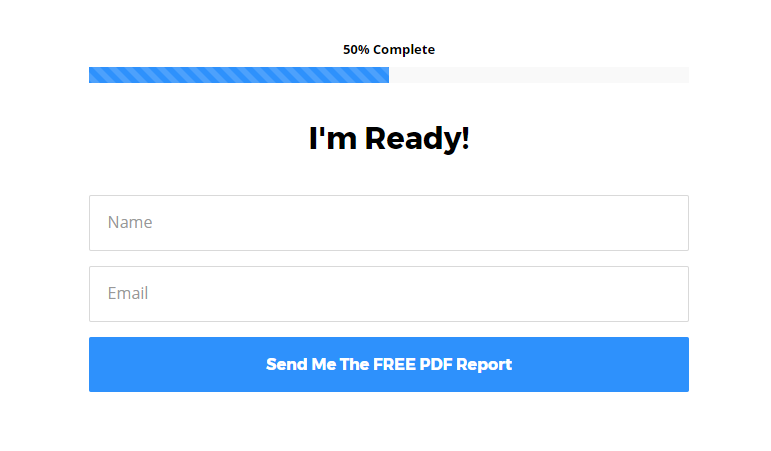
They enter their info and it automatically sends them the new report.
Now the next step is to set up email marketing so you can automatically follow up with this person.
Remember how Len Smith amped up his monthly revenue with a little email marketing? Thankfully, Kajabi will help take care of that so you don’t need another tool or app.
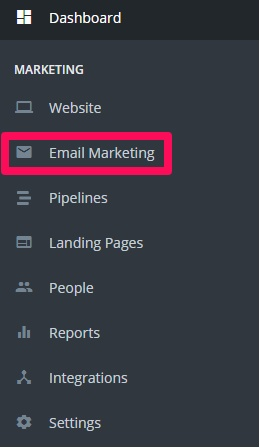
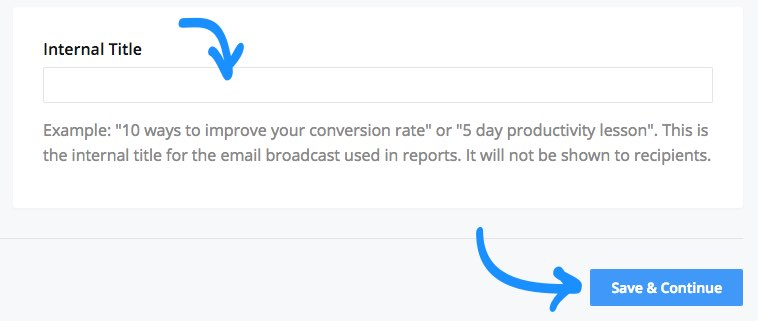
From here, you’ll want to click on “+ New Email Broadcast” to do exactly that.
You can get started by creating a simple title for this email. Don’t stress too much about this step, though, because it will only be seen by you internally.

Next, you’ll pick which subscriber list to send this email to. The point here is to filter out any people who should not receive this email.
So for example, if someone has already downloaded the report or purchased the product, you wouldn’t want them seeing the same exact email again.

Email filters in Kajabi come in all shapes and sizes.
You can filter people based on:
- Contact: If someone’s a member of another list (like a Past Customer).
- Active: If someone has been active in the last 7, 14, 31, etc. days.
- Opt-In: If someone has completed a certain form.
- Product: If someone already owns the product you’re trying to sell (or a different one that you want to cross-sell now).
- Offer: If they’ve already received a particular offer.
- Email Sequence: If they’ve already subscribed to a specific email sequence.
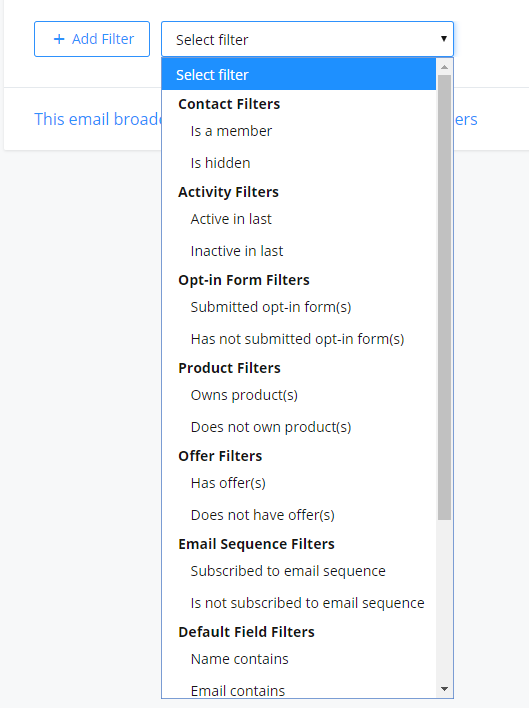
That’s a ton of options, right?!
Believe it or not, these extensive options are a good thing. It means that you can build sophisticated sales funnels that maximize the amount of profit you can make.
And best of all, you don’t need to try and hook together a bunch of other different outside tools. Instead, Kajabi takes care of all the heavy lifting for you, so it’s both easy and fast.
Now let’s get to writing that perfect email.
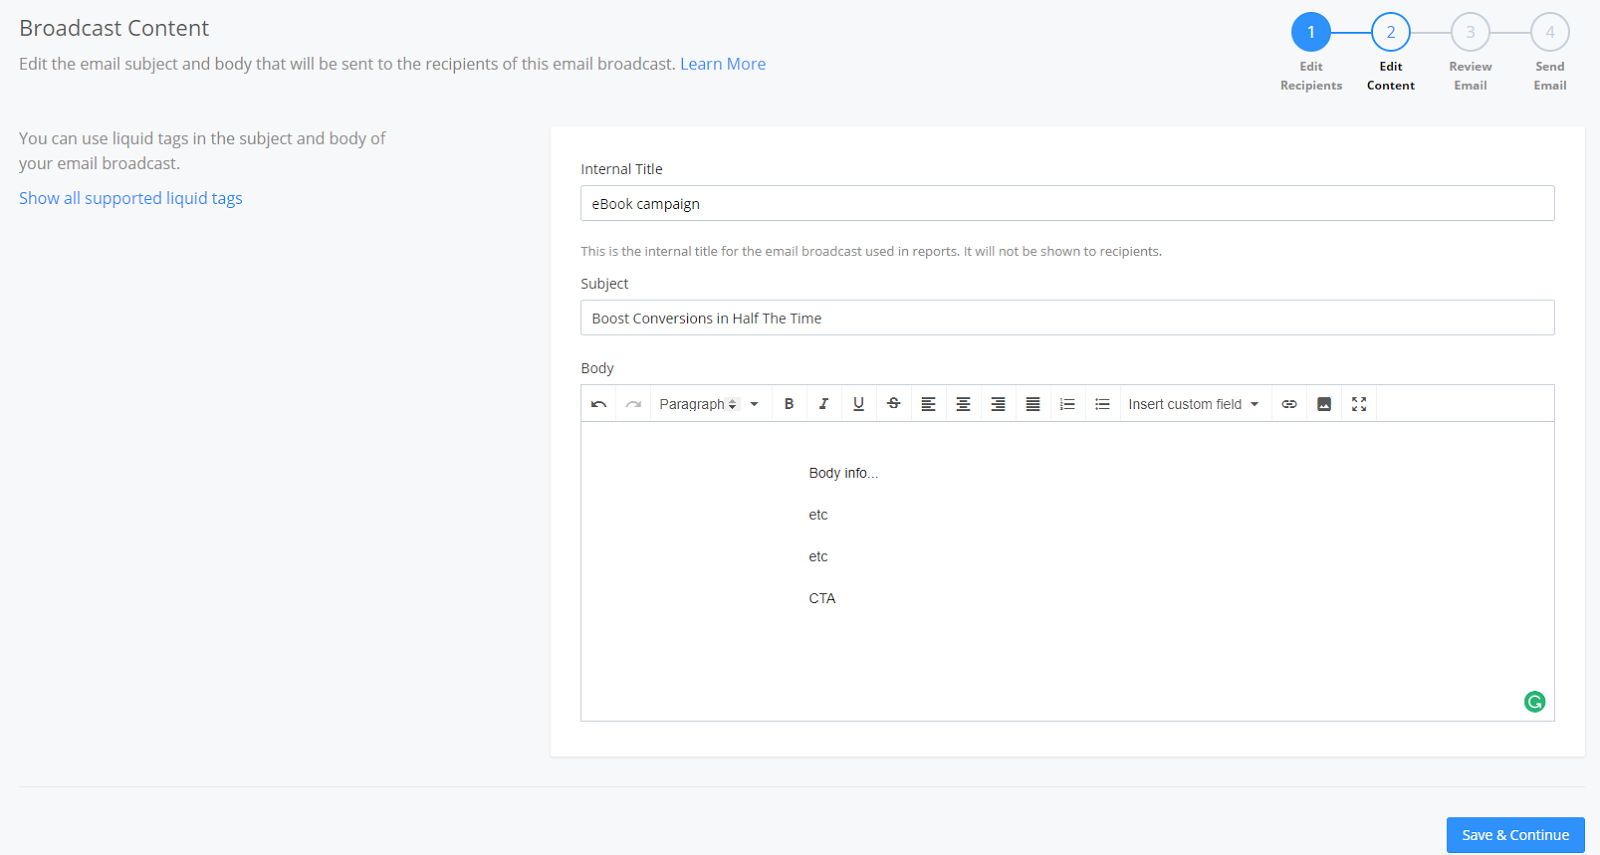
It’s a simple text editor that you can point, click, and start typing. When ready, hit Save & Continue. Their email building wizard will walk you through the last few steps to get this email live in no time.
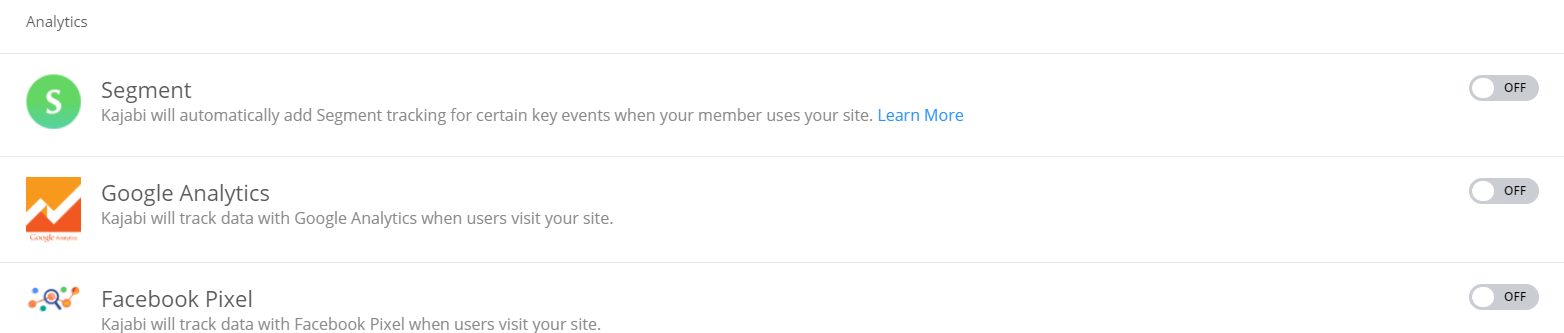
Beyond all of these ‘standard’ features, Kajabi also integrates with a ton of other tools that you might already be using. This way you don’t have to replace them. You can simply set up an integration with a few keystrokes.
Look for Integrations under the Marketing tab in the menu to check them all out:
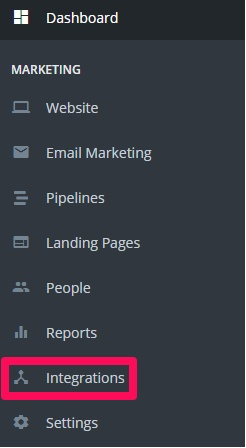
Some of the most common integrations include companies like Aweber, MailChimp, and Drip (for email marketing).
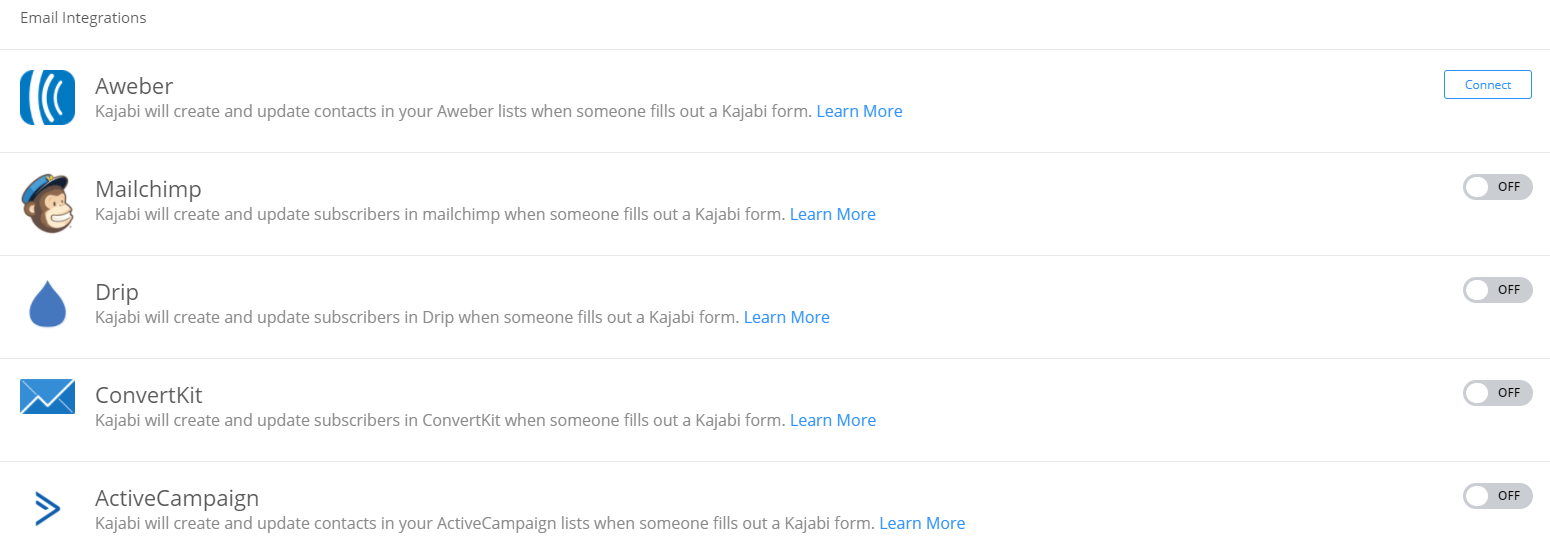
But you can even get a little more advanced with analytics tools (to track opt-ins, conversions, etc.), ClickFunnels so you can build out sales funnels, and Zapier that connects to hundreds of other popular software tools.

You can also integrate with payment gateways like Stripe. That means you can start accepting credit card payments without the usual hassle of piecing together external payment processors (like PayPal) that commonly send people away from your site to complete the payment.

Kajabi also offers a built-in Coupons feature so you can run sales and discounts on your new online course. Look for them under the Sales Dashboard:
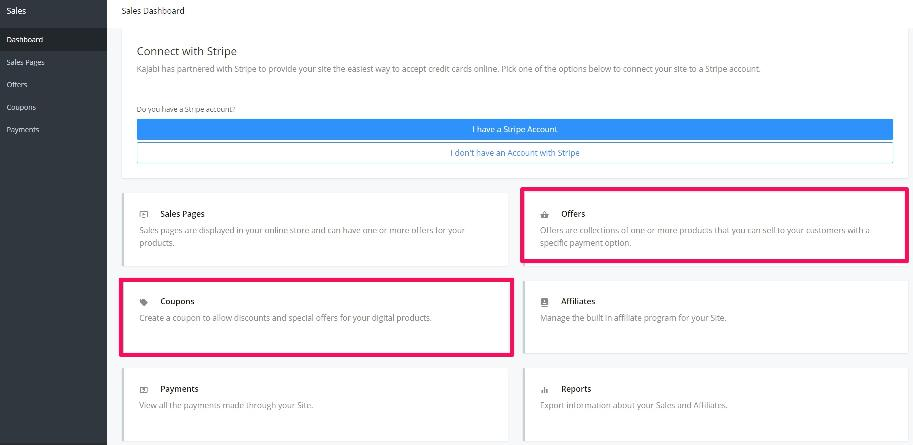
If you want to set up a coupon, simply connect your Stripe account to create a discount code. Otherwise, if you want to set up an offer, you can put products into a bundle (and even include something free).
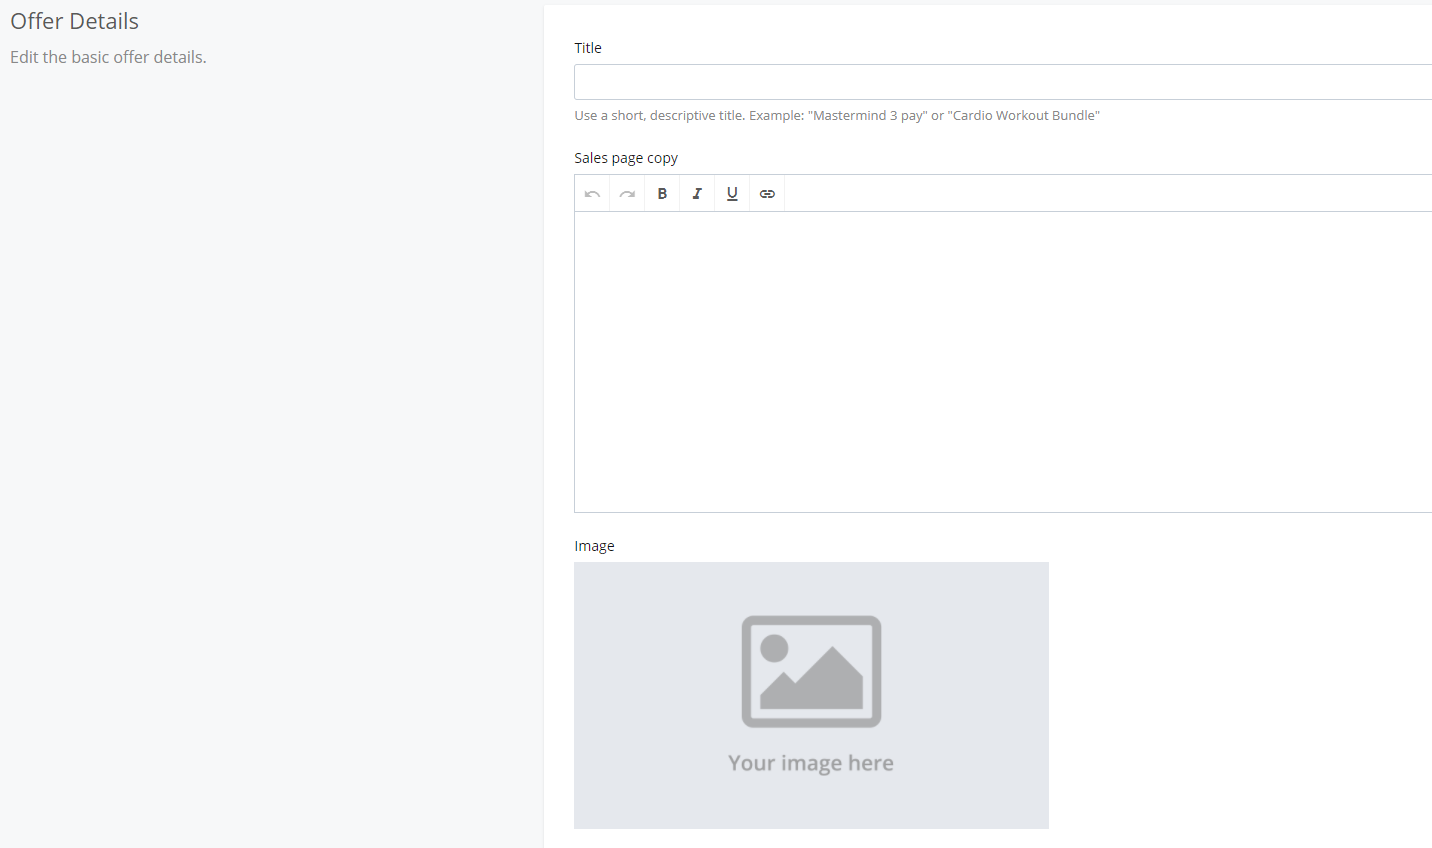
Start by clicking “+ Add New Offer”:
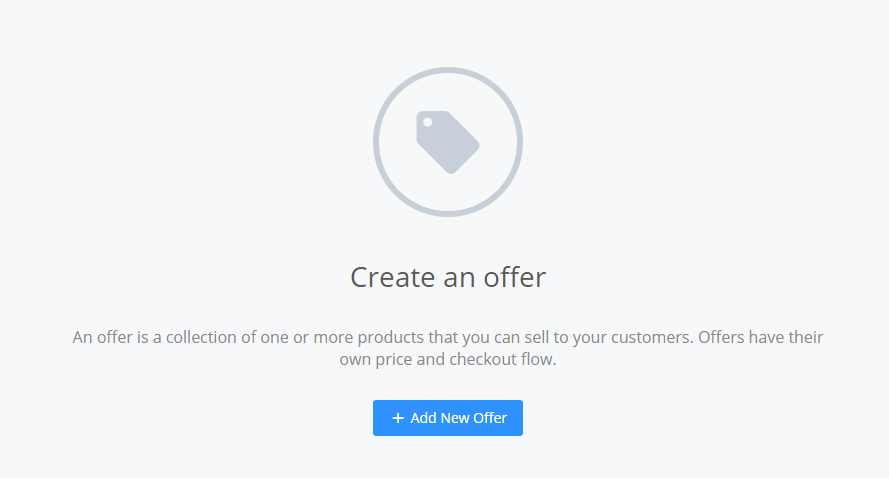
Then you can add details on the sales page copy that tells people what’s included with the offer and how they can redeem it.
Last but not least, you can set up a few different ways for people to pay for it.
That includes everything from a free offer, to a one-time payment, multiple installment payments, and even a recurring subscription.
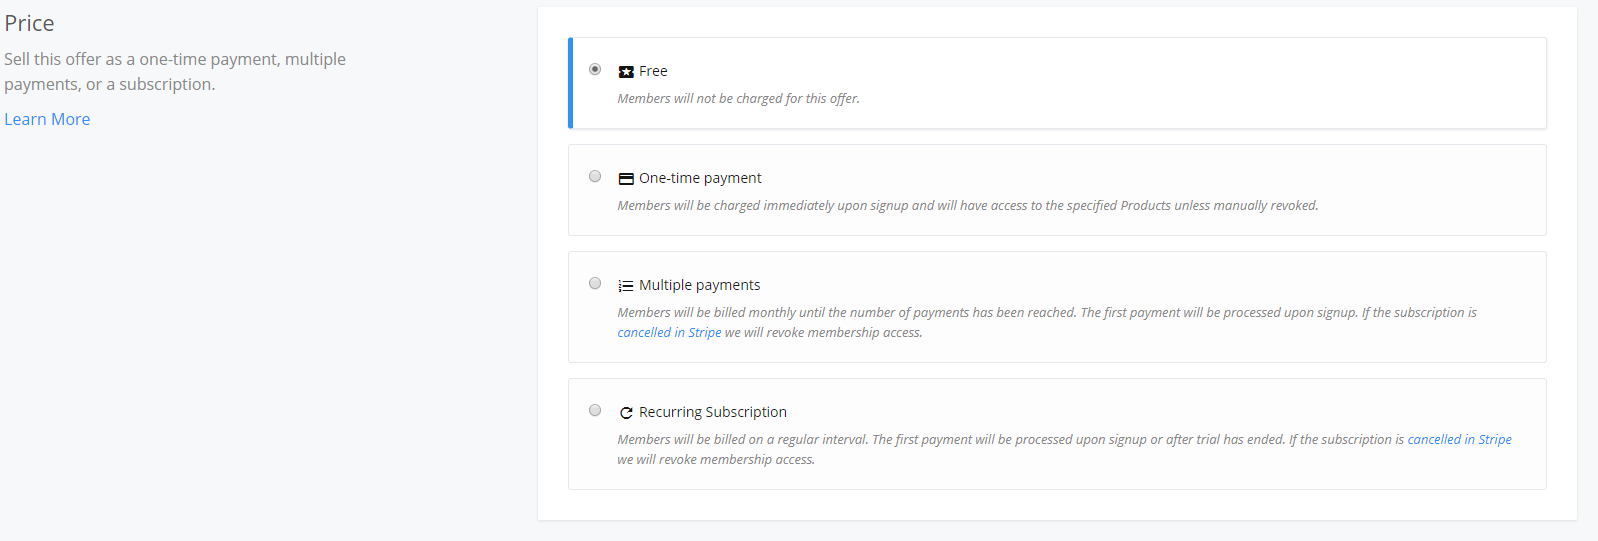
Select how you’d like to set up pricing and then activate the offer to push it live.
Spending all of this time and energy to create a new product has been fun. But the real goal here is to start making some money.
Working with other affiliates is one of the best ways to get new product sales off the ground (especially if you don’t already have a built-in audience to promote your course to).
Affiliates are like third-party sales people who will promote your course for you. And in exchange for bringing you new sales (which you otherwise wouldn’t have seen), they get a small cut of the action.
Thankfully, Kajabi also has a built-in toolset to invite, manage, and eventually pay out a percentage of new revenue to your affiliates.
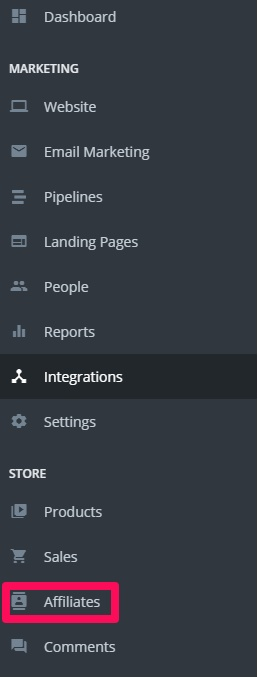
Look under the Store tab in your Dashboard menu to find the Affiliate option:
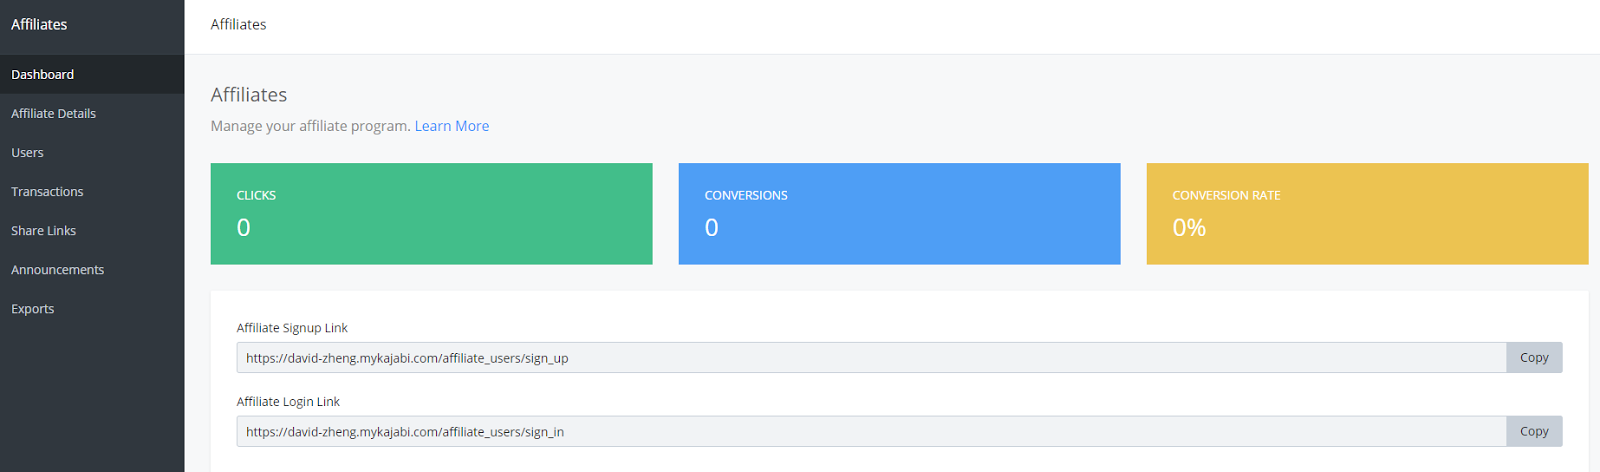
The initial Affiliate Dashboard page will instantly display key stats like new clicks, sales, commissions paid out, etc.
Under that, it will also display the affiliate links you can simply copy and paste to give out to these new salespeople.
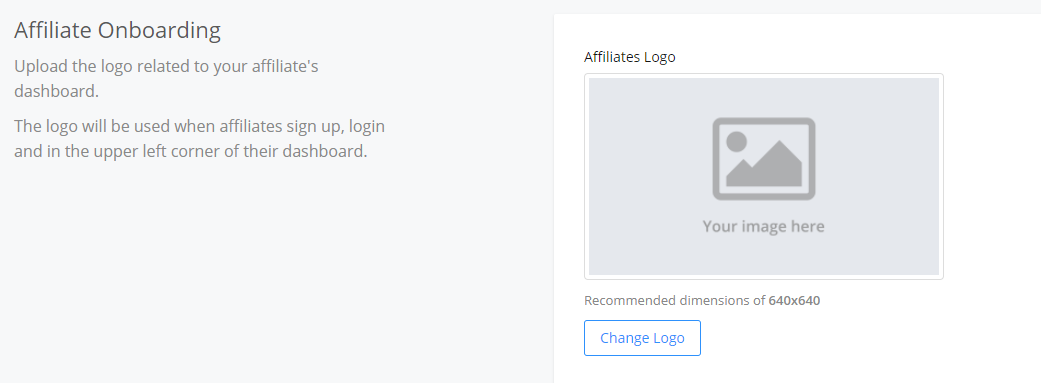
You can even customize the experience for new affiliates so that they’re more excited to help you sell. For example, you can edit the Affiliate Onboarding section with a new logo:
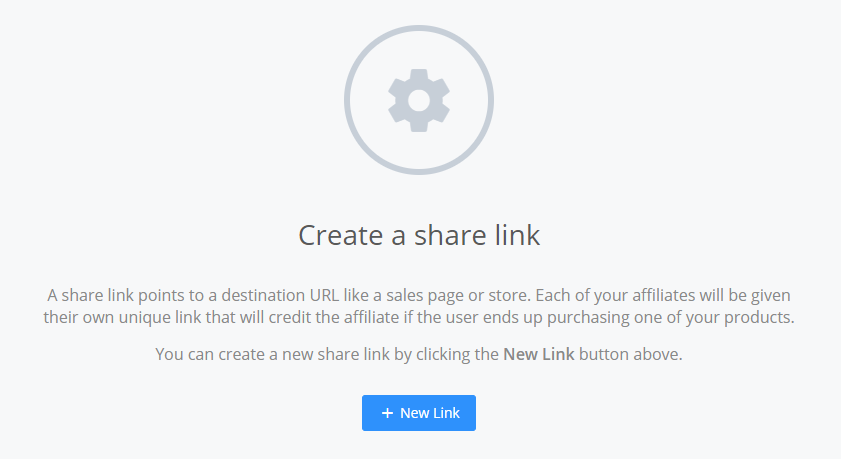
And then you can also create new, unique share links for each one. This helps each affiliate get paid their fair share. But it also helps you track which affiliates are performing the best (vs. the ‘deadweight’ who’s not getting the job done).
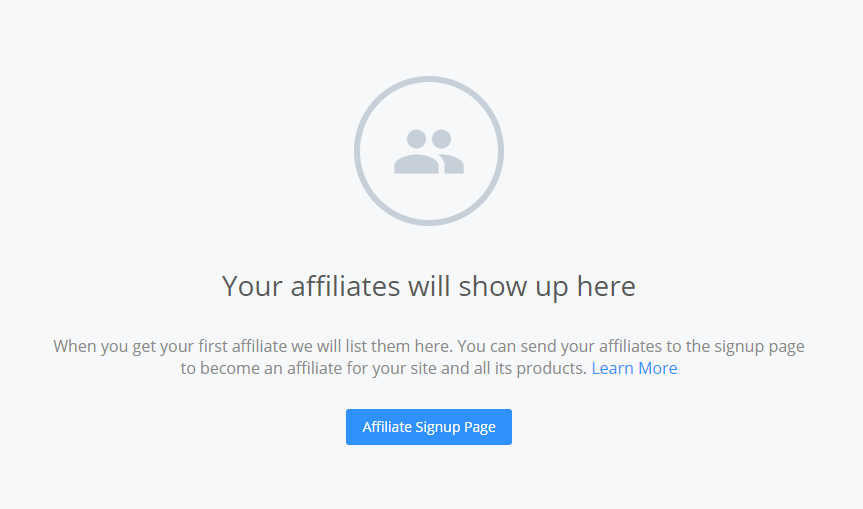
There’s also a separate login page for affiliates, so they can sign up through an easy step-by-step process that helps them understand how they can help you sell more.
We’ve covered a lot of ground so far. You should be proud!
But there’s still one final section to review before moving on.
You’ve spent so much time and energy so far getting this new online course live. So you’ll understandably want to see what’s working, what needs to be switched up, and where you’re killing it.
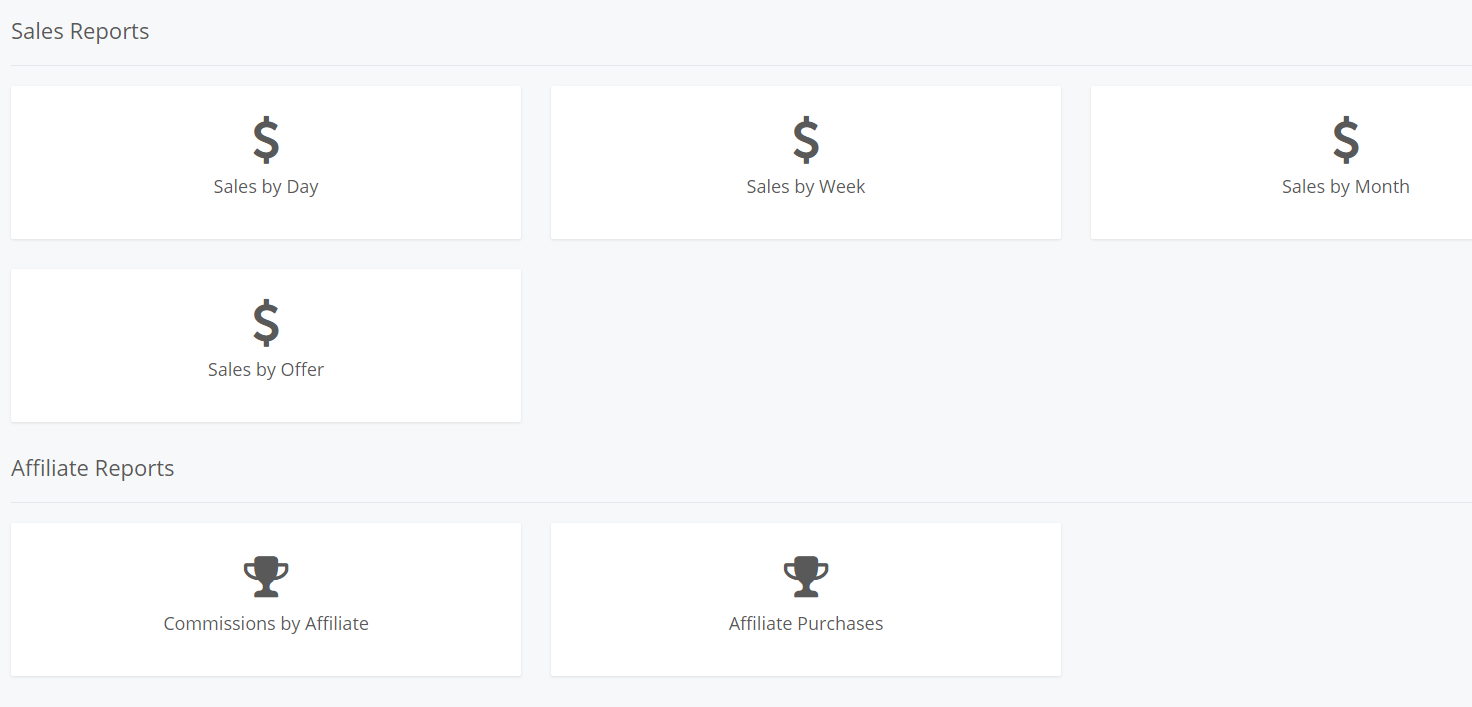
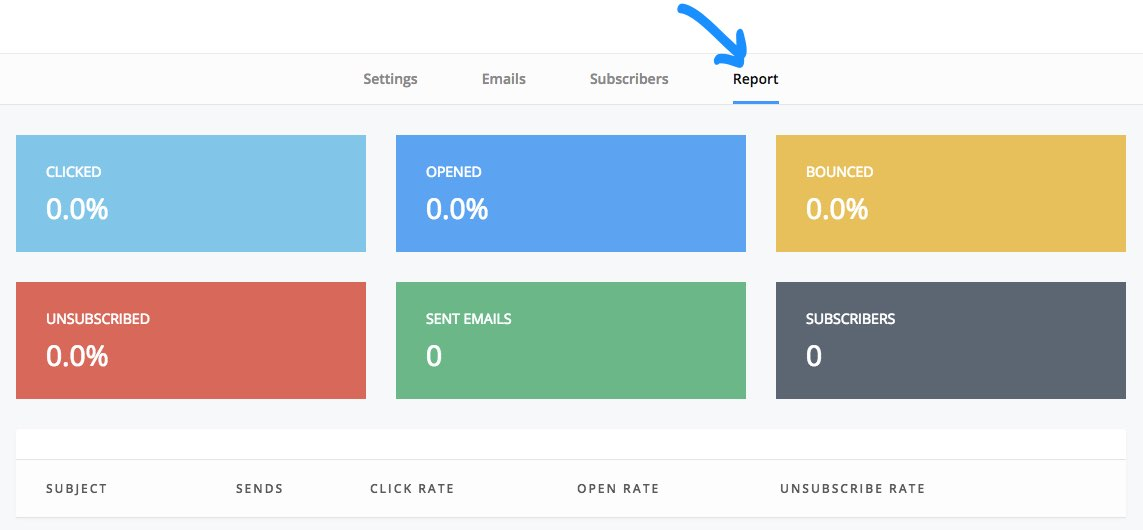
Look for Reports under the Marketing section in your Dashboard menu:
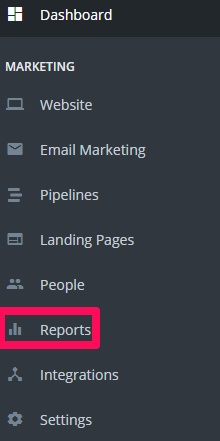
Kajabi’s Reports help you manage ‘direct’ sales you’ve made through direct promotion, and they also split out any sales you’ve made through affiliates, too.
Now you’re good to go!
Once your new course is finalized you should be ready to hit the ground running. Refer to this section so you can create, manage, and start selling your course in less than an hour.
But here’s where the fun starts.
Let’s talk about how to promote your brand new online course.
How to Promote Your New Course
Remember John Omar?
He was the one who pulls in over a million bucks while traveling.
He has some advice for course creators:
“Build the best possible course in whatever topic you are teaching,” he said. “There are a ton of free resources out there to learn iOS, but why did our course get 60,000 students in two days and not the others? And why did thousands of people subsequently pay us for our courses? Because we put everything we have into being the best on the market.”
So that’s the first step: Build the best course possible.
But what if you’ve got the best course out there, and you’re marketing like crazy with little results? Effective course promotion is just as important as the class content itself. After all, it doesn’t really matter how good it is if no one ends up seeing it.
Here are some surefire tips for promoting your course.
Many times, people don’t understand that they need what you have to offer. They don’t see the problems in their life or the value that you’re about to deliver.
So you need to ‘grease the wheels’ so to speak. That means before you start selling directly, you need to build up the required anticipation, interest, and desire.
Specifically, you need pre-suasion.
The idea behind pre-suasion comes courtesy of Dr. Robert Cialdini, who’s the same author of the excellent Influence book that shows you how to persuade and influence others. That book has sold three million copies, so it’s safe to say that he knows what he’s talking about.
Cialdini says you can get someone to emotionally ‘buy-into’ your message before you even tell them the message. You do this by using “privileged moments.”
That might sound complex, but it’s not.
It’s kind of like a first date. You need to ‘set the mood’ by putting on nice clothes, getting your car washed, etc. so that your date is impressed.
Here’s how it works when you want to sell your new online course.
First, make sure all efforts are leading the user’s attention to the message. Then, give them a point in the process that opens their eyes to the message.
For example, this frequently occurs in videos using pre-loading (or having the user focus on something before it’s told to them outright).
This also often starts with creating good visuals. Pre-suasion can occur if you give users something to look at that immediately channels their attention. Use effective wallpapers or images and put your message right before their eyes.
Next, use effective phrasing: The right questions and language on your site and in your videos can channel attention, too. So, make that language lead users where you want them to go.
In other words, you’re ‘priming’ website visitors. You’re laying the groundwork so that they understand what’s at stake, what they need, and why they should buy from you.
Take the experiment conducted by San Bolkan and Peter Andersen in which simple phrasing caused a huge increase in participation.
First, they tried to get study participants by simply asking them to join the group. Only 29% agreed.
But then, when they approached people by asking if they considered themselves “helpful,” more people paid attention to the request, and participation grew to 77%.
Now put the most important idea front and center. You can lead a horse to water, but you can’t make him drink. But also, sometimes you have to lead the horse to water. You have to draw attention to what you want your audience to see.
Even more, make sure they can see you/your product. If you’re using a video, put yourself right smack dab in the middle. This will help prop you up as an authority on the topic and an expert in what they are about to sign up for.
And finally, know your angle. What are you pulling people in for? Match your message to how you’re appealing to your potential customer.
One of the best ways to hit all of these objectives is through a blog post series.
A single, standalone blog post probably wouldn’t cut it, to be honest. There’s already another 2 million blog posts published every day. That means those new customers could be anywhere else on the web. You have to get them to choose your content.
A blog post series, in contrast, let’s you build up anticipation with multiple efforts.

In the beginning, you are introducing readers to the post. Giving them some intel on what they are about to read. This part focuses on the problems and pain points that someone’s already experiencing (so it grabs their attention).
Then, you put the most important information in the middle. This is where you can expand on all of the different pain points or symptoms they might be dealing with so that everyone’s shaking their head in agreement with what you’re saying.
At the end, you give the reader your conclusion (or steps to solve their problems), along with a nice little CTA for your new course.
How does this translate into a blog post series, though?
Simple. The first blog will be the series’ introduction. It primes them for the posts ahead and what they can expect to learn by continuing to come back. It’s a high-level explanation of what’s to come.
The middle posts go back to the meat of the topic. And, if you’re doing it right, with every additional post, you are ramping up momentum and building anticipation for the next one. Readers should finish the posts excited to learn more.
Finally, with the last post, you conclude all the most important points. You’ve strung readers along, and now they have all the information you’ve given them to come to one logical conclusion: Join your new course.
You’ve already established yourself as an expert up to this point. You’ve given the readers useful information that they can apply immediately to see that you’re legit. And the course is a logical ‘next step’ for them to continue their journey.
So how do you pick a topic for your series?
Select a topic that complements the course but isn’t the course outright.
For example, if your course was about freelancing/working from home, you could create a blog series on organizational tips and tricks to stay productive.
When the blog series is done, you could entice readers by asking them to use the new organizational skills they’ve learned to increase their earning potential with your work from home course.
At the end of the day, no matter what you choose, the series needs to build interest and demonstrate that the course will be a good investment.
Now, you’re probably wondering where you’ll find time to create even more content.
You can finish up a blog series with a little more speed by batching it. By focusing on one step of the content creation process at a time, you can get the whole series done more quickly.
Here’s how it works.
Step #1. Start brainstorming your blog series ideas.
Put pen to paper on any and every idea you have for your series.
Write down everything that comes to mind that’s related (or unrelated) to your course.
Think about what subjects will build interest in the class. Consider who your ideal reader/audience is. What images will you want to use? What links will be helpful for research? What quotes can you use?
Hopefully, when you are finished with this step, this process will point to some good ideas on the direction to take the series.
Step #2. Create a basic outline for the blog series.
You can either create every outline ahead of time for the entire series, or you can do them one at a time as you go through the series.
For example, your rough outline could look a little like this:
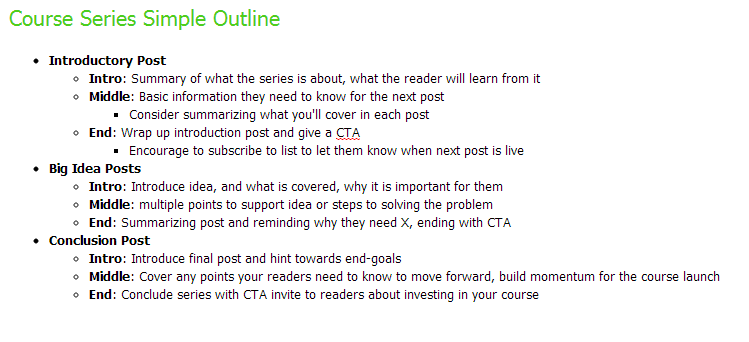
And remember, outlines can be rough. They just need to include the key points that you’ll cover.
Step #3. Begin the research phase.
Let’s be honest: Research can be a time suck, yes. But it’s a critical part of the batching and writing process.
Fortunately, Google can help speed this up. Take to the search engine to seek out all the parts of your outline that have some holes (or that you need additional information for). Once you find some good hits, pull out the most useful information from each.
Then, copy and paste that info underneath the corresponding bullet in the outline. Be sure to include the URL so you can cite or go back to the page if you need to.
This isn’t a method of stealing content, just a helpful tool to put all the information you need into one place. Replace the content with your own words and newfound knowledge from your research.
Step #4. Write your rough drafts.
Don’t be overly concerned with quality at this point. Instead, you’re looking to get information down on a page as quickly as possible. You’ll be able to come back and iron out the kinks later.
Write even more than you think you’ll need initially, because later during the editing process you’ll probably end up cutting back a lot of the weaker parts.
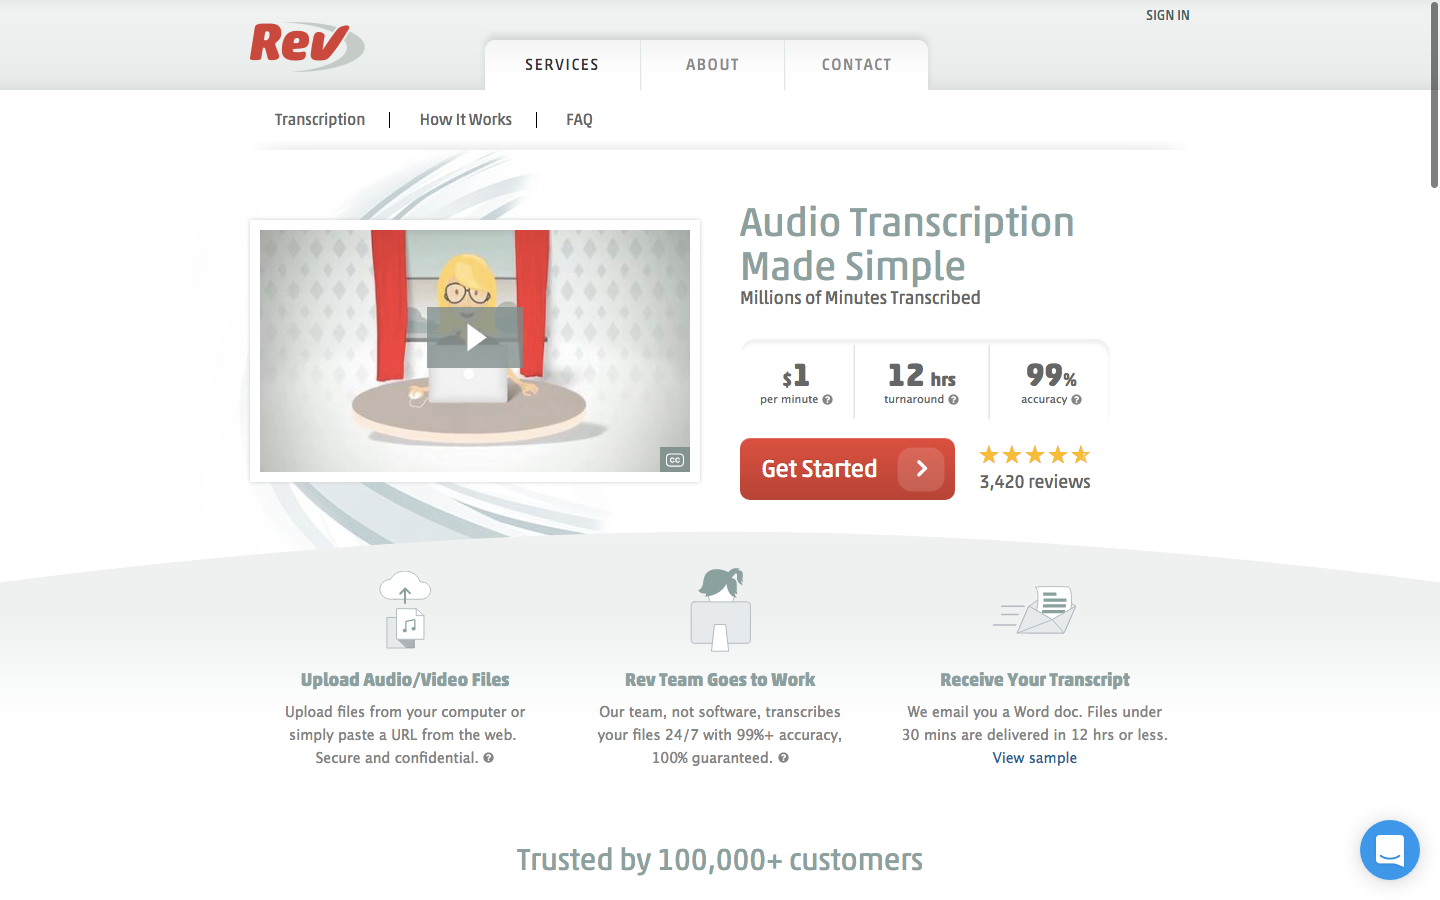
Want to crank it out even faster? Try voice dictation software. Simply dictate the blog into your mobile or computer mic, and then you won’t be slowed down by your slow fingers. There’s a ton of options out there, like Rev, that start at only a dollar per minute or so.
Step #5. Edit your rough drafts when finished with your brain dump.
Don’t kid yourself: You’re going to need some time to clean up these drafts.
When you’re all done with the first go of the drafts, take a break. Try to spend up to two days away from it to come back with fresh, discerning eyes. Then, get after it.
Read it aloud. Have someone else read it for you. Read it again. Make sure to include all the important links and images for the post.
Now you should be ready to hit the Publish button!
You can either schedule all the posts out ahead of time or publish one by one. Use the feedback you receive and incorporate it into your course (if you are still creating it).
Make sure to use the posts as a way to build your contact list by encouraging readers to subscribe (because they don’t want to miss the next post).
That means you can add little teasers at the end of each one to preview what they’re going to find out next. Then you can also include links to previous posts in the series so people can jump back-and-forth.
The good news is that you can even build a blog series right inside Kajabi. That way it’s easy to include a CTA at the end that will drive readers to your free report lead magnet or pipeline that you built out earlier.
Look for the Blog section under the Website tab when you’re logged in:
Then go ahead and click “Set up my blog.”

Here you can add a blog title and description. Click “Save” when you’re done.
At the top right of the page, you can start adding new posts. Add images, tags, etc.
Then, include your CTA or lead magnet at the end of the blog.
Ideally, you want to ‘funnel’ these people into a lead magnet. This is like the carrot at the end of the stick that you can use to give visitors something of value in exchange for their email address.
Eventually, the bulk of your revenue should come from the contact list that you’re constantly building. That’s because emails allow you to build up trust and credibility with people over days, weeks, and even months. That way, by the time you introduce your new course to people, there’s no hesitation to buy.
Here are a few of the most common lead magnet ideas to start with:
Free email courses are similar to the blog post series you just created. However, this time they’re a little more in-depth and scheduled for a preselected frequency.
For example, they could go out once a day, for every day the course is going on. People know when the emails are coming, and they are expecting them (which means they are more likely to open them).
Free email courses are another way of positioning you as an authoritative expert on your course’s topic. Email courses create a positive association in the minds of your audience, and the consistency of good information will enhance your credibility.
Best of all, they’ll lead people to want more (so you can naturally direct them to sign up for the course to get the full value).
The email content typically depends on your audience.
So for example, long-form, text-based emails are fine when you’re writing about dense information that people want to consume line-by-line. (Just like this very article you’re reading!)
Maybe your content isn’t flashy or image-heavy. That’s OK, it doesn’t have to be. Don’t change it just for the sake of the email. Many readers often prefer a straightforward, single-column approach.
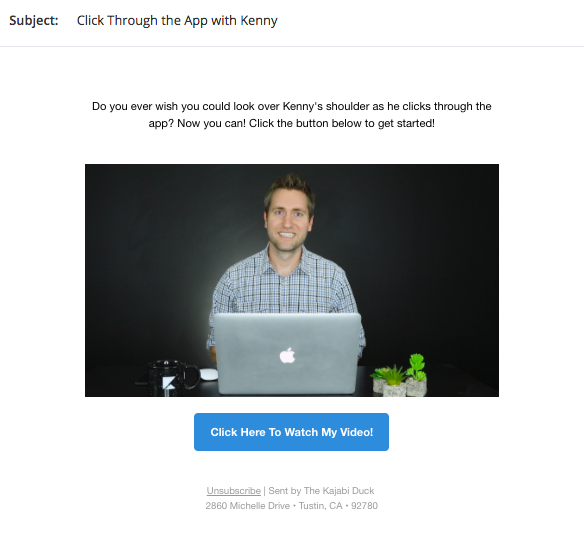
One excellent way to strike a balance between delivering good information and including visuals is through a simple ‘talking head’ video.
This way you can speak directly into a camera and give people a sense of who you are, what you stand for, and your style.
Even better, if you have old video content, you can repurpose it for these emails as well.
Here’s a perfect example of what one of these video-based email courses would look like:
Marketers who use videos grow their revenue 49% faster than those who haven’t yet caught on that videos work.
They show your audience who you are and put some life into your content. Creating an informative, engaging video is a great lead magnet to score additional emails.
Audio emails can also be a great alternative for people who are camera shy. This way you can read off old written content, repackage it as a high-quality audio sample, and allow people to quickly listen to your information while driving or commuting.
You can also include past presentations from PowerPoint or Keynote that will give your content a nice visual explanation so they can better understand what you’re talking about.
No matter which route you choose, don’t stress about being ‘too professional’ or polished. The content quality is what matters most here.
Checklists are a slimmed down variation on the free email course. In this case, you’re simply taking the ‘long-form’ information, paring it down a bit, and putting it into a more ‘actionable’ format.
Remember those organizational tips from the blog series we were talking about?
You can now use them to create a checklist of the best ways to be productive throughout the day. Or the top XX tips for a productive home office.
It’s like a shortcut that gives people exactly what they want as quickly and efficiently as possible. (As opposed to having to sift through a ton of emails or other dense information).
Webinars are one of my favorite personal lead magnets because they often convert at over a 20% conversion rate.
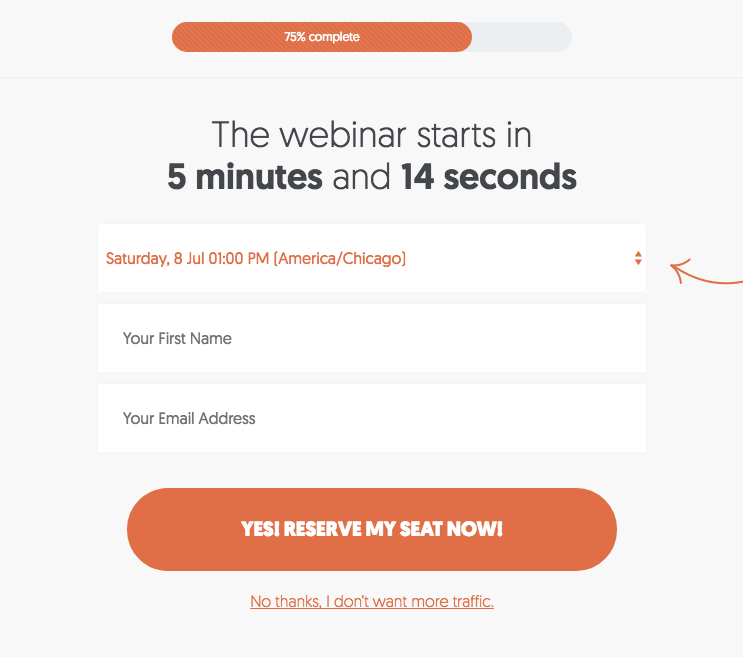
They also allow you to build trust and interact with others at scale. So instead of a one-to-one phone call where your exposure is limited, a webinar can help you hold the undivided attention of hundreds (if not thousands) of people for up to an hour.
The Q&A section at the end is often one of the best ways to answer questions that might be holding people back from buying your course immediately.
I love webinars for another sneaky reason, too.
You can use a webinar as a test run for a potential course.
Creating an online course does take a lot of work. So you’ll want to be sure that people are going to love the topic and information before you ever invest all that time and energy. A webinar can help you do a mini test run and gauge your audience’s feedback.
One way to start with this approach is to go back through your blog analytics. Which posts have performed well in the past and why?
Both webinars and live video are easy with Kajabi because you can embed live videos right on your landing page. Simply create a new Product (by following the steps outlined in the last section) and then create a new Category and Post for the video.
Then grab the embed share link to your video. Here’s what that looks like on YouTube:

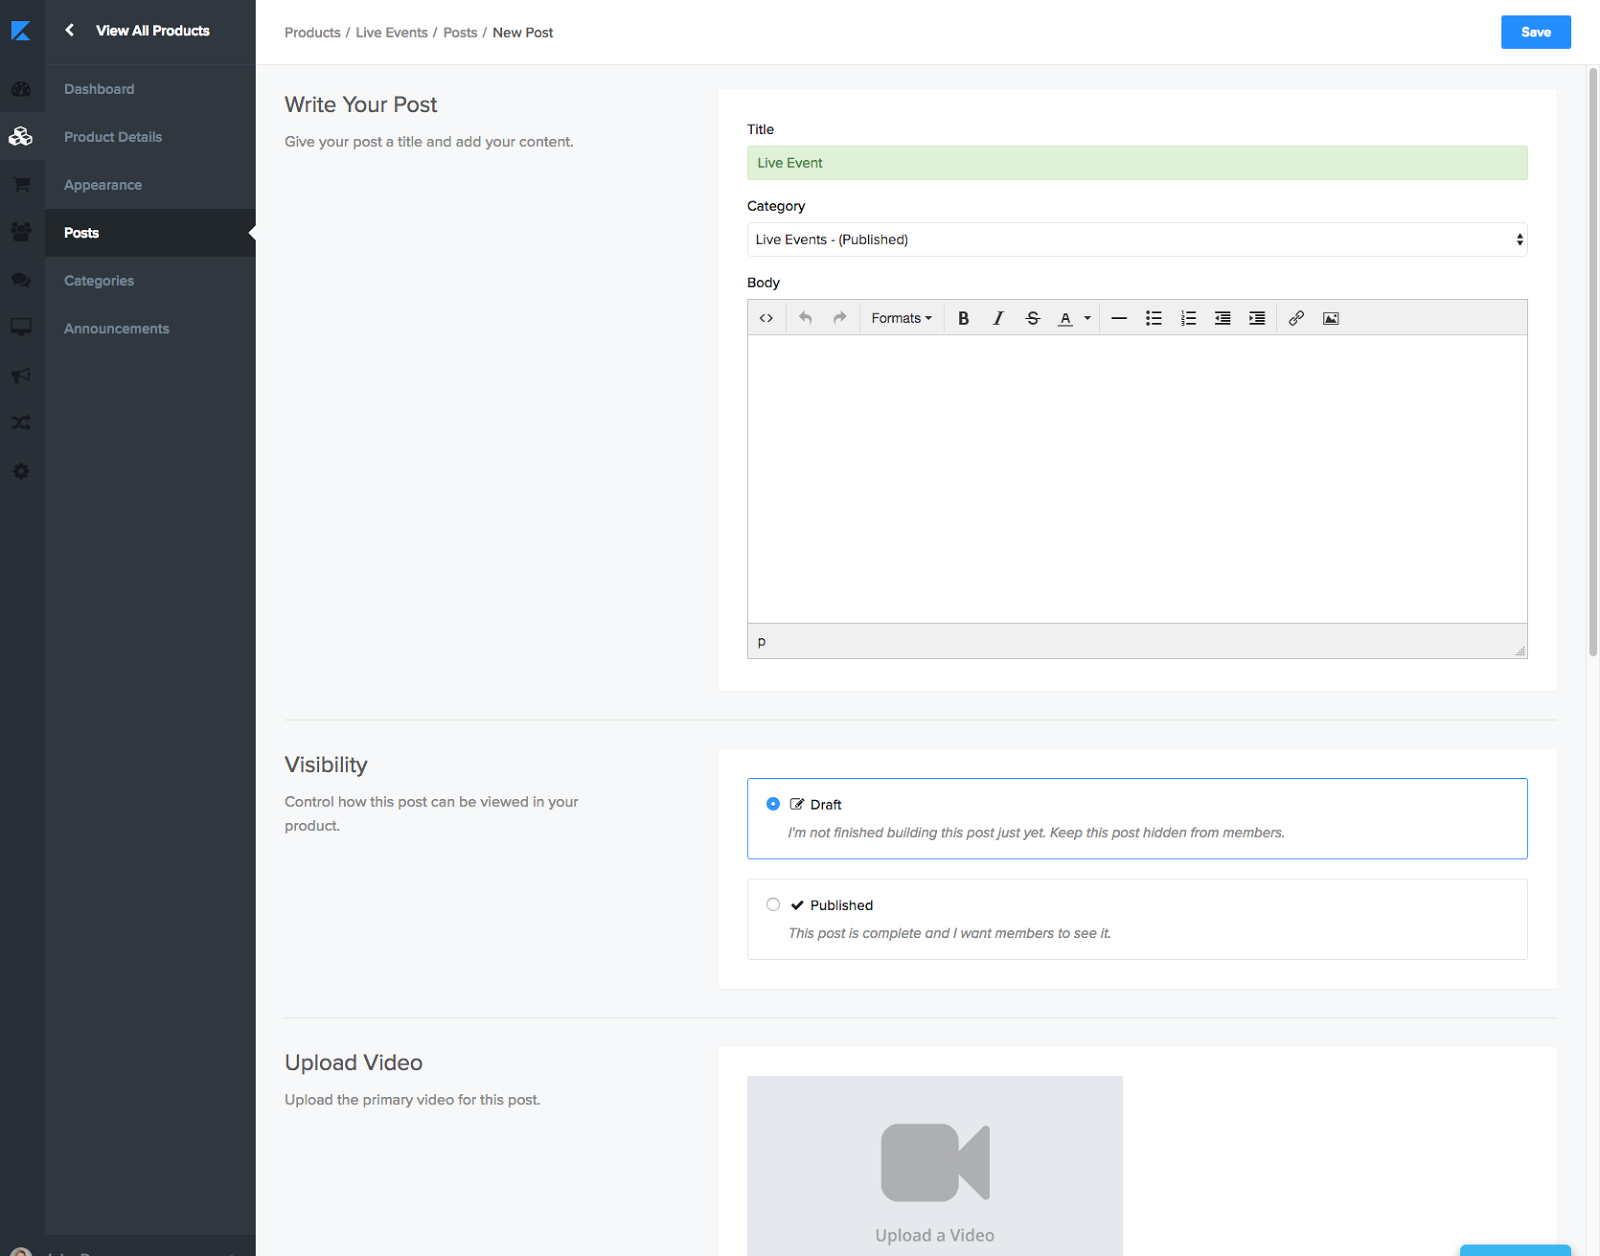
Head back to your Kajabi page and click on the source code icon that looks like two brackets facing each other: < >.
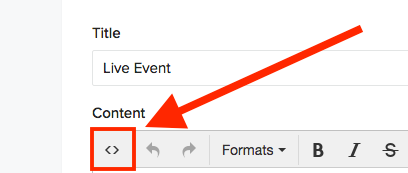
Then all you have to do is paste the code in and save your work.
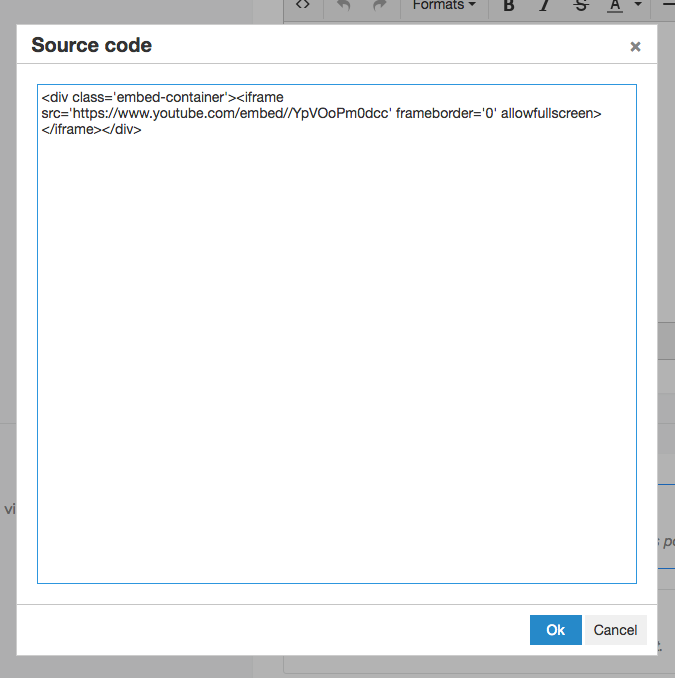
After clicking “Ok,” you should see your video pop up immediately.
After people opt-in for your lead magnet or sit through your offer, you can begin dripping out automated sales emails.
These are like a ‘secret weapon’ because you can increase engagement and product sales at scale across thousands of people, all without you ever having to lift a finger manually.
The best approach is to schedule these out in ‘stages’ or a specific sequence. For example, these steps should look just like any other sales approach:
- Contact: Leads here are in the “new prospect” bucket
- Engaging: Continue to communicate with the live lead
- Qualified: Identify the lead as someone who should be moved through the sales funnel
Be careful, though.
You need to take any previous communication into account. Otherwise, this approach can backfire quickly. So be sure to double check how people are being added to these lists, and more importantly, how and when you’re taking them off the list so they don’t see redundant messages.
Even though they are automated, they shouldn’t seem automated.
Bryan Harris used this approach to bring in $220,750 in just ten days. He took a small portion of his email list of people that had already expressed some interest in his course. He sent them his product hypothesis and then asked for their feedback. In return for their feedback? A pre-order link for his course.
He continued this process and eventually received 39 pre-orders (from a group of 229) — before actually ever having created a single lesson for it!
That was a 17% conversion rate, far surpassing his 10% goal. So he was encouraged to dive straight in and start building his course out.
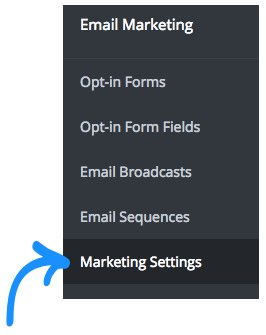
Kajabi can help with automated emails, too. From the Marketing tab, click Marketing Settings.
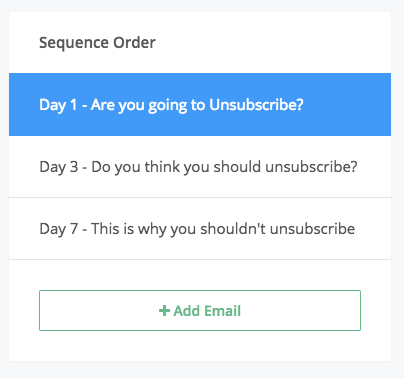
Then click on the email sequence tab and then “New email sequence.” Give it a title, then hit “Save & Continue.”
Now you can continue adding new emails and re-ordering them to come up with the perfect sequence.
Finally, pick which people or groups are going to get the email. Use the filter option to select exactly who you want.
Want to see how well the emails performed? Kajabi’s report feature will show you click through and conversion rates.
So best of all, you don’t have to guess what’s working (vs. what’s not).
You can see right here inside Kajabi which of your lead magnets are performing best so you can double down to skyrocket revenue.
Conclusion
It is time to get started with your own course.
Most people can’t afford to take on the massive amounts of debt required to go back to college. Many older people also can’t take the time away from their day jobs and families, either.
That’s why online courses are exploding in popularity. They’re the perfect mix of both convenience and affordability.
That means people are already out there, looking day and night for your expertise. They need your help and skills to solve issues in their life or learn how to do something better, more effectively, for cheaper.
They need help, and you can help them. Creating a new online course today can make that all possible.
What has your experience been like with online courses?
Comments (52)