
Most search optimization for blog posts revolves around non-technical aspects.
You write relevant and high-quality content that addresses your target audience’s interests and reach out to authority website owners to start a relationship and get backlinks.
But SEO isn’t limited to the usual on-page and off-page techniques.
You’ve got to get beyond keywords, link building, and blog post content. Only if you build a strong technical foundation of your website will it have the best chance of ranking in search engine results.
See, Google has become much more sophisticated. But, if you can help the search engine bots understand your website architecture, they will crawl and index your content easily. And, feeding information the way that search bots like will help you to extract excellent search results.
Are you wondering what the aspects that are a part of technical SEO are?
It includes optimizing your URLs, making your website’s navigation flawless with proper link building, fixing your website code, and using proper title tags or alt tags on images.
Now, I can understand if you’re getting nervous after hearing such technical terms, after all, blogging should be an easy social media medium.
That’s why in this article, I’ve prepared a technical SEO checklist that is friendly for blog post beginners but still offers your readers a positive user experience.
Ready to grow your organic traffic with technical SEO?
Then, let’s begin.
1. Crawl your website with Screaming Frog and clean your untidy URL structure
A stellar site architecture will get you the much-needed love from search engines.
Start with crawling your website, by downloading Screaming Frog (a limit of 500 URLs in the free version). It will fetch key onsite elements, finding duplicate page titles, meta descriptions, as well as reviewing your URL structure.
To get started, enter your root domain in the blank box and press the start button.
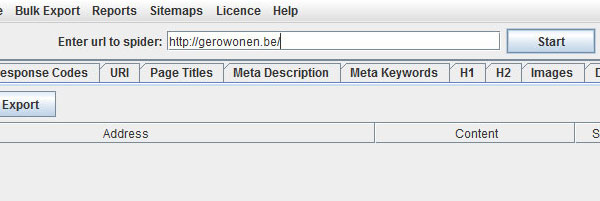
The tool will process results quickly, depending on the size of your website. There’s a progress bar at the top that you can check.
Once analyzed, start by checking the ’Response Codes’ tab. It will show you the HTTP status codes of your URLs.
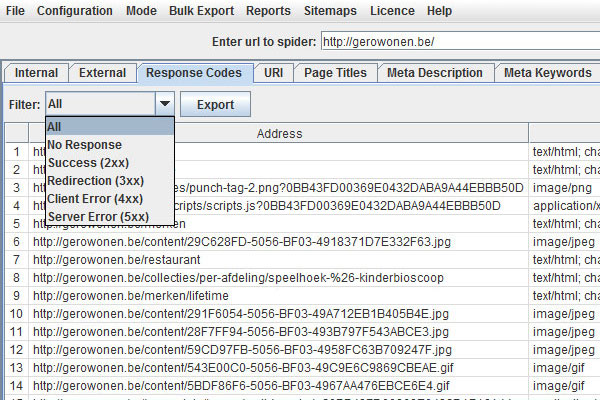
I’ll explain the importance of these status codes and redirects in point #2.
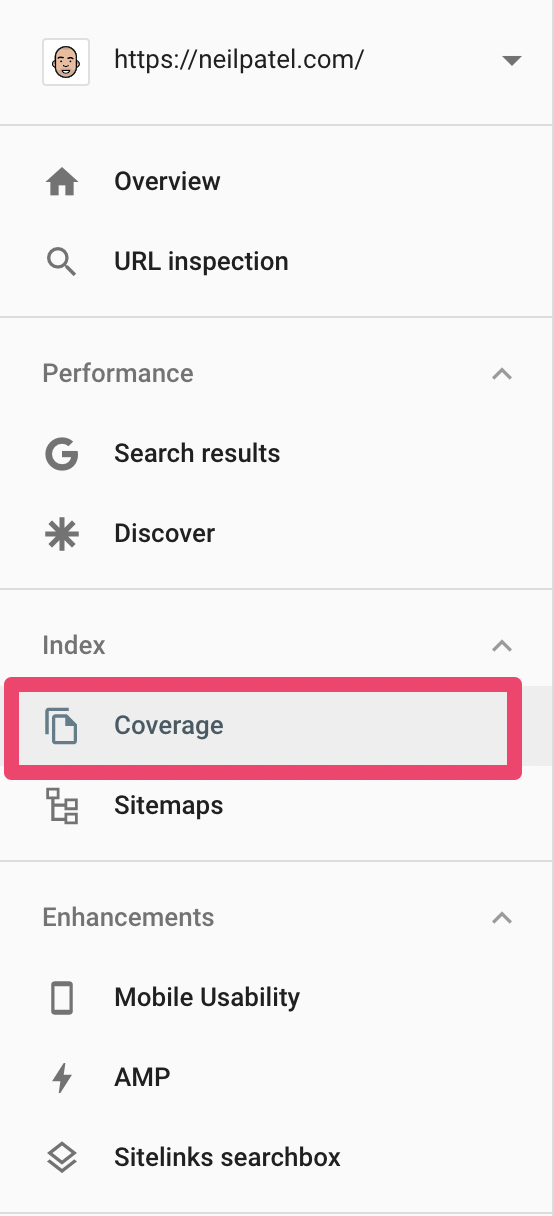
You should also cross-check your website’s crawl errors by logging into Google Search Console. The crawl errors can be found in the Index Coverage Report of the new Search Console design.
Next, check the tool’s URL tab and sort the column by length.

A good URL for all search engines is short (4 to 5 words) and explanatory of the content inside. Use your title tag and meta description for more elaboration.
Spot any unnaturally long URLs and non-ASCII character URLs that can cause indexation problems. Screaming Frog has filters to sort such URLs at the click of a button.
Ensuring that you have a compelling and punchy title, appropriate image size, and a persuasive meta description is a part of on-page SEO. So, I won’t discuss that, except to remind you to properly define the alt tag so images are recognized and valued in your blog post. The tool has tabs and filters for these items.
A critical aspect of the tool is creating an XML sitemap – a website roadmap for search engines to show how your content is organized. This is essential for search results.
You’ll need to use the top navigation bar to find the feature under Sitemaps > Create XML Sitemap.
A large website can have multiple sitemaps. because one XML sitemap can’t have more than 50,000 URLs and the file size of the sitemap should be less than 10 MB.
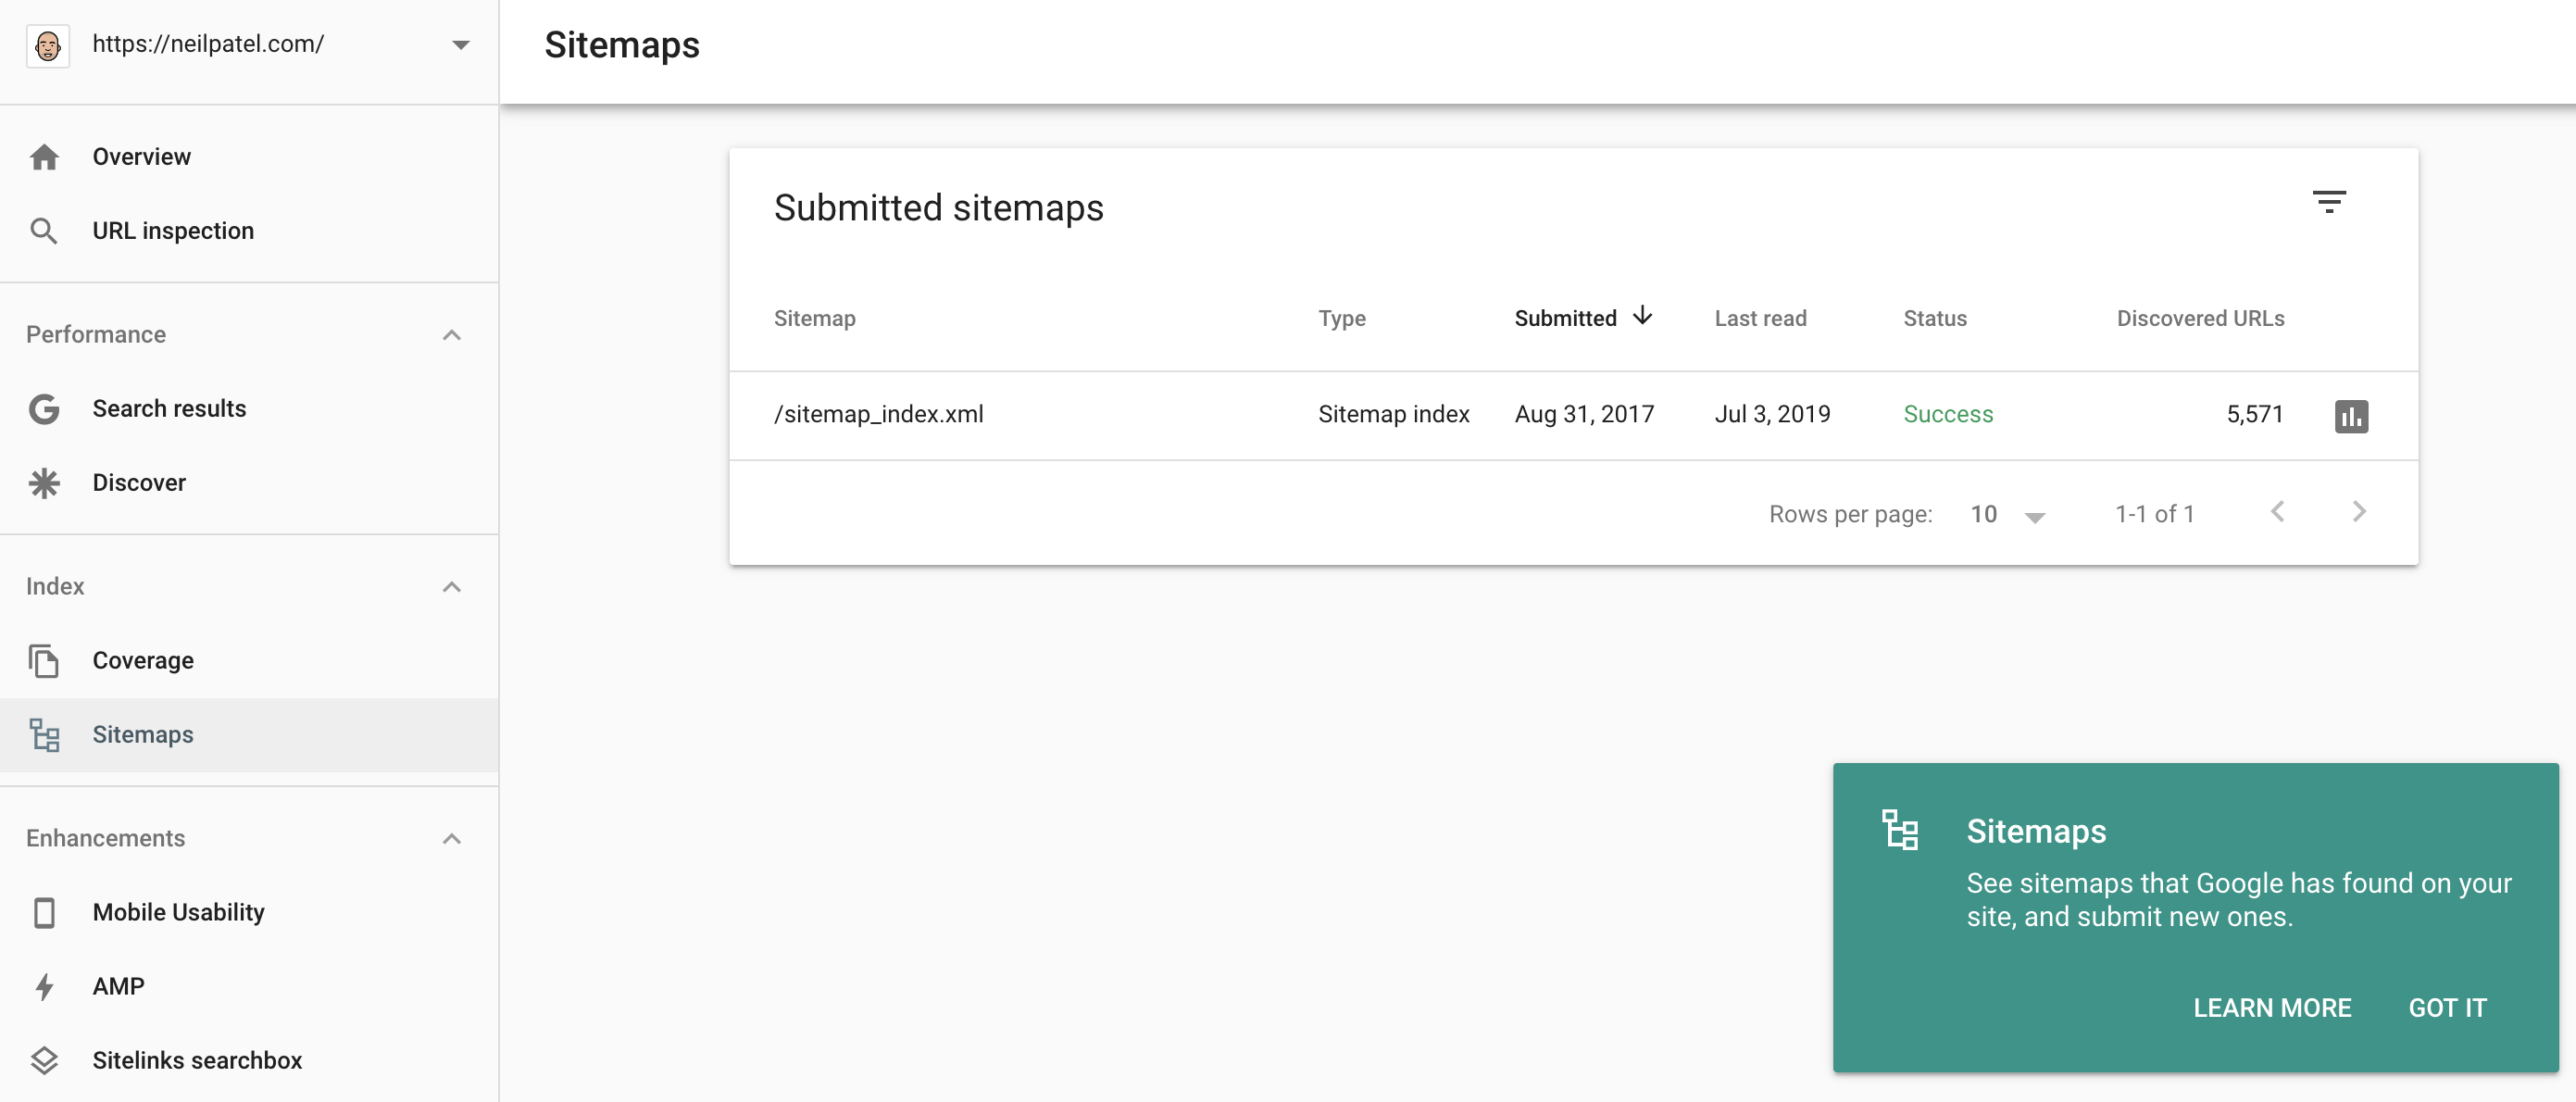
Once created, you can submit the sitemap from Google search console, using “Crawl >> Sitemaps >> Add/Test Sitemap.”
I’d also advise you to create an HTML sitemap that can be read by the users (also helps search engines). If you’re on WordPress, you can use Yoast’s SEO plugin for creating an HTML sitemap.
Way back in 2007, Google and Yahoo united to use a system for the auto-discovery of sitemaps – without the need for you to submit your sitemap to all search engines.
So, you also need to share your sitemap location under your website’s robots.txt file. This article explains how you can create a robots file, integrating your sitemap location.
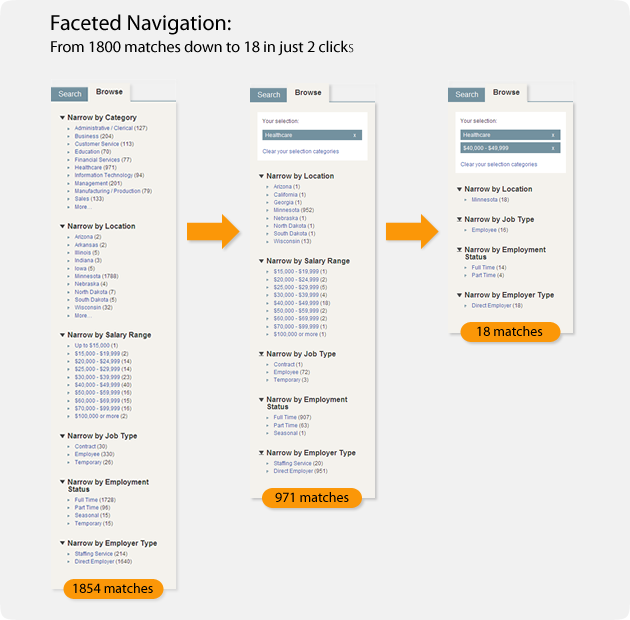
Pro Tip: Silo your website content to help search engines understand what your website is about. This means that you break your content into easily understandable categories and that all of your website pages are accessible within 3-4 clicks.
The pages that present deeper than 4 clicks might face difficulty in getting crawled, resulting in poor search results. So, use the right filters and a faceted navigation. You might just narrow down millions of results to the essential few in a couple of clicks.
2. Properly implement redirects and fix your broken links to optimize your crawl budget
Good link building starts with making sure people can find the content. Let’s talk about the most important status codes – 301, 302, and 404.
Start with understanding how to use the correct version of redirects when link building. Many webmasters get confused between:
- 301 – a permanent redirect that passes 90-99% of the original page’s authority.
- 302 – a temporary redirect that indicates to the search engine that the original page will be restored soon.
If you use a 302 redirect instead of 301, then you’re going to confuse search engines. And, if a 301 redirect stays for a while, you’ll lose some traffic.
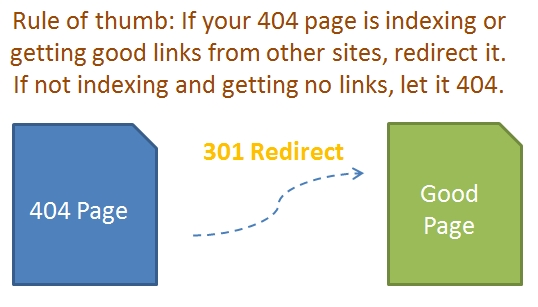
As a rule of thumb:
If you’re no longer willing to have a page on your website, then 301 redirect it to a relevant and updated one.
You should also pay special attention to the pages that show a 404 error code (found through Google Search Console and Screaming Frog in point 1).
They might be your website pages that:
- have been moved to new locations,
- Were incorrectly linked by other webmasters,
- Had URLs deleted from your website.
The bottom line is that these incorrect URLs waste Google’s time, indexing non-existing content on your website damaging your search results.
How?
Google allocates a crawl budget to every website, based on their Page Rank (it’s an internal metric used by Google search team, not the one that you see).
If you waste your valuable budget on links that don’t even exist, then the bandwidth to scan important URLs will become limited, ultimately meaning, search engines dismiss it and people might not find your latest blog post as easily.
So, either create a user-friendly 404 page that shows your brand’s personality or 301 redirect the 404 error page to a relevant page on your website to preserve link juice.
To be sure that Google crawls your website’s most important URLs, you need to have meaningful and user-friendly internal linking. Naturally, use keyword anchor text and channel your users, as well as bots, to other relevant pages in an article.
You’ll build keyword relevancy and vastly improve your website’s crawlability.
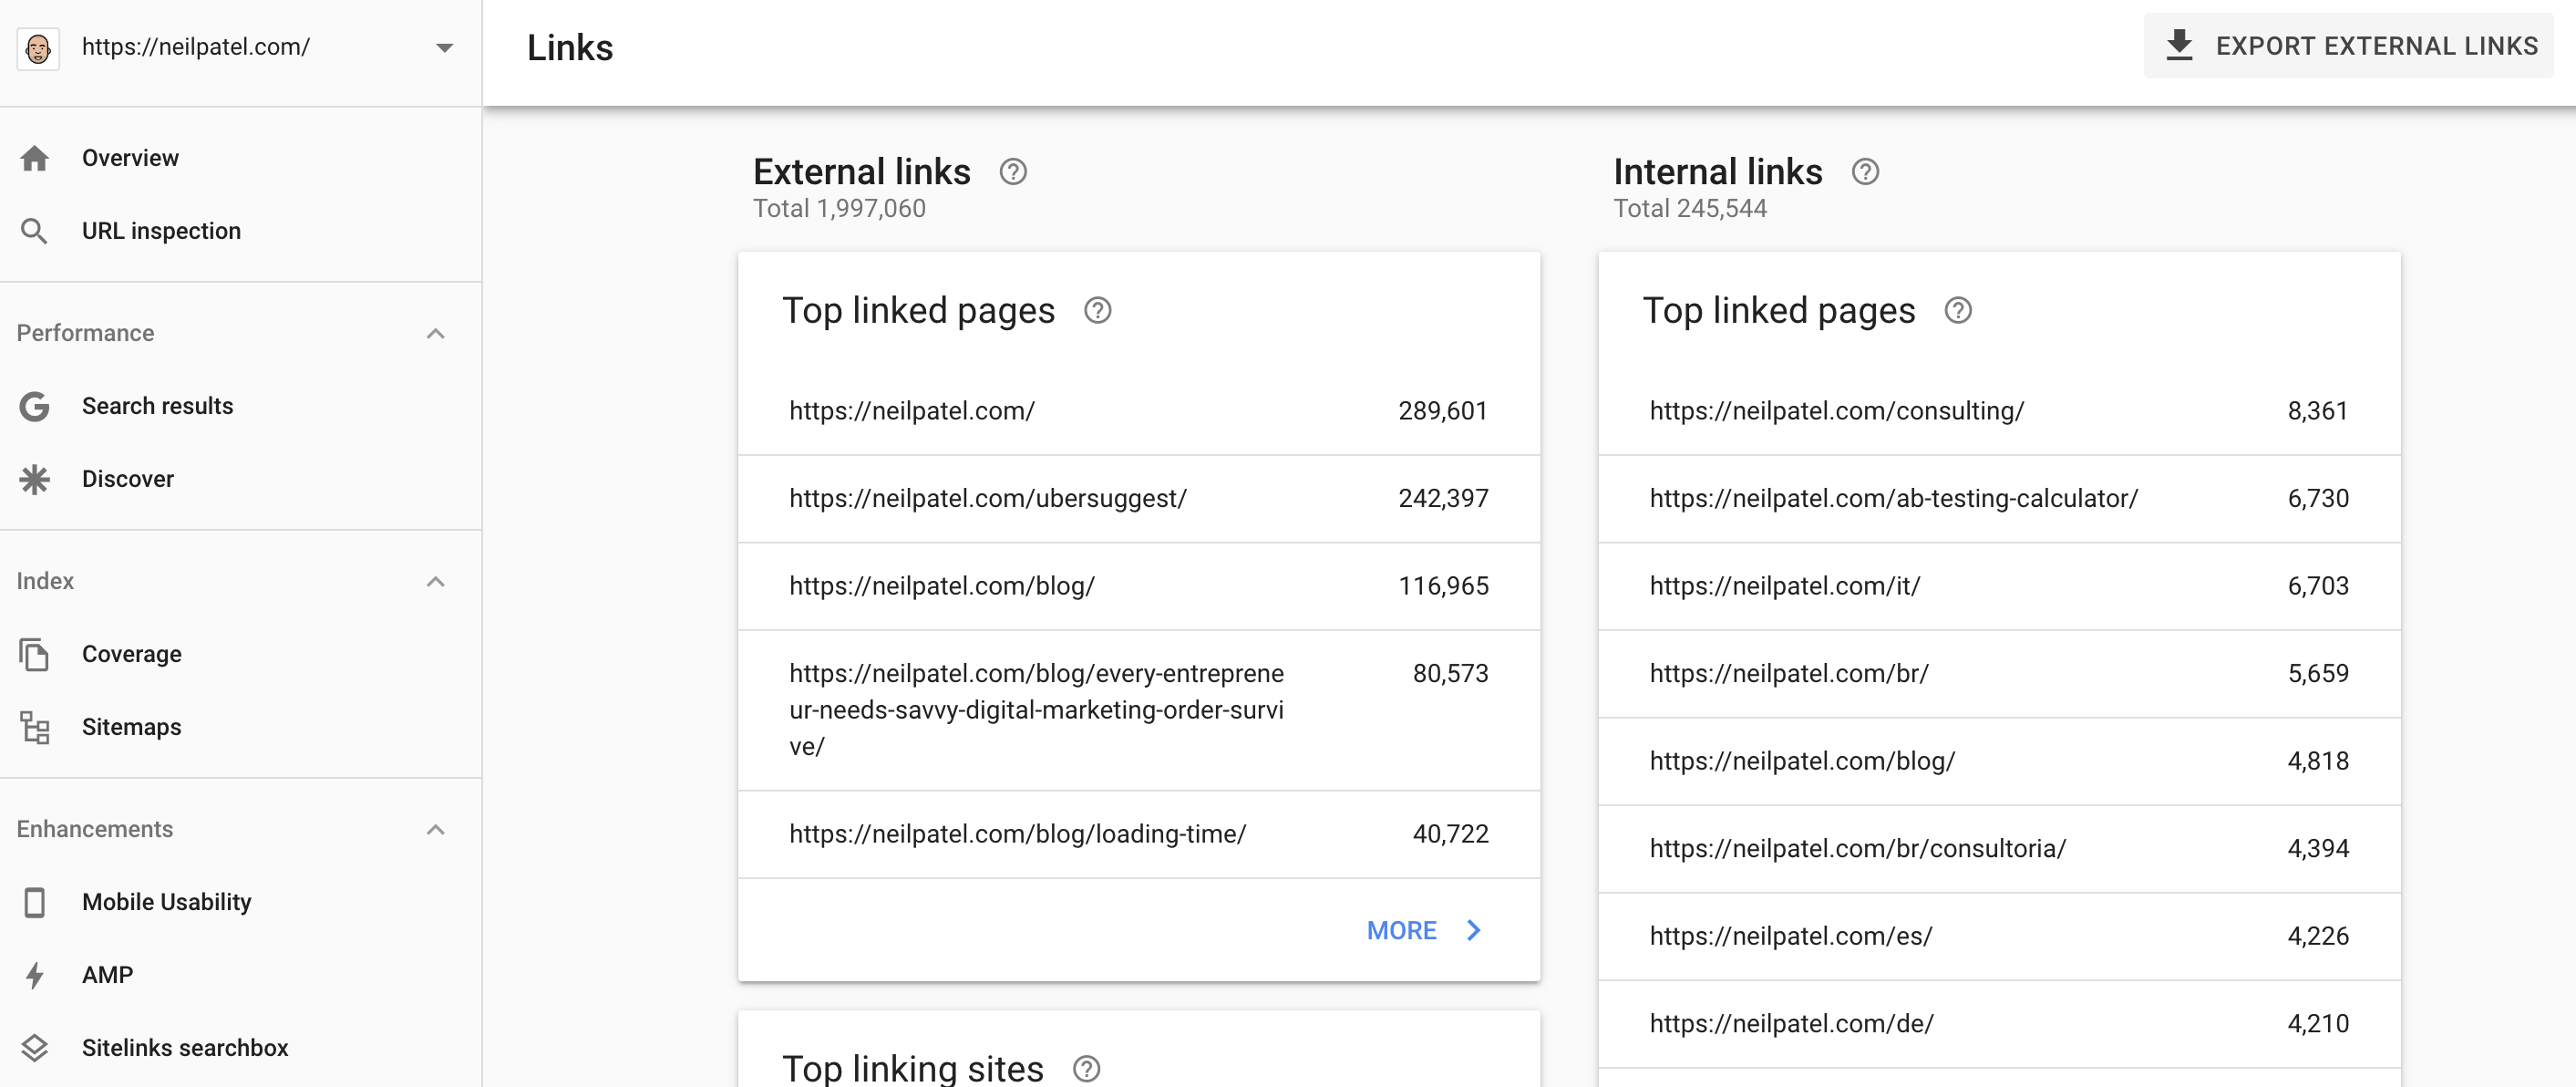
If you want to determine which pages are the most important (based on internal links), you can access your internal link report, inside Google Search Console. Understanding this will help you in future link building too.
In their analysis, HubSpot found that their 404 pages were actually resolving a 200 response instead of a 404 server response. This means that they were asking Google to crawl and index their 404 pages.
Moreover, they also found many incorrect inbound links from other websites. For example, their URL – https://www.hubspot.com/products/inbound-marketing/ had 370 links (including a .gov link). And, such a page didn’t even exist on their website!
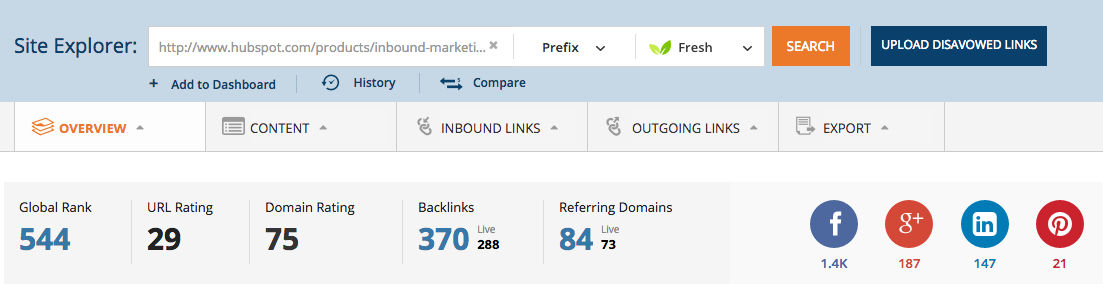
After scanning their ‘not found’ page, they discovered that it had over 8,000 backlinks from more than 2,000 different domains.
Woah!
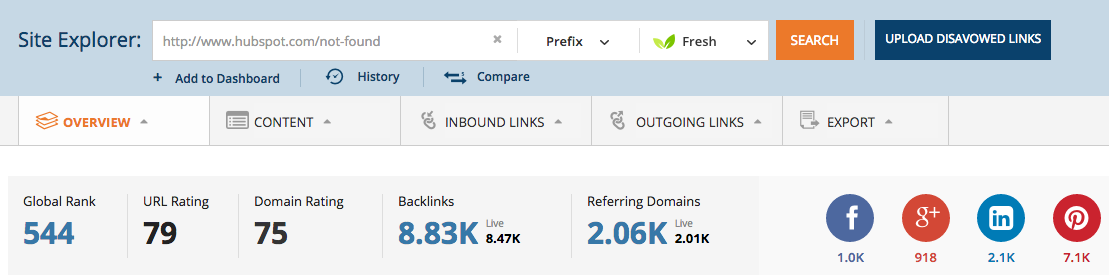
They removed the ‘not found’ page so that it goes to a 404 page. And, they set up 301 redirects, sending searchers with incorrect URLs to relevant pages on their websites.
3. Remove junk from your code and ensure that your site loads fast
Unless you’re living in a cave, you already know the importance of loading your website fast.
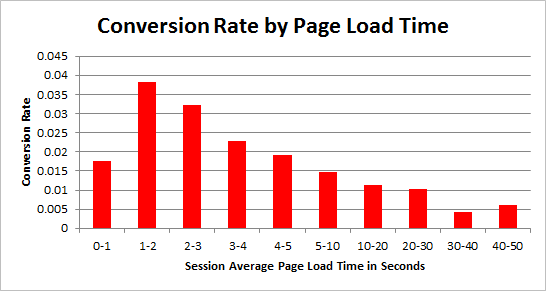
Every second delay can cost a 7% loss in conversions. You want search engines to find you, find you fast and then load as quickly as possible.
And, higher speed is also correlated with higher search rankings.
But, 40% of people will close a website if it takes more than 3 seconds to load. By speeding up, you can deliver answers to people with their low-attention spans. You’ll get more engagement, higher user experience, and higher rankings.
Let’s start by understanding the issues plaguing your website, with Google’s PageSpeed Insights tool. Just plug your URL inside the tool and hit the “Analyze” button for insights on how a search engine sees your site.

A score above 80 is fine. But, you should consider fixing the issues presented by the tool.
If you want the exact time that it’s taking to load your website, then go to Pingdom and take their speed test.

You’ll get your website’s load time, along with the page size, grade and the number of requests your website is sending.
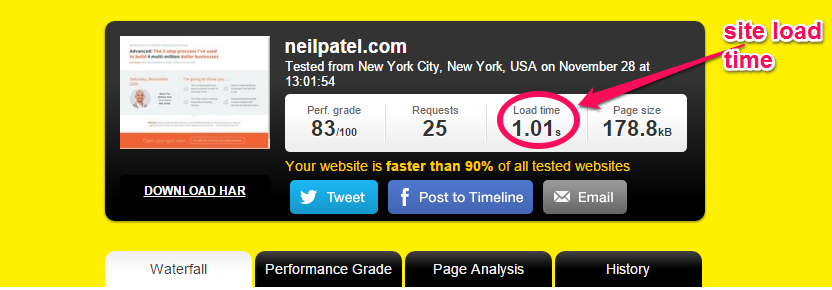
If your website loads in 7+ seconds, you need to work on the recommendations suggested by the tool.
Start with installing CloudFlare – a free Content Delivery Network. It can save 60% of your bandwidth and substantially reduce the number of requests sent by your website.
Next, WordPress users can install a cache plugin, like W3 Total Cache.
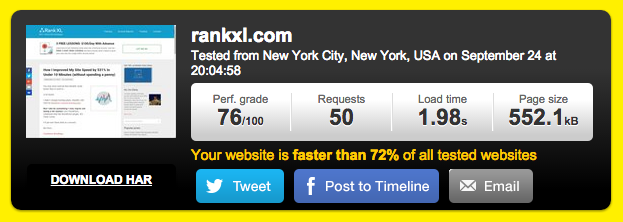
Just by making these couple of changes, Chris managed to shave 8 seconds from his website loading time, from 9.18 seconds all the way down to 1.98 seconds.
Many other common problems cause slow loading time negatively impacting your search engine success. Venture Harbour has done a great job at compiling 22 resolutions for improving site speed here.
Note that improving your website’s load speed on mobile and desktop involves different steps. Since a great mobile experience is equally important, check out some tips for speeding up your mobile website on this mobile landing page article.
4. Resolve duplicate and thin content issues
Thin and duplicate content issues surfaced after Google’s 2011 Panda update that penalized websites for low content quality.
Duplicacy confuses search engines that are trying to find the most relevant page on your website and you might lose search traffic.
According to Matt Cutts, about 25-30% of the web is duplicate content.
How do you fix duplicate content issues?
Start with scanning your website with Siteliner. It will crawl up to 250 pages and show you the duplicate content, sorted by percentage match.

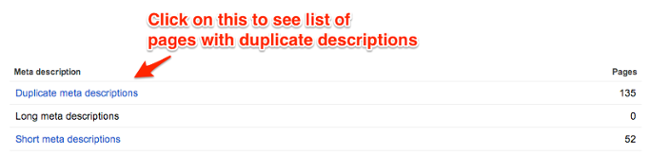
You can also use the Google Search Console to check for duplicate issues. Head over to “Search appearance >> HTML improvements and click on the number to get the specific duplicate content cases.
Depending on your situation, you can resort to any of the following 3 steps for resolving duplicate content issues:
1. Implement “noindex” tags – If you’re facing duplicate content issues due to pagination, then you can set the meta robots tag value to “noindex, follow”. This ensures that search engines crawl the links on the specified page, but will not include them in their index.
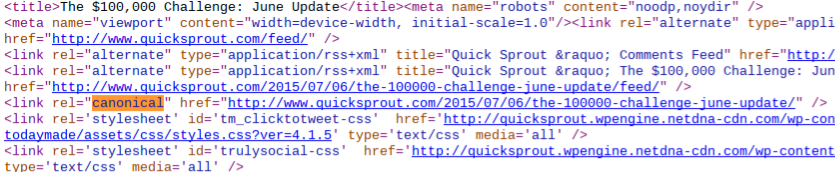
2. Implement a rel=“canonical” tag in the <head> of the duplicate page – This is a way of showing the preferred version of your page to Google.
And, it resolves the unintentional duplicate content issues created as a result of session IDs, affiliate codes and URL parameters.
Here are 3 URLs that will take a visitor to the same page, but might get indexed as separate pages in search engines and lead to a penalty:
- neilpatel.com/blog/13-secrets-thatll-boost-your-facebook-organic-reach/
- neilpatel.com/blog/13-secrets-thatll-boost-your-facebook-organic-reach/?sessionid=5349312
- neilpatel.com/blog/13-secrets-thatll-boost-your-facebook-organic-reach?ref=email/
3. Delete or reduce the quantity of duplicate content – This is a simple solution if it’s possible to implement for you.
5. Get the edge with rich snippets in SERPs
Have you heard of schema markup?
It’s a structured data vocabulary standard that is recommended by most search engines.
The search bots use this data to understand your content, categorize your pages and show rich snippets in SERPs. Schema markup isn’t a search ranking factor, but can positively impact your CTRs.

While schema isn’t new, it involves manual labor, so many webmasters don’t implement it. In over 200 million page crawls by Raven, 80% of pages weren’t using schema microdata.

You can get started with Google’s Markup Helper. It’ll take you step by step through the process of tagging data to a URL. You can go through this detailed schema markup tutorial.
If you’re on WordPress, the Schema Creator plugin can also help in feeding some values.

Conclusion
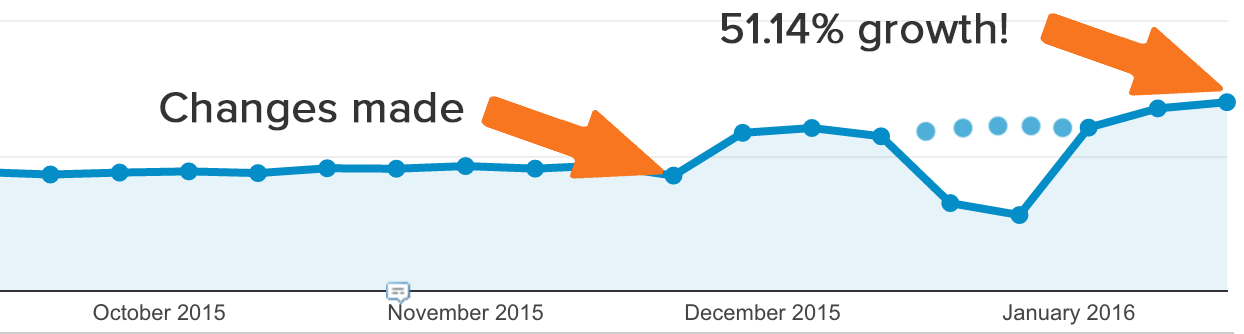
Don’t undermine or underestimate the importance of technical SEO to improve search results. HubSpot managed to increase their traffic by 51.14% in just one month, by making technical SEO changes to their websites.
The 5-point framework in this article is easy to implement for beginners. And, it will lay a strong foundation for your SEO efforts.
Social media won’t simply send your blog post viral. You need to give search engines the foundation with the right title tag, alt tag, and all the right link building components.
Prevent duplicate content and use the tools discussed to improve traffic because a search engine sees your site as most relevant to any user experience.
If you’re still confused with a technical SEO concept, then I am here to help.
What’s the number one problem that’s stopping you from conducting a technical SEO audit of your website?
Or if you’re a technical SEO expert, then please share any additional tips in the comments below.
Comments (56)