Pinterest is one of the most popular social networks and most visited sites on the web.
In fact, there’s evidence to suggest that the platform has over 100 million active users.
What makes the social media platform even more interesting is the fact that they’ve recently allowed marketers to advertise on Pinterest.
Because Pinterest is a new advertising platform, competition levels for you and me are still relatively low.
This represents a massive opportunity for people who work in content marketing.
In this article, we’re going to take a look at how you can take full advantage of the advertising capabilities provided by Pinterest and how you can use this social media platform to reach some of your content marketing goals.
We’ll look at the specific tactics you can use to ensure your ads are shown to the right people via the social network darling.
We’ll also analyze how you can create ads that will convert and bring you revenue.
By the end of this post, you’ll know more than most marketers about promoting yourself on Pinterest.
Let’s begin!
A very brief look at how Pinterest works
If you’re new to the world of Pinterest, you might not know exactly how the social media platform works.
Pinterest describes itself as a ‘bookmarking website.’
This means that people can ‘Pin’ whatever they have found on the web, on their Pinterest ‘Boards.’
They can then use Pinterest as a means of sharing their ‘bookmarks,’ or just as a way of saving things for later reference.
People in search of new content on Pinterest use the search bar, to see what other people are bookmarking.

Because of its collaborative nature, 96% of Pinterest users use Pinterest to research what they’re buying.
On top of that, 87% of people report Pinterest helped them to decide what to purchase – meaning they acted upon the information they discovered on the social network.
What kind of audience does your business cater to?
Before we go explore featuring an online ad on Pinterest, it’s worth first considering the kind of audience your business caters to and how the social media platform might work for your content marketing strategy.
That’s because Pinterest is made up of a fairly large user base, but that user base is primarily heavily weighted by of a certain demographic.
If you look at the stats, you’ll find that the majority of the audience within Pinterest is female.
Hard metrics tend to vary, depending on the data you look at and when it was compiled.
Here’s a chart from 2014 mentions how a whopping 80% of the user base was estimated to be female at that point in time.
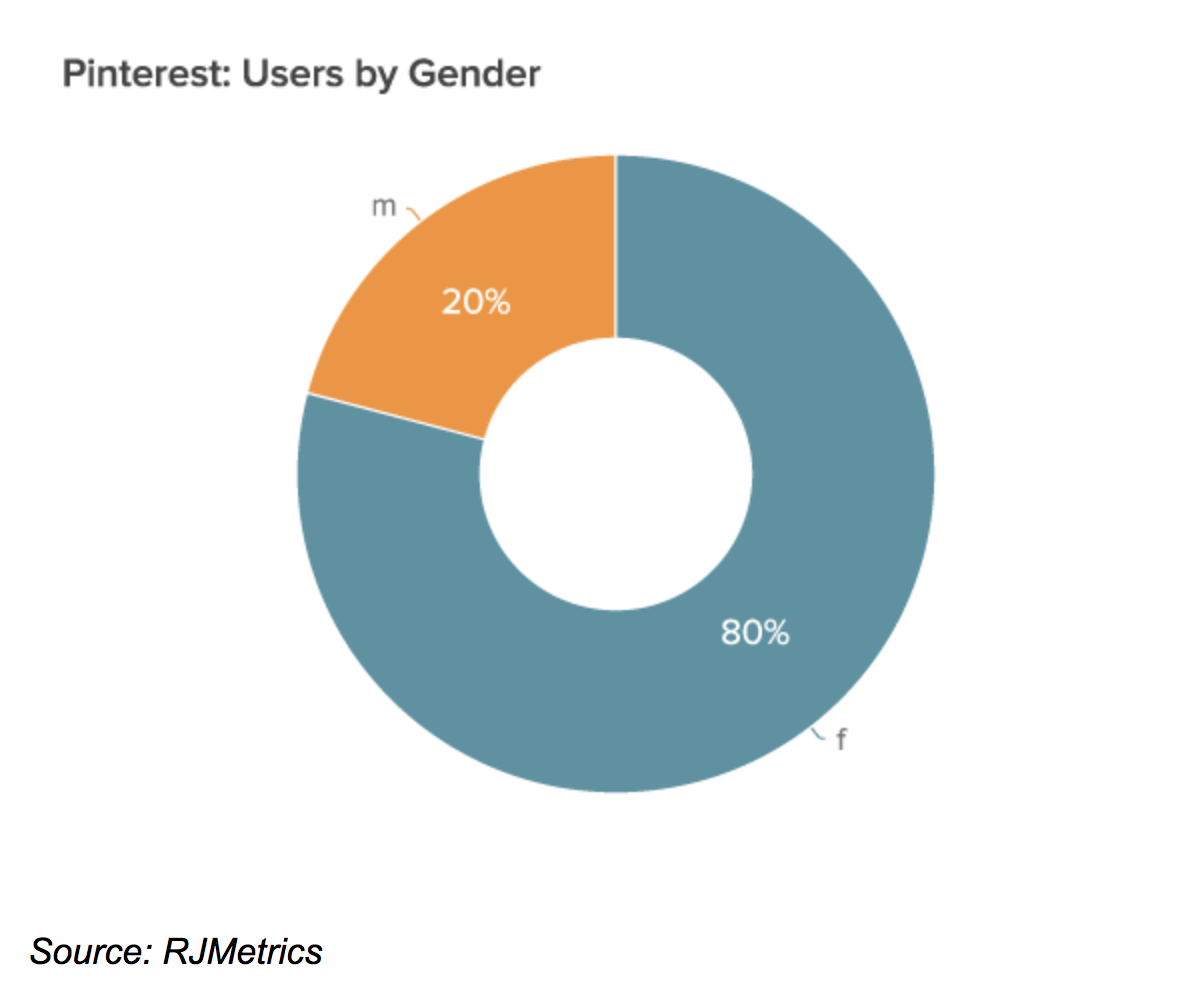
The same source also mentioned how it was mainly the female users of the social media platform that were actually interacting with the site’s content.
The chart below shows how, 92% of the Pins were posted by females.
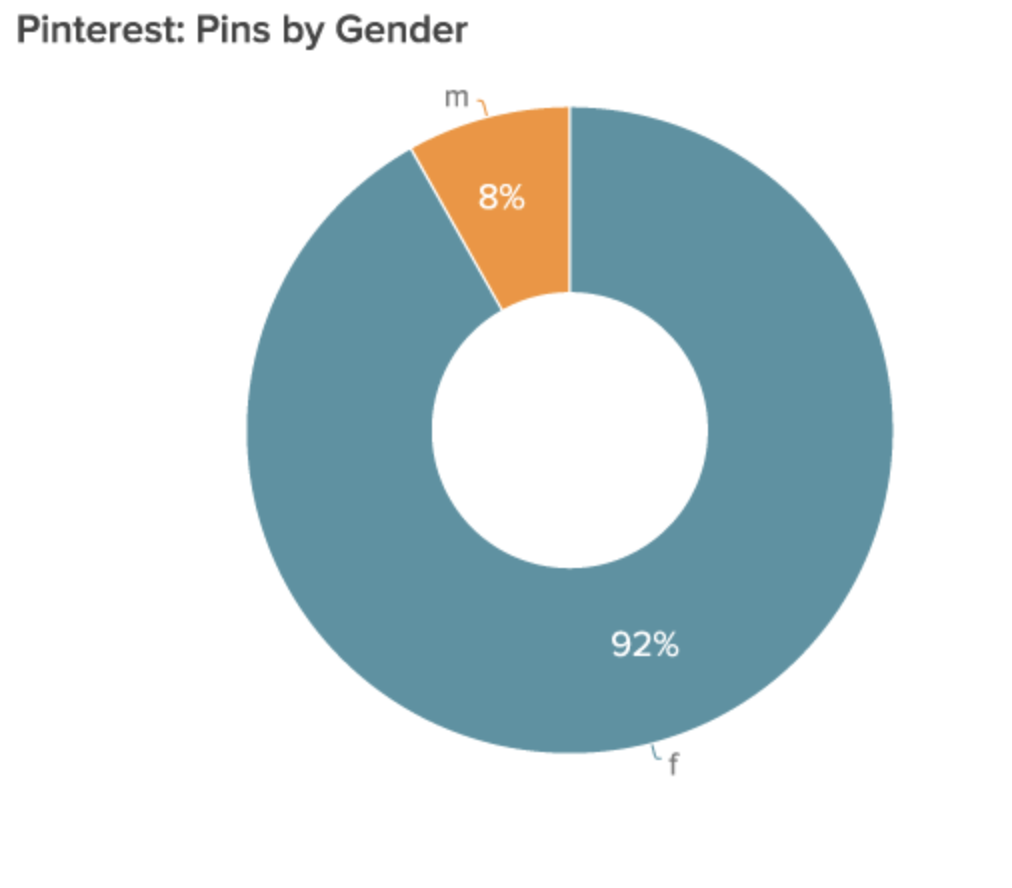
Hello Society, found similar data, after doing some of its own research.
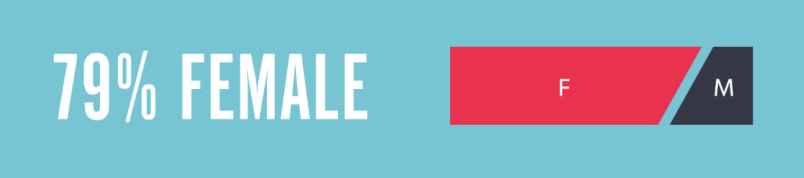
Upon studying the ages of those on the social network, Hello Society learned that there was the following distribution.
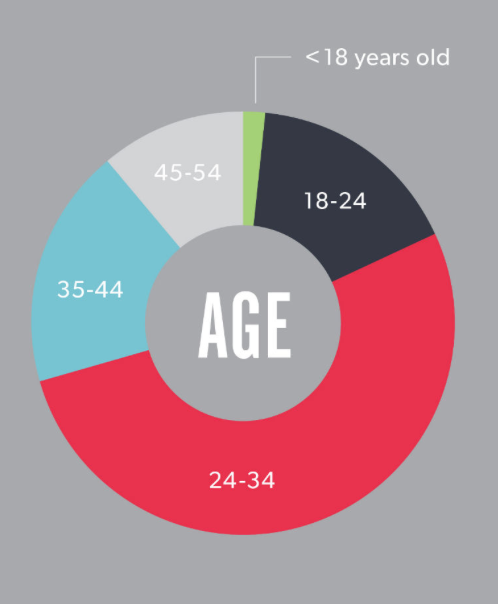
It is worth knowing the above, as you might struggle with the paid traffic option provided by Pinterest if your audience is completely different than what has been mentioned.
Of course, that does not mean that your online ad campaign on the social media platform won’t work.
It is just something to keep in mind should you see poor results on the platform – when compared to Facebook or AdWords.
Despite this, you can always use the targeting options provided by Pinterest to ensure that whatever you’re promoting gets in front of the right people – regardless of the stats.
In fact, if you search ‘Bob Villa,’ you’ll see that they used Pinterest to increase the amount of males visiting Bob Villa-related websites.
They managed to boost the number of male ‘pinners’ visiting their website by 20% by creating ‘Boards’ dedicated to males only.
So, though the size of certain demographics will be smaller on the social network, there’s still potential for most markets.
As with any paid traffic platform, it is essential that you have a clear sense of who your audience is ahead of time.
If you don’t know who you’re going to be targeting, you’ll end up wasting a lot of time and money.
When you know who your audience is, to a very detailed level, you’ll have a better understanding of what images to create and how to populate your Pinterest profile and Boards.
You also have a better sense as to what kind of messaging to use within your description.
I’ve discussed many times before how you can develop a good sense as to who your target audience is.
When doing so, I’ve mentioned how you can and should use Buyer Personas to get the job done.
Creating such a persona revolves around you asking questions that reveal the nature of your customers.
Such questions reveal the struggles your potential customers face, what they enjoy doing, what they hate doing and where they eventually want to be in the future.
The questions also reveal some of the obvious things too, like age, gender and career choices.
If you already have a popular Facebook Fan Page, you can use the Audience Insights tool to reveal the kind of demographics your business currently appeals to, you can then translate that information over to Pinterest.
However, if you already have a popular Pinterest Board, you can use the Analytics provided by Pinterest to discover who your audience is.
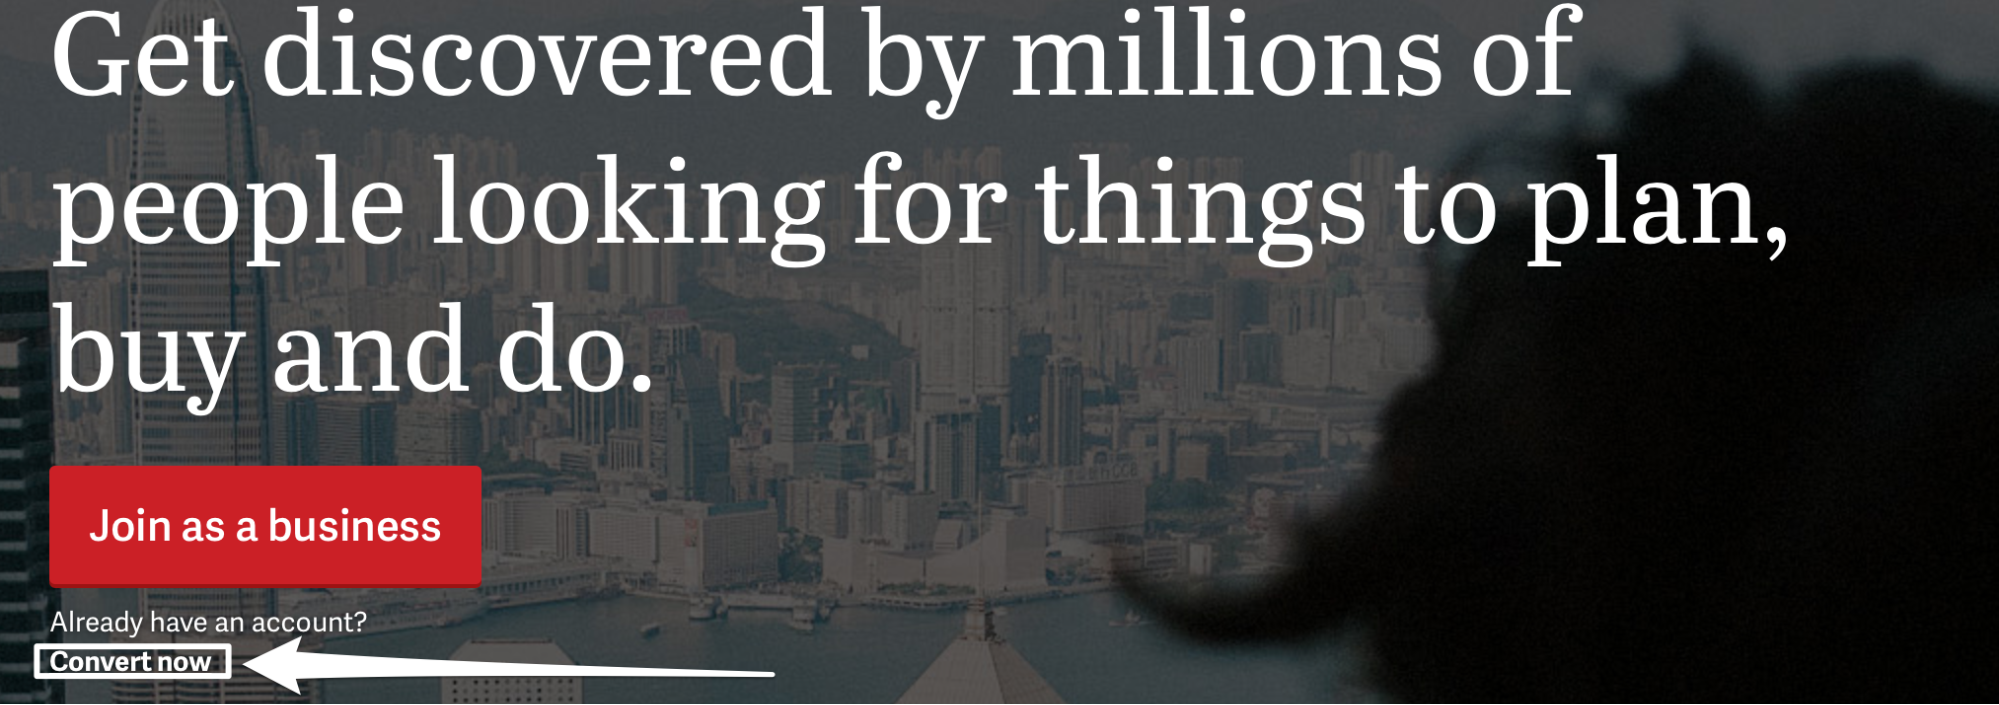
To do that, go to business.pinterest.com.
Click on the link that says ‘Convert now’ and convert your Pinterest account to a business account.
Then enter in all of the relevant information.
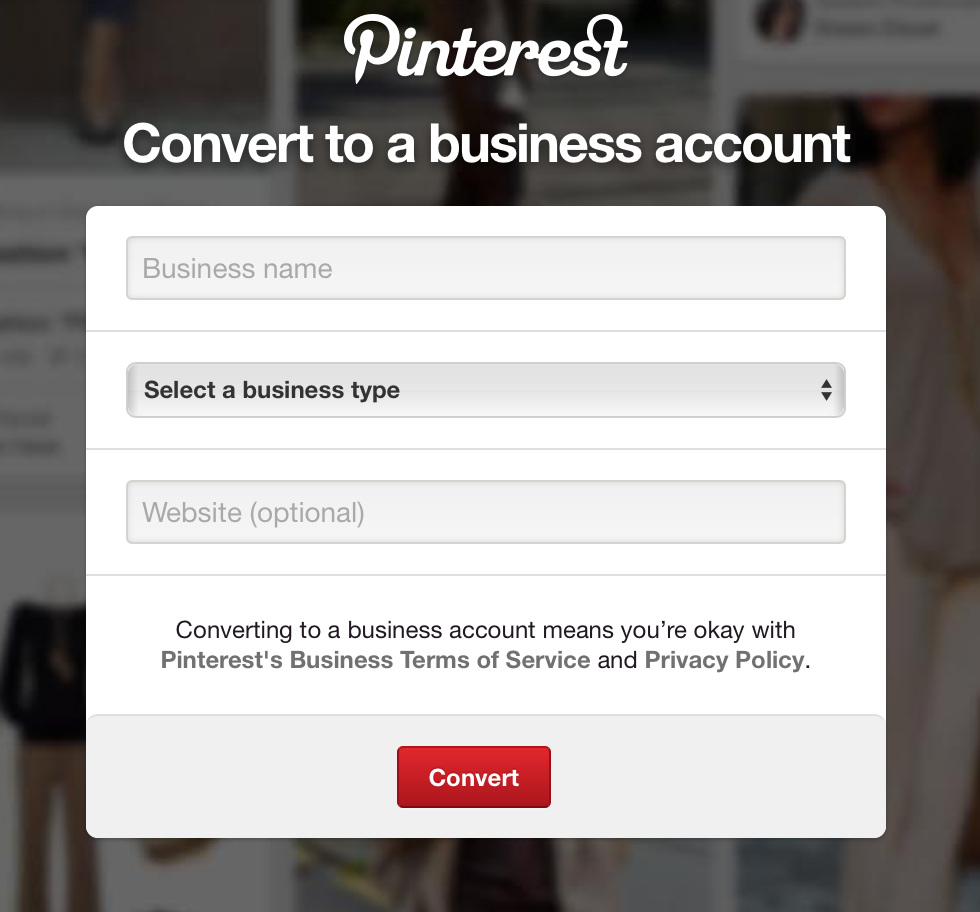
Once you have done that, you should then see the following page (note that what you see on this page sometimes varies, depending on what you’ve done already).
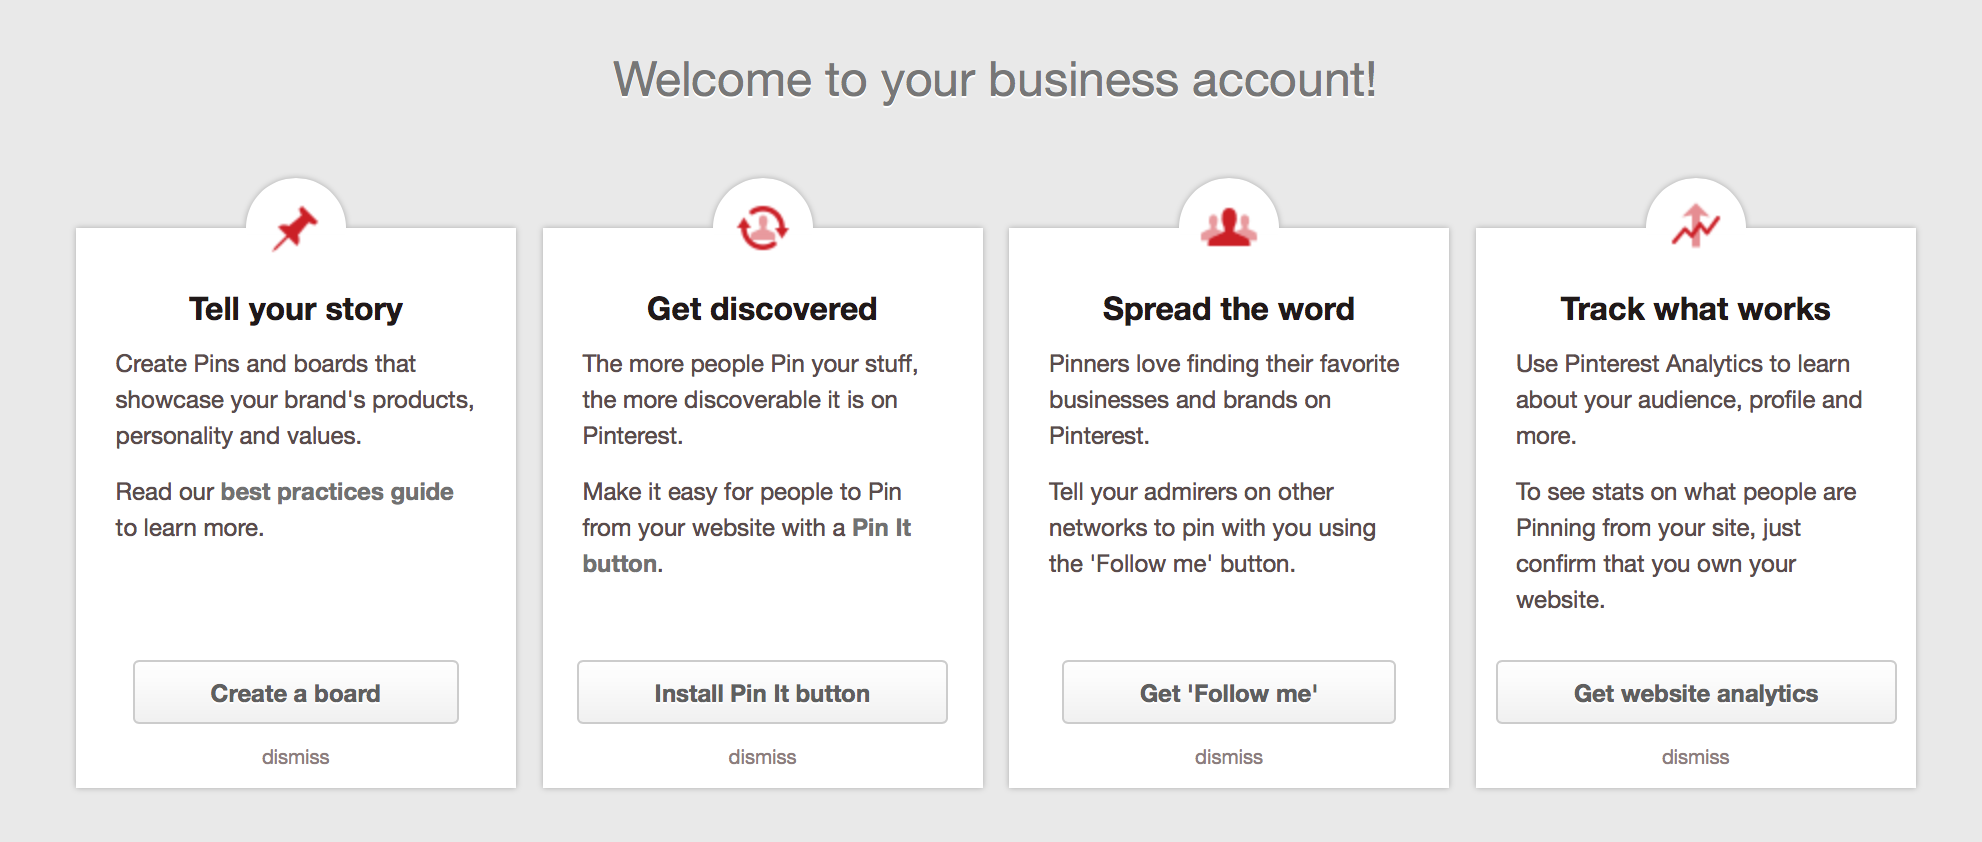
Pinterest can provide analytics based on how people are ‘Pinning’ items on your website.
As you might have guessed, this can provide some valuable information as to who exactly your target audience is.
If you want to gather information in this manner, you’ll need to click on the ‘track what works’ section.
The ‘track what works’ section will rely on you and having some code installed on your site.
If you have not linked your website to Pinterest yet, follow the instructions in the dialog box and click on ‘account settings.’

Then scroll down the page until you see ‘Website’ and enter in the URL of your site.

You’ll then need to click on ‘Confirm website.’
And then the following will appear:
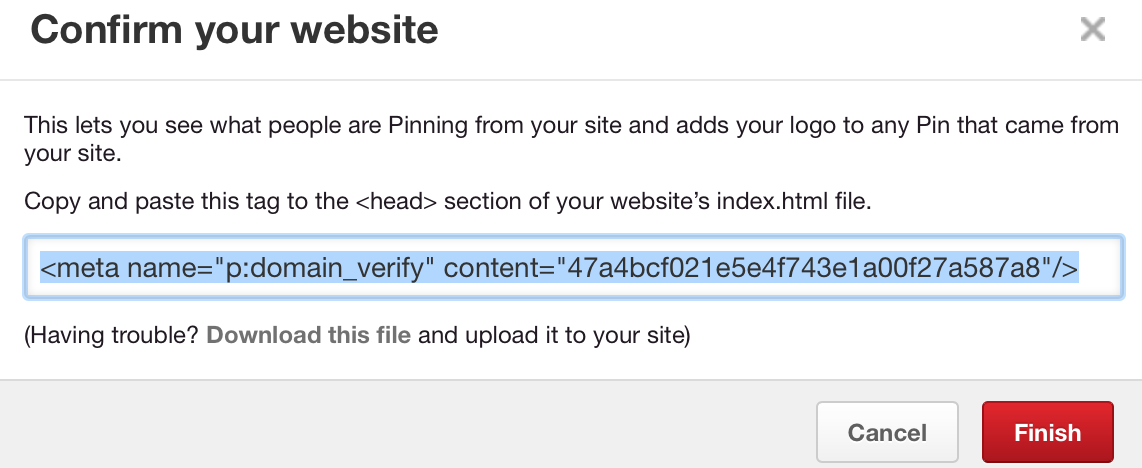
You can see that in order to confirm your website, you’ll need to take that line of code and install it on your site – similar to what Google Analytics tends to ask of you.
If you’re not that great at technical stuff, you can always put up a job posting on Upwork to find someone who can give you a hand.
It won’t cost you a lot of money, as the task itself is actually quite simple to complete.
Either way, once the code is installed on your site, click on ‘Save Settings.’

Once done, Pinterest will be able to collect data based on how people are ‘Pinning’ items from your site.
I don’t really have a lot Pinterest integration on my site right now, so I won’t be able to provide analytics from my site.
If you don’t have any ‘Pin It’ buttons on your site, it may be worth your time to set things up so that you do.
Maggi experienced a 400% increase in Pin creation from their domain, by adding ‘Pin it,’ buttons.
The data collected as a result of adding ‘Pin it’ buttons allowed for Maggi to find out more about their audience, leading to them creating better content.
And as you know, better content results in improved levels of engagement.
If you want to access analytics information, simply head over to https://analytics.pinterest.com/.
Once there, you should see the following page.
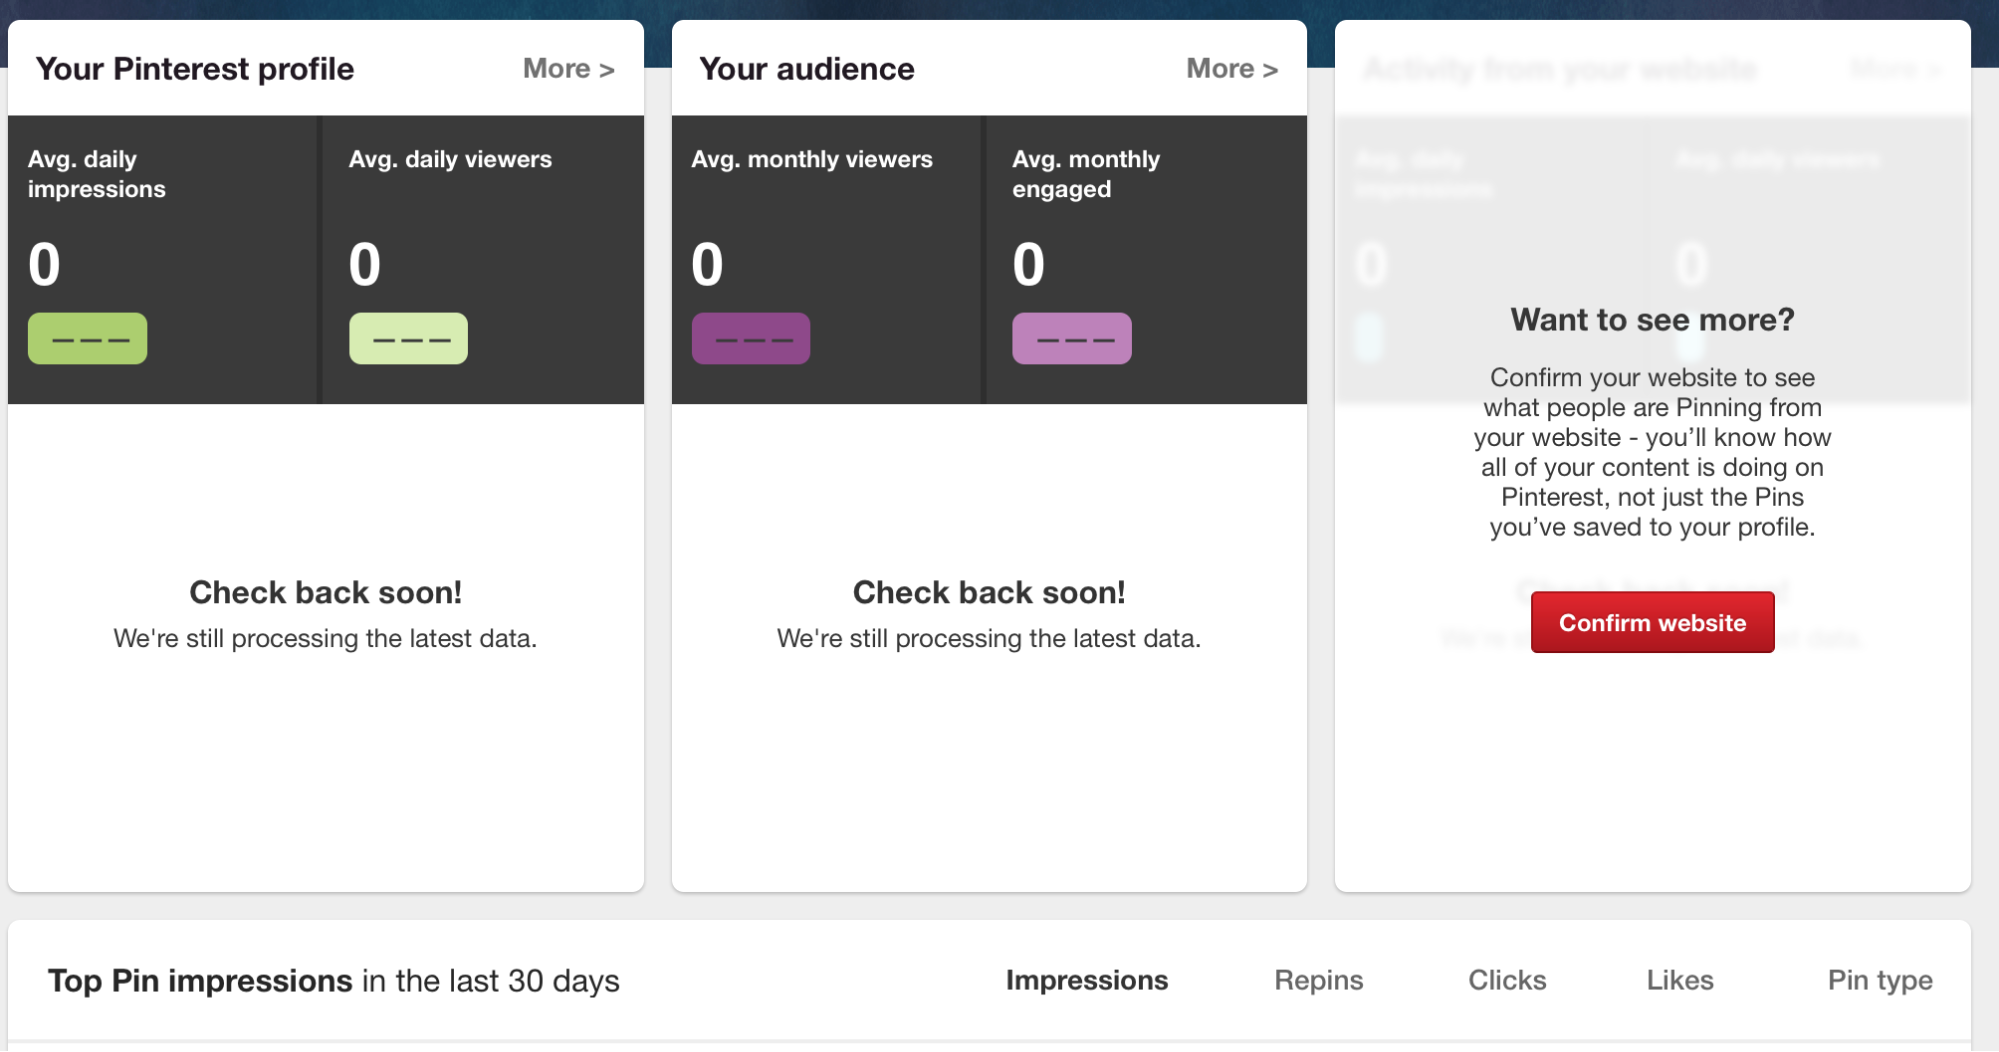
The ‘Your Pinterest profile,’ and ‘Your audience’ sections give you a brief overview of how much attention you’re attracting on the platform.
Once you confirm your website, you’ll also be able to view a section known as ‘Activity from your website.’
This section will provide similar information, but this time from the perspective of your website.
The section at the bottom, known as ‘Top Pin impressions’ provides you with an overall view of how people are interacting with your content.
This kind of information is very helpful when it comes to promoting some of your own Pins.
However, there is even more interesting data to be found within the ‘Your Audience,’ tab.
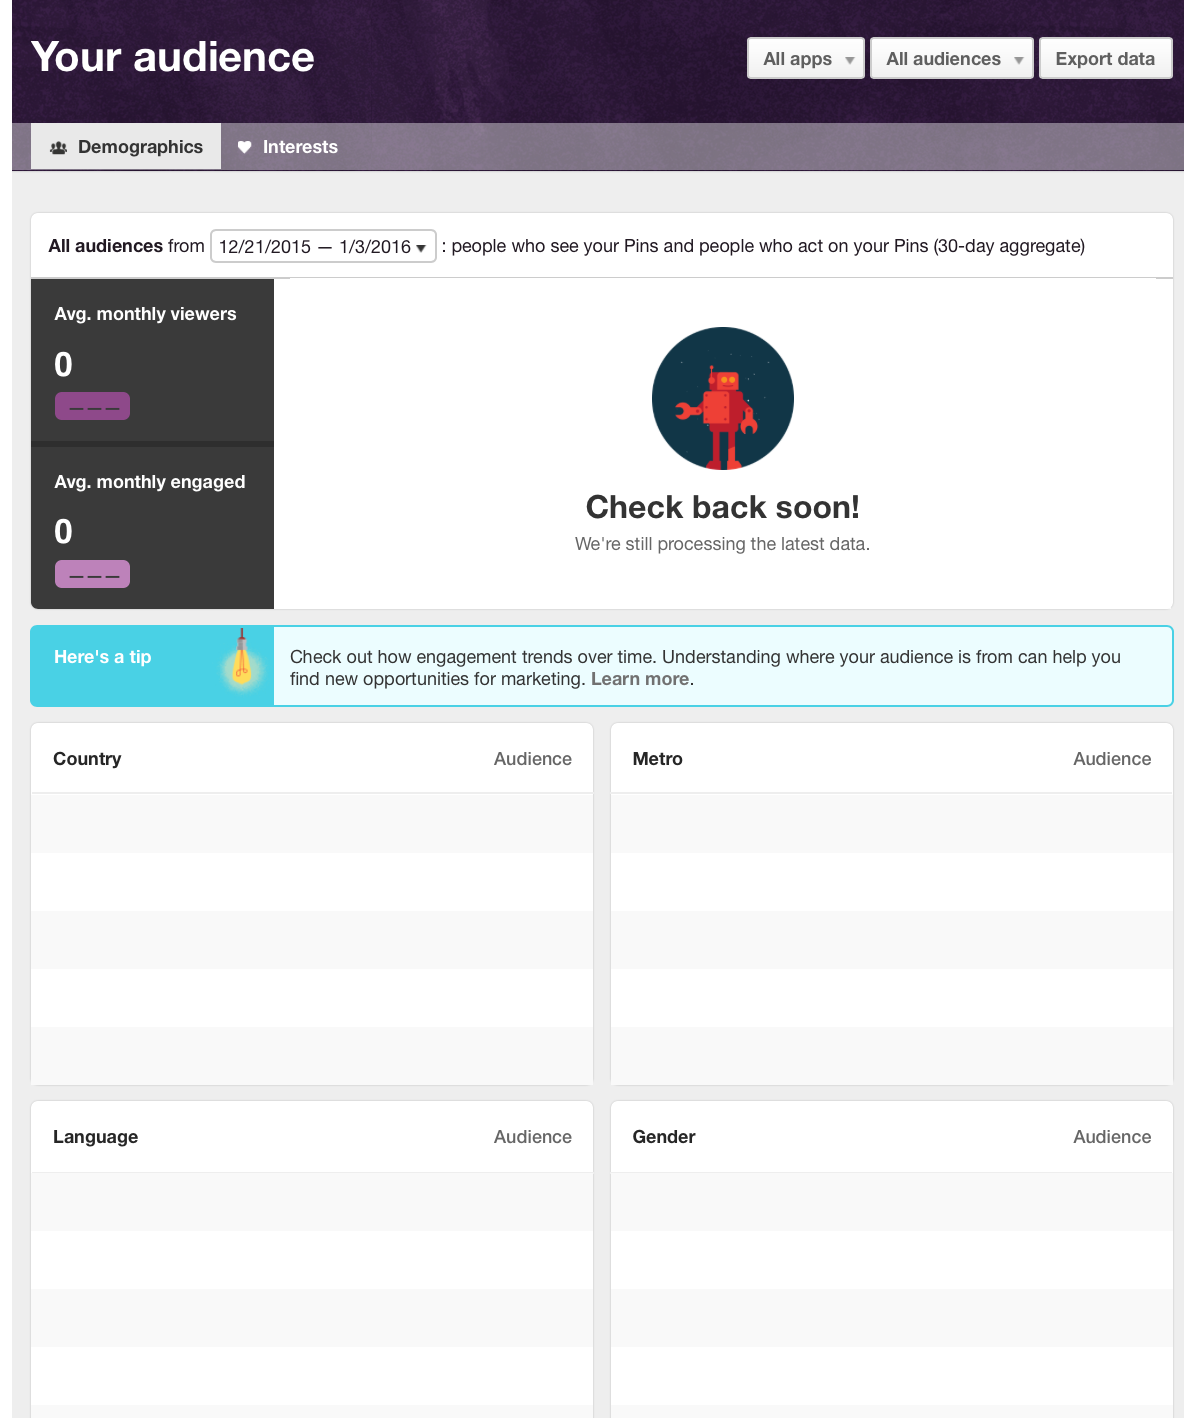
Here you’ll be provided with some in-depth analytics about who exactly is interacting with your content.
You can use this information when you’re creating your ads, ensuring that they’re shown to the right kinds of people.
The ‘interests’ section can also be used to inform your targeting when creating an online ad.
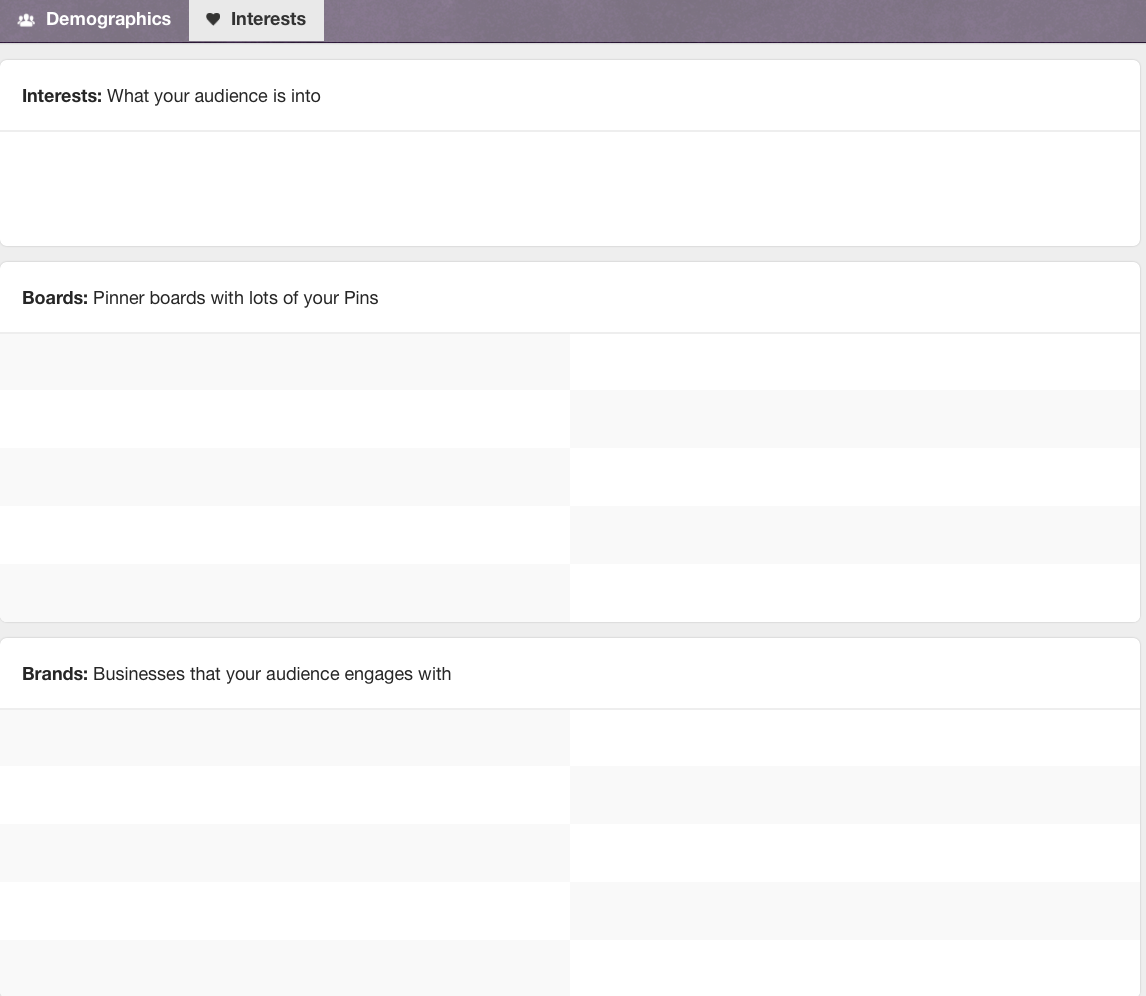
Here you’ll be able to work out what your audience is into and the kinds of businesses that your audience engages with.
Later, we’ll cover how you can use this information to create your ads.
The importance of using engaging imagery
As you probably know, Pinterest is an image-heavy platform – in fact, the social media platform is arguably all images.
And so, if you want to succeed with Pinterest, you need to ensure that you’re using engaging imagery.
Now, this topic is a 5000-word blog post in and of itself, but let’s take a look at some basics to help you when you’re aiming to create an appealing image.
The first is to focus on using only high quality pictures.
Note: the kinds of images you use will depend on the goals you have in mind.
For example, images designed to raise awareness will differ from those designed to drive engagement.
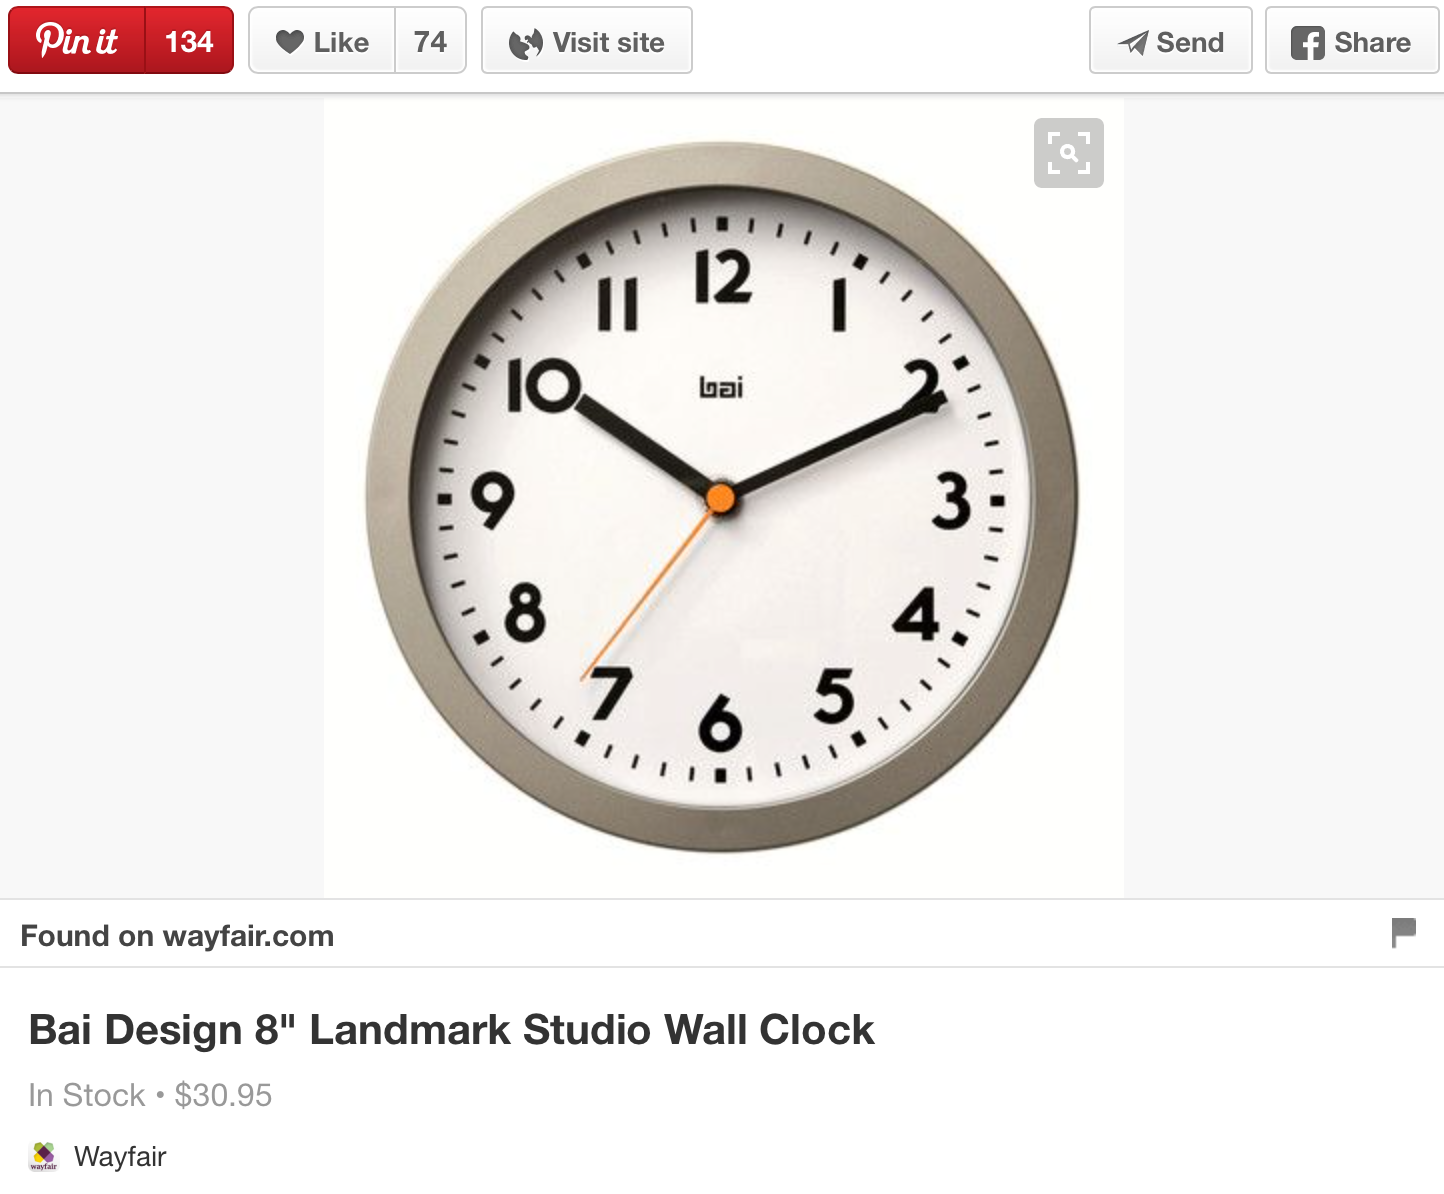
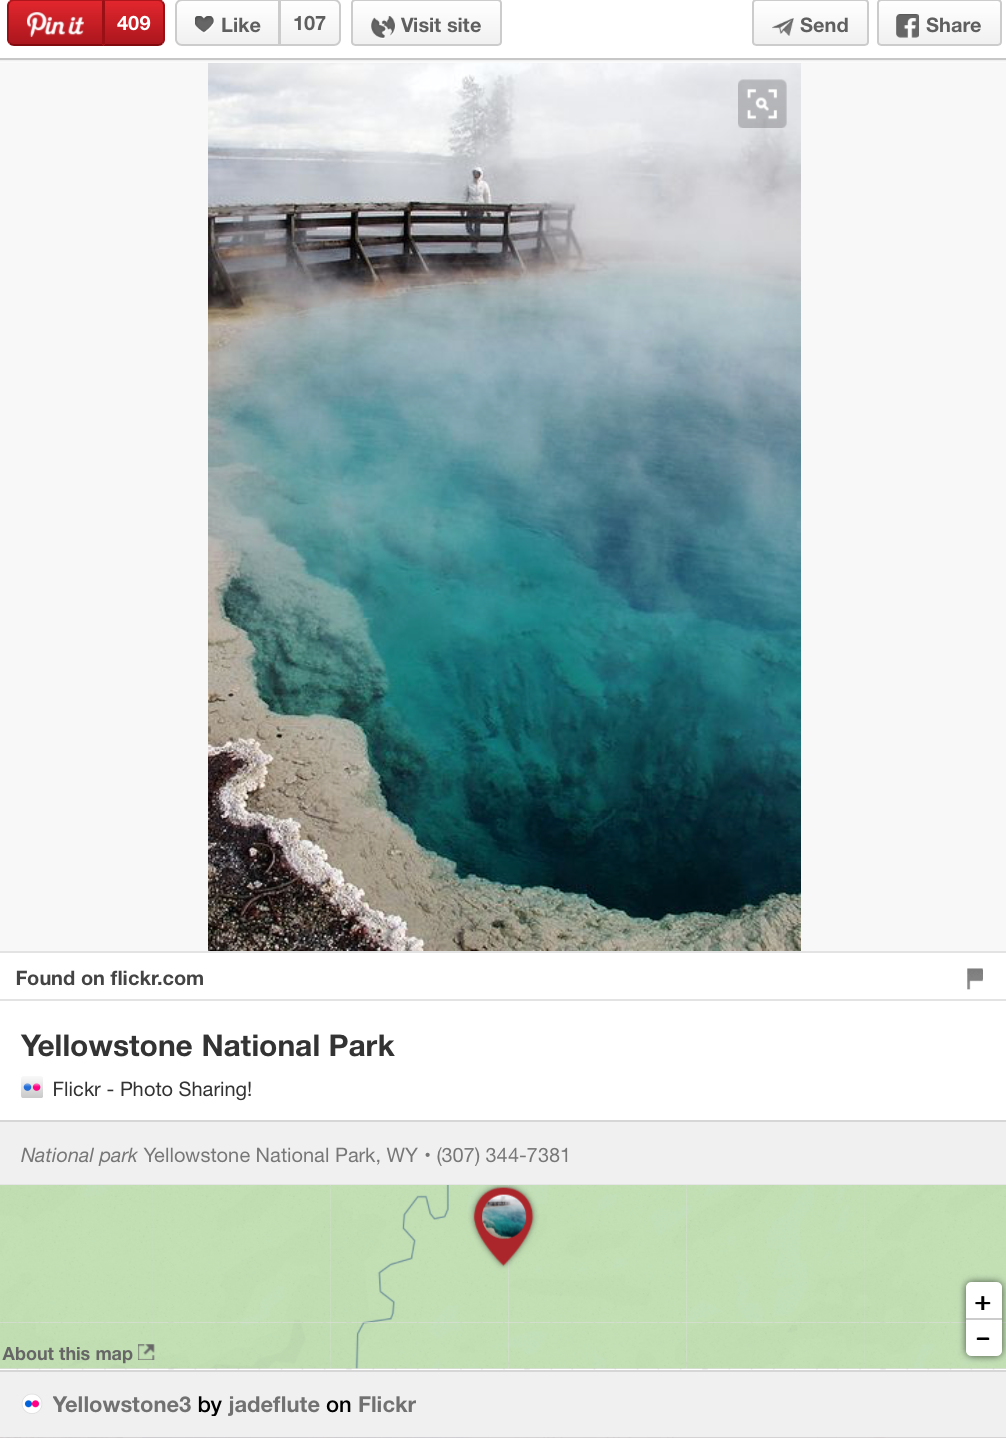
Take a look at the two images below.
The first one is designed to increase awareness and the second one is designed to drive engagement.
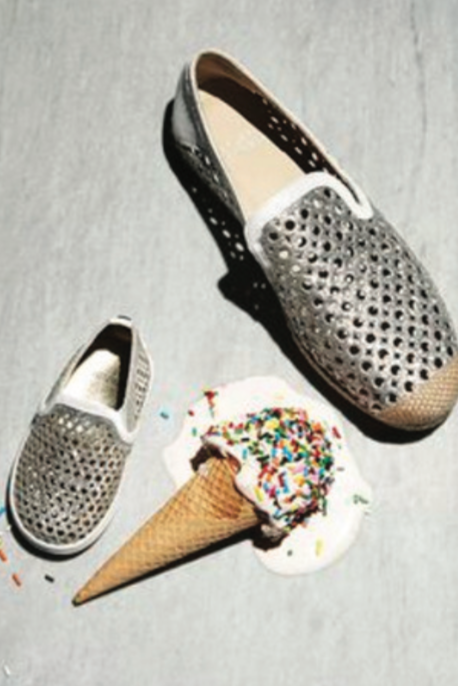
Images designed to raise awareness need to be relatively simple.
It is important that these images have a professional touch to them and they must not look as though they’re ‘user-generated.’
You don’t have to be a professional photographer to get the job done, but don’t post anything that looks blurry, at the very least.
Also, make an effort to ensure that any pictures you do take have proper lighting.
Images need to be relatively simple and they should clearly showcase the product that the Pin is trying to promote.
If you can add a little bit of quirkiness to the image, that also helps – just make sure it doesn’t distract.
The first picture above, is a great example of how that can be done.
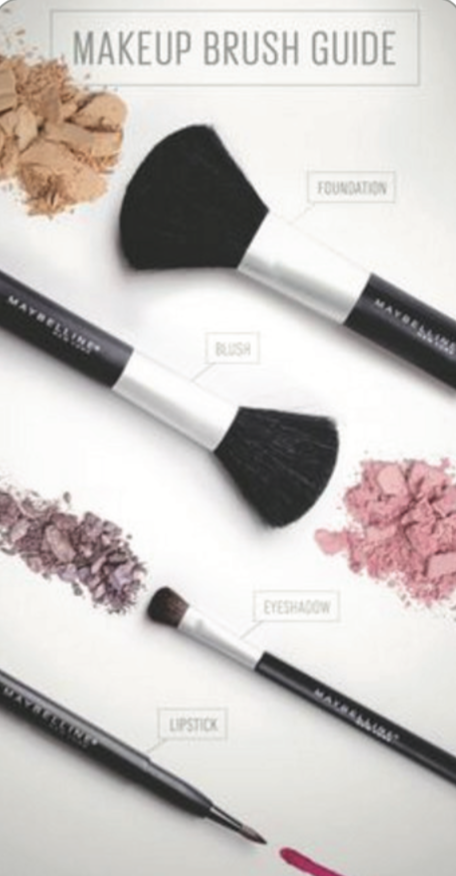
Images that are trying to improve engagement can be (and often should be) a lot more detailed.
After all, those who tend to click on such Pins, tend to be on the search for ideas and information.
If you can make it seem as though there is something enticing ‘behind the Pin,’ clicks will be higher.
One of the best ways you can do this is by explaining concepts within the image as if the image itself was a ‘mini infographic.’
That’s not the only way you can make images more detailed.
You can also showcase multiple variations of a certain product within an image.
Here’s an example that demonstrates that point.

The image is designed to sell handbags, or to at least get people to click on the Pin, so that they’ll take a look at the handbags on offer.
The thing is, Pinterest is made up of many different types of people who all have their own tastes.
As a result, if just one handbag was shown, only one slice of the potential audience would be attracted to what is being offered.
However, by showing the same product in multiple variations, the appeal of the Pin is broadened and engagement is likely to be higher.
When implementing this tactic, don’t overwhelm your images.
If you want to get a sense as to what kind of images work best, consider looking at some of the top boards in your niche.
Then take a look at what exactly makes their images appealing and how you can apply some of those strategies into your own efforts.
Now that we have a sense of what to do when it comes to the exact images, so let’s consider how you can multiply the effects of a great image within your pin.
In the words of Pinterest, ‘Pins represent ideas.’ If your image is unable to convey an idea effectively, you can use a text overlay to get the job done instead.
Here’s an example of how that can be done.
If you were to showcase a list post, you could adopt the following style.
Here’s another example of how you can use ‘text-overlay.’
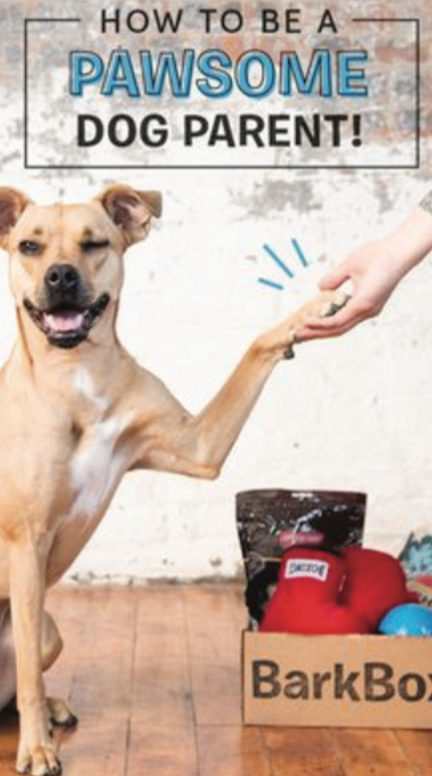
There’s even the option to include a ‘Call to Action’ within your images.
Again, remember to keep in mind the audience you’re dealing with.
Not all audiences will respond to the same kind of ‘Call to action.’
In some cases, you might want to use something ‘gentle,’ like the image below.

Don’t go overboard when using a ‘text-overlay’ on your images, as this can sometimes backfire, making it hard for your images to be seen on a mobile device.
All your images should look good on mobile, as 75% of Pinterest usage comes from mobile.
If you’re images don’t look good on a mobile device, you’re excluding 75% of your potential audience.
Because of the way users interact with Pinterest, images that take up a lot of vertical space will tend to attract a lot more attention.
So try and make them as vertically large as possible.
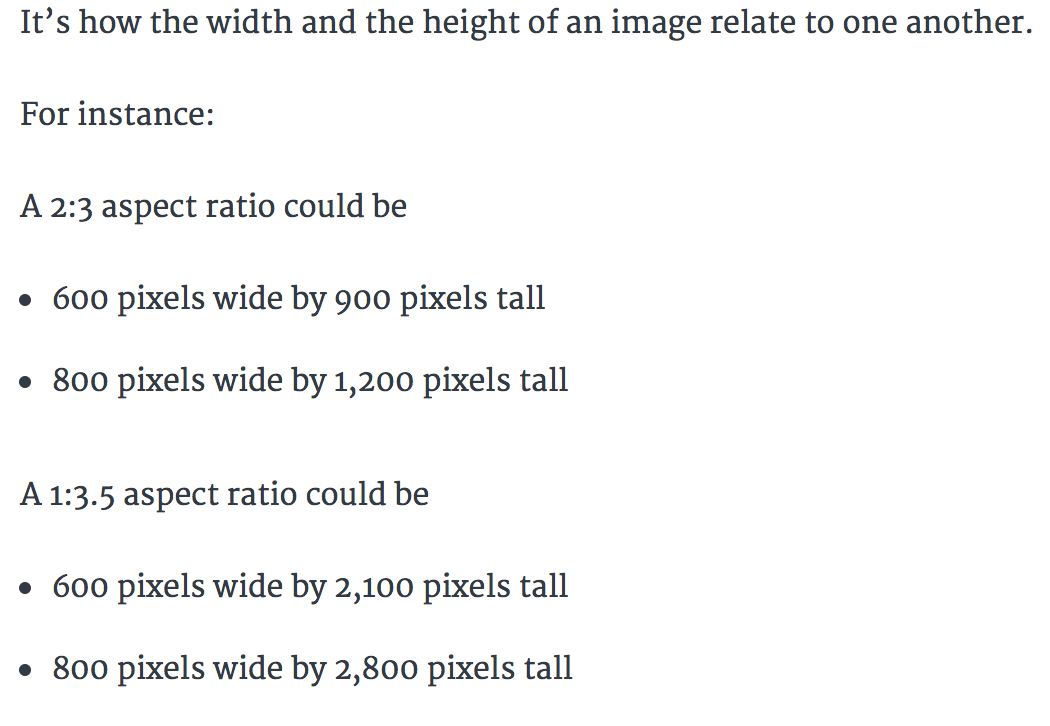
Here’s some advice, provided by Pinterest, about the shape and size of your Pins.

Here’s a quick explanation from the guys over at Buffer, as to how aspect ratio works.
Creating Pins can be a little tricky, especially if you’re not good at photo-editing.
If you find yourself struggling, you might want to take a look at a solution known as Canva.
I’ve spoken a lot about how you can use Canva for image creation – especially for social media purposes.
Let’s quickly go over how you can use it for Pinterest images.
Create an account at Canva.
You should then see this.
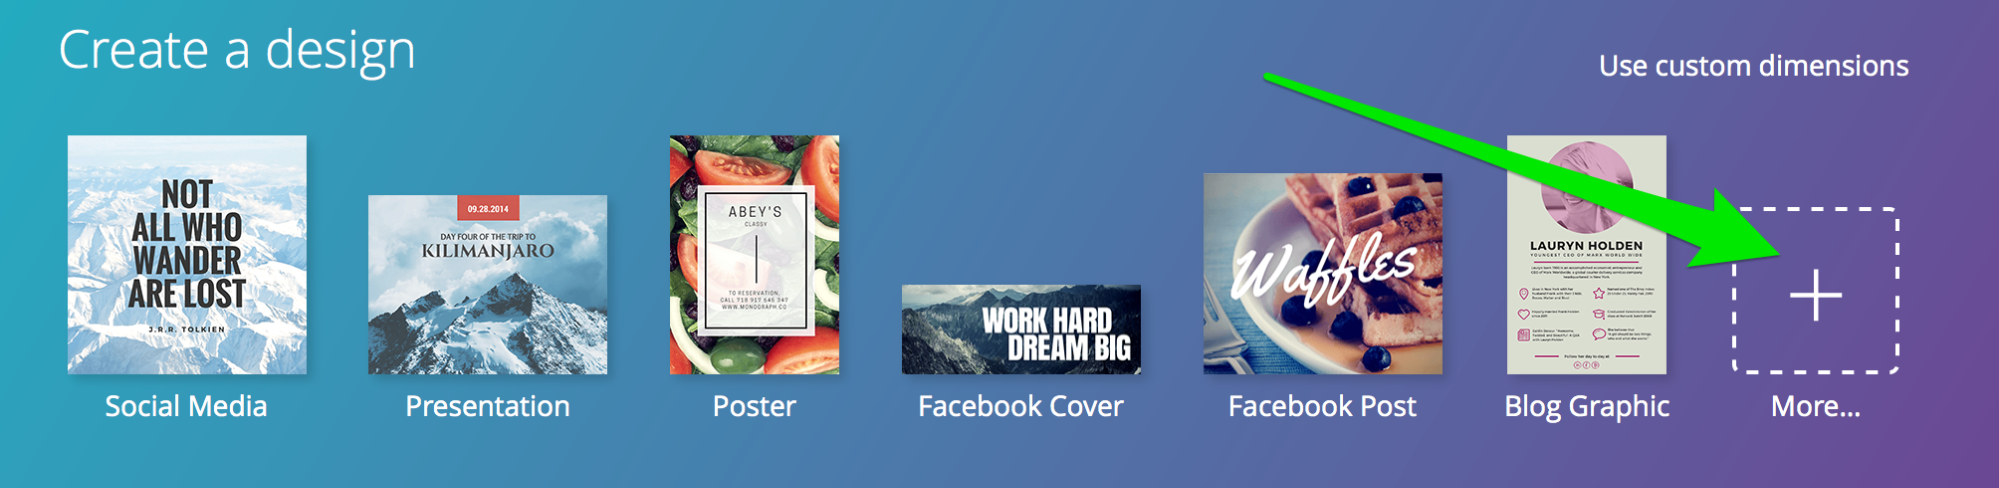
Click on the ‘More’ icon.
Then select ‘Pinterest Graphic.’

You can then go in and create an image of your own.
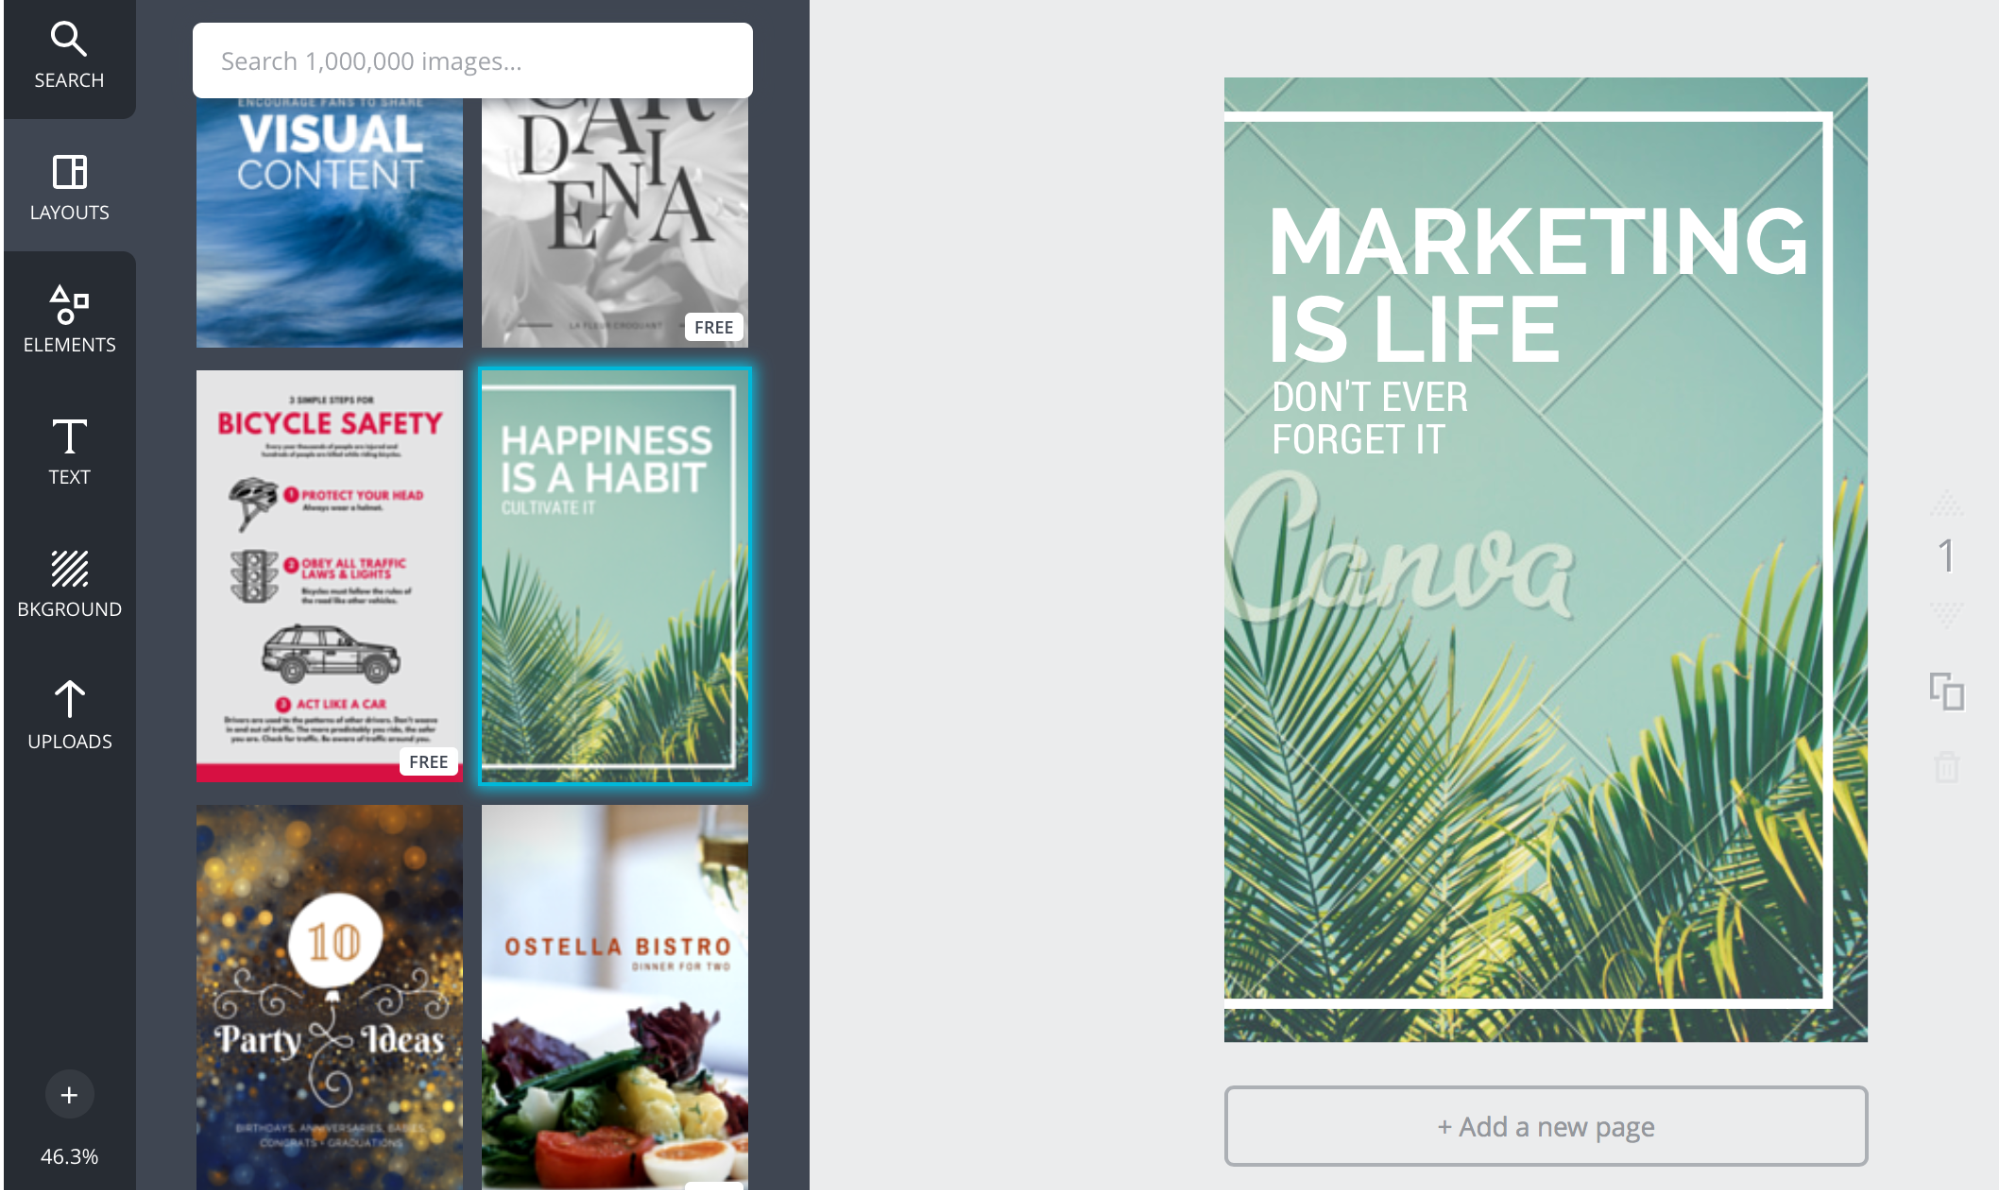
Once the image is completed, you can just click on ‘Download’ and select ‘Image: for web (JPG).’
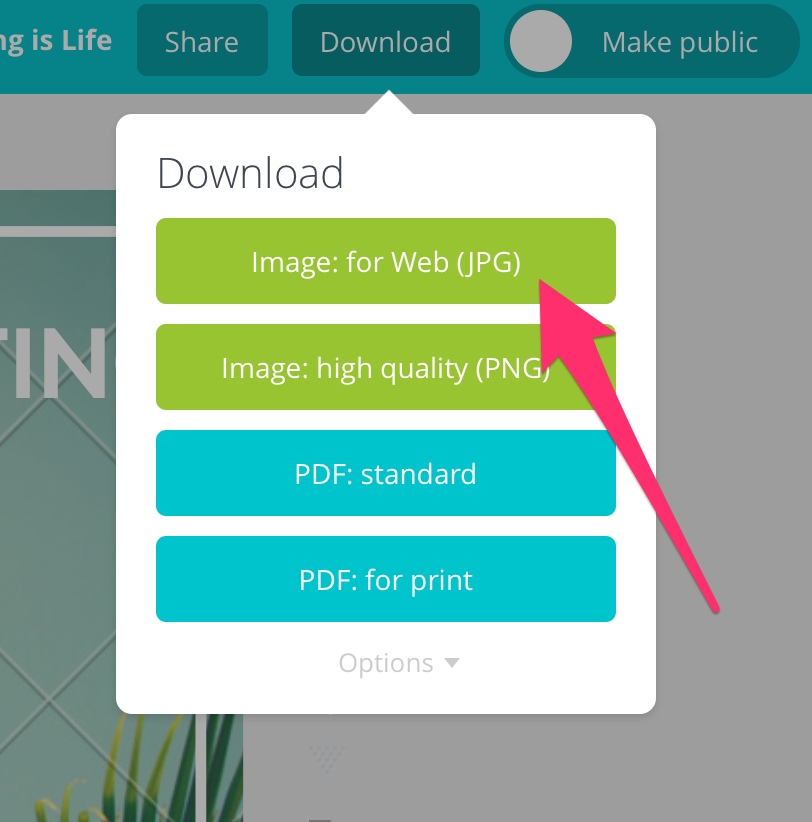
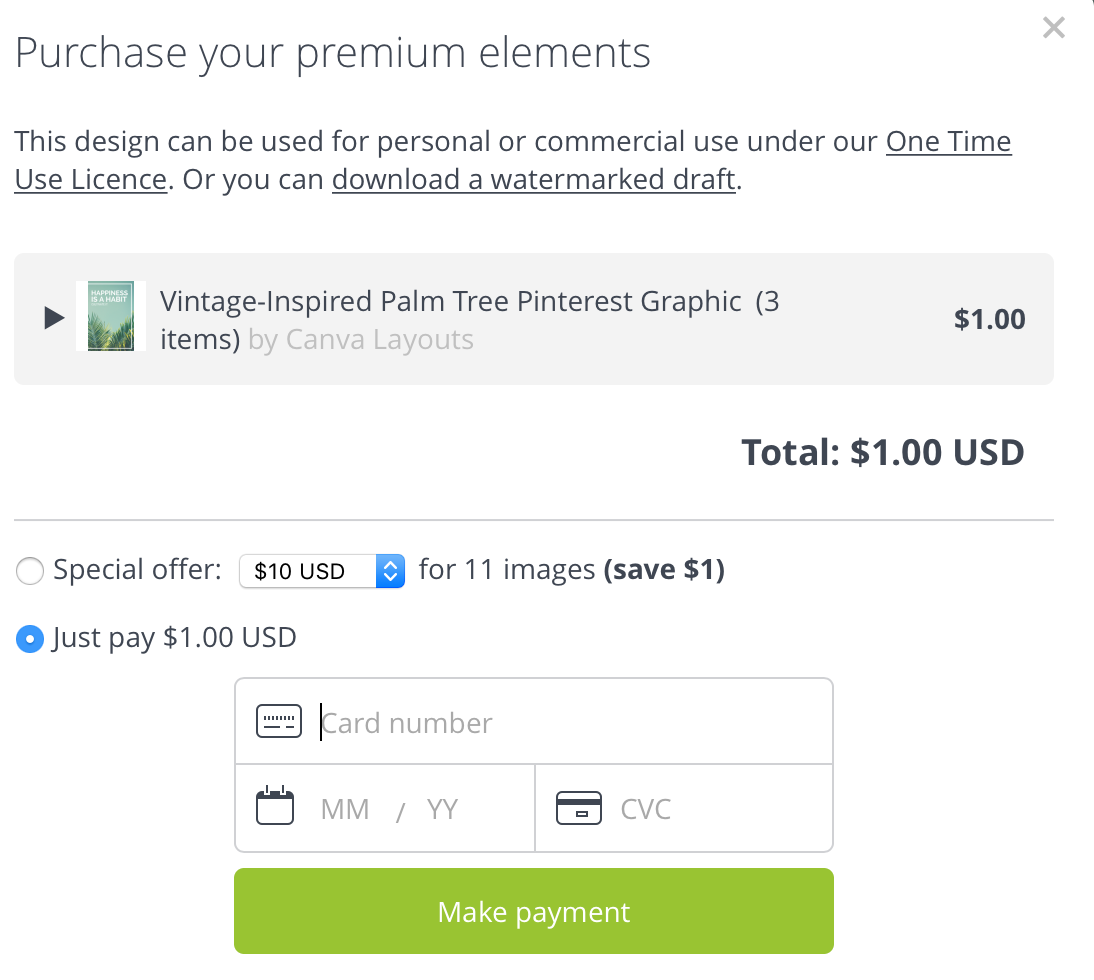
If you use a ‘Premium element,’ you’ll have to pay a little for it.
But it doesn’t really cost much. The image shown above only costs $1.00.
Okay, so that is how you can go about creating effective images for your ‘Pins.’
Getting the images right, as with everything in marketing, is all about testing.
Though you can follow best practices, there’s nothing like having some of your own hard data to work with.
For example, even though there’s evidence to suggest that images without faces achieve 23% more Repins, you’ll need to test this out for yourself as it can vary from niche to niche.
Next, let’s look at how you can write the description for your Pins.
The description for your Pins
Though there are a lot of images within the Pinterest platform, there is also a fair bit of text beneath many of the images.
It is the combination of the image and the text that makes up the entire ‘Pin.’
The description you use about your Pins is also going to allow for your Pins to be easily found, so it is important that you include any keywords that relate to your product.
If you know a little bit of copywriting, you’ll be ahead of most people who are using the Pinterest platform.
In any case, let’s quickly cover some tactics you can use to create text that is engaging.
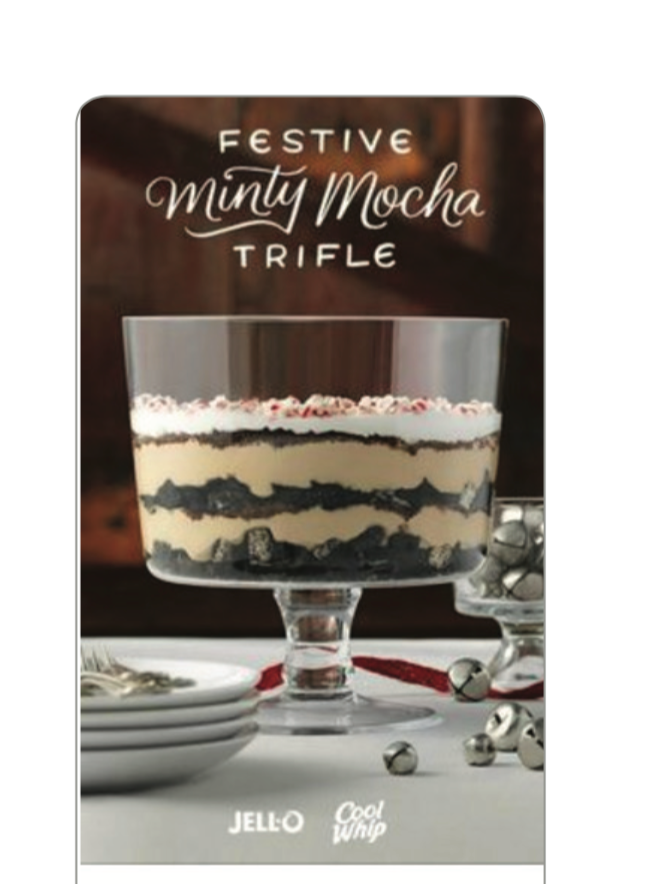
How you approach the creation of text is going to depend on the style of the image.
If you have an image that is designed to raise awareness, the text is going to read slightly differently from text that is designed to raise engagement and generate clicks.
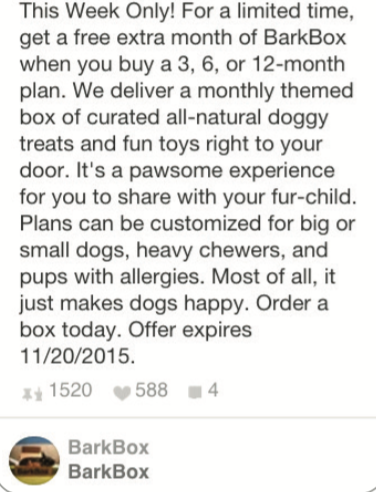
Point being that in an awareness style image, you’ll need to provide a lot more in the way of context, making it so that you expand on the image.
You’ll often find that awareness style Pins tend to explain things in ‘story’ and they often set the scene in terms of how the product can be used.
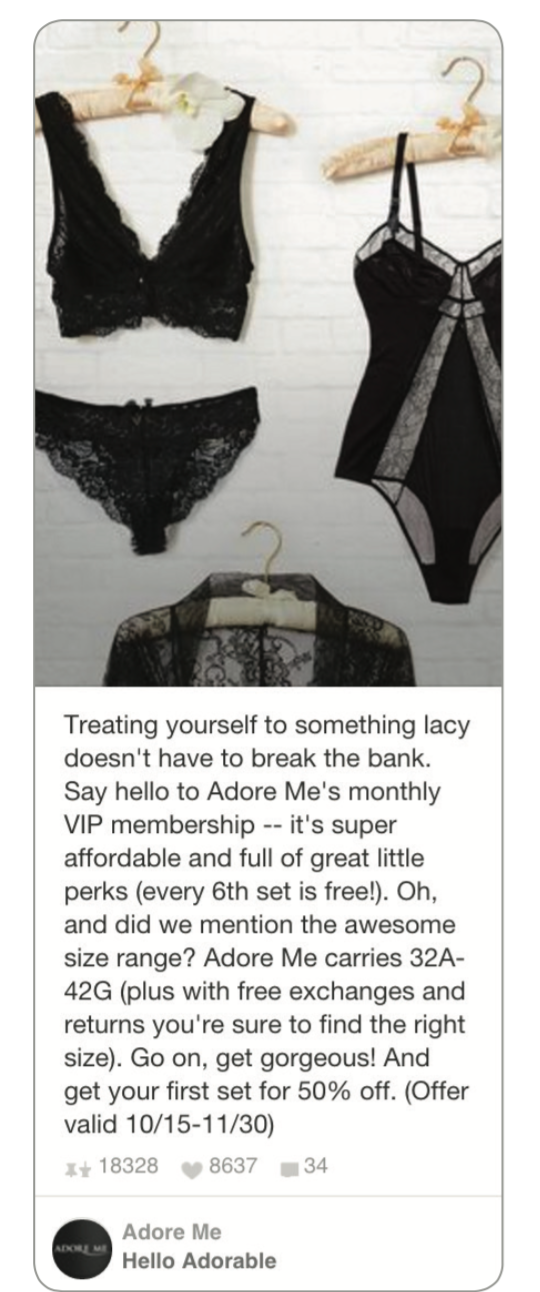
Here’s an example.

See how the text is designed to explain how the item in the image can fit into someone’s life and it explains all of this by ‘setting the scene.’
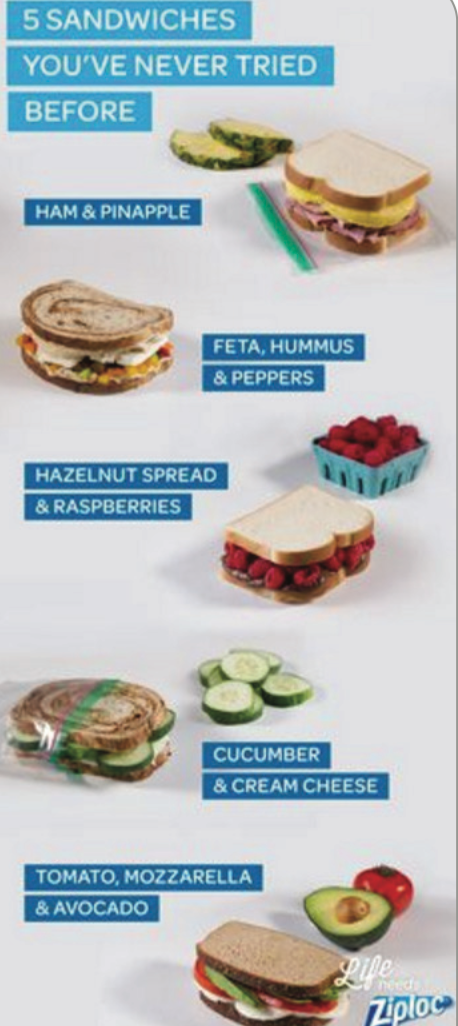
If you’re looking to drive engagement and clicks, you’ll want to focus more on benefits within your description.
What you’ll find is that some of the best descriptions out there approach things from this standpoint:
The challenge -> Why the image in the ‘Pin’ tackles or helps reduce the challenge -> What needs to be done next.
It will also help if you do all that you can to counter any objections someone might have about engaging with the item in the image.
Say you’re promoting a recipe- you might want to state that’s it’s quick or that it doesn’t involve the typical roadblocks people might face when cooking that type of food.
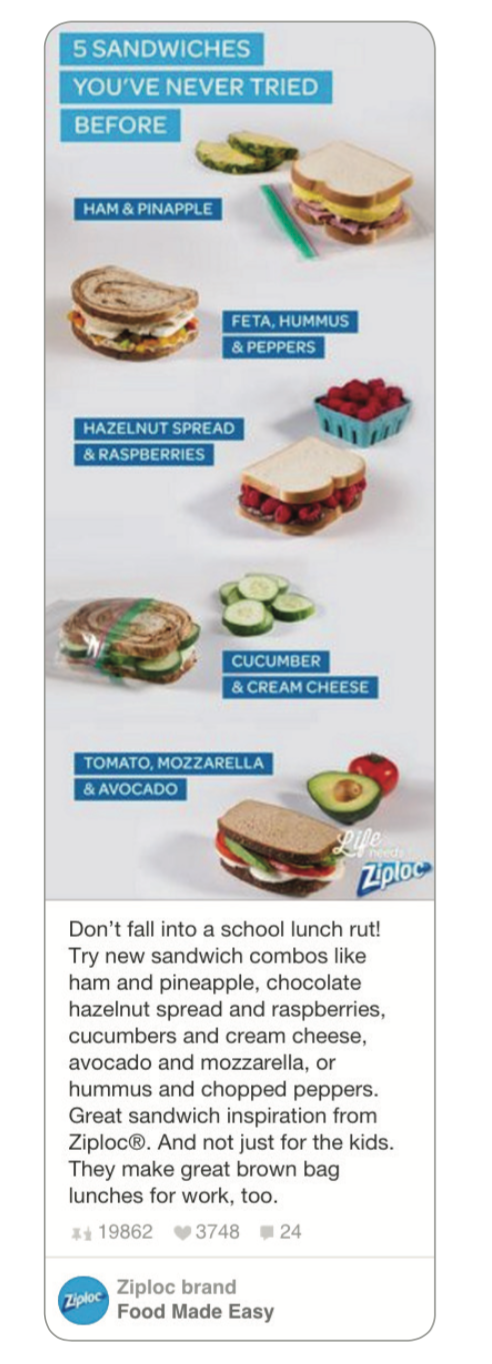
Here’s an example that borrows from something we looked at earlier.
Here’s another example.
You can also add in some promotional text, as shown below.
Whenever you’re building your description text, be sure that you’re being as concise as possible.
There are a lot of other images to be found on Pinterest and this means a lot of other distractions.
If someone has given you their time, make sure you make the most out of it – you can’t do that if you’re rambling.
Rich Pins
Rich Pins have been used by many marketers on Pinterest in order to achieve higher Repins and clicks.
There is some evidence to suggest that brands with Rich Pin integration, can see an 82% rise in Repin/Pin ratio.
When used properly, Rich Pins can really take things to the next level.
Made.com managed to achieve a 173% increase in revenue with the help of Rich Pins.
On a side note – Made.com will often check how their Pins are doing using Pin Analytics, therefore dictating what kind of Pins they’re going to create next.
Even Target managed to achieve a 70% increase in traffic from Pinterest when Rich Pins were enabled.
Rich Pins come in the following forms:
- Article Pins
- Movie Pins
- Product Pins
- Recipe Pins
- App Pins
- Place Pins
Note: If you want to make the most out of Rich Pins, you’ll need your web developer to adjust some of the code on your site.
You may be able to do some of this yourself, but it requires adjusting the ‘metadata’ on your site so that Pinterest can quickly gather the right information.
Once you’ve adjusted the code on your website, you’ll also need to ‘Validate’ your Rich Pins.
You can do that by visiting https://developers.pinterest.com/tools/url-debugger/.
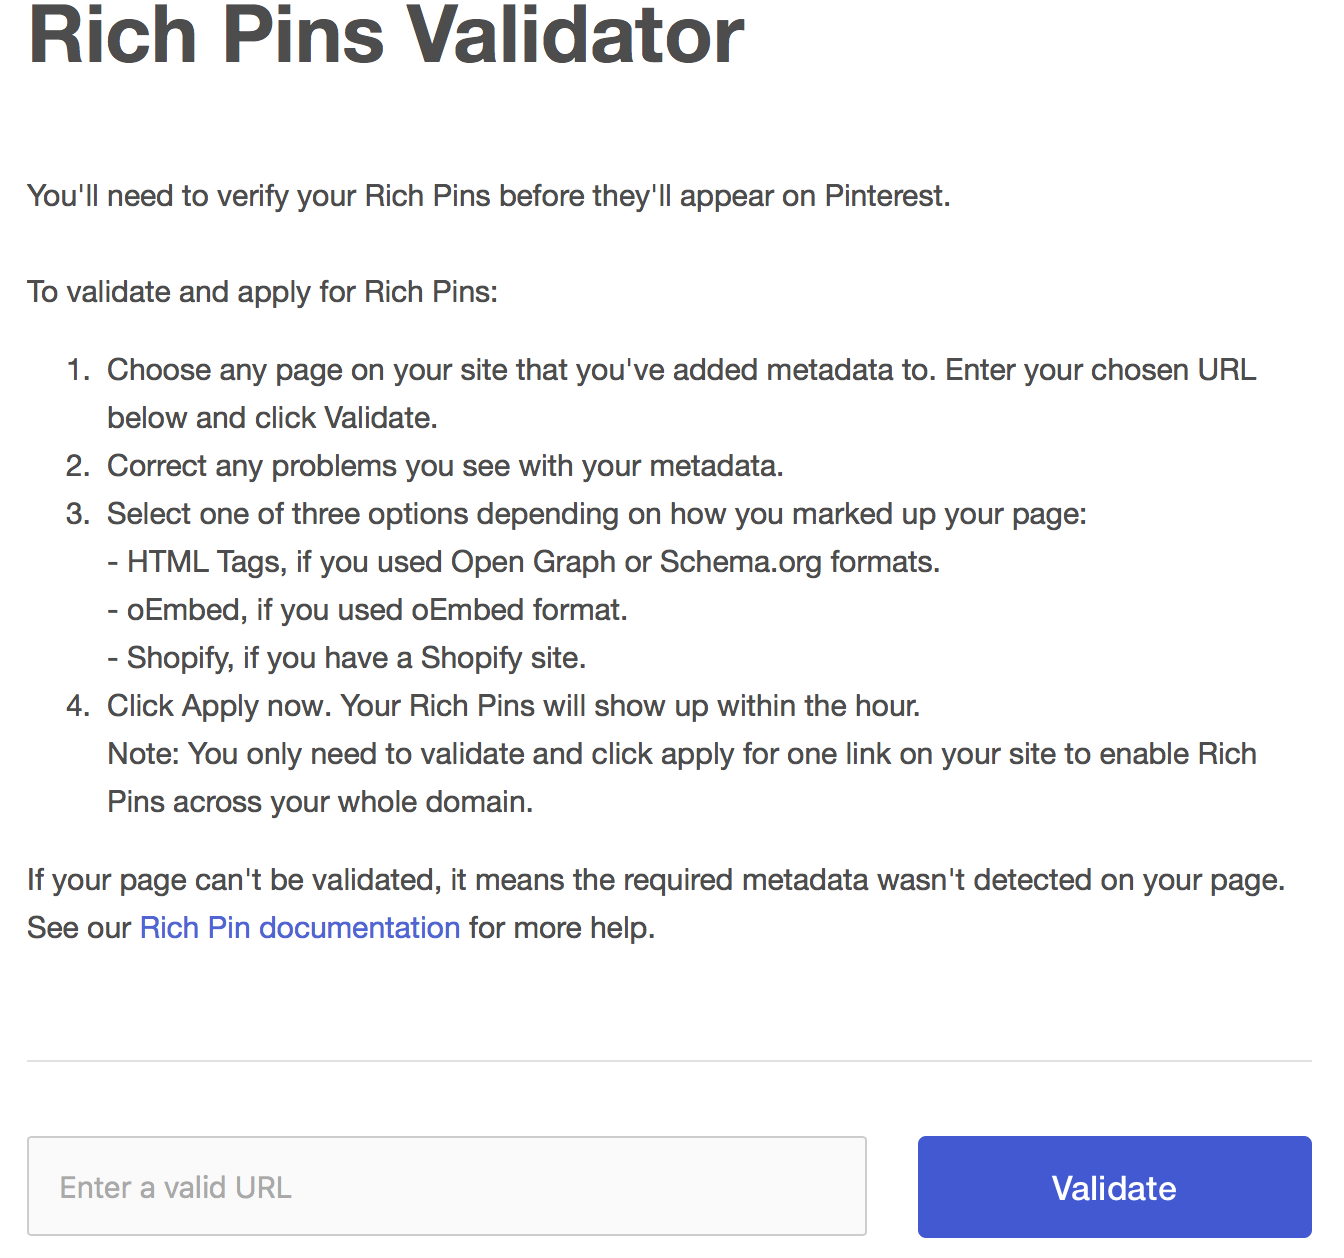
As you can see, this can be a little technical, so help might be needed.
In any case let’s cover what Rich Pins allow for.
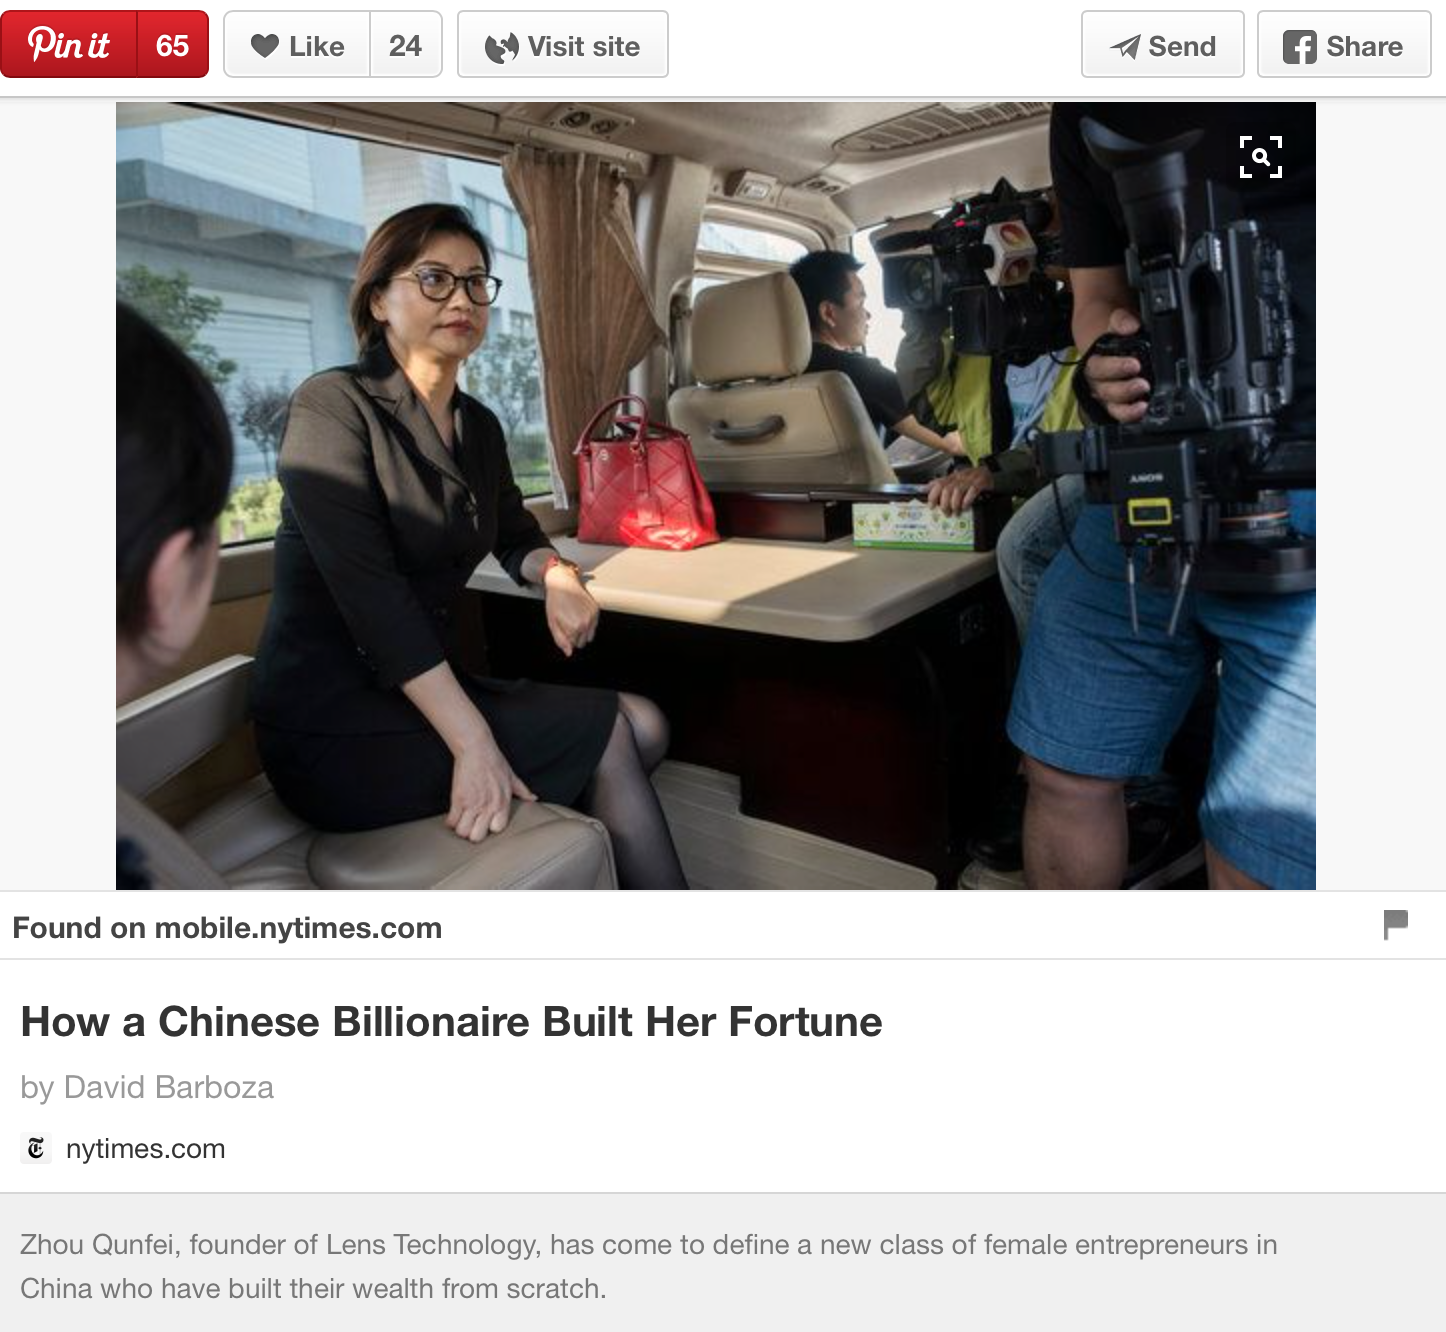
When it comes to ‘Article Pins’ you can now easily showcase the headline, description and author of the article in question.
Here’s an example.
Recipe Pins allow for the ingredients, cooking time and serving information to be quickly shown for the recipe in question.
An example can be found below.

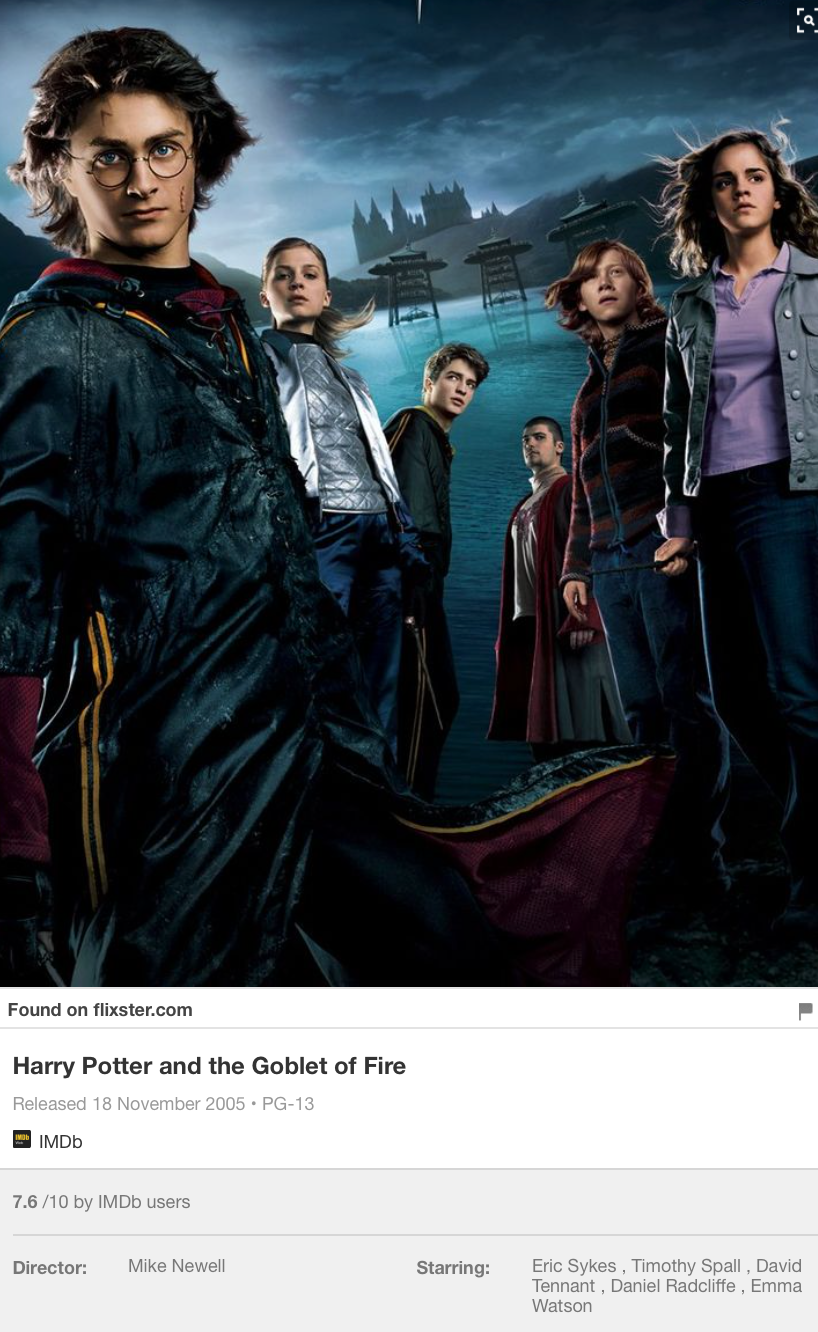
Movie Pins allow for you to quickly see the rating of a movie, as well as who stars in the movie.
There’s also the option of creating Product Pins.
These Pins allow for you to display the price of a product and whether or not it’s in stock.
The showcasing of the price is a useful addition, especially when you consider that Pins with prices get 36% more likes than those without.
Place Pins let you quickly identify where the location within the pin lies and also displays some contact information.
App Pins allow for you to install an app directly from Pinterest.

You can see how Rich Pins provide a much ‘richer’ experience for those who are browsing Pinterest.
When combined with Promoted Pins, conversions are likely to be higher, because less people will be clicking on your Pins out of curiosity.
The descriptions provided by the Rich Pins ‘pre-sell’ those who eventually click on your Pins.
Creating your Promoted Pins
Now let’s go through the process of creating the ads themselves.
Dot & Bo. managed to increase traffic to their website by %18,000 thanks to Promoted Pins and Ezra Firestone, managed to earn $41,254.34 all from a $775.50 ad spend.
So there’s plenty of potential here – provided you set things up properly!
To get started with creating a Promoted Pin, first head over to https://ads.pinterest.com.
You should then see the following screen.
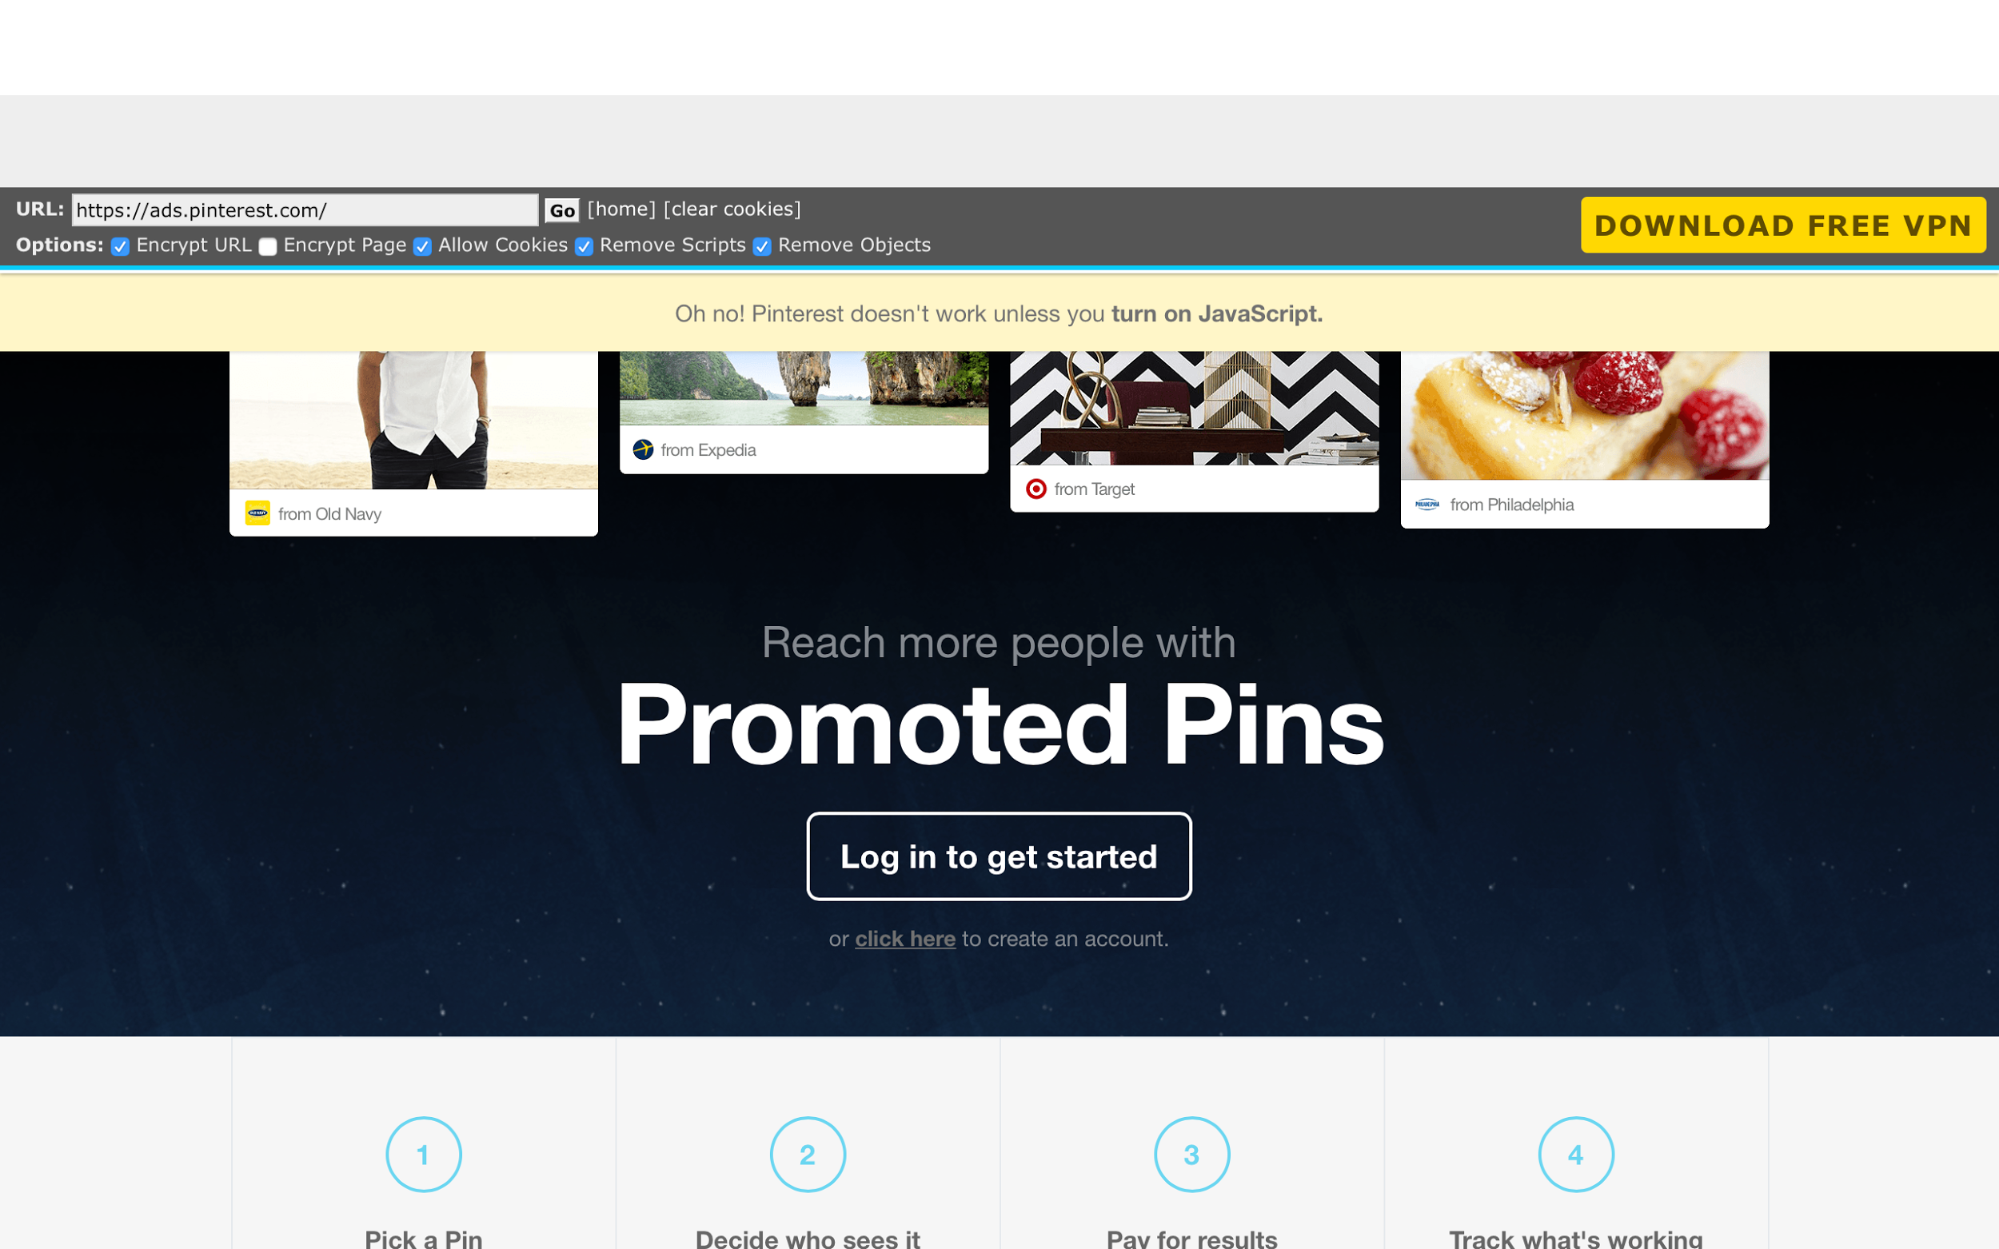
Click on ‘Log in to get started.’
Assuming you already have a business account (which we mentioned during the analytics section earlier) you’ll then be taken through the creation process.
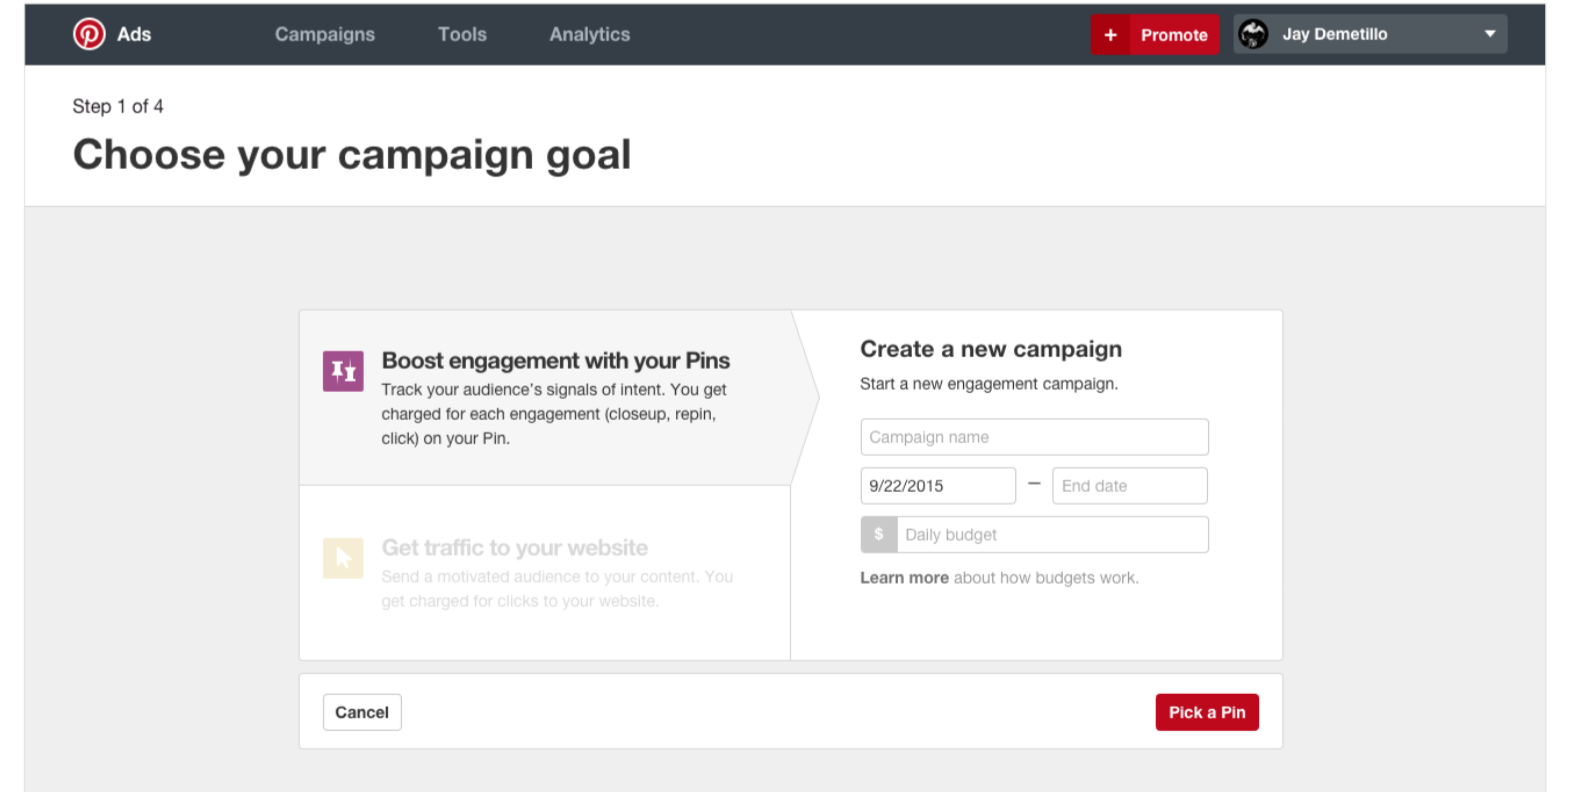
There are two ‘campaign goals’ here to choose from.
If you choose the ‘Boost engagement with your Pins,’ option, you’ll pay when people engage with your Pin.
Engagement counts as a ‘Closeup, Repin or just a click.’
If you choose the ‘Get traffic to your website’ option, you’ll only pay when people visit your website.
The option you pick is going to depend on what you want to achieve.
If you’re just looking to raise awareness, then the first option might be best. If you’re directly looking to drive sales, the ‘Traffic’ option might be best.
Whatever option you choose, you then need to select a Pin that you want to promote.
When you’re picking a Pin to promote, you can decide on displaying your most clicked on Pins of the past 30 days or the most Repinned of the 30 days.
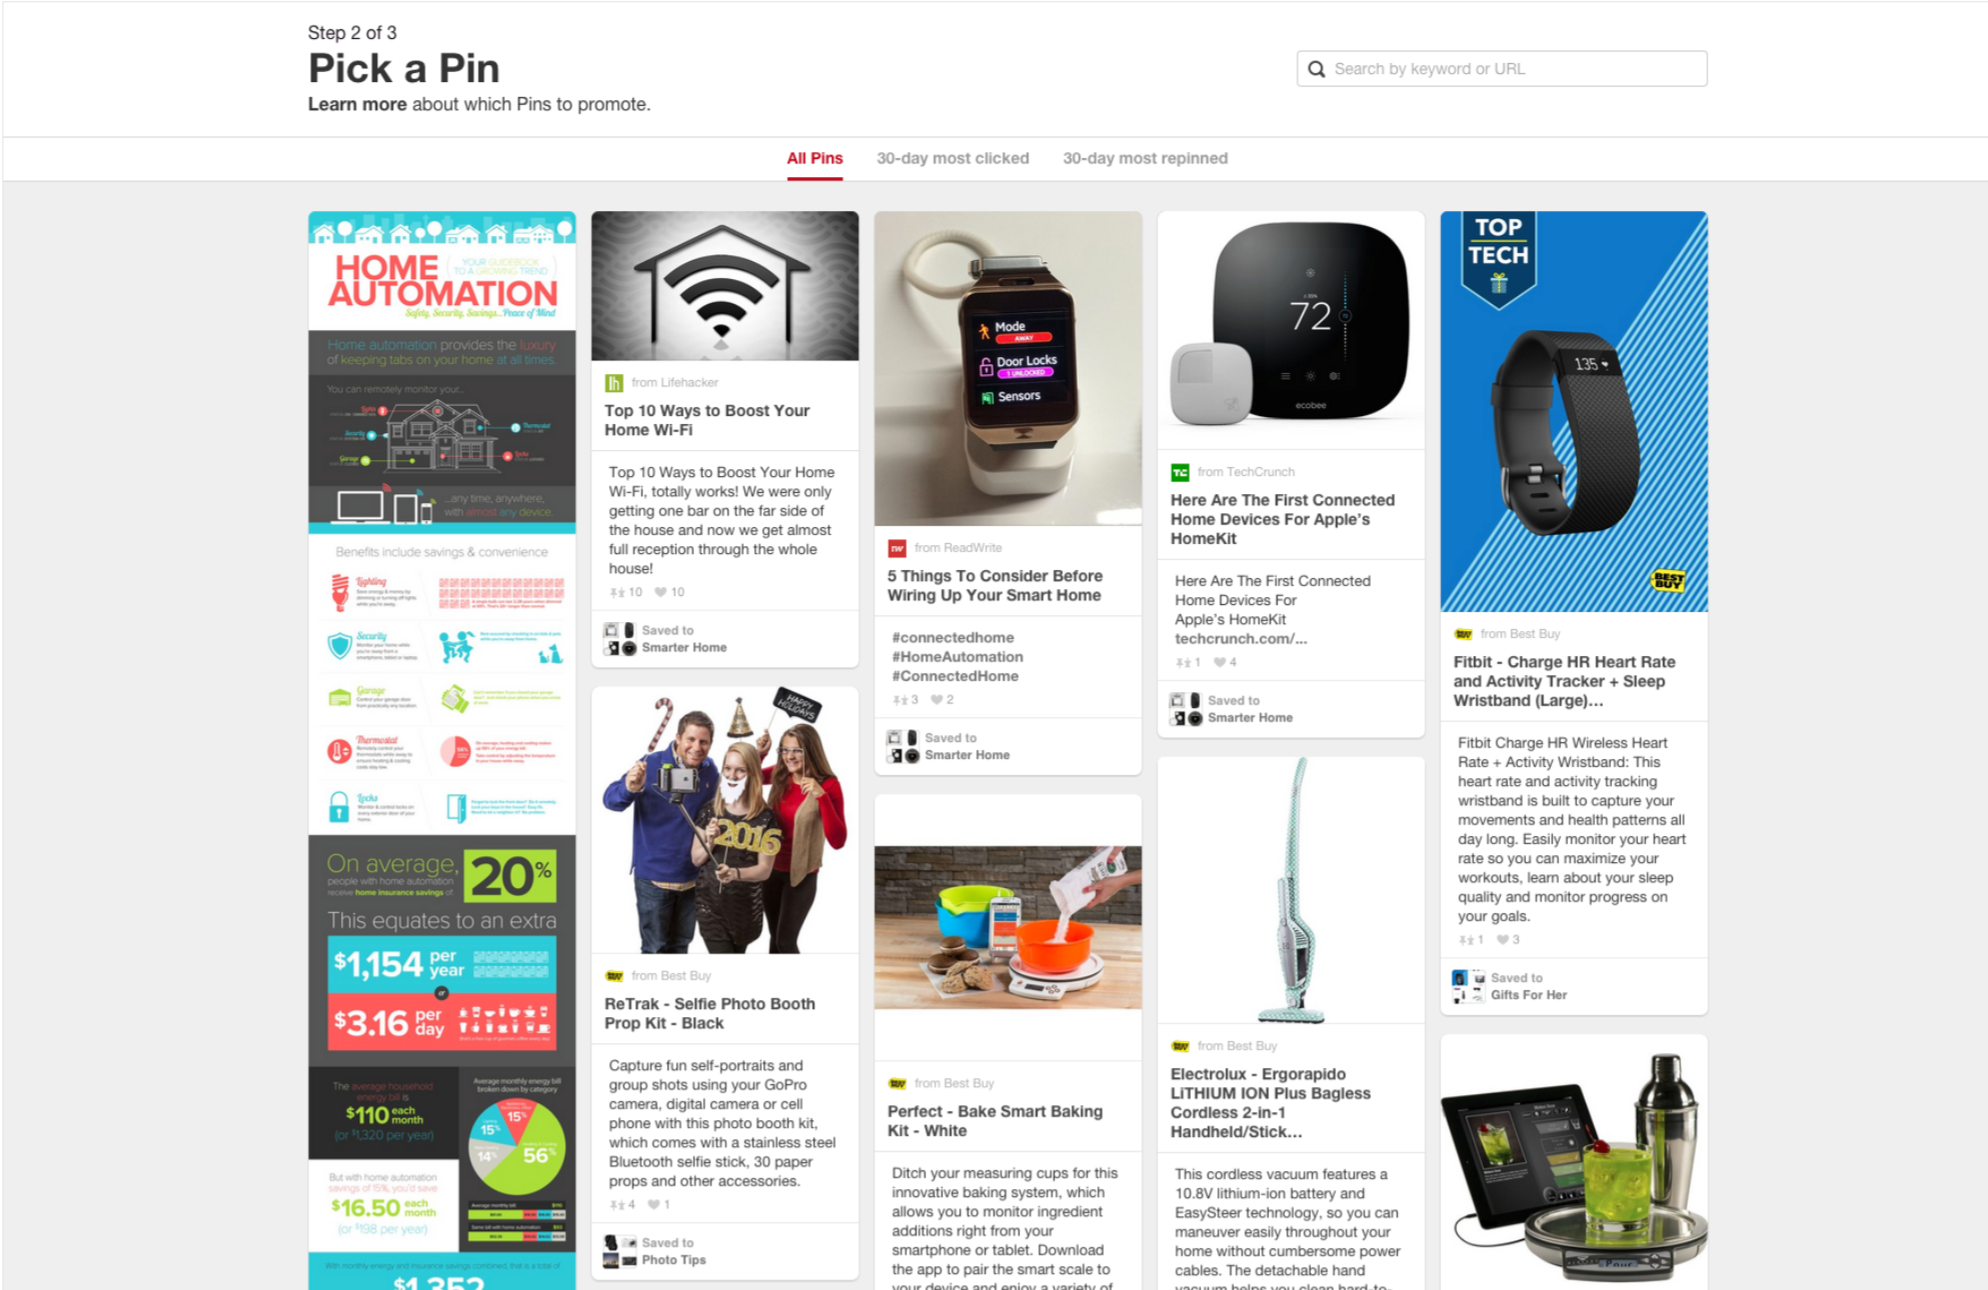
If you’re running an engagement campaign, the most Repinned option might be best, because Repinned Pins are essentially Pins that have been shared.
And if you know what is getting shared, you’ll be able maximize the impact of raising awareness when you’re putting some dollars behind the pin.
If you’re running a traffic campaign, then it might be better to choose the most clicked option.
That’s because you have some evidence that people are going to click on the pin and then go through to your site.
You’ll then need to adjust the targeting settings of your campaign.
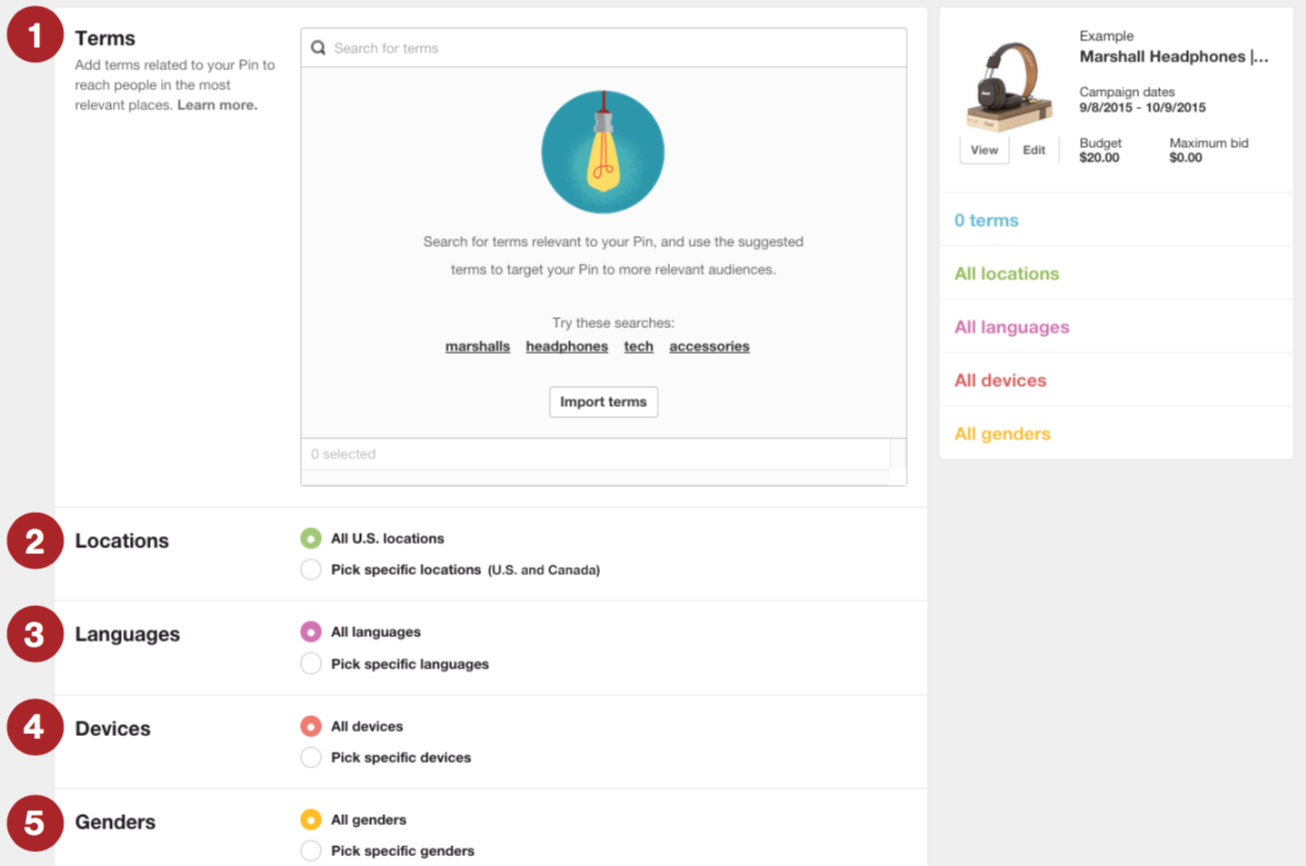
‘Terms’ means the keywords that are related to whatever you’re trying to promote.
Pinterest recommends using around 20-30 terms to maximize coverage.
This is relatively easy to do, because when you’re adding terms, you’ll be provided with some ‘related terms.’
You then have the option of selecting the ‘Location, Language, Device and Genders.’
At the start of your campaign, you may want to target your campaigns only towards English-speaking countries (as well as setting the language to English too).
That might result in higher click costs, but the conversions will probably be better.
The ‘Genders’ you pick will depend on the promotion in question.
As for the ‘Devices,’ keep it open for now and then experiment later when you have a profitable campaign on your hands.
You then need to decide on how much you’re going to be spending.
Exactly what you’re going to be spending is determined by the goal you chose earlier.

You’ll find that Pinterest provides you with an estimated bid based on how much other advertisers are paying for their promotions.
It is worth sticking to the suggested bid and not undercutting it.
That’s because low bidding could result in low levels of exposure, meaning not many people clicking on your ads.
You may then throw away an otherwise good ad campaign, just because you weren’t willing to pay the right amount.
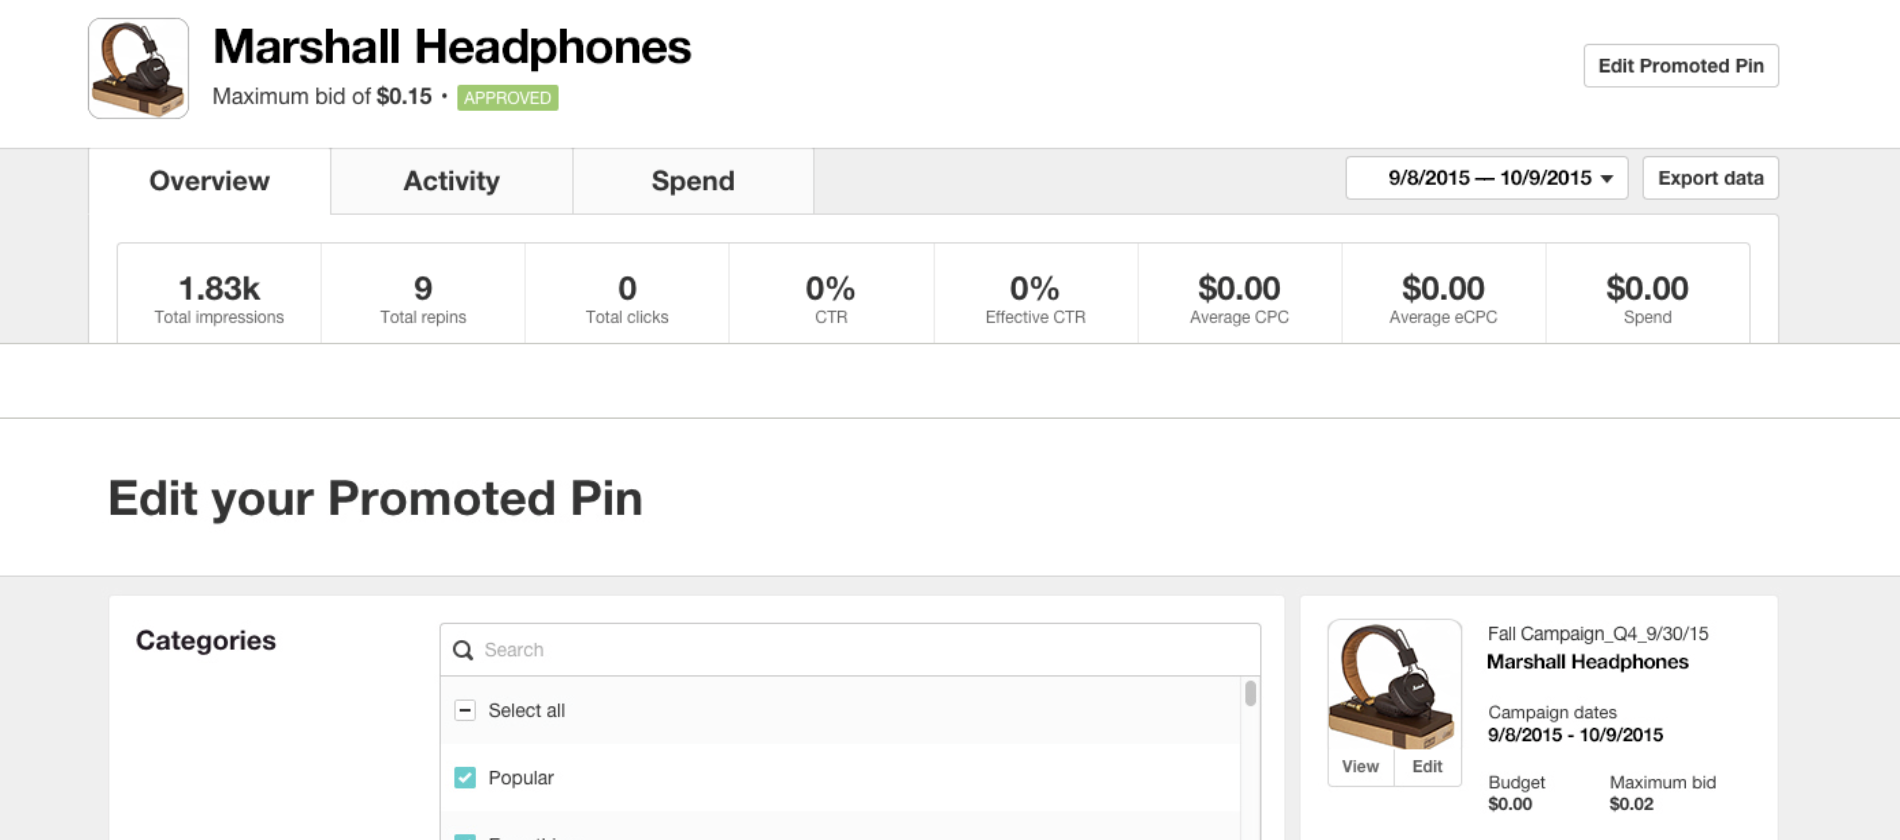
Once you’ve set the bid for your ad, you’ll then be able to enter in an ‘Original Pin description’ and a ‘Destination URL for Promoted Pin.’
We’ve talked about how you can create an effective ‘Pin description’ earlier.
The ‘Destination URL for Promoted Pin’ is just the website you’re looking to promote with the Pin.
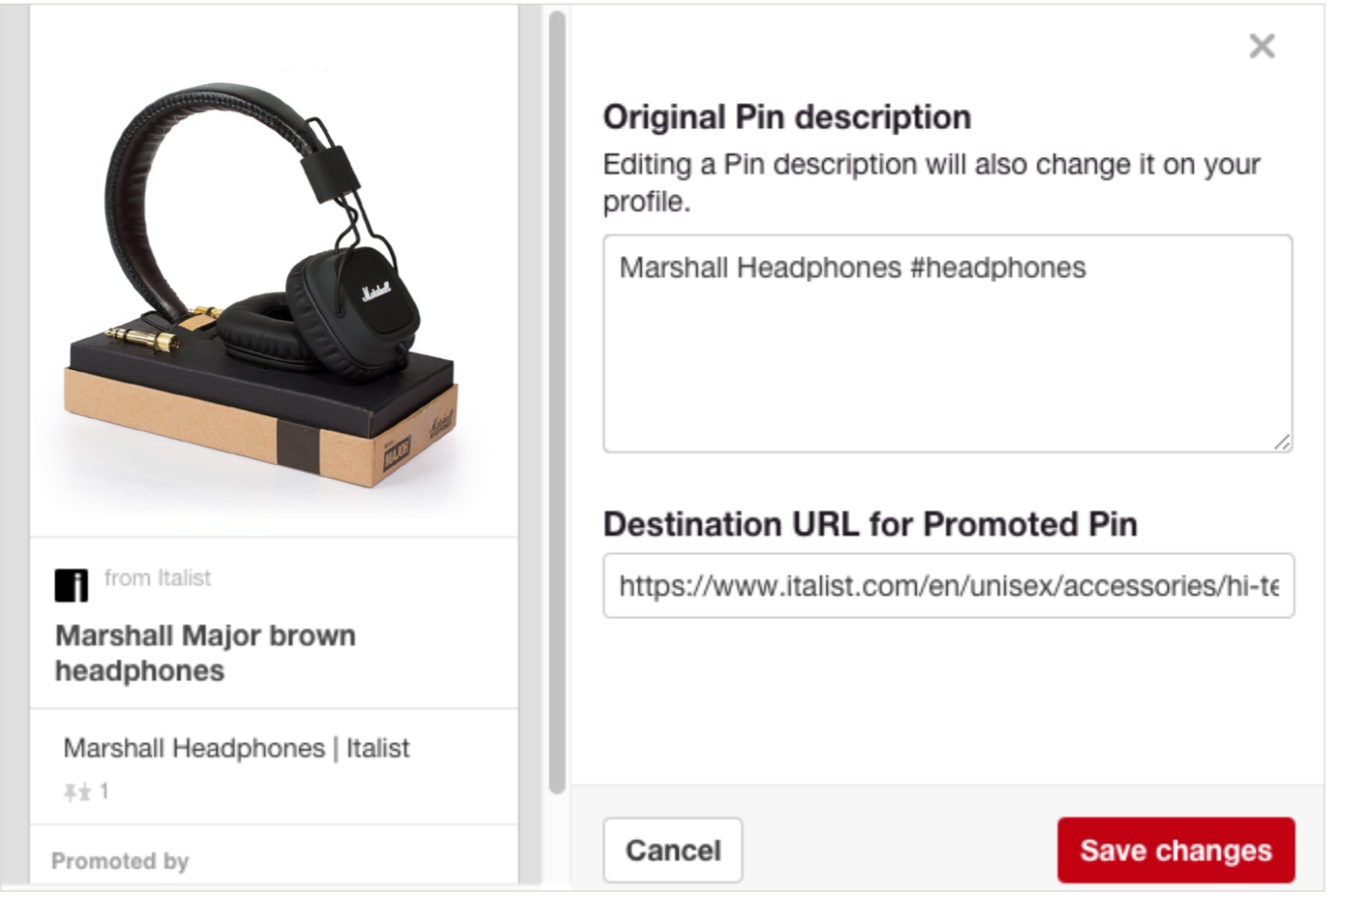
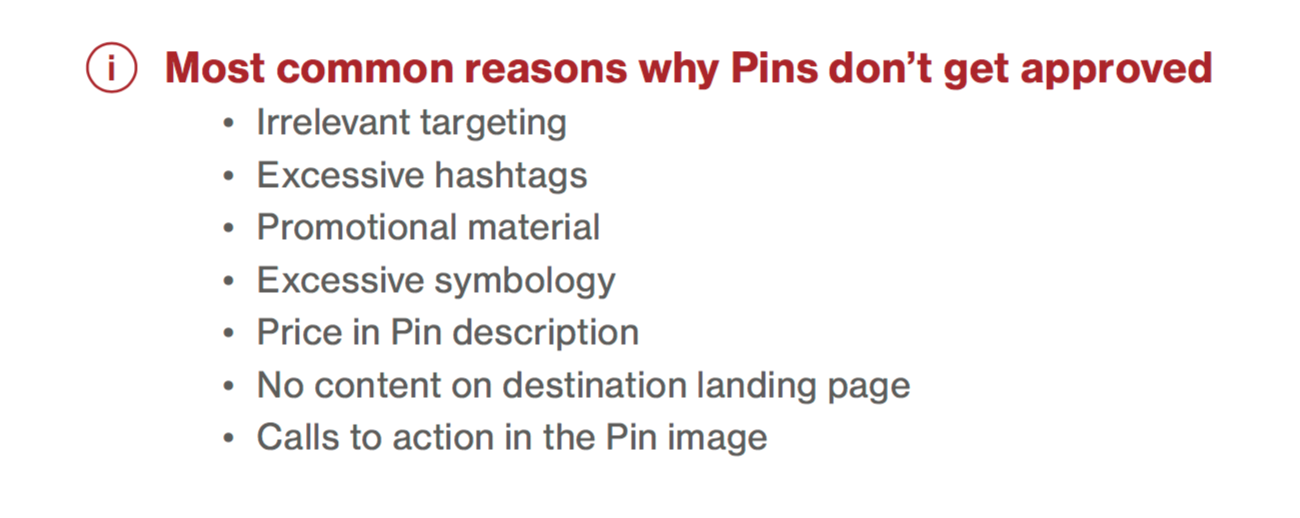
You’ll then need to send off your ‘Promoted Pin,’ so that it can be reviewed.
If you’re Pin is rejected, it may be for the following reasons.
Once your Pin is active and being promoted, you’ll be able to collect some metrics about how it’s performing.
You can use ‘Conversion Tracking’ to see ‘which’ Pins are driving ‘what’ results.
Setting this up might be a little bit tricky if you’re not really used to dealing with bits of code.
But, although perhaps a pain to set up, it’s worthwhile because it will reveal some useful information.
You can access the ‘Conversion tracking’ section by clicking on ‘Tools’ and then selecting ‘Conversion tracking.’
You’ll then see the following screen.

When it comes to picking a ‘conversion type’ it will again depend on the purpose of your campaign.
Pick the option that best matches what you’re trying to achieve, or, at the very least, measure.
The ‘timeframes’ option allows for you to set a window in which you want to judge your results.
This can be helpful if you’re trying to quickly gain a sense of how well a campaign is performing and how well it is going to continue performing.
Once you have adjusted all of the settings here, you’ll then need to insert a bit of code on your site.
Where you place the code is going to depend on the ‘conversion type’ you chose before.
When you’re creating a Promoted Pins campaign, you’ll rarely rely only on the success of one pin.
You’ll want to create a whole bunch of Pins.
That way, you’ll increase the chances of finding something successful because you can weigh each pin’s success individually, but also compare pins to each other.
When simultaneously promoting multiple Pins, it’s good idea to check out how each one is doing so that you can stop running the ones that are costing you money without bringing results.
The ‘ads manager’ home page will give you a quick sense of how your promotions are going.
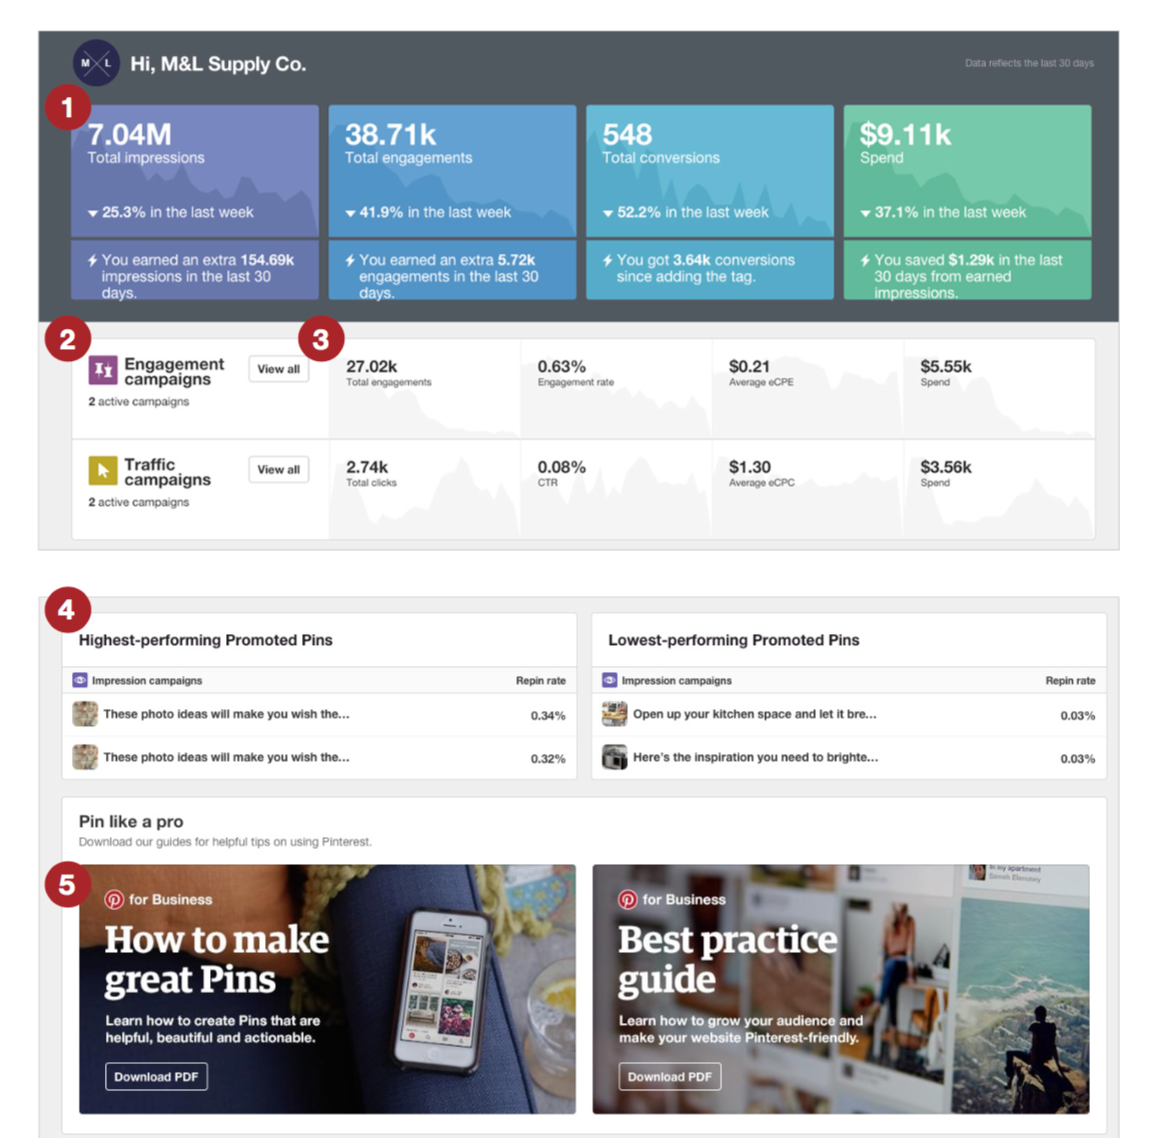
If you look at the section numbered 4, you can quickly see which Pins are bringing the best results and which ones aren’t.
As you begin to explore your campaigns at a more granular level, you’ll be presented with the following kind of data.
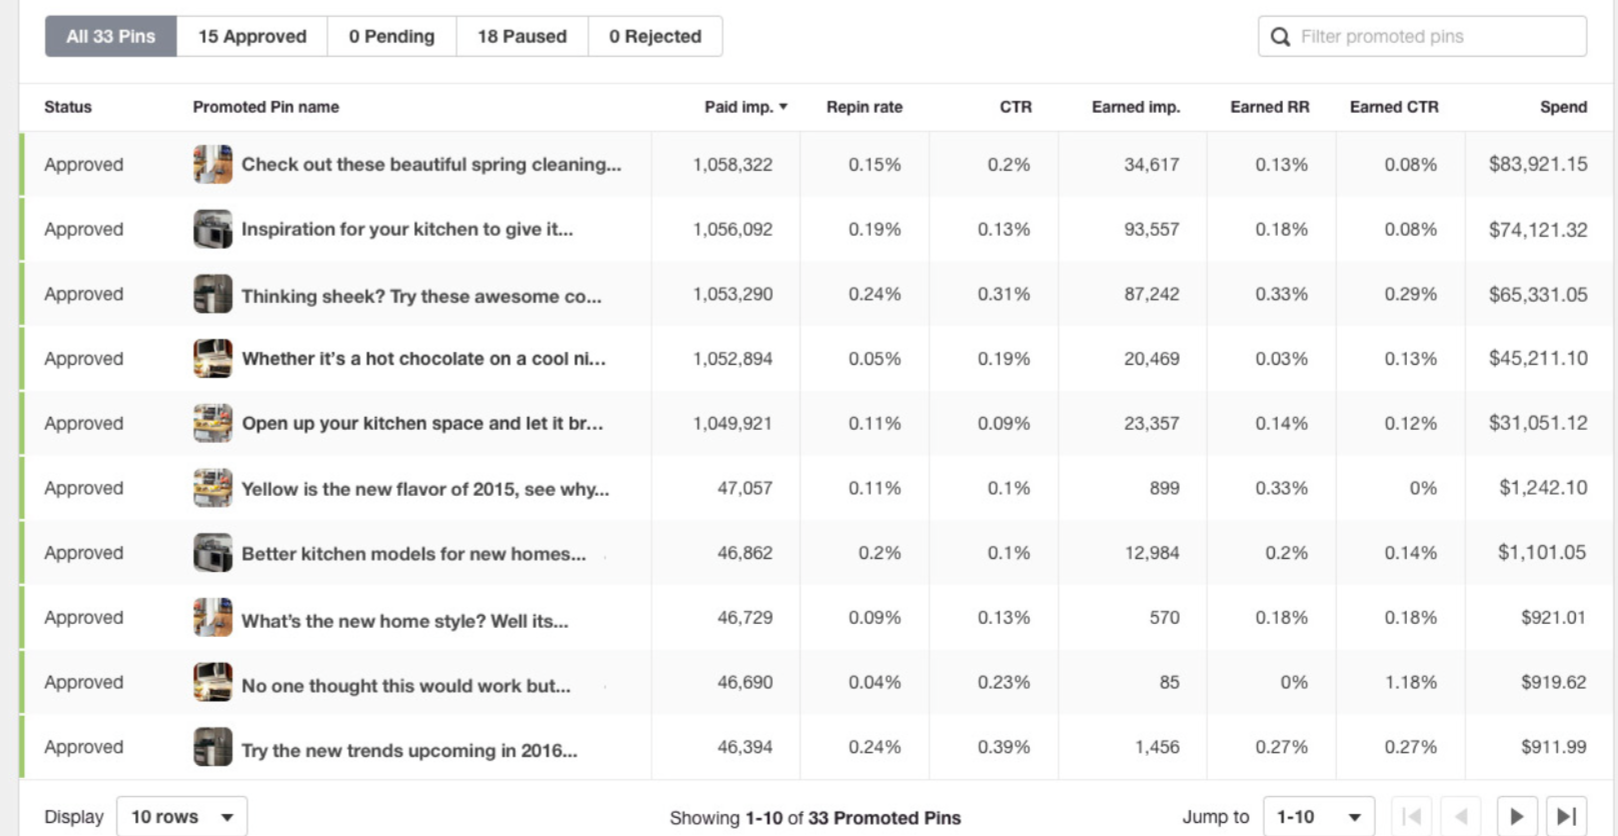
Here you can tell exactly how each of your Pins are performing.
If you have some Pins that are performing well, it might be a good idea to boost the budget on those, while also ensuring that they’re available on all devices.
On top of that, you might want to start to promote them in other countries.
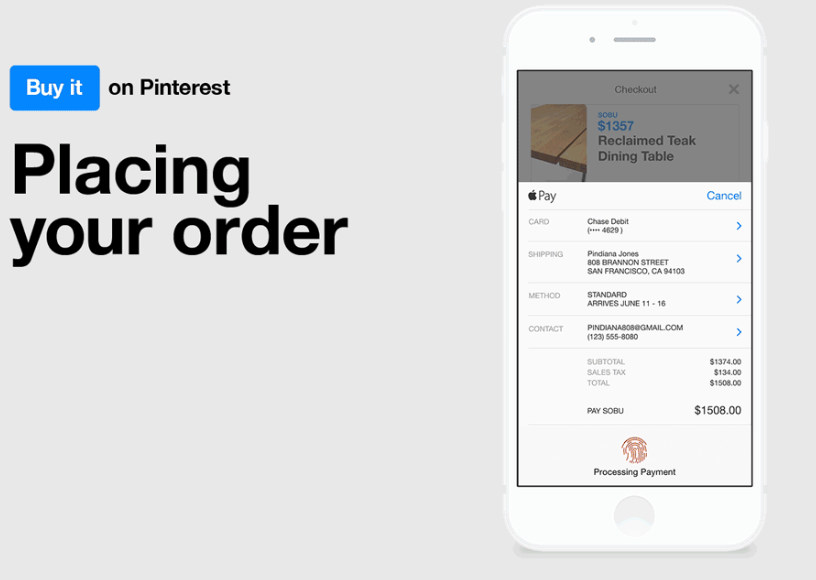
Buyable Pins
One feature that’s really exciting is the feature known as ‘Buyable Pins.’
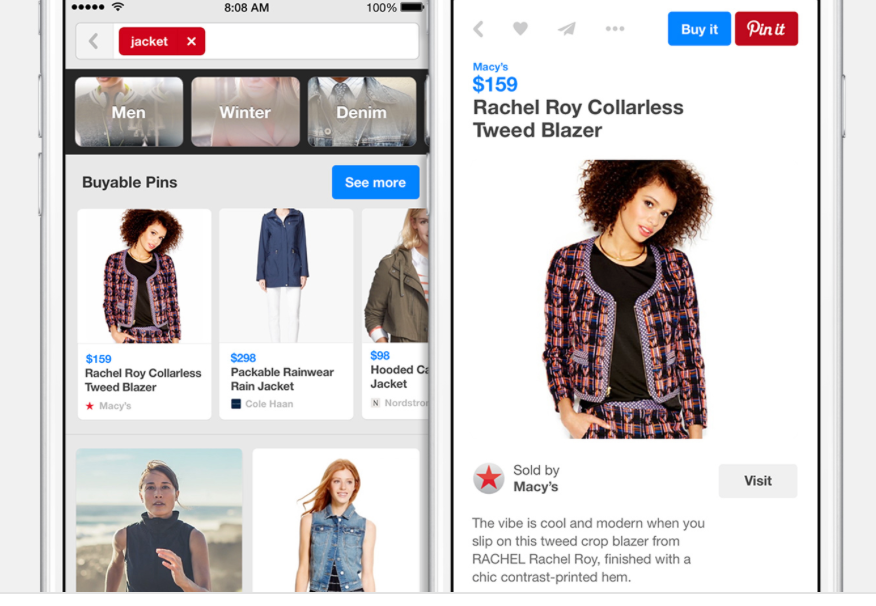
In short, this feature allows for people to buy items from directly within a ‘Pin.’
This means that the checkout process is made much smoother because buyers don’t have to go through several apps to complete their purchase.
On top of that, Pinterest is looking to integrate features such as Apple Pay, which will allow for the purchases to be made even quicker.
At the moment, Pinterest ‘Buy Pins’ work only with the following integrations.

This is definitely something to consider experimenting with, if your offer lends itself to this kind of transaction.
It’s being rolled out slowly, so not everyone has access – that’s why we’re discussing it as a separate section.
But when you find that you can use the feature, figure out a way to integrate it into your campaign – the results will most likely be more than worth the effort.
Conclusion
As you can see, there is a lot of potential when it comes to using ‘Promoted Pins.’
As with any ‘self-serving’ advertising platform, you’ll first need to appreciate what resonates with the user base before you attain the results you’re after.
For Pinterest, that might include identifying what pictures work well on the social media platform, but also how you need to go about writing descriptions.
You can always maximize the potential of your Pins by taking advantage of the ‘Rich Pins’ feature.
Of course, you’ll need to experiment over time, as you’re not likely going to get your ads perfectly dialed-in on the first go.
But, the more ads you run, the more likely you’ll hit on the optimal online ad–and the more likely you’ll begin to understand how to generations on this social network.
In any case, you now know more than most marketers when it comes to advertising using Pinterest – all that’s left now is for you to run some campaigns of your own!
What have you experienced when running some Promoted Pins of your own?
Comments (46)