
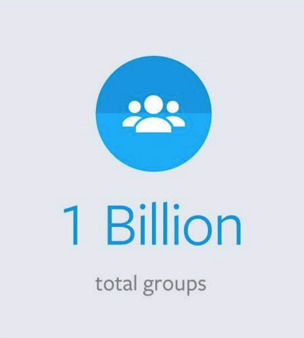
Facebook now has over 2 billion active monthly users. 1 billion of those users participate in Facebook Groups.
Creating a group of your own is an inexpensive and effective way to reach your target market.
If you’re not already familiar with Facebook Groups, it’s essentially a community within Facebook’s platform that users can join and participation is encouraged. Groups are built around common interests or goals, like cooking or running, but there are plenty of business-focused groups too.
In this post, I’m going to cover everything you need to know to start and grow your own successful group, and how to use it to market your business.
By the end, you’ll know more than most Facebook marketers about taking a Facebook Group from nothing to something spectacular.
Let’s get started.
Who is your group for?
The first thing you need to figure out about your group is who it’s for.
If the goal of your group is to generate leads for your business, your group should attract your ideal customers.
For example, say you’re a graphic designer who wants to work with small businesses or startups. Your group should provide valuable tips for small business owners, like how their brand can make them stand out.
It’s important to have a specific target market in mind for your Facebook group.
There are a few reasons for this.
First, if you can be precise in terms of who you want to help, you’ll be able to describe your group more effectively. When you can clearly communicate how your group can benefit others, you’ll easily attract new members.
The biggest benefit of clearly communicating the benefits of your group is that it becomes filled with your ideal customers instead of random people.
For instance, imagine you were looking to create a group that provided “dog training advice for Labrador owners.”
Which group do you think your target audience would like to join most?
A group called ‘dog training,’ or a group called ‘dog training for Labrador owners.’
I bet you chose the second one, right?
That’s because the second one sounds like it’s more tailored to the needs of someone who has just adopted a Labrador and is in need of training advice specific to the breed.
The sense of community in the second group is also likely to be higher because there’s an increased level of commonality too. People join groups to be around others like themselves.
So, that’s one reason why you need to be precise when setting up your Facebook group.
The second reason is that it makes it easier for people to find your group.
One of the main ways new people will find your group is by searching on Facebook. There are 2 billion daily searches on Facebook.
If you give your Facebook group a specific, keyword-rich name, it will be easier for people to find. Using our Labrador example above, it’s likely to show up for the term “Labrador dog training” but could get lost in thousands of search results for just “dog training.”
But before you can market your group, you need to create one.
How to create a Facebook group
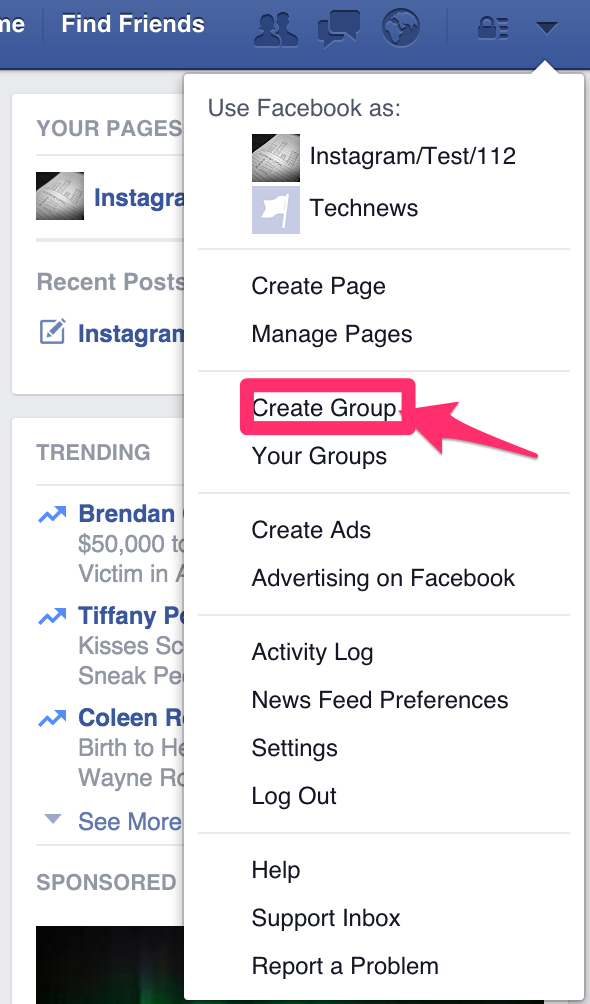
First, log in to Facebook. Then, open up the dropdown menu by clicking on the ‘downwards arrow.’

Then select the option ‘Create Group.’
You’ll need to provide some basic information about your group.
Create a ‘Group Name’ based on the principles we just covered. You might also want to click on ‘Pin to Shortcuts.’ This will ensure that the group can be found in the left-hand sidebar of your Facebook profile.
On top of that, you’ll also want to set up your group as a ‘Closed’ Group.
Having the group set to closed means that only people who join will be able to see your content. This makes the group exclusive and gives people a reason to actually join (so they can access your content).
You will be able to screen the people that are joining your group and ensure that not just anyone with a social media account gets in. Remember, to keep your group high quality, it needs to be informative and not ‘sales-ey.’
There are around 1.15 billion daily Facebook users so you can be sure that some of these people want to join groups just to spam them. A closed group prevents this.
The last part of setting up your group is to add a friend. You need to add at least one person. Otherwise, you won’t be able to create the group.
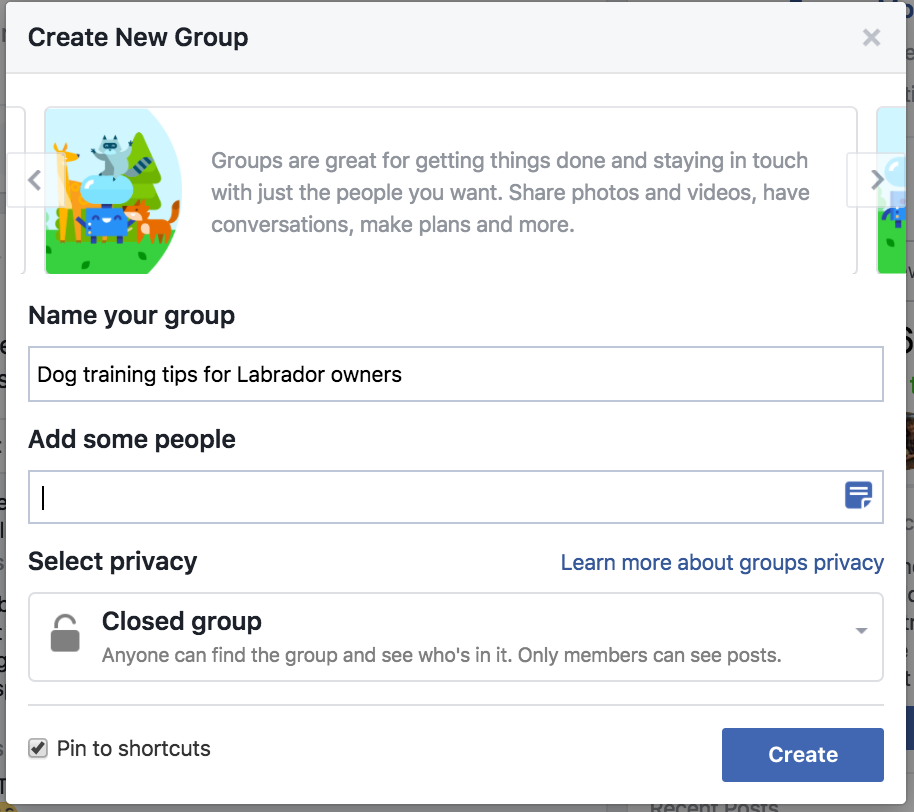
The best way to get around this is to just add one of your friends. You can always delete them from the group later.
If they’re a good friend, they probably won’t mind!
You then get to choose an icon for your group. In my case, I went with something dog related.
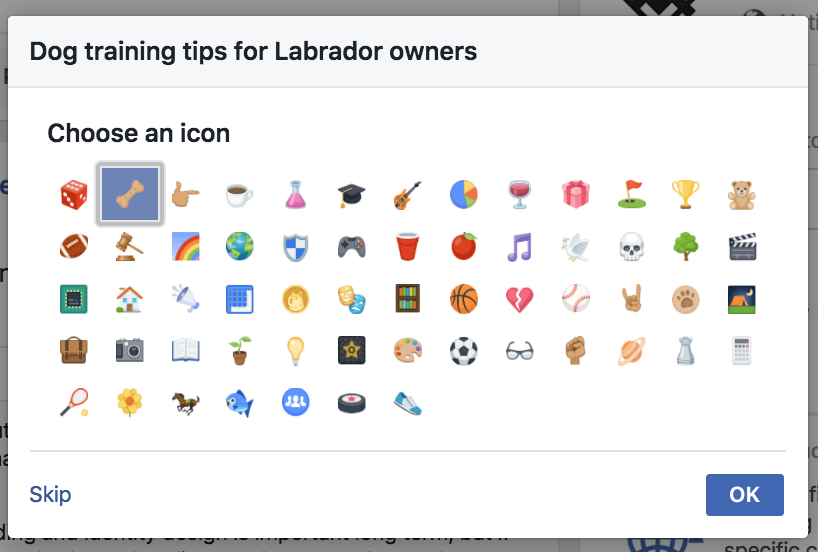
Once you’ve picked an icon, you’re taken to your group page where you can customize the look and message for your group.
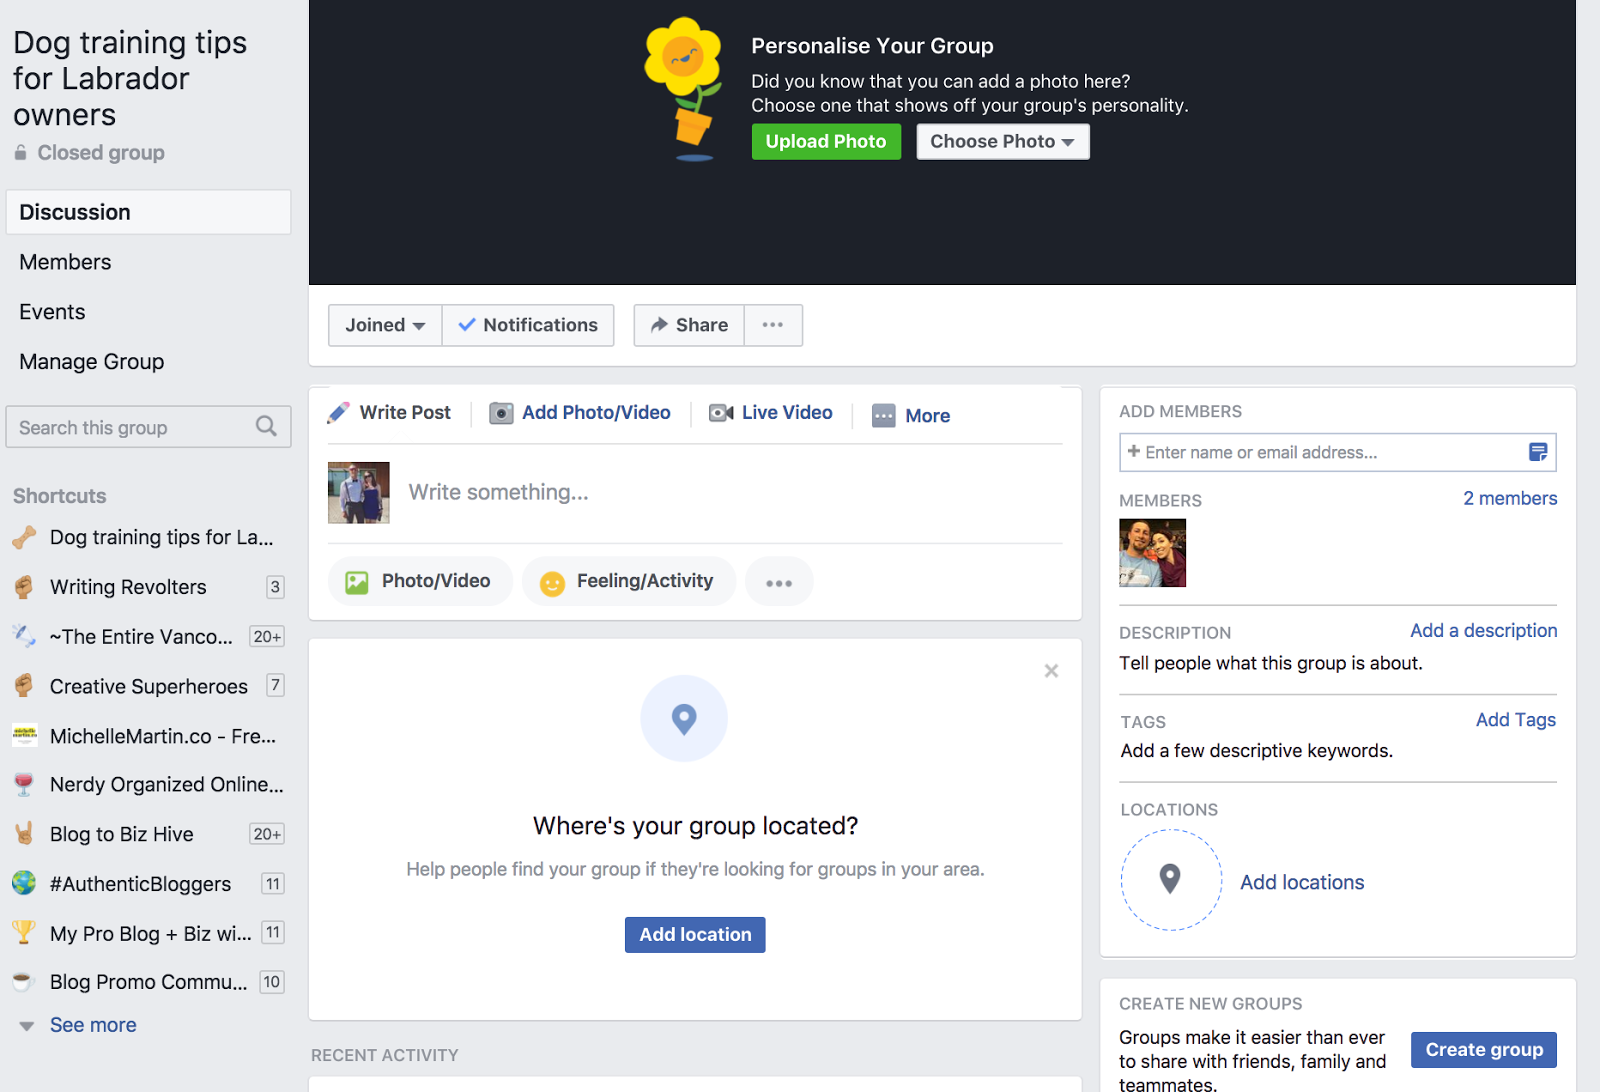
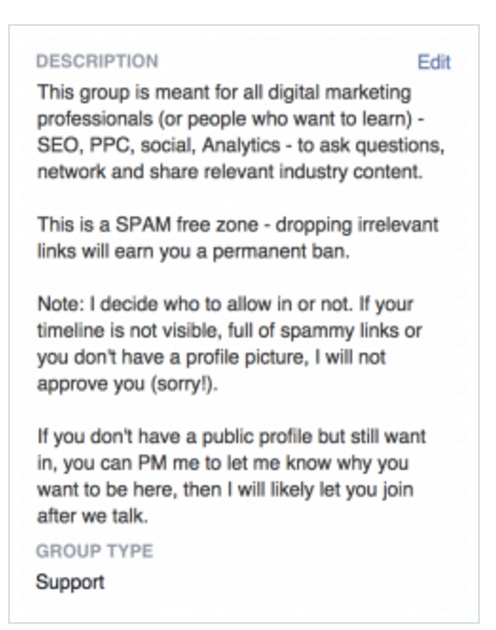
First, we need to give the group a description. Click on “Add a description” on the right-hand side.
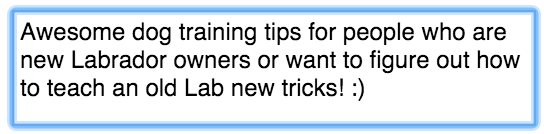
This is what potential members will see when they find your group. Make sure the description is clear and entices people to join.
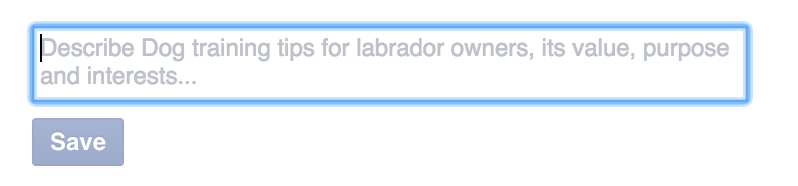
Here’s what I came up with.
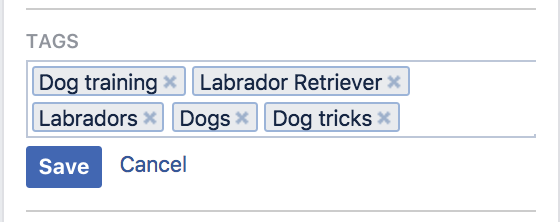
Then, click on Add tags (also on the right-hand side) to choose up to 5 descriptive tags for your group. Here’s what I picked:
We then need to give the group a ‘Cover Photo.’
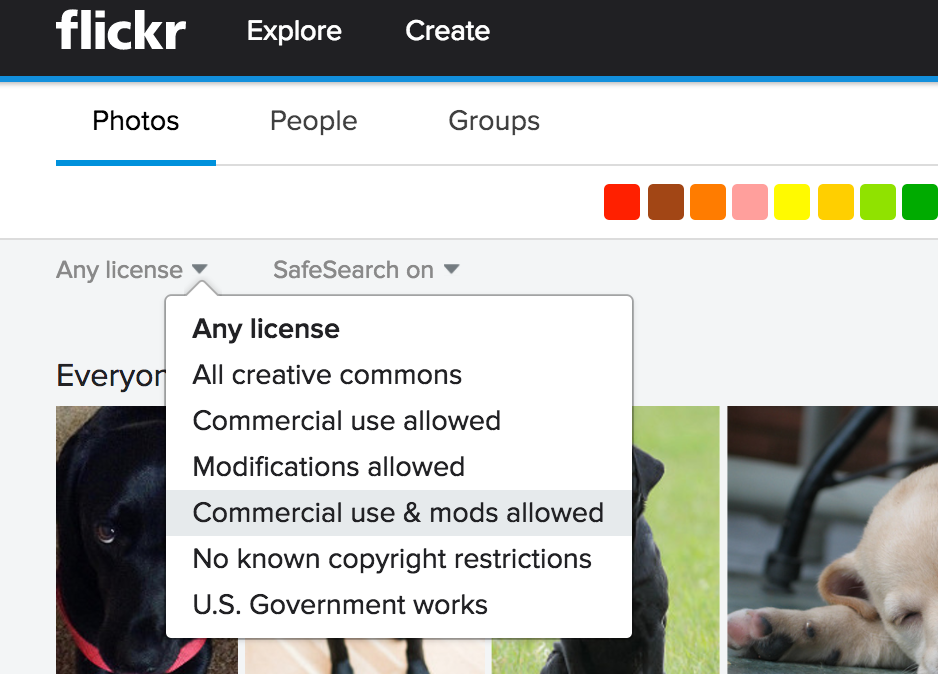
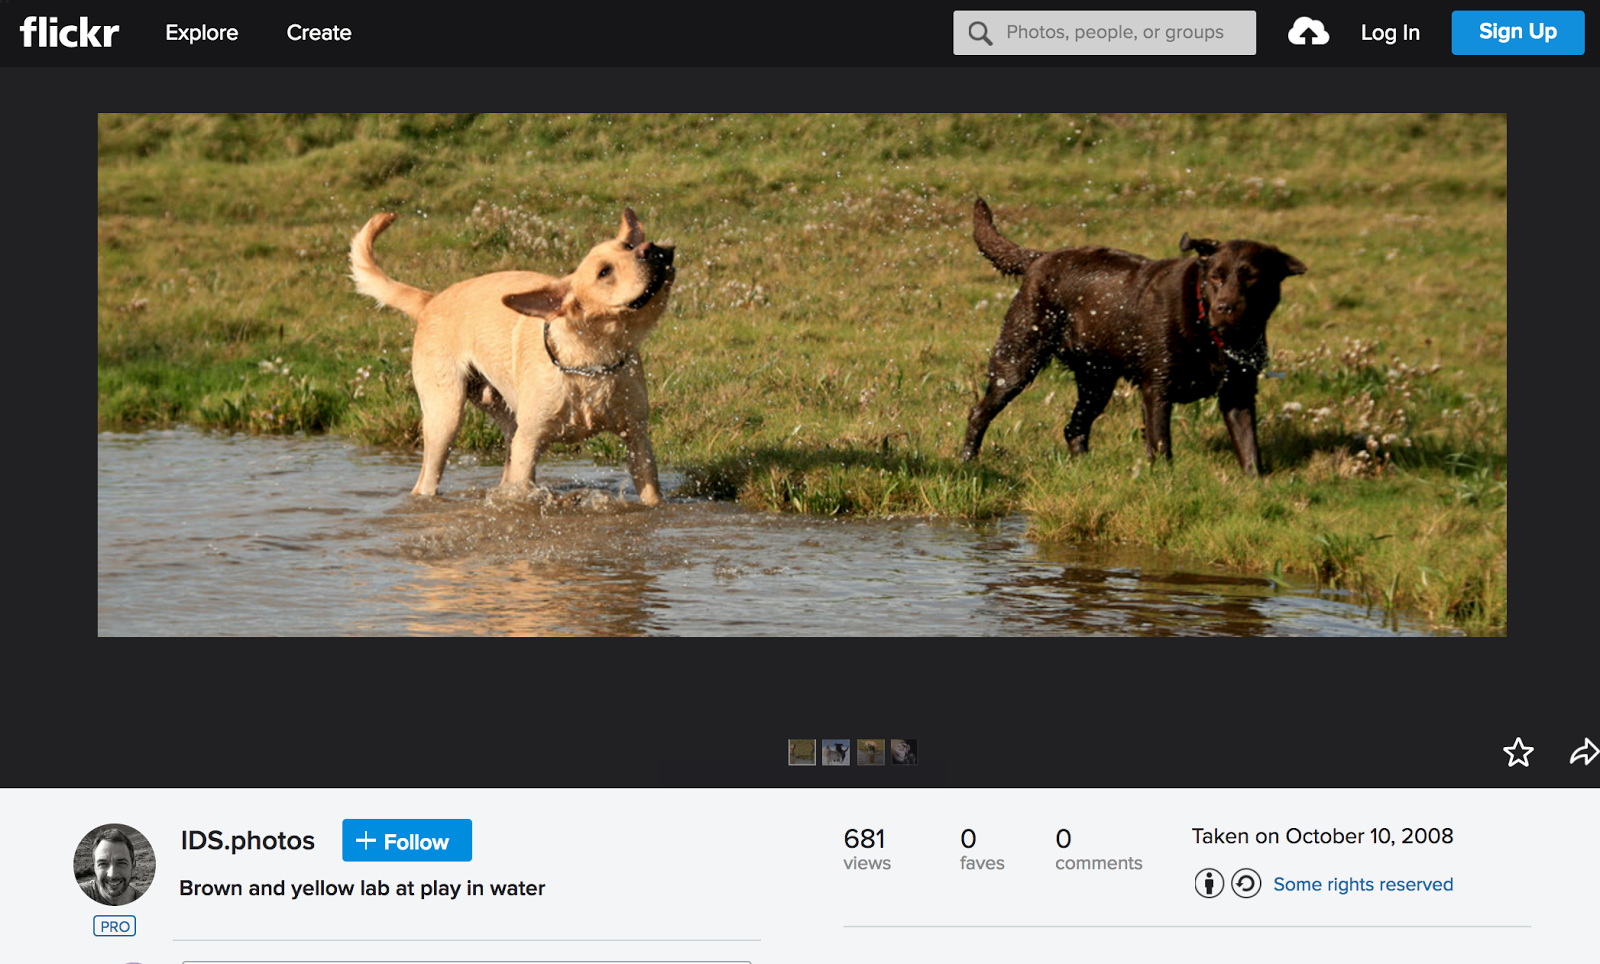
If you don’t have a great photo that matches your group, you can head over to Flickr and find one. Search for something related to your group topic.
I searched for ‘labradors.’

On the search results page, click on ‘Any license’ near the top left and choose ‘Commercial use & mods allowed.’ This means the photographer is okay with you using it to promote your business, or in this case, a Facebook group.
Here’s a cool picture I found.
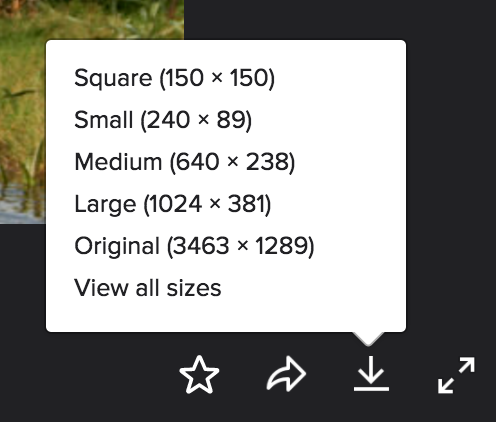
If you want to download a picture, click on the arrow icon in the bottom right, and then choose ‘Original.’
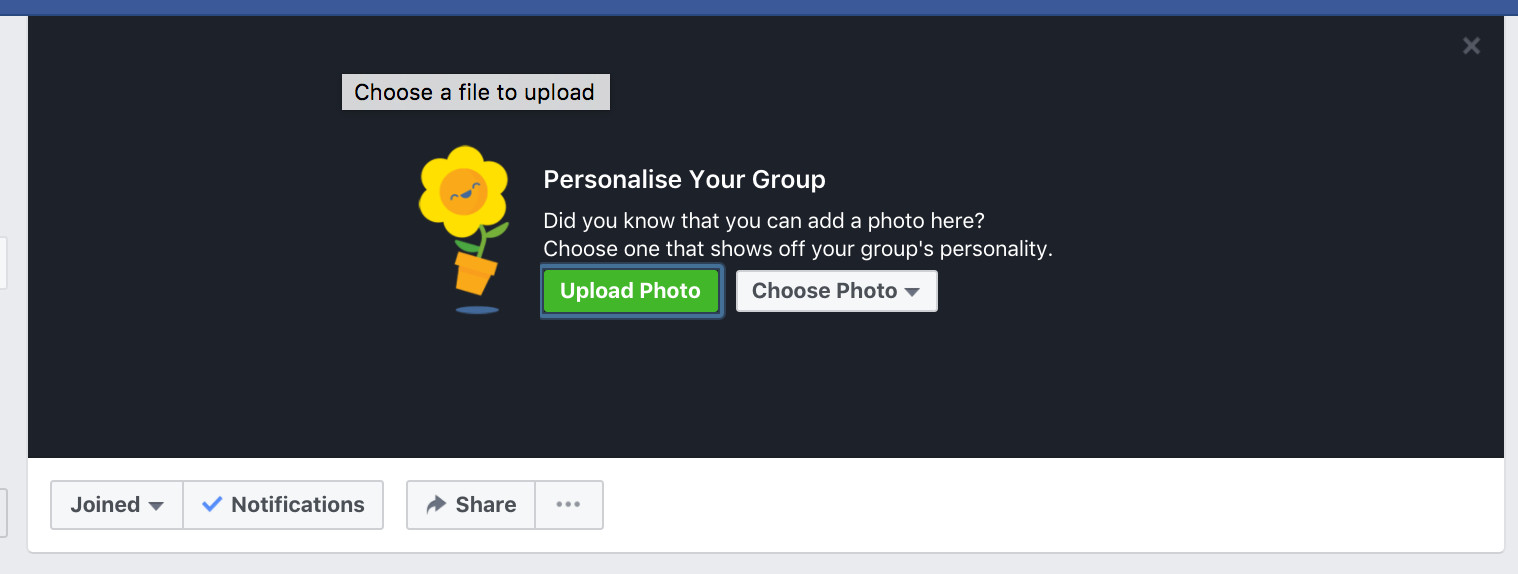
Go back to your Facebook group page and click on ‘Upload Photo’.
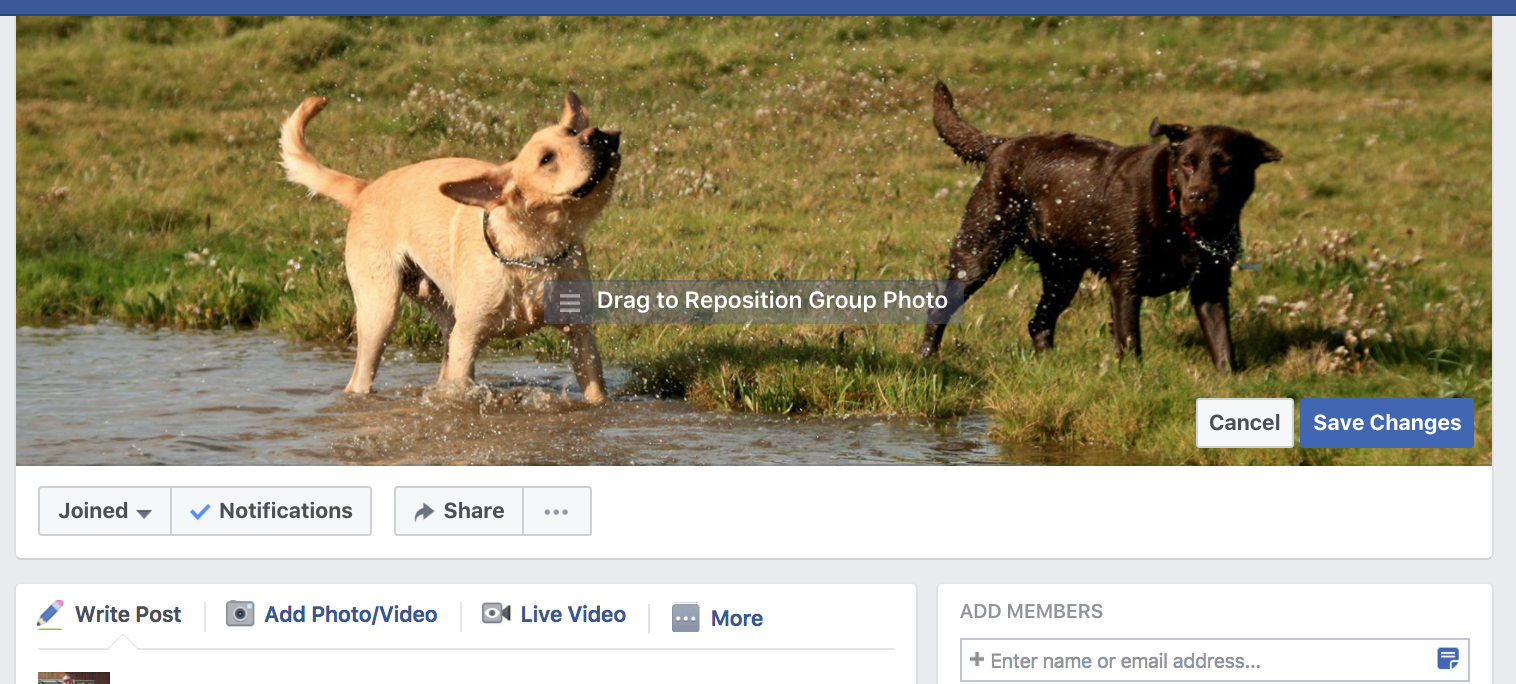
Click and drag it around to reposition it until it looks good.
Those are the basics of setting up your group.
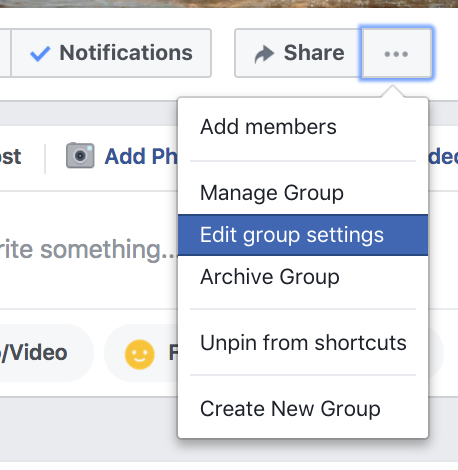
There are a few more things we can do to increase its chances of being found in Facebook’s search.
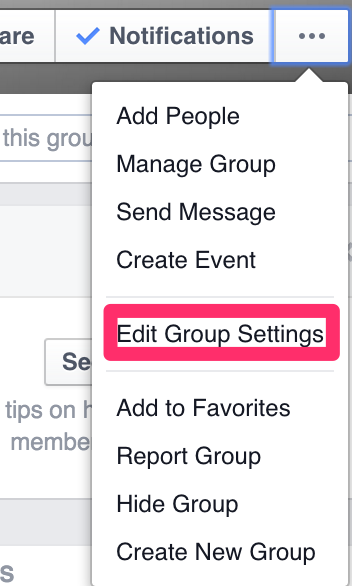
Click on the three dots as pictured, and then select ‘Edit Group Settings.’
You’ll then see this page with a few more settings.
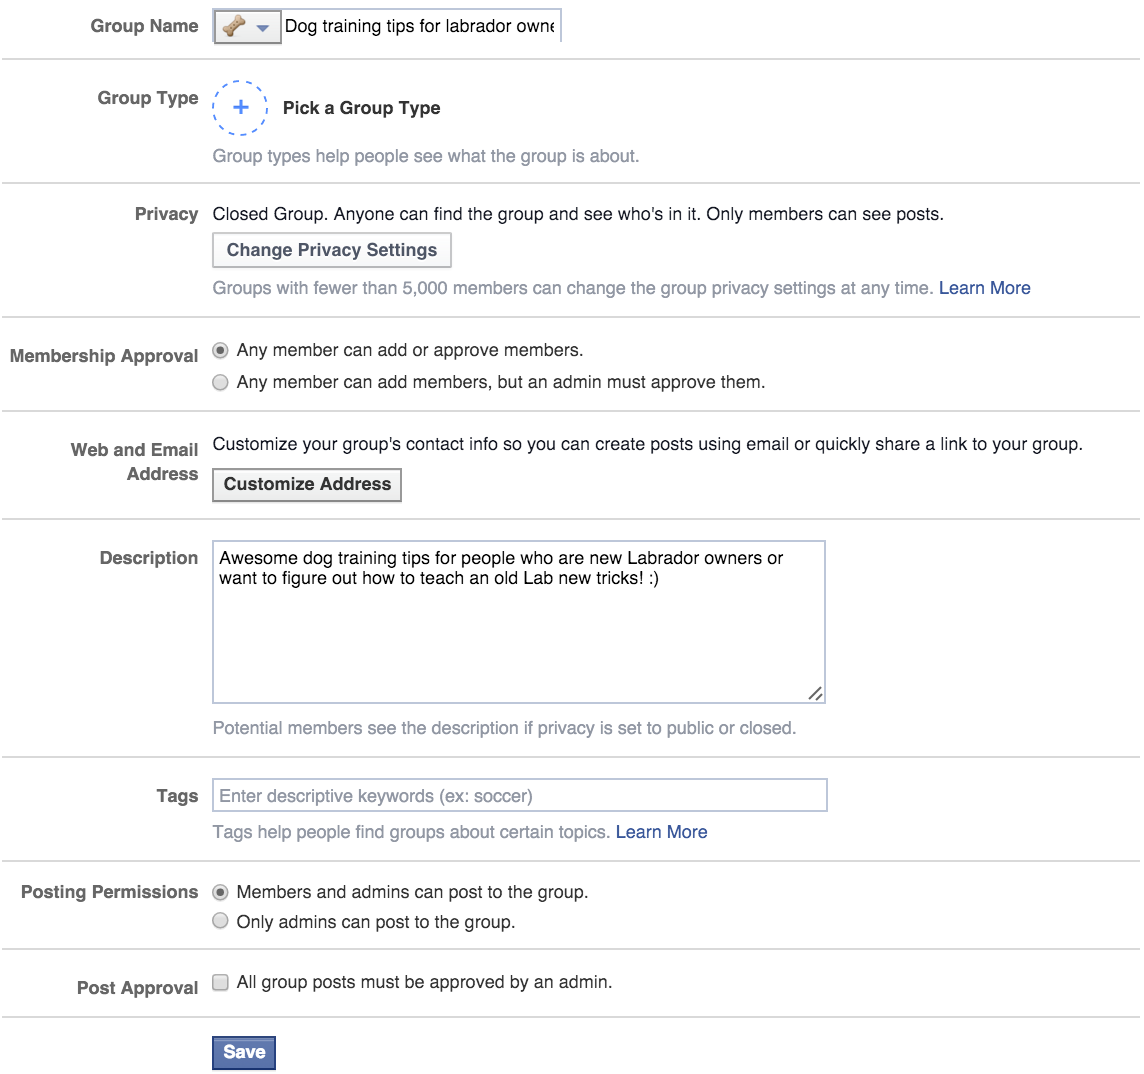
First, we want to ‘Pick a Group Type.’
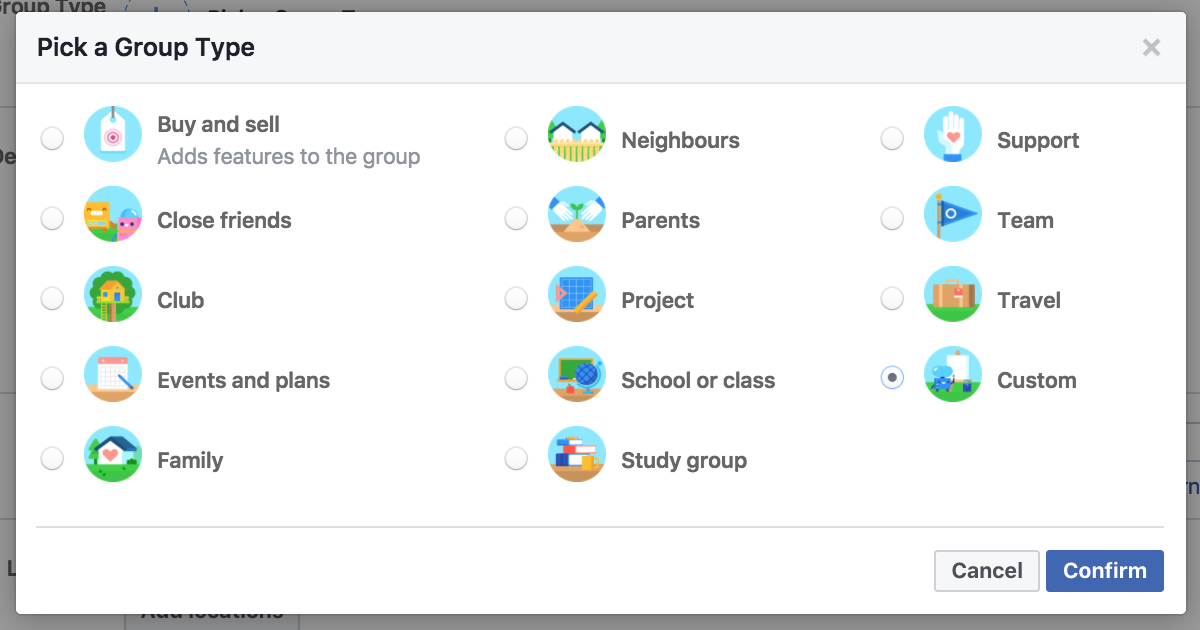
I chose ‘Custom.’
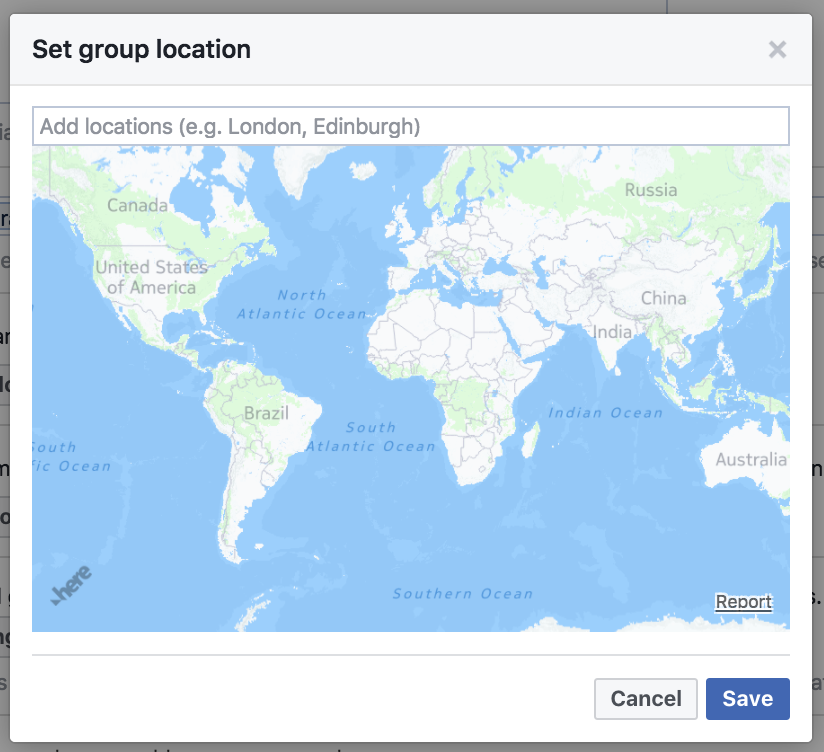
If you’re trying to attract people from your area, add a location for your group.
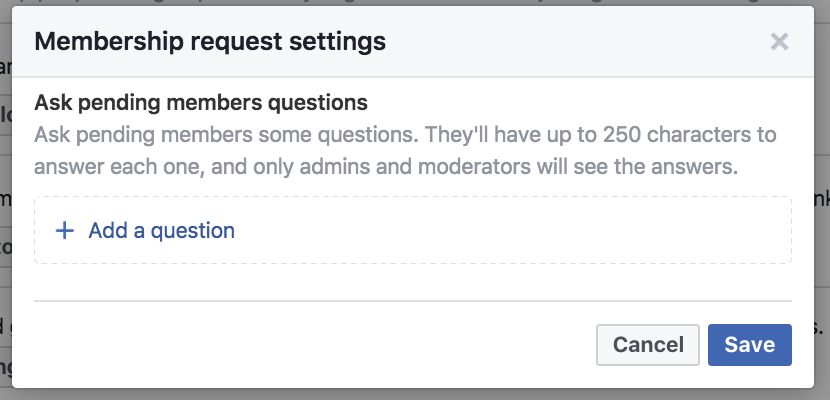
You can also ask new people who join your group some questions. This is handy to learn more about your members and see if they would be a good customer fit for your business.
Let’s dive into how to grow it now that your group is set up.
Create a Facebook Page for your group
You may be wondering why you need a Facebook Page and a group.
You don’t necessarily need a page for your group, but if you want to promote your group with ads or with public social media posts, you need a page to do that.
Your group is a private area where only members can view and discuss content.
A Facebook page is a public profile, where anyone can see your content. They can “like” your page, which means they’ll see your posts on their personal Facebook feeds.
There are two main benefits to a public Facebook page:
- It allows to you run ads promoting your group (more on that in a bit).
- And, it allows you to freely promote your group via public social media. People who stumble across your page may find your group interesting too and join it.
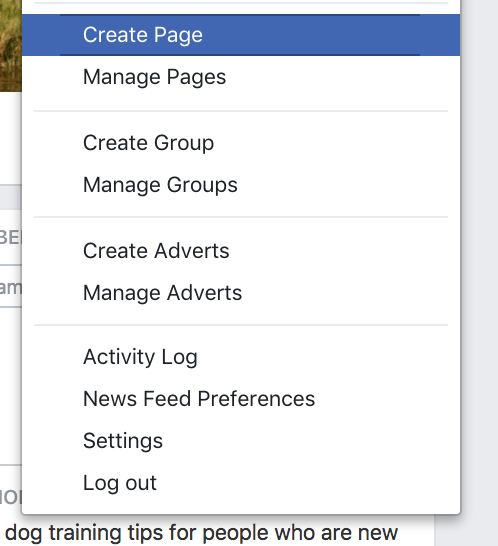
Setting up a Facebook page is quite similar to a group. Click on the top right menu next to your profile photo and choose “Create Page.”
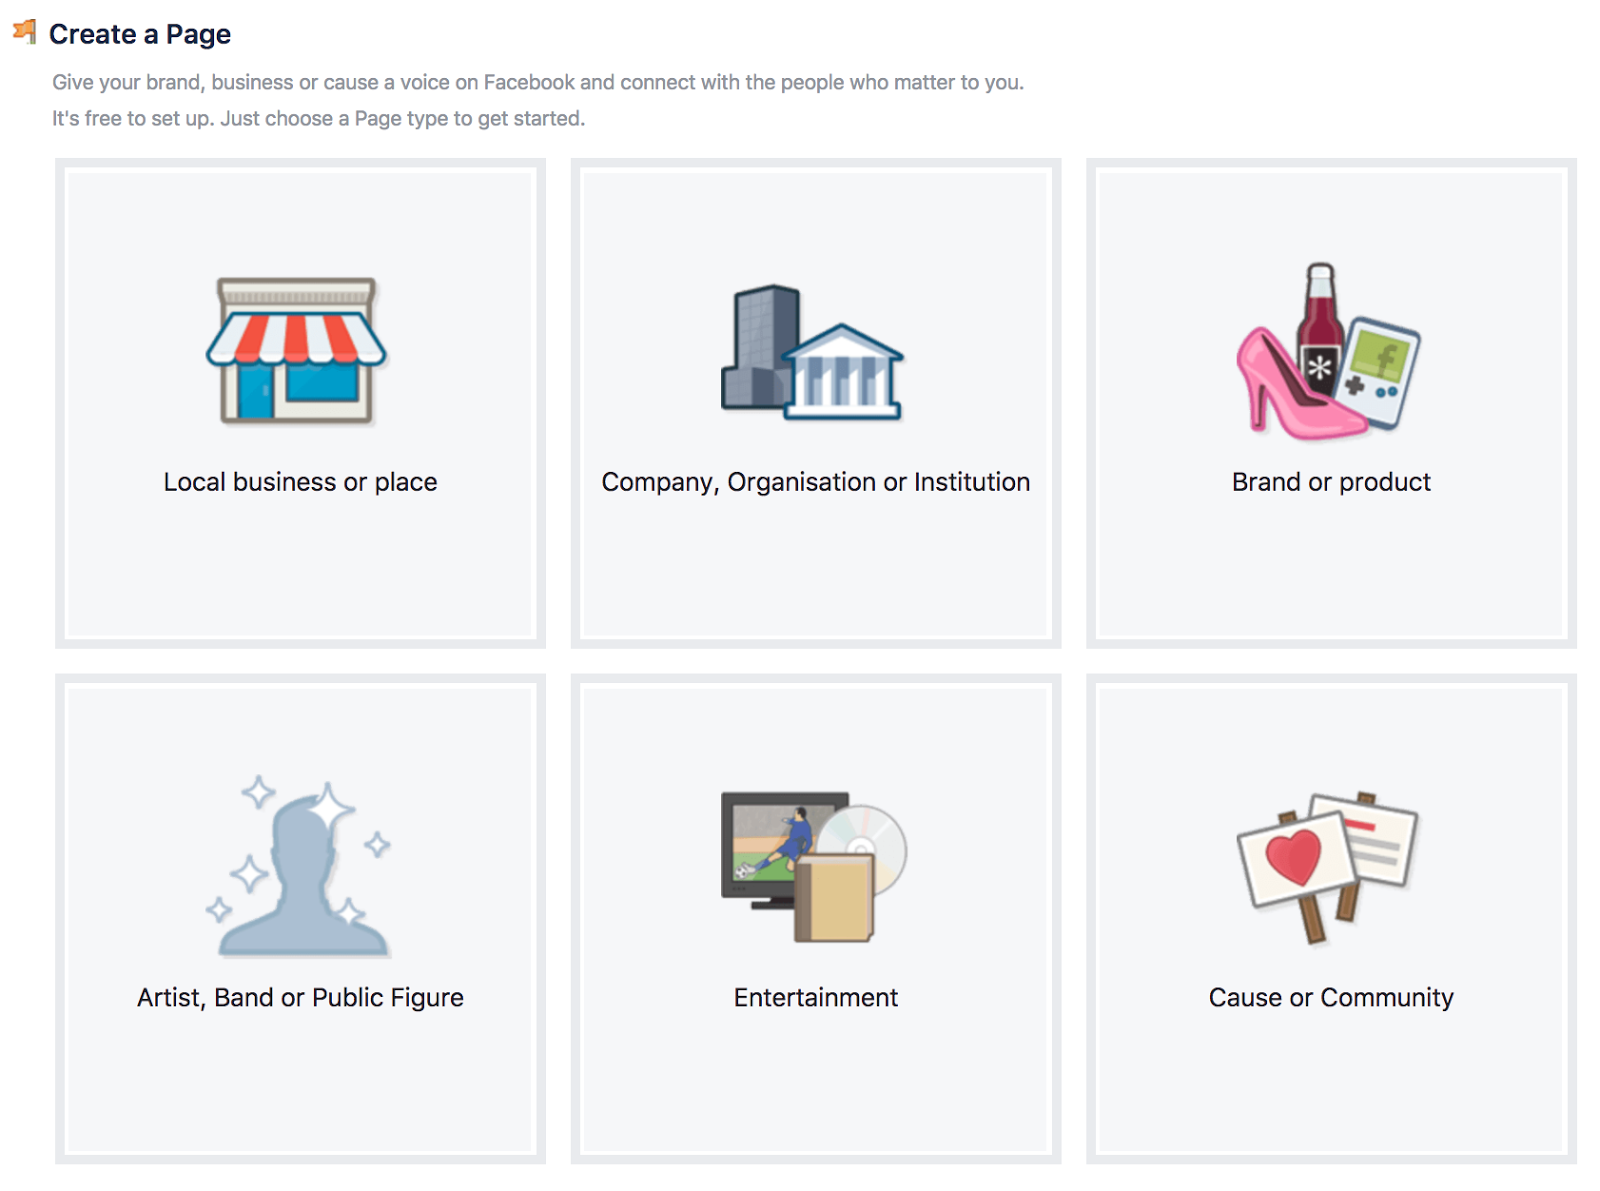
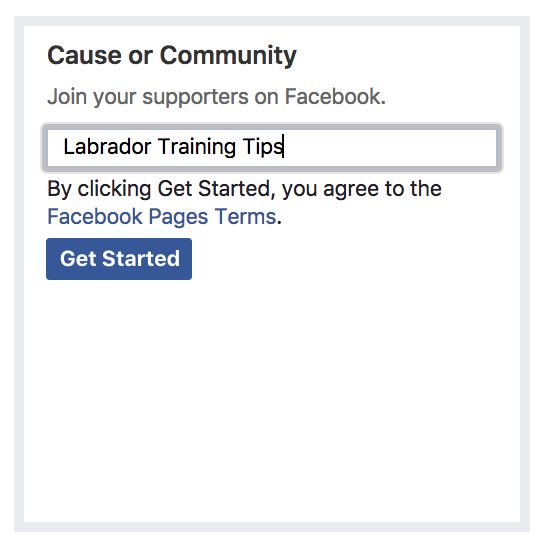
Then you have to choose a type of page to create. I chose Cause or Community since I want to create a community of Labrador owners.
Enter a page name and click Get Started.
Like our group page, you’ll want to spend a few minutes setting up your page. Add a profile photo and a cover photo. You can use the same ones as your group.
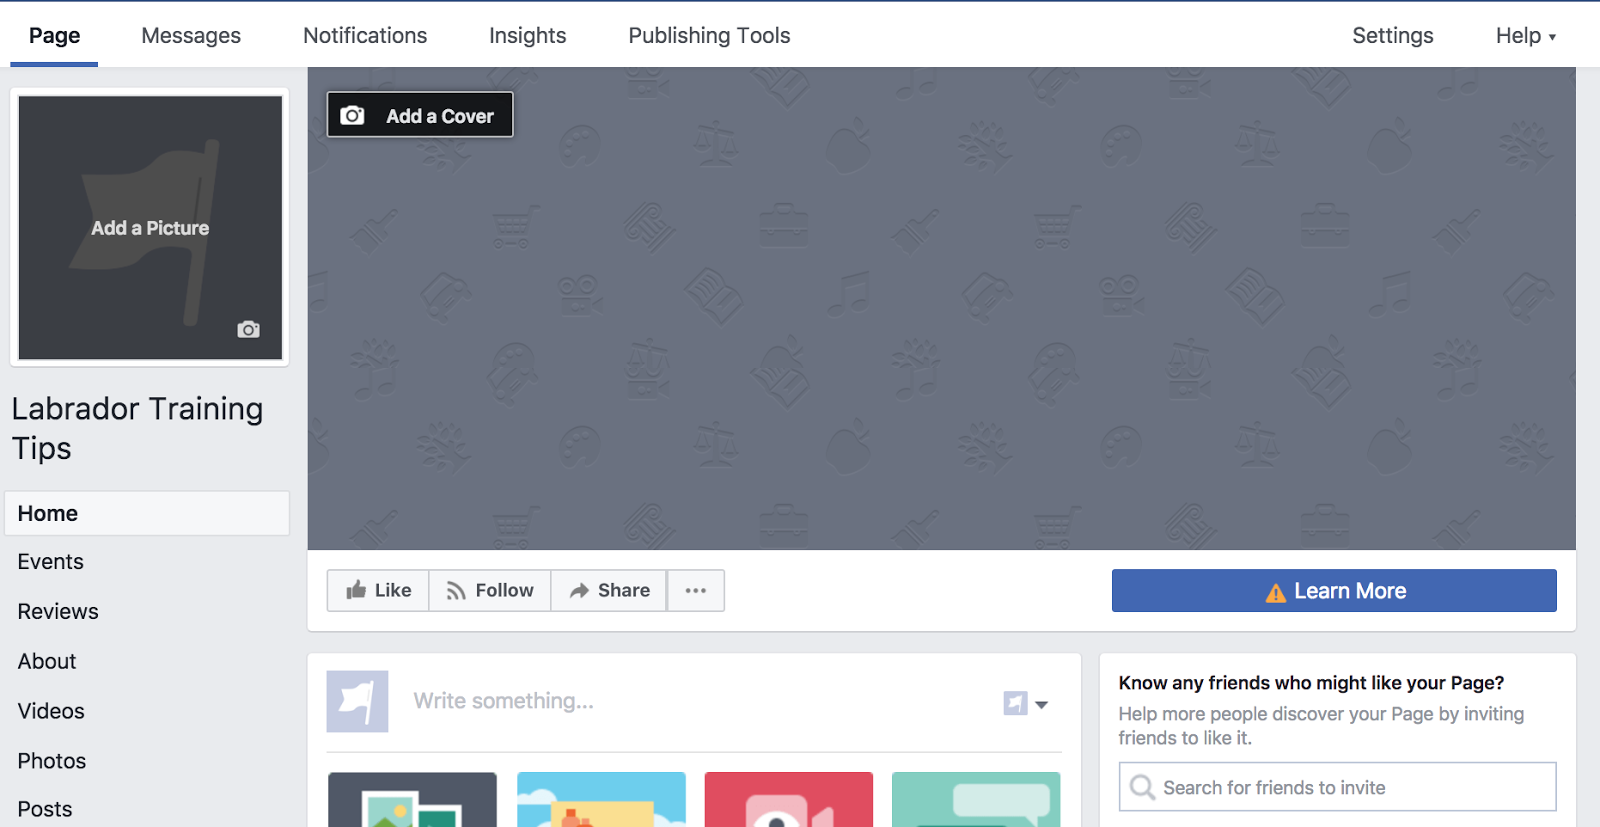
In fact, you should use the same photos in order to associate them clearly. When a visitor sees them, they’ll know the page and group are related.
Then you want to add a description and a bit more info. Click on About on the left-hand menu, then click on Edit Page Info at the top right.
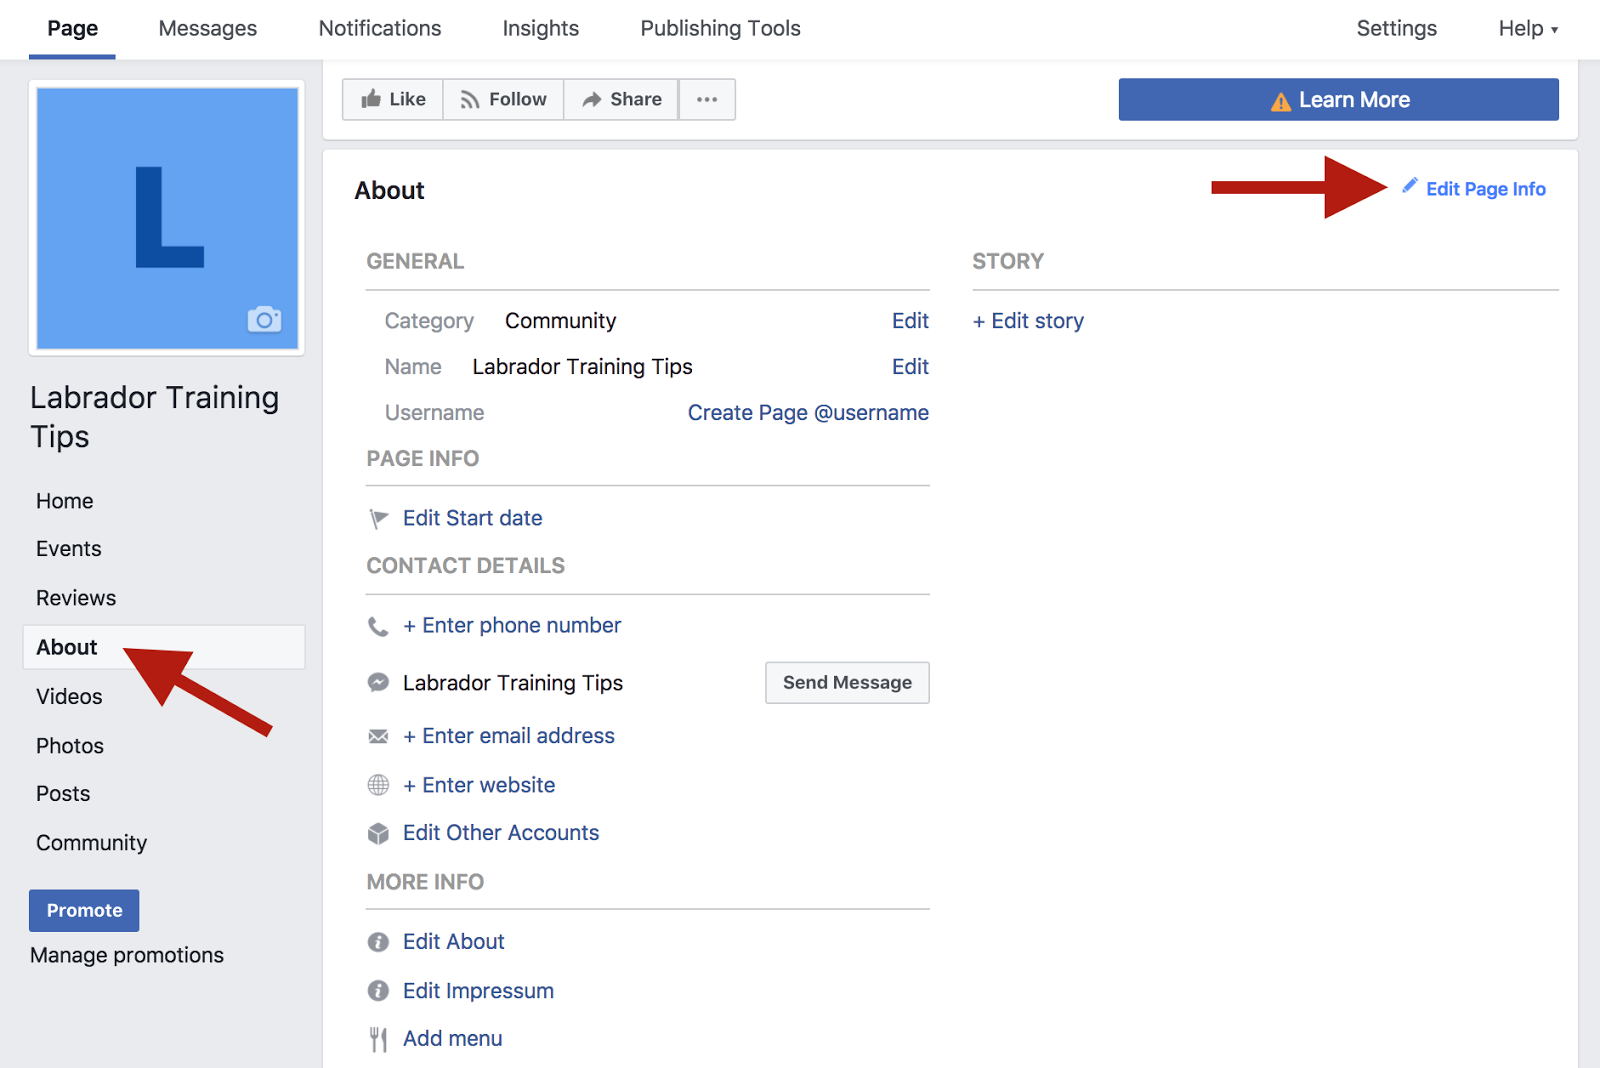
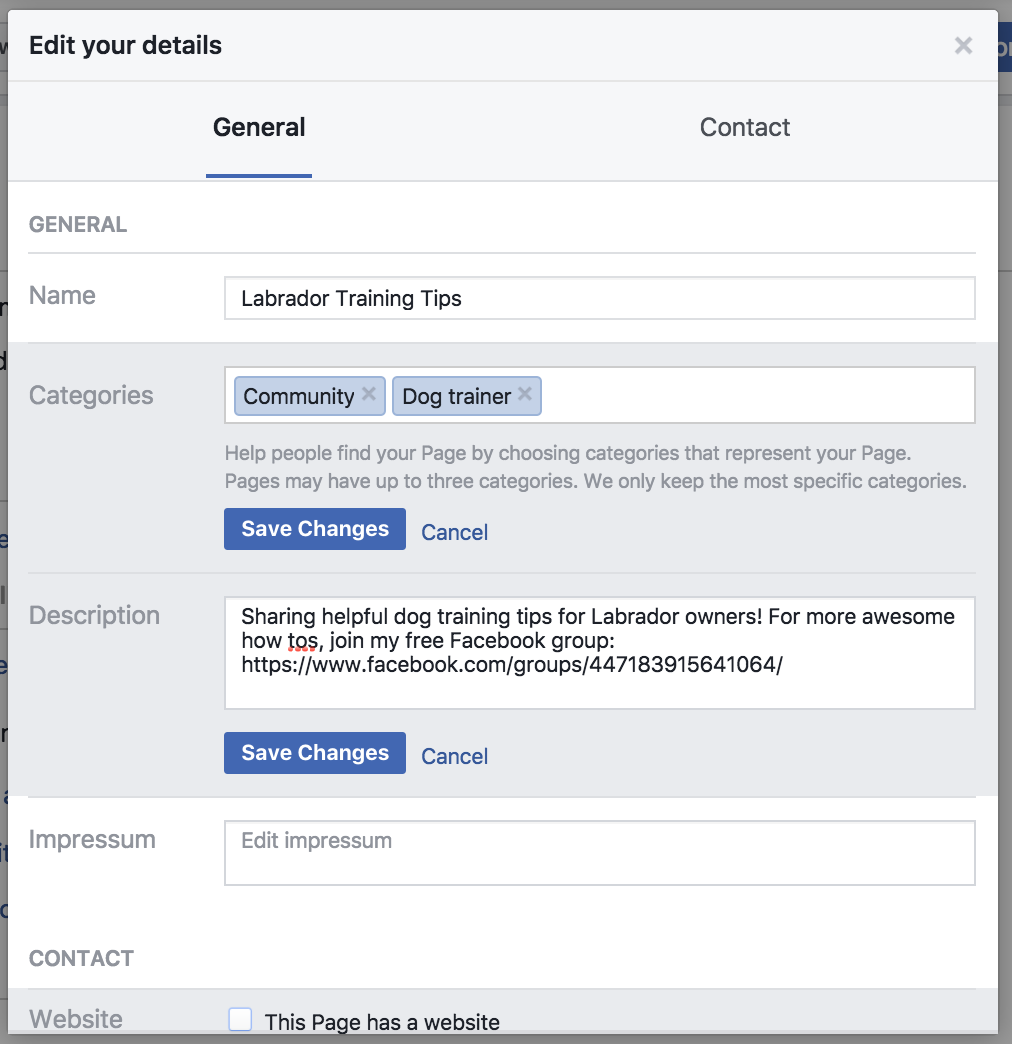
You’ll want to add relevant categories for your page and a description. In the description, promote your group and include the link to it to encourage people to join.
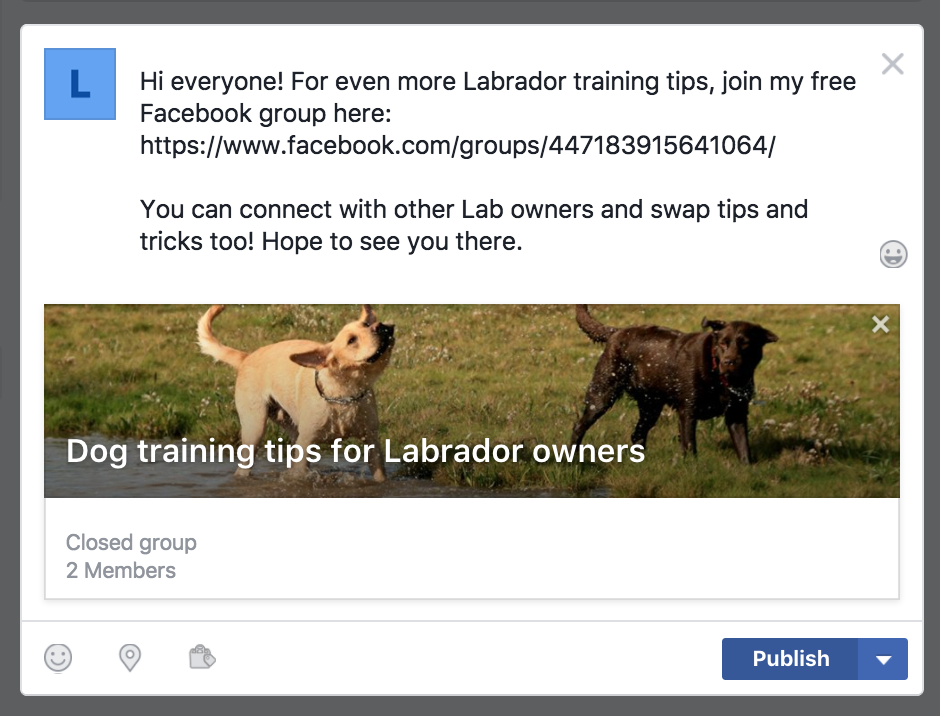
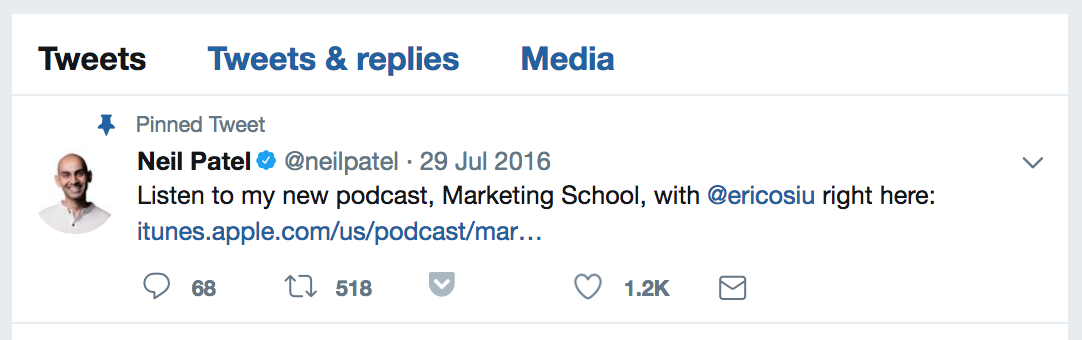
In addition to listing your group in the description, you’ll want to create a pinned post on the page that promotes your group.
A pinned post is just a regular post that an admin has ‘pinned,’ or fixed, to the top so it’s the first thing everyone sees when they visit your page.
To create one, write a regular post on your page.
Press Publish. On the post, click on the downward arrow at the top right of it and then click ‘Pin to top of page.’
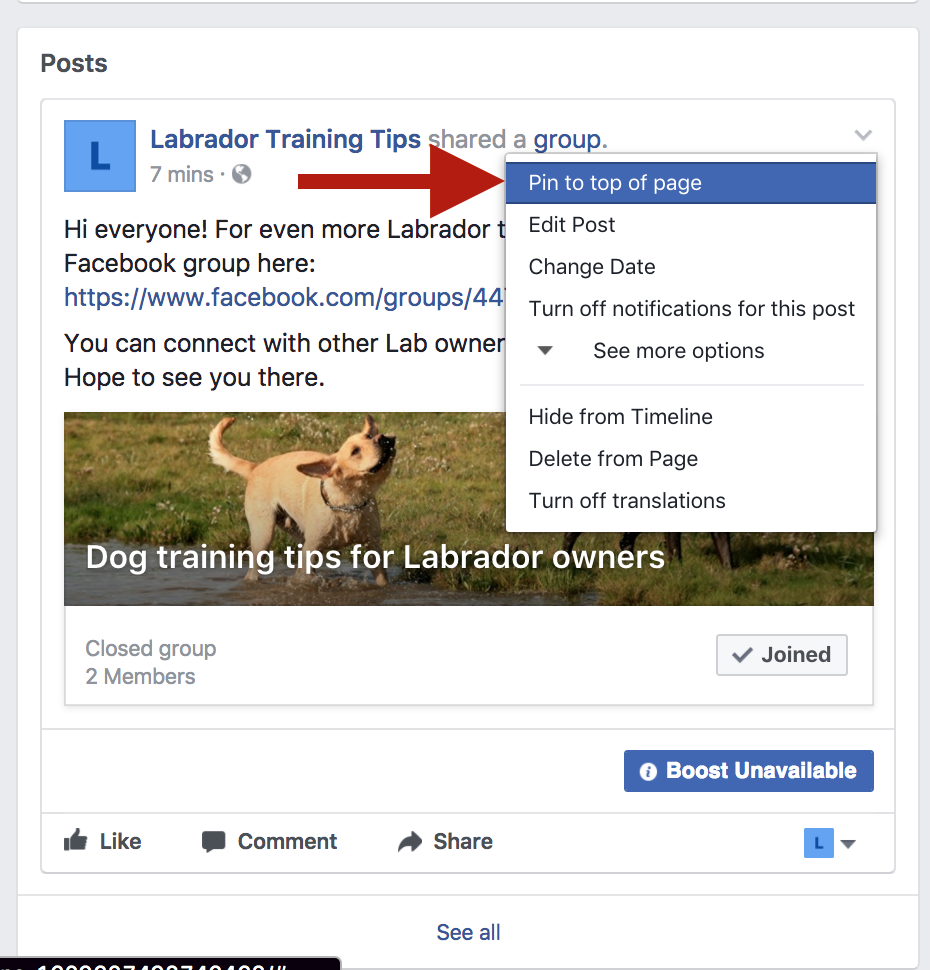
This will keep the post at the top of your Facebook page for everyone. When new visitors check out your page from your ad, they’ll see the link over to your group as well.
Let’s explore how to use your page it to grow your new Facebook group.
Grow your Facebook group with ads
One of the easiest ways you can get people to join your group is to run some targeted Facebook Ads. Like I mentioned before, running ads requires a page.
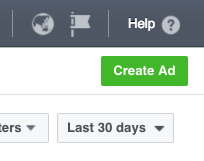
Once you’re happy with how your Facebook group and page look, head over to Facebook’s Ads Manager.
Click on the green Create Ad button in the top right.
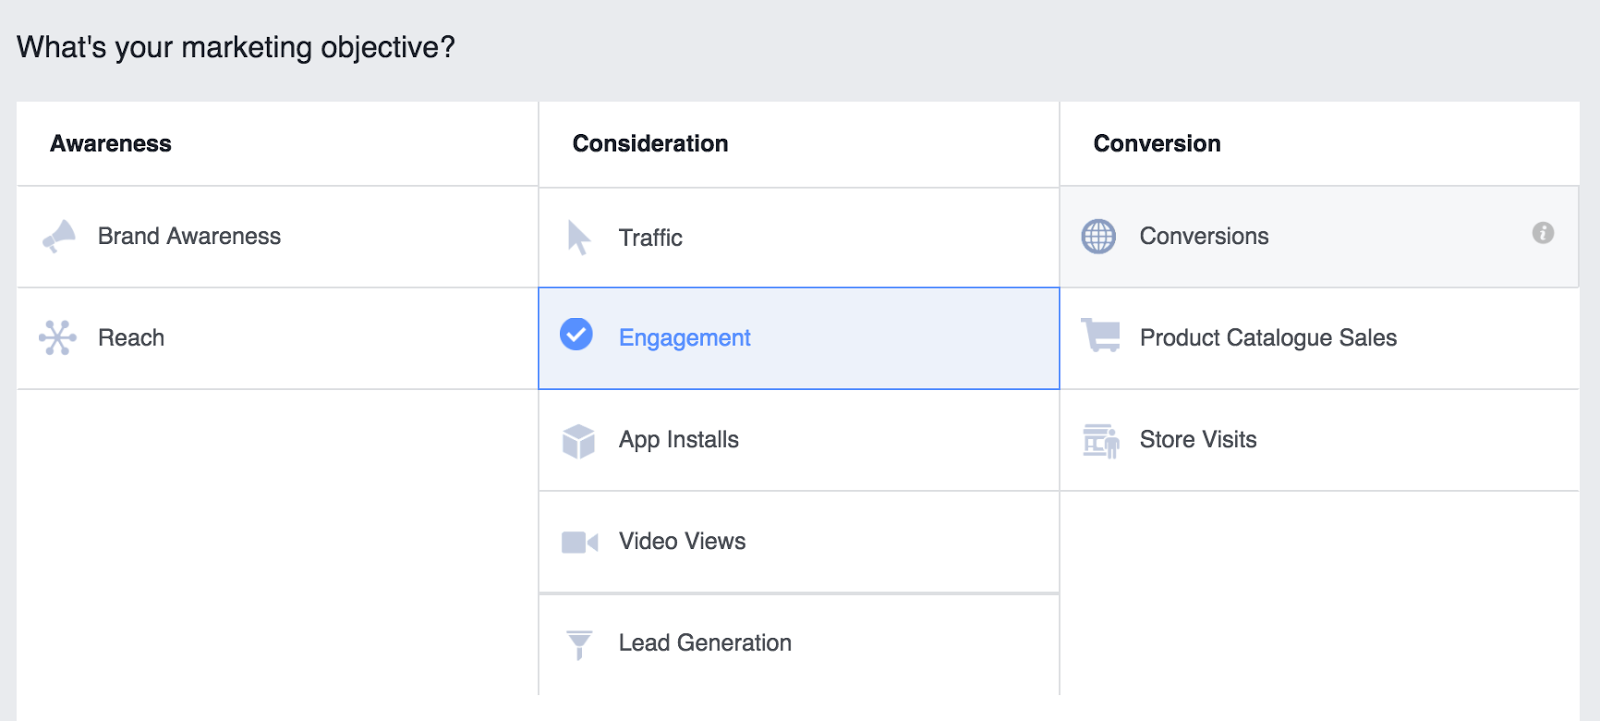
Then choose Engagement from the list of ad options.
Choose a name for your ad campaign and make sure to select Page Likes as the goal.
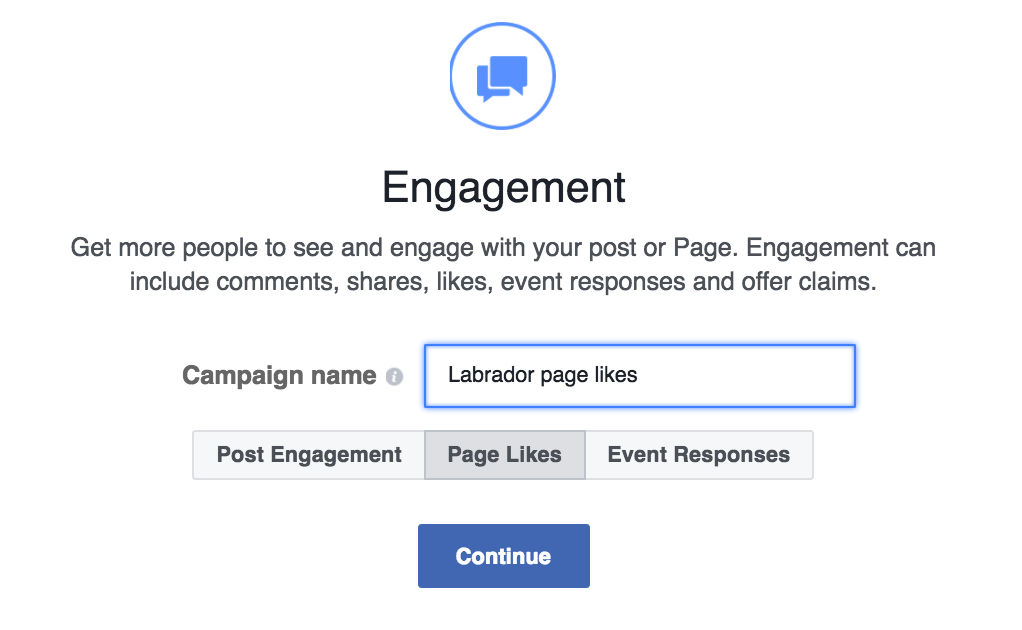
Click Continue to advance to the next section.
What I’m going to focus on now is showing you how to set up a unique audience of Labrador owners. You’ll target your ad to this audience so that you can drive Lab owners to your page, where they can discover and join your group.
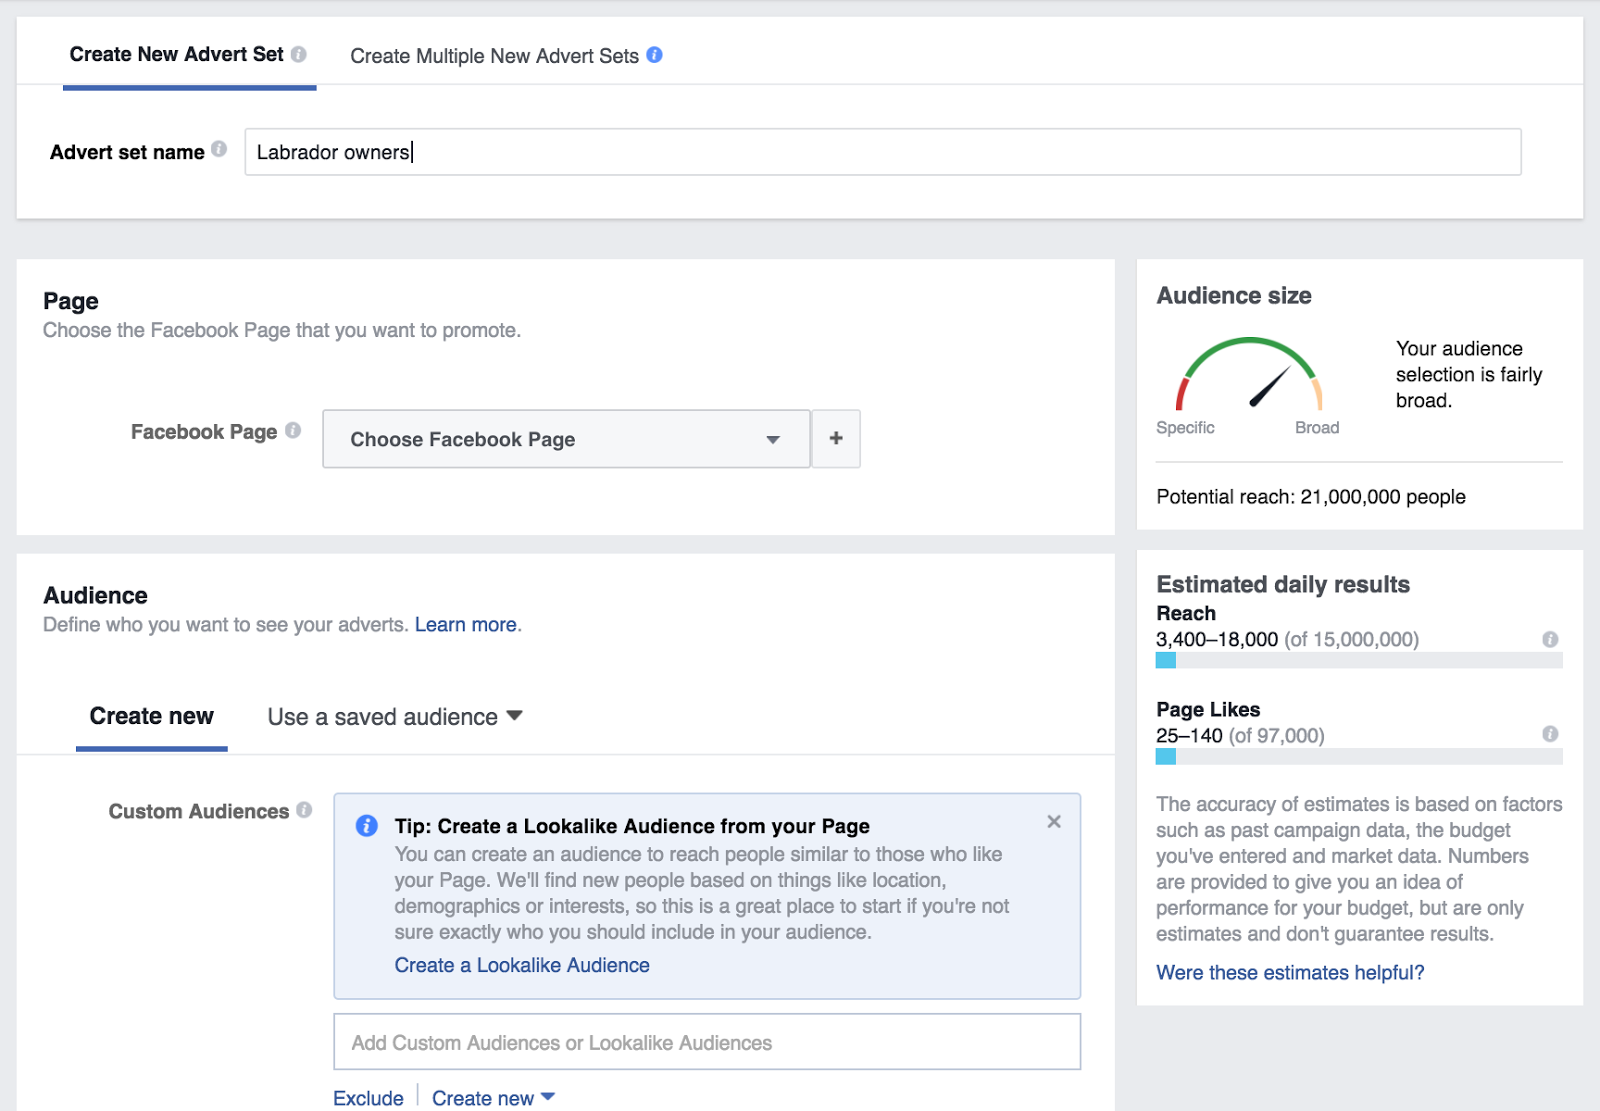
Enter a name for your ad set. I chose ‘Labrador owners.’ Next, pick your Facebook page from the drop-down list.
The Audience section is really important.
This is where you’re going to define who’s going to see your ad.
Since we’re promoting your Labrador training page and group, clearly we want to attract Labrador owners, right?
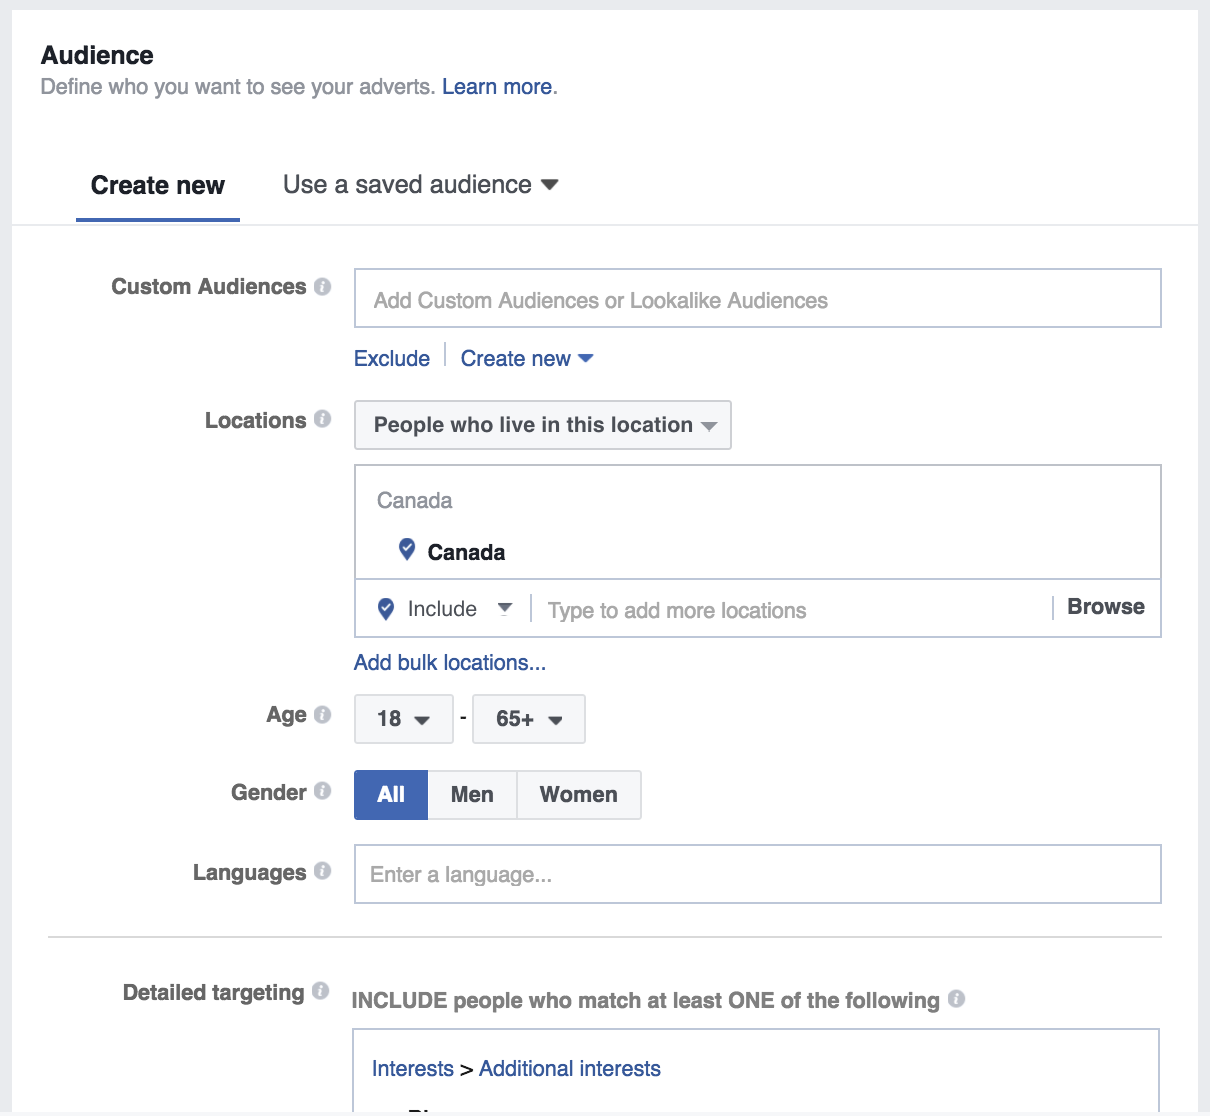
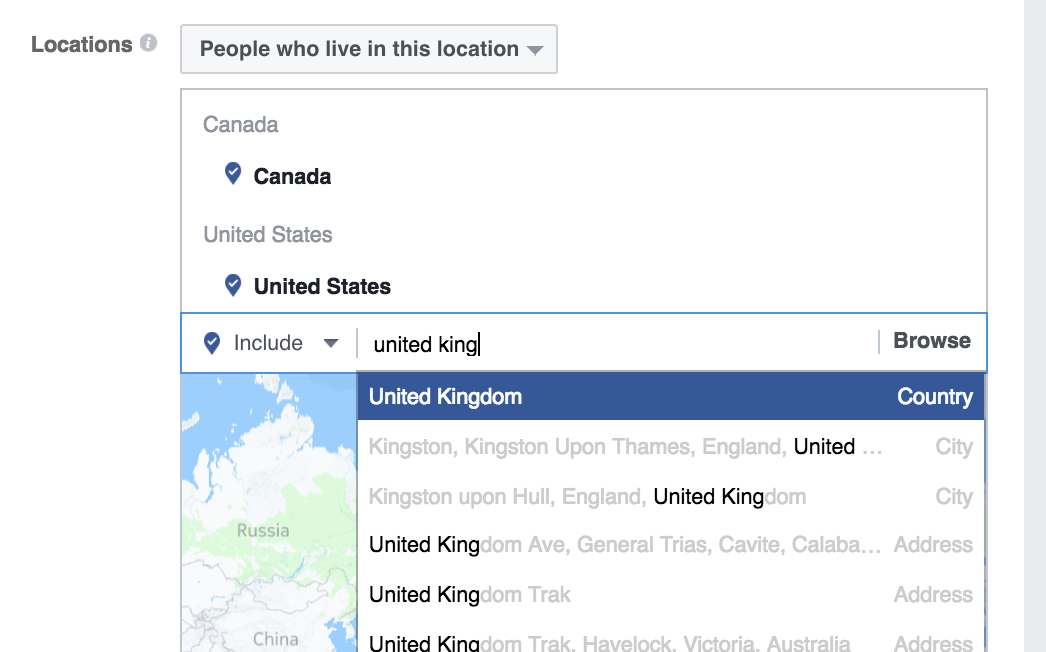
First, enter the locations you want to target. I’ve picked Canada, the United States, and the United Kingdom.
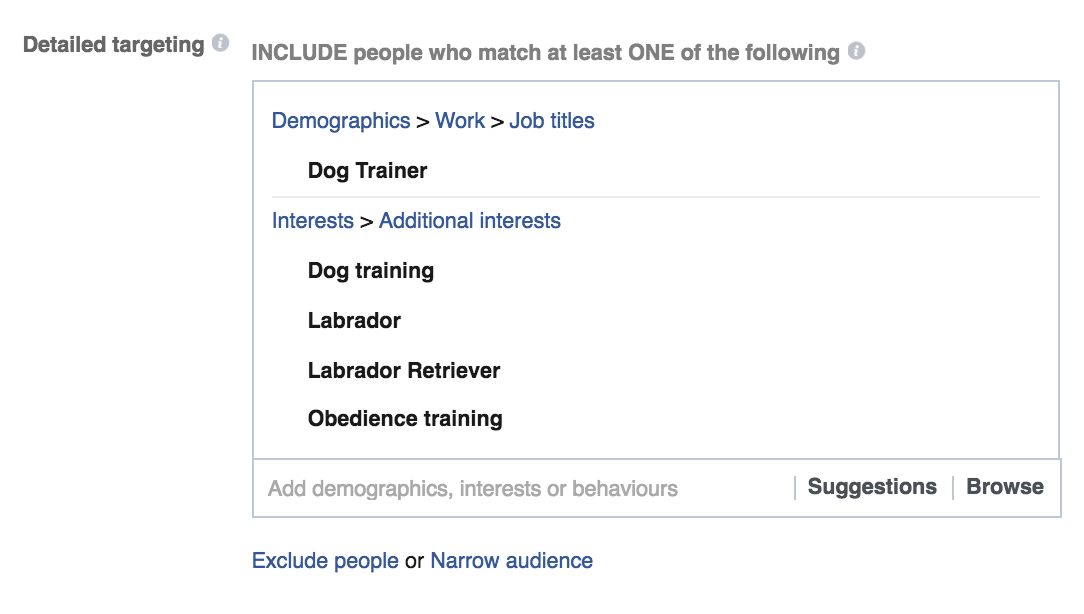
The Detailed Targeting section is the most important. This is where you can specify interests and hobbies. Facebook will show your ad to people that fit this description.
Type in “Labrador” to get a list of related interests.
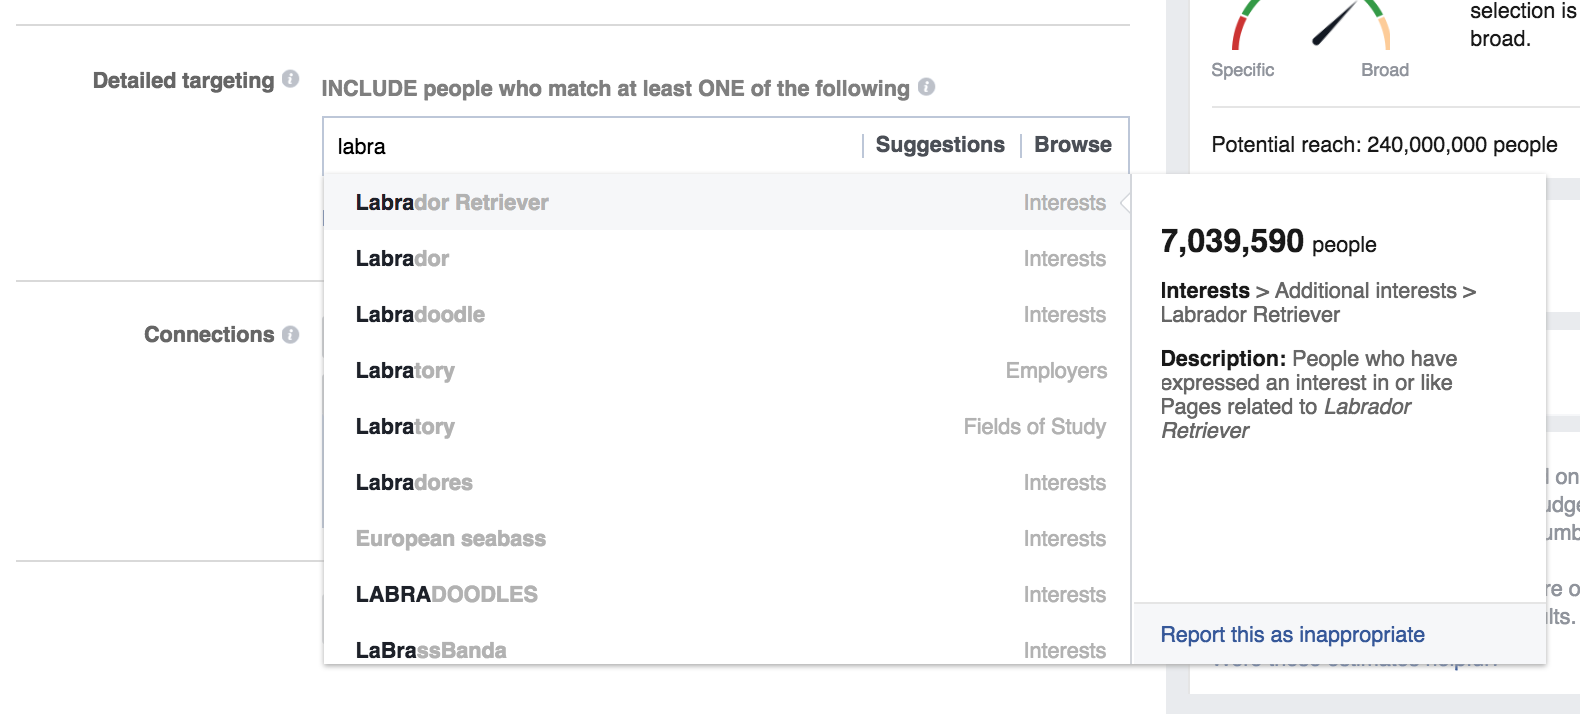
Here’s what I picked for my audience interests.
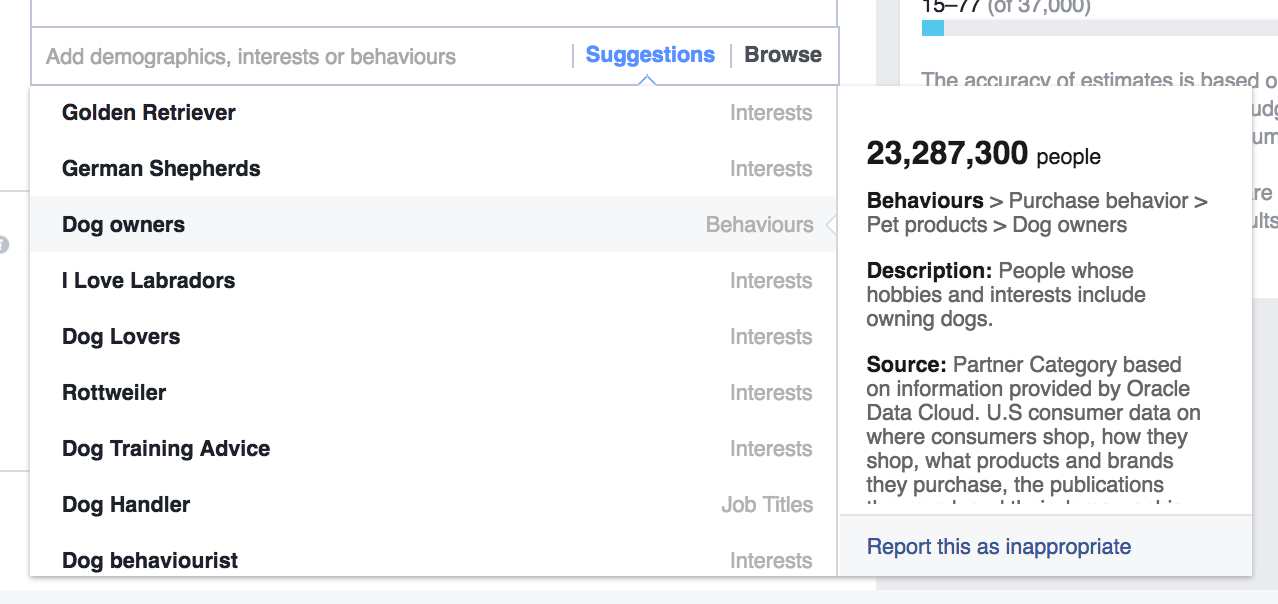
You can also click Suggestions on the right side for interests Facebook thinks are relevant to your audience. This is a good way to find new ones you hadn’t thought of already.
Facebook picked a few good ones for me, like Golden Retrievers, dog owners, and I Love Labradors. I added those to my audience profile.
Click Save Audience, and you’re done!
Now you have a defined group of people to target with your ads.
By targeting an ad specifically to people interested in Labradors, you have a good chance of attracting them into your group.
There’s a lot more that goes into setting up a Facebook ad, like writing the content, setting a budget, and more. For detailed steps on how to create effective Facebook ads, read this post I wrote all about it.
Another method of advertising on Facebook is to promote a post on your page, known as “Boosting” a post.
You’ll notice this button at the bottom right of all your page’s posts.

If you have a small budget for advertising, it doesn’t hurt to experiment with this tactic.
If you click the button, you’ll see a few options for instantly setting up your ad.
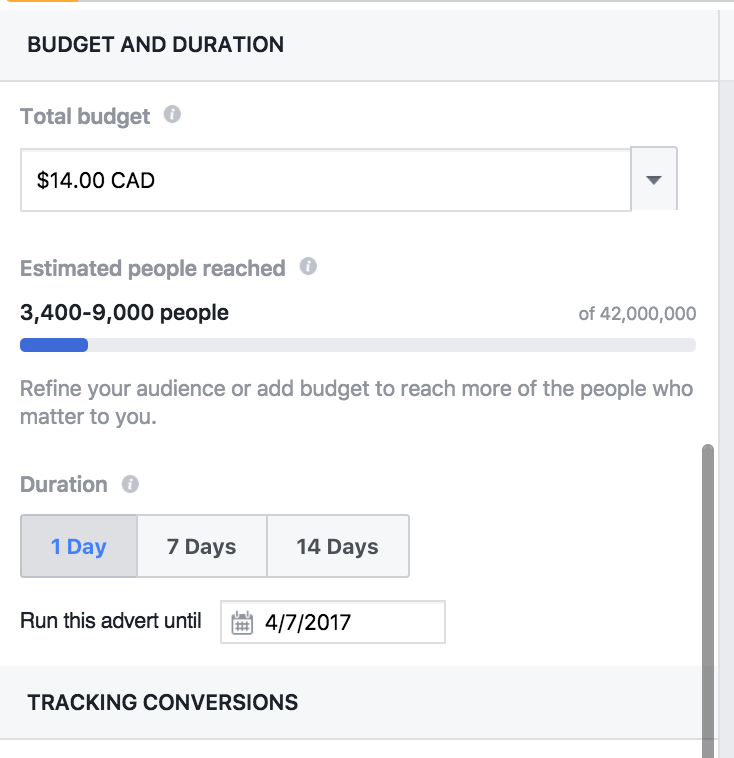
Adjust the budget and timeframe to your liking, then click Boost.
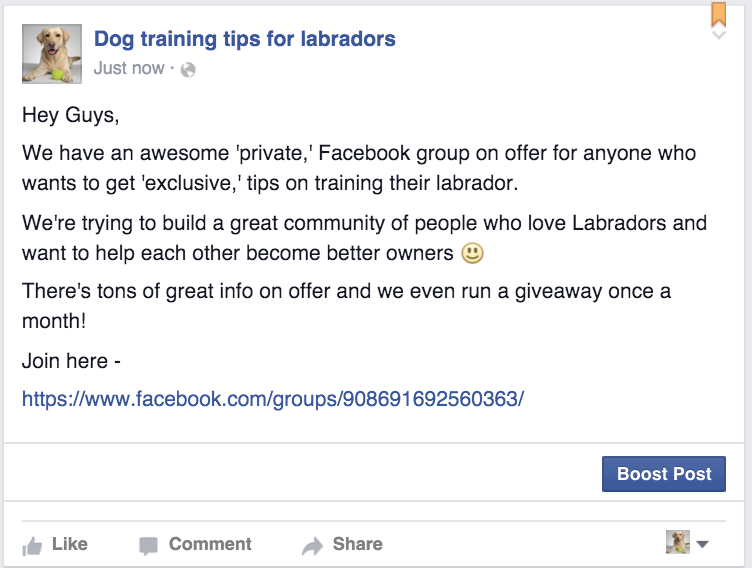
Since this is promoting a post on your page, it’s a good idea to boost a post that mentions joining your group.
A lot of factors go into a successful Facebook Ad, from the visuals to the written content and especially who it’s targeting. You’ll most likely have to experiment with a few different ads and targeting strategies to achieve desired results.
After spending $50 or so, you’ll have a much better sense as to whether or not this strategy is working, and if you should continue to boost posts or not.
Once your Facebook page starts to grow, it’s a good idea to promote some of your most popular Facebook posts to see if there is any ‘trickle down’ effect.
This effect happens when people see your page from an ad, see the pinned post about your group, and jump over and join the group.
Advertising your page and using a pinned post are two effective and relatively inexpensive ways to grow your new group on Facebook.
But you don’t have to spend money to grow your group!
Now I’m going to explain some totally free ways to market your group.
Grow your Facebook group without advertising
1 billion people visit Facebook Pages every month, and there’s an average of 4 million ‘Likes’ every minute! That adds up to 250 million Likes every day.
You just need to get a small slice of that action to see results for your group.
An easy, free way to do this is by mentioning your group on your Facebook Page from time to time.
Don’t just use your page to drive traffic to your group. The page has to provide valuable and interesting content for visitors too. Otherwise, they won’t “like” the page or follow it for updates.
You already have the pinned post at the top of the page for new visitors to see, so I suggest waiting until your page has around 100 followers (or, “likes”) before mentioning the group again.
This is because your page fans will have forgotten the pinned post by then, but will see your new post in their timelines. Don’t be overly pushy or spammy. Just tell people what they can expect from your group.
Here’s something that I came up with.
Posting about your group should be done no more than once a month, so you don’t start to annoy people who just want to follow your page’s content, but don’t want to join the group.
An easy way to post links to your group every month without having to remember to do it is to use a social media scheduling tool like Hootsuite.
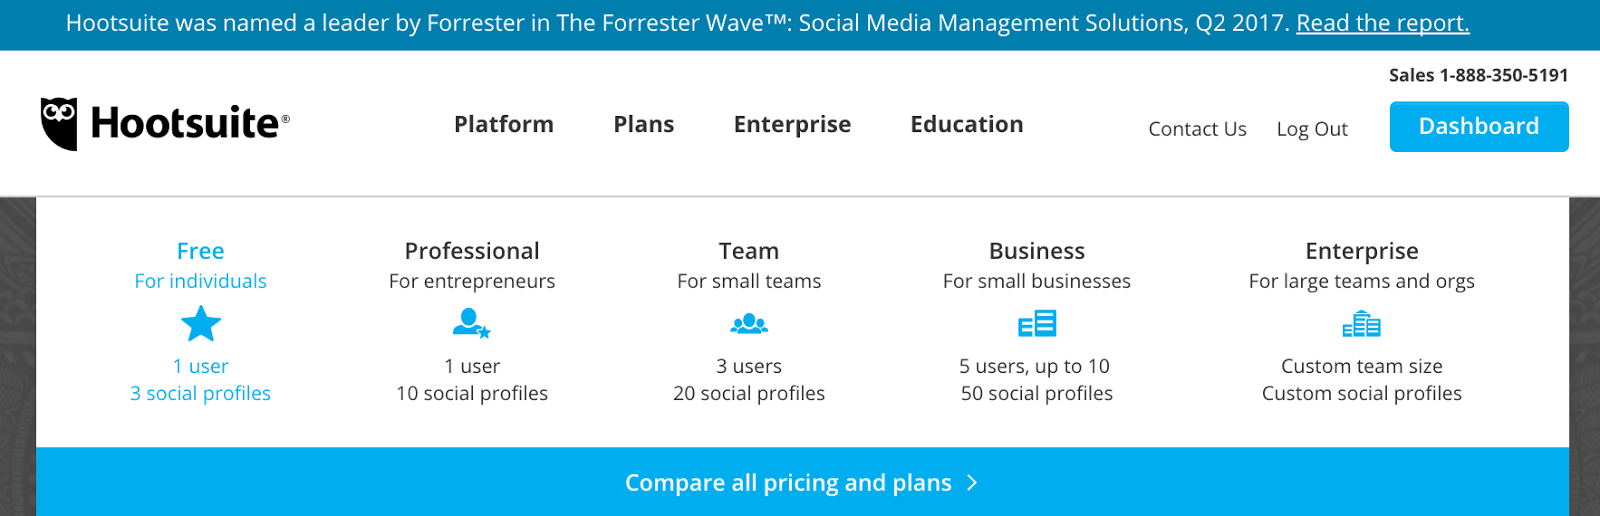
Hootsuite has a plan that allows you to post to 3 social media profiles as much as you want. And the best part? It’s 100% free!
Visit their site and click on Plans -> Free to get it.
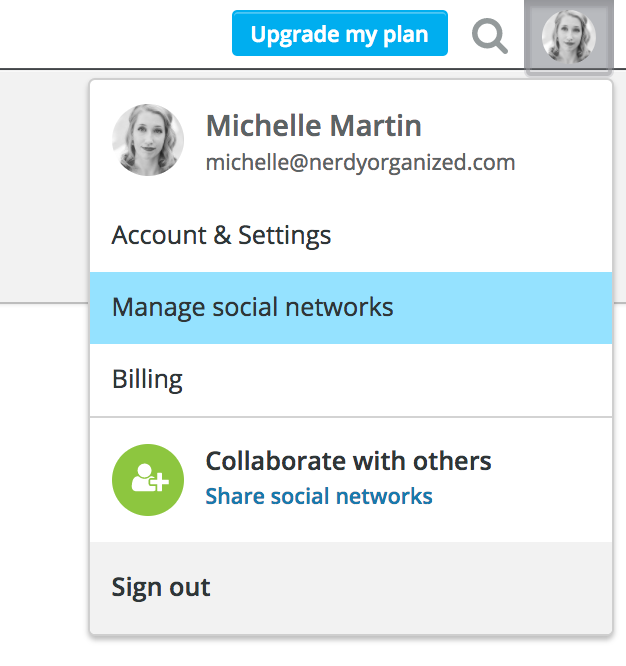
Once you’re signed up, click on your profile picture at the top right and click on Manage Social Networks.
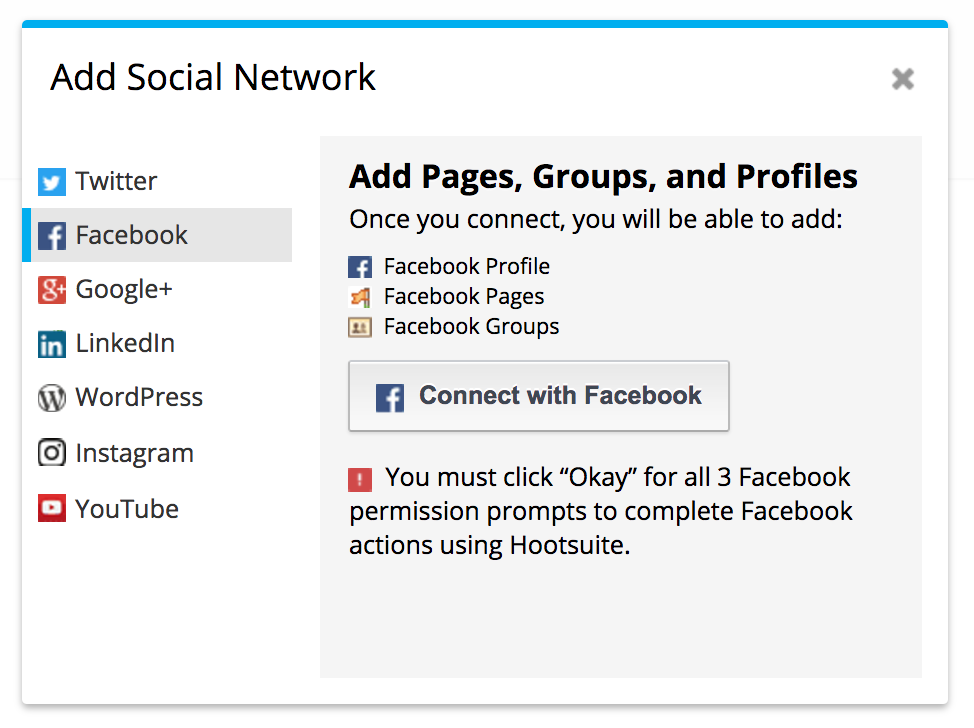
Click on “+ Private Network” to add a new social media account. Click on Facebook and follow the authorization steps to add your profile.
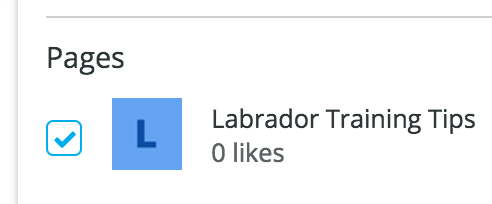
After signing into your Facebook account, select the Facebook page you want to post to and click Done.
Move your mouse to the top of the page, and the post creation box appears. Write a promotional message for your Facebook group here.
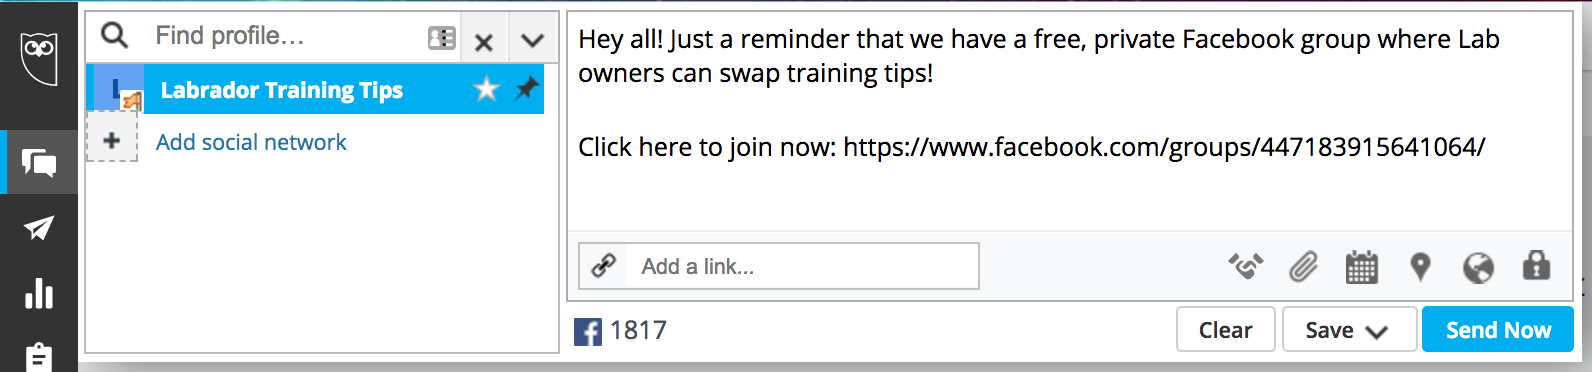
Click on the calendar icon near the bottom right.
You can choose to either AutoSchedule your post or pick a specific date and time to post it. AutoSchedule is great when the date doesn’t matter, as it means Hootsuite will pick what it thinks the best time to post your message is.
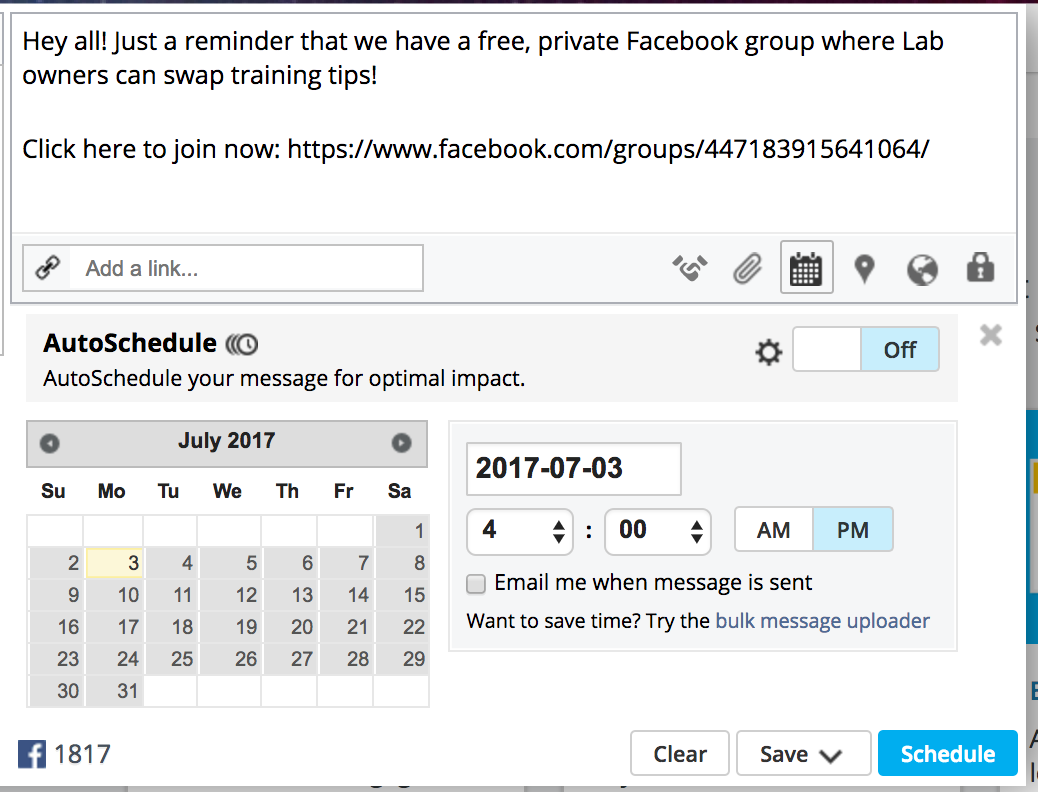
In this case, we want to set the date and time ourselves so we can be sure to space out our group promotion messages.
After you click Schedule, your post will be sent out on the date and time you specified.
Just repeat this a few times to build up several months worth of promotional posts in only a few minutes.
Make sure you schedule them about a month apart, so it doesn’t look like you’re spamming your page with requests to join your group all the time.
If you have an email list of subscribers from your blog or website, you can also send them a note to let them know about your new group too.
This is a very effective way of getting new group members, as these are people who are already interested in what you have to say.
Grow your Facebook group by promoting it in other groups
Another extremely effective strategy you can use to grow your Facebook group is cross-promotion.
There are over a billion groups on Facebook, so chances are there are some similar ones to yours.
Cross promoting your group in other related groups is a great way to grow it quickly. However, you also want to be mindful of each group’s rules about self-promotion.
Many groups don’t allow you to just drop in, make a post about your own group, and leave. It’s disrespectful as well. You want to make sure that you’re not just spamming these groups with your link.
You wouldn’t want someone doing that in your group, right?
To find a group to promote yours in, search for topics related to your group on Facebook.
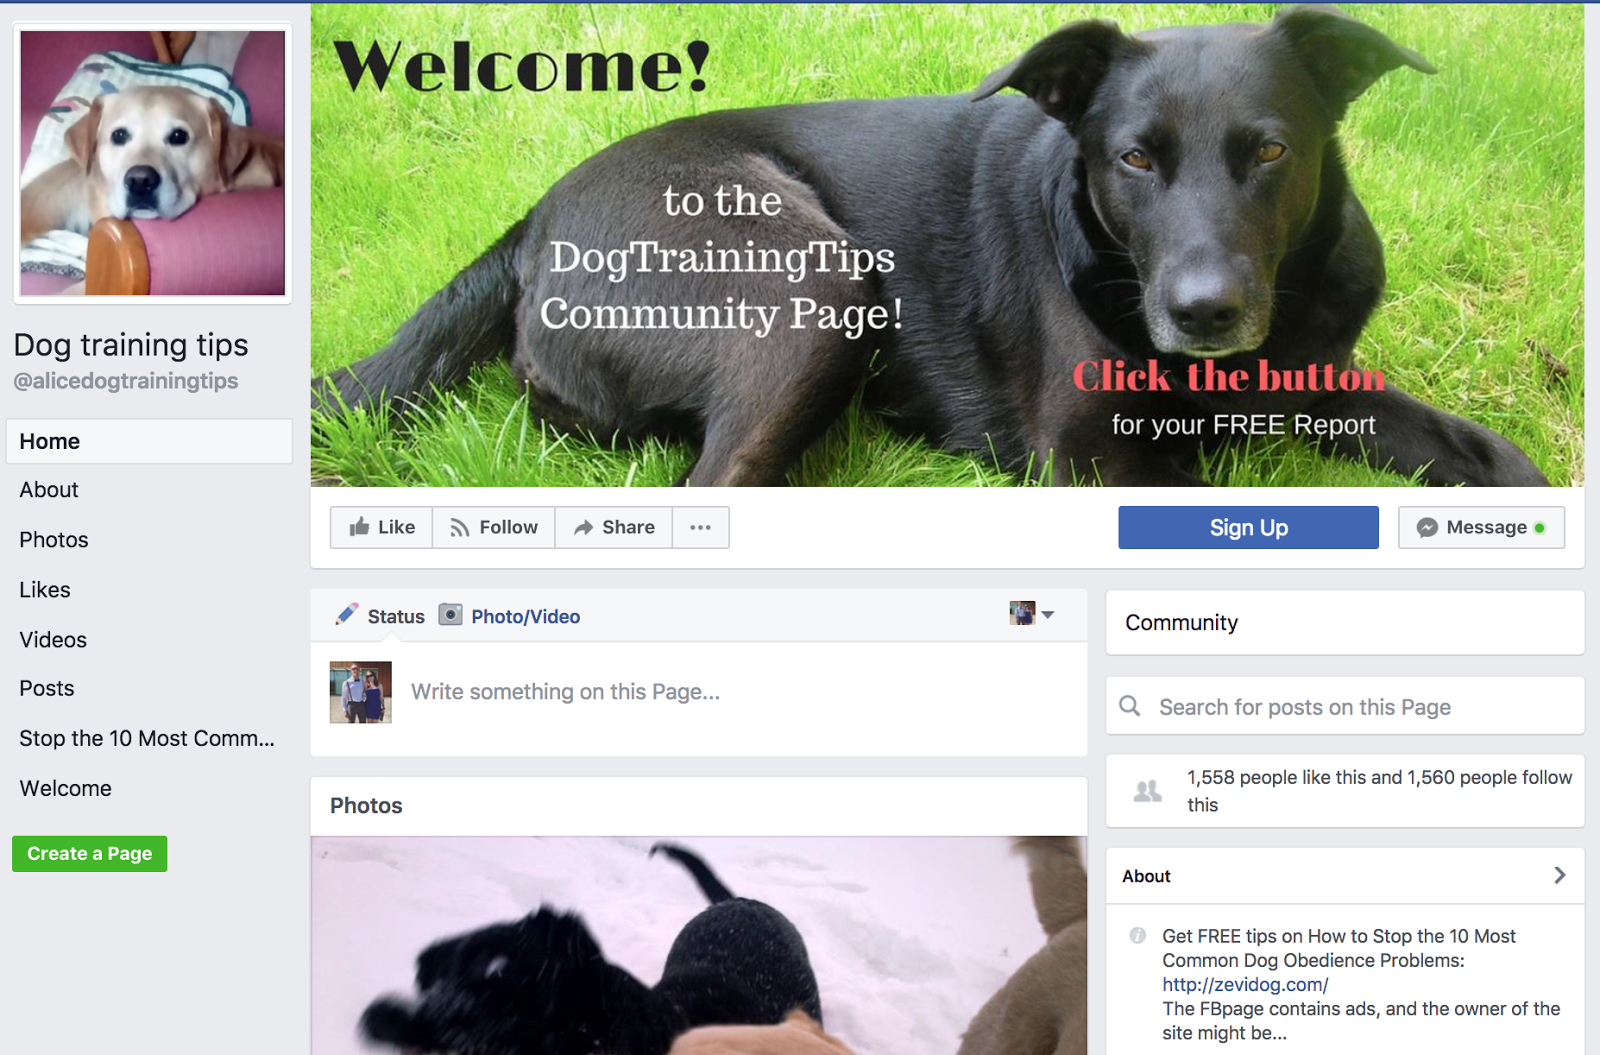
Carrying on with my Labrador training example, I typed in ‘dog training tips.’

Find a group that has at least 50 members.
Here’s one that’s quite popular with over 1,500 members.
Join the group and provide value in at least three to five posts before talking about yourself. Look for questions from others you can answer and leave a thoughtful, genuine comment.
Remember, it doesn’t do any good to just run in, drop your link, and run out. People will tune out if they think you’re just there to promote yourself.
Take a bit of time to be helpful first, then promote your group.
Some groups have strict rules about promoting yourself and say that you can’t just make a post on the group page, but instead can only post as a comment in a weekly promotion thread, like “Promo Fridays.”
The group rules are usually written in the description, so take a look there before making a post.
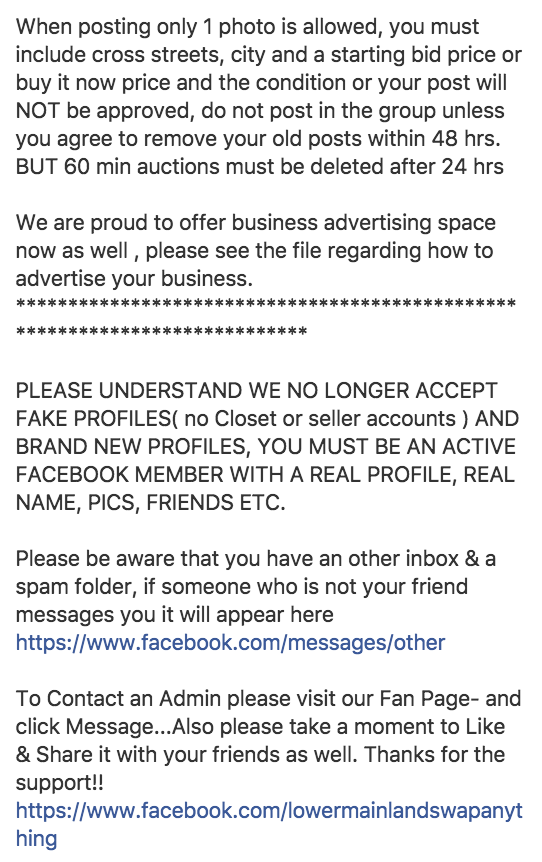
Groups may also have a pinned post to the top of the page that details their rules or links to them, like this one:
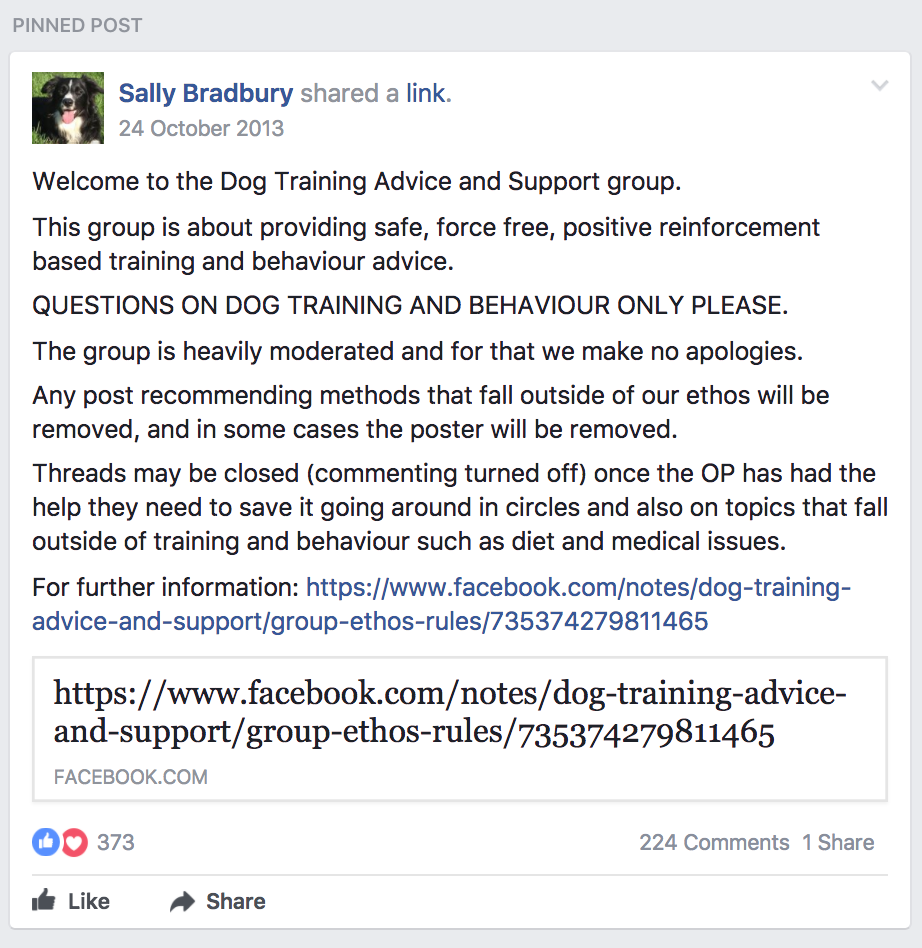
Make sure you review the rules and post accordingly.
Here’s something I posted to promote my Labrador group.
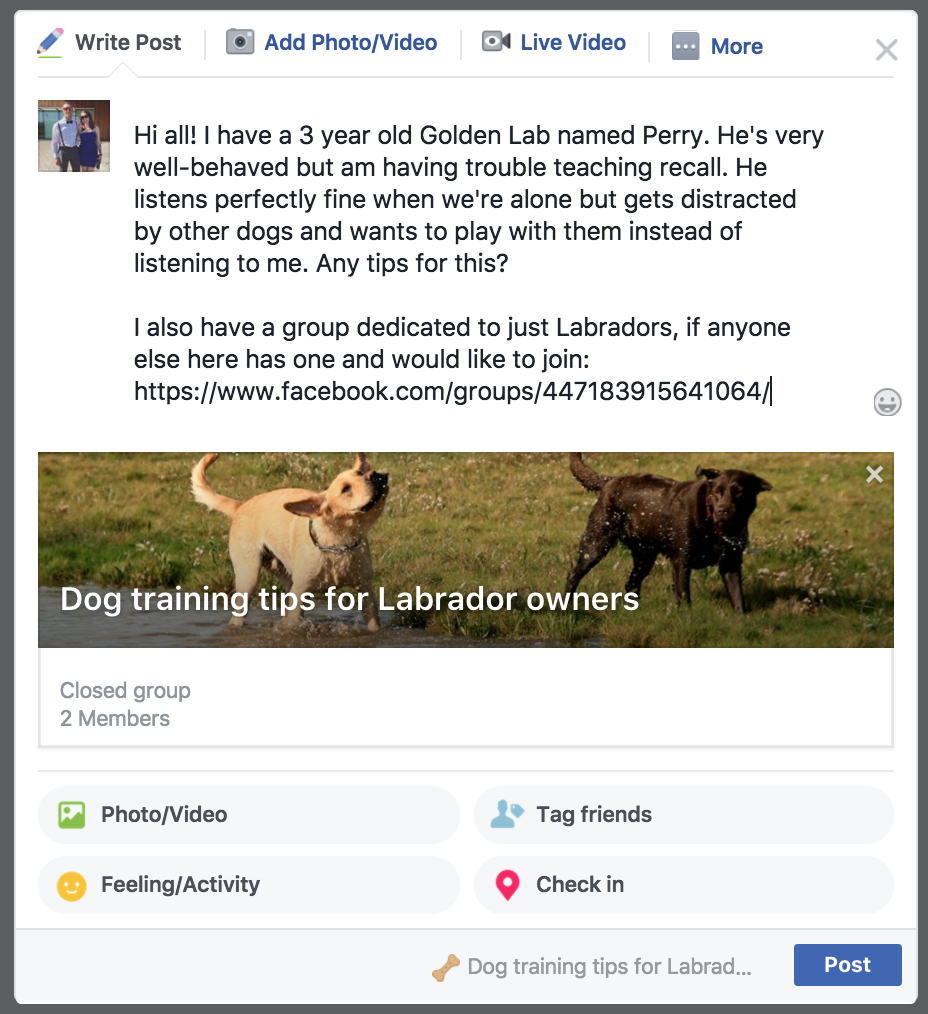
I made a point of asking a question to the group, instead of just saying, “Hey, I have a group for Labradors, come join!”
Another way you can cross-promote your group is to contact the group admin and ask them to help market your group. In exchange, you could link over to theirs from your group too.
Not everyone will take you up on it, but it’s worth a few minutes of your time to try!
Most groups list the admins in the description, like this:
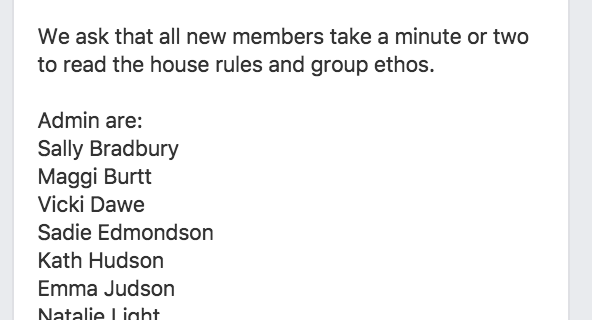
I’m going to assume that Sally created the group since she’s listed first. I’m going to send her a message.
Click on the Members tab on the left side.
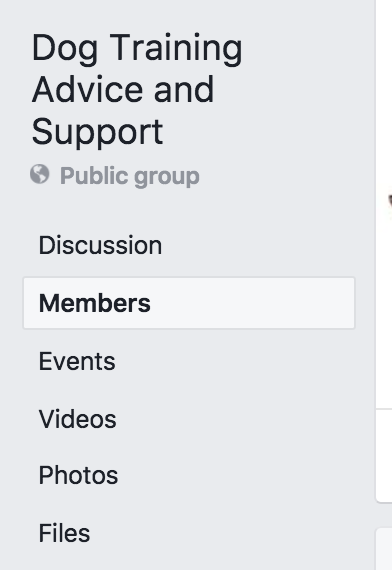
Then, click on Admins.
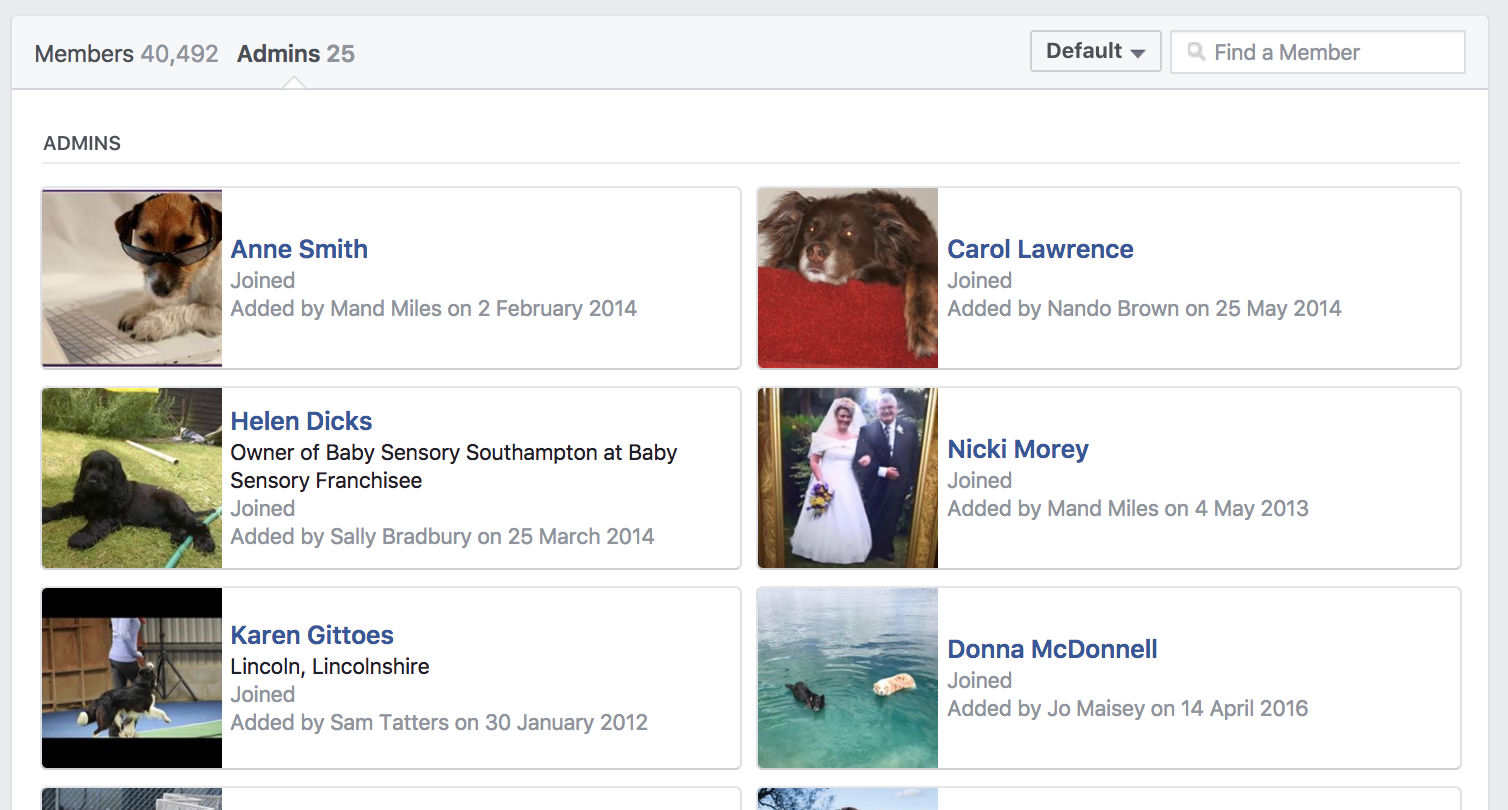
Scroll through until you find Sally (or search at the top right!).
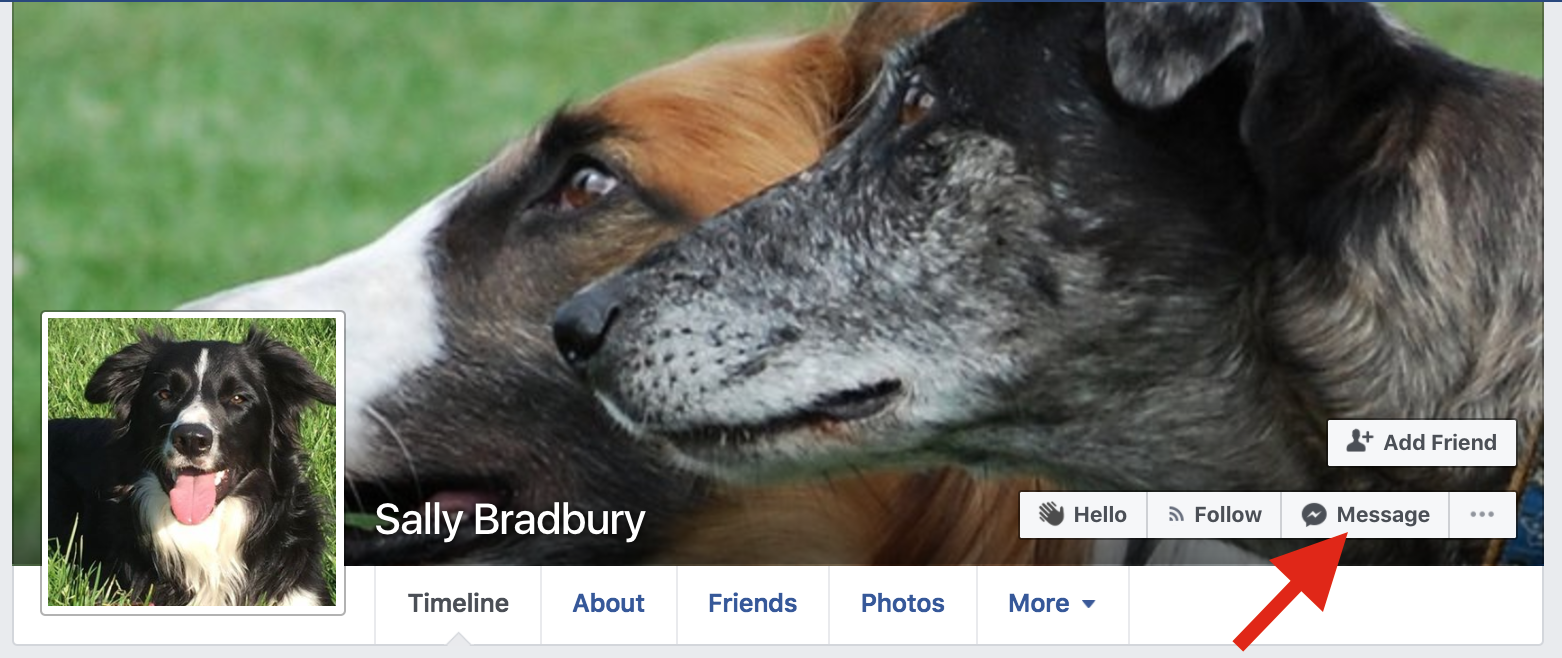
Click on her name and you’ll be taken to her profile. Click Message.
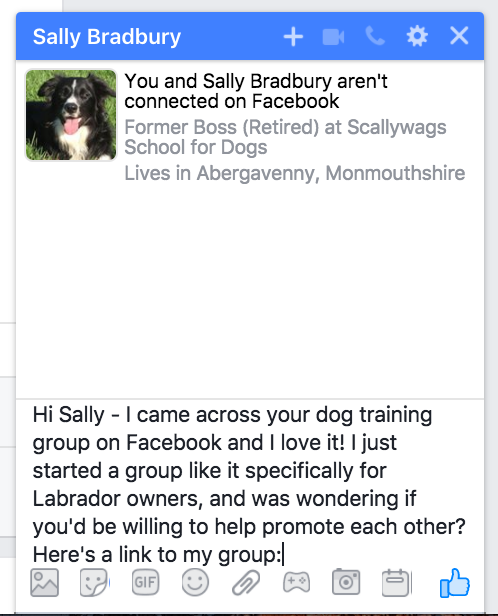
I wrote Sally a quick but nice message about offering to promote each other and included a link to my group. It only took a few minutes and could result in a lot of exposure for my group if she agrees to promote it.
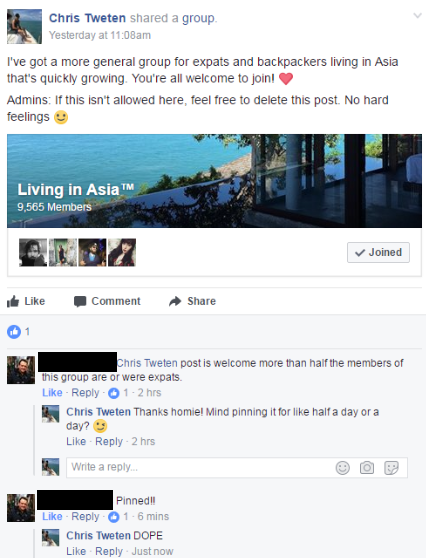
Chris from STB Collaborations used this strategy to grow his Facebook group by 923% in just 3 days!
He left a post promoting his group about living in Asia on other large groups in his niche. He made sure to include a nice note to the group admin that he’d have no hard feelings if they deleted his post.
Some deleted it, but others were more than happy to help Chris promote his Facebook group.
Chris also used what he calls his “Super Fans,” the highly engaged members of his group, to attract new members. He created a private chat with his top 25 fans and asked for their help growing the group.
He says this was crucial to growing his group so quickly for free.
His Super Fans ensured posts welcoming new members went out often, kept offensive posts from being seen, and helped approve new member requests quickly.
Which leads us to another easy way to grow your group…
Encourage existing members to promote your Group
Like Chris did, you can use your group’s existing members to help attract new ones.
Exactly how you do this is going to vary depending on what your group’s about and how many members you currently have.
As a good first step, you can simply make a post in your group asking people to share it. Let them know you want to make this group the best and most popular one for your topic, and you need their help to do it.
People like to feel helpful.
In fact, a study conducted by The New York Times in 2016 found that people shared content on social media for 5 main reasons:
- To reveal valuable and entertaining content to others.
- To define themselves to others.
- To grow and nourish relationships.
- For self-fulfillment.
- To get the word out about brands and causes they like or support.
Appeal to your group members’ emotions by letting them know how much their sharing helps grow the group, and how much you appreciate it.
Another option to get your members to share the group is to run a contest.
Contests are very effective, for obvious reasons. Everyone likes to win!
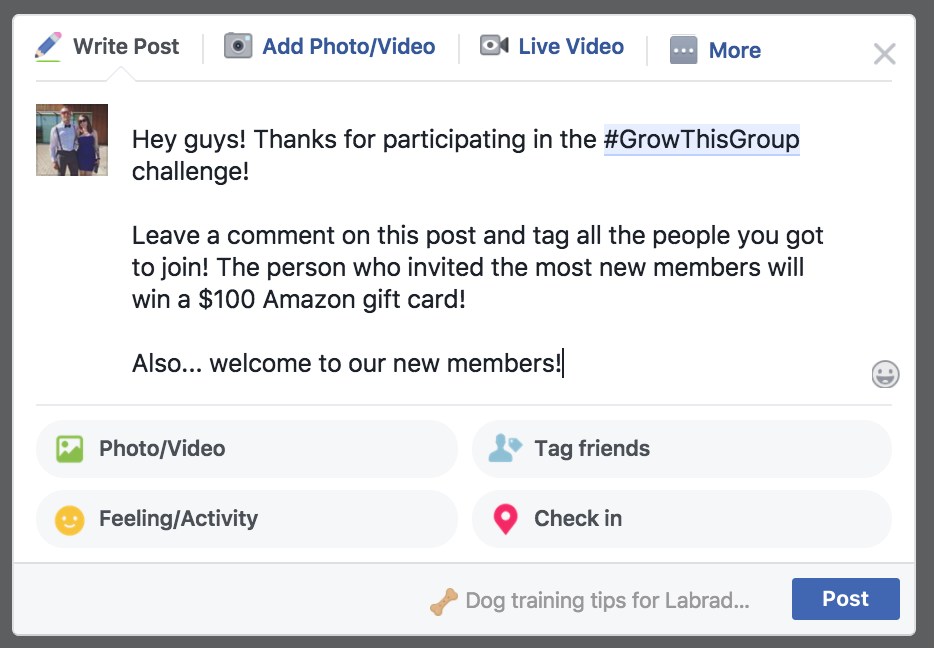
Your contest winner could be the person who gets the most new members to join the group. At the end of the contest, get everyone who invited others to tag who they brought into the group in the comments section of a post.
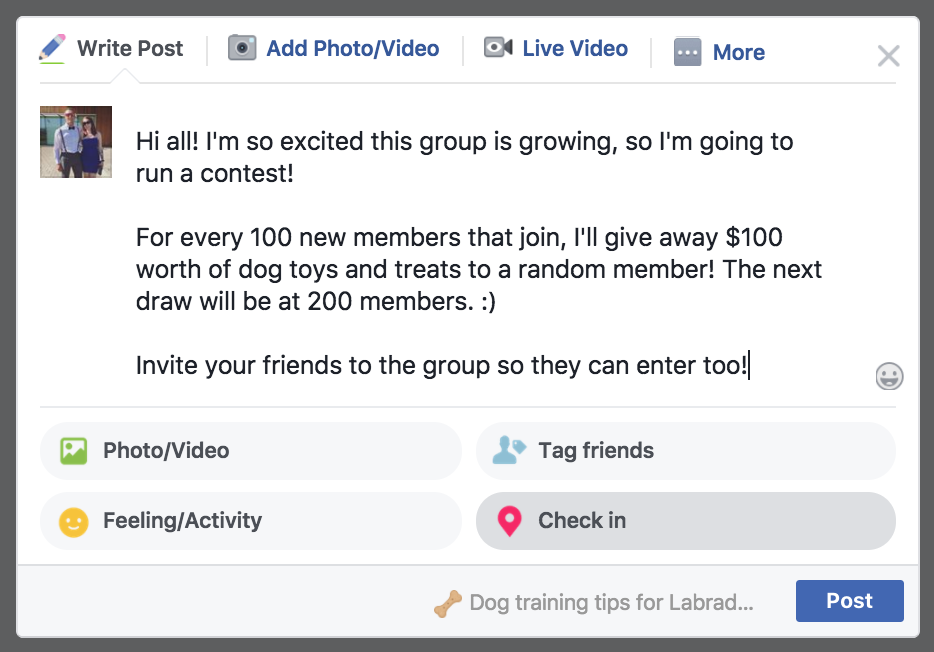
Additionally, you could run competitions for each milestone that the group reaches.
So, for my Labrador group, I might say that for every 100 members who join, I’ll do a $100 giveaway of dog-related goodies.
In these posts, I could also ask members to invite people they know to join and enter the giveaway too.
According to Facebook, the average user has 155 friends.
Surely your members will think that at least a few of their family and friends would like to get in on your Labrador group and win some dog goodies.
Encourage influencers to join your group
Another way to grow your group is to get influencers in your niche to join.
This may be hard to find for certain industries, like my Labrador example. Unless I’m able to attract a top dog trainer like Cesar Milan or someone of his fame!
The main idea is to promote some of the influencer’s content, then tag them when you’re promoting their item.
You should do this on your Facebook page because what you post there will be public. The influencer will see that you tagged them in a post and may comment on it or share it with their audience.
If you tagged an influencer in your Facebook group, they wouldn’t see it unless they were already a member.
By tagging them in your public post, the influencer will be notified, and they’ll potentially check out your group. Hopefully, they’ll also become a member.
As other people see that the influencer is a member, they may join your group simply out of curiosity. Their thought process is that if the influencer is a member, surely the group must be good!
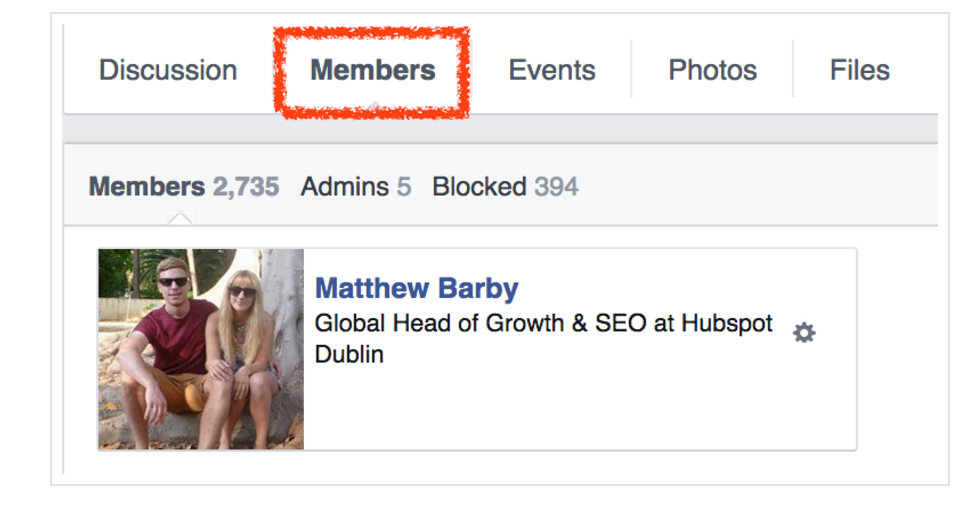
Here’s how the tactic worked for Ryan Stewart, who managed to get Matthew Barby to join his Facebook group.
Ryan made a post on his Facebook page sharing one of Matthew’s articles. He also tagged Matthew in the post.
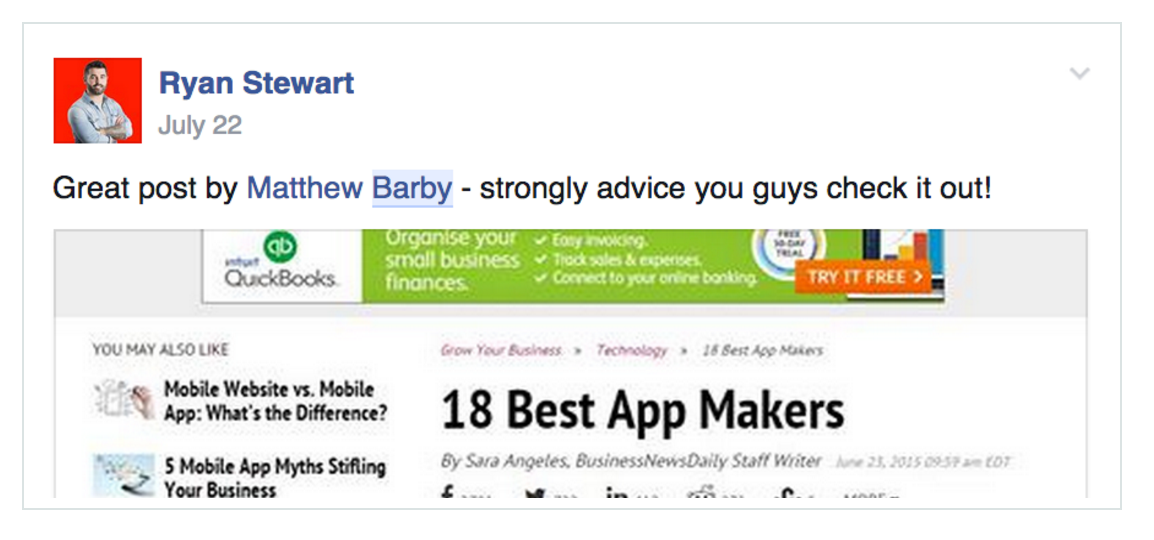
And then… Matthew became a member.
 If you’re not sure how to find influencers, just take a look at people in your niche that have a large number of social media followers.
For content marketers and SEO experts, hey, that’s me. 🙂
But seriously, influencer marketing can have a huge impact on your group’s growth especially if you’re just starting out.
For more information on using influencers in your marketing strategy, check out my step by step guide to reaching out to influencers.
Promote your Facebook Group on other social media platforms
This one might seem obvious, but it’s important to remember. Post about your group on all your social media channels!
Your target audience doesn’t just hang out on Facebook. Promote it on Twitter, Google Plus, Pinterest, LinkedIn, etc. You get the idea.
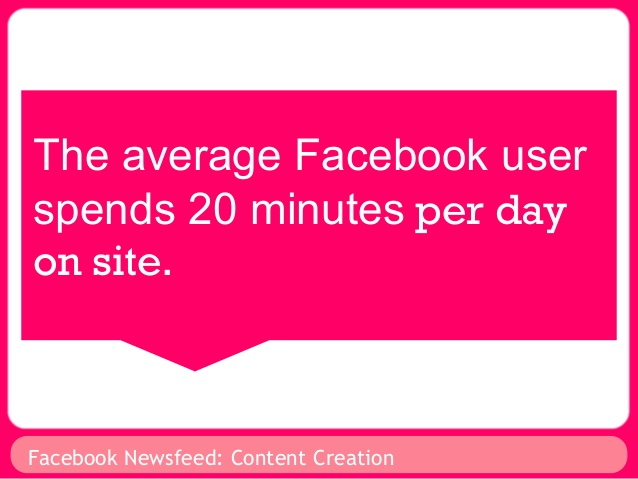
Facebook is still the king when it comes to user engagement. The average visit length is 20 minutes, with over half (55%) of all users logging in multiple times a day!
This means that even though people might use another social media channel, a lot of them will still check out Facebook at least once a day.
Why not make it so that the reason these people check Facebook is to see what’s going on in your group?
Make sure posts that promote your group make it into your regular posting schedule on all your platforms.
You can even tweet or mention other influencers to let them know you have a group that might be of interest to their followers. Ideally, they’ll see your group as beneficial to their audience too, instead of you competing with them.
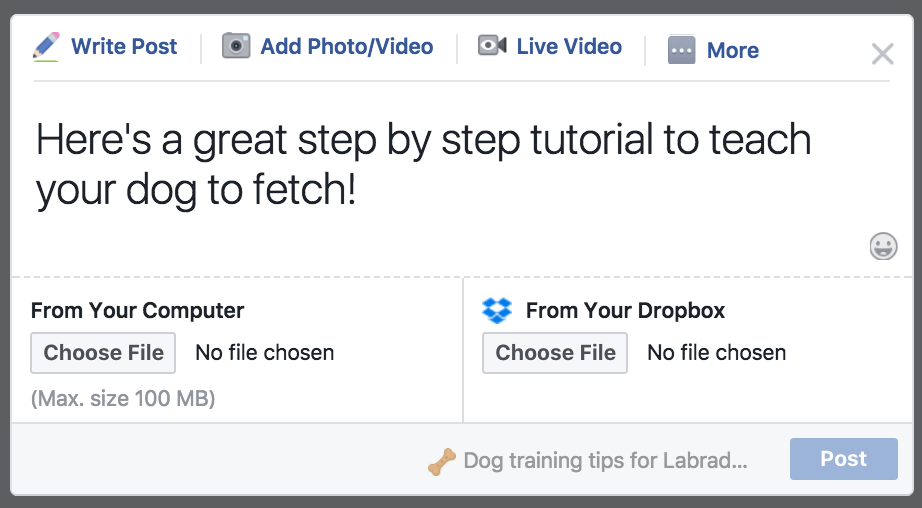
If you’re struggling to get people to join your group this way, consider using a gated content approach.
The gated content approach means you might not tweet about the group itself but instead post about a piece of content that can only be found in the group.
The content could be a free video training, a guide, a PDF checklist, you name it. For my Labrador group, it could be a video showing you how to train your dog to fetch.
You would then let people know that there is some awesome content available inside and that they can get it by joining the group.
I frequently feature my podcast on my social channels to drive traffic to it. Same goes for a group.
When you link over to special content that’s found only in your group, you need to store it in your group.
Here’s how to do that.
Go to your group’s page, and hover over the More text on the post creation area.
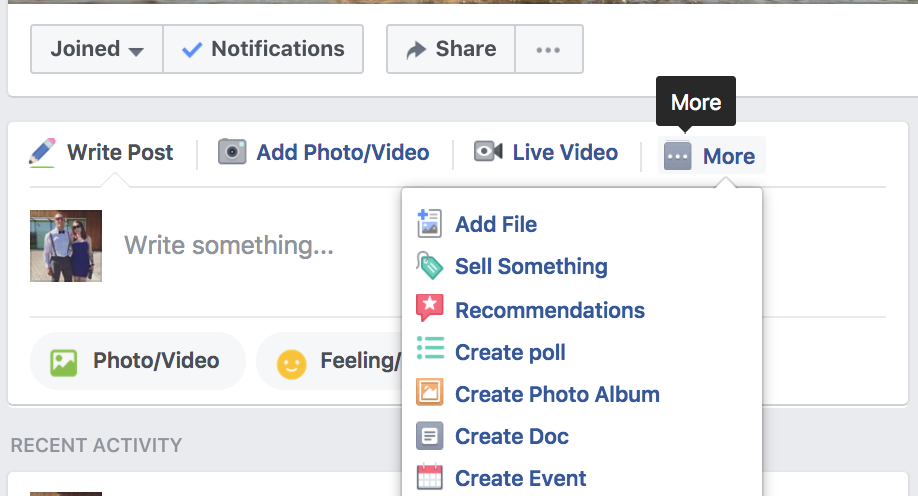
Click on Add File to upload a PDF or other type of document. You can add a note about what the item is too.
Most people don’t know where the files are kept in a group, so it’s a good idea to include directions on where to find it in a pinned post at the top of your group.
How to make your Group successful?
So far we’ve covered what you can do to get people to join your group.
However, what’s arguably more important, is figuring out how you can get people to stay in your group and actively participate.
If you can figure out how to get people involved, your group will maintain itself.
The first thing you need to consider to is how you’ll deal with spam.
Spam can quickly kill a group. No one likes to receive messages that are not going to be of use to them or that are just overly self-promotional. Don’t make your good group members abandon ship due to spam.
If you’ve chosen to set up a ‘closed’ Facebook group, spam shouldn’t be too much of an issue because you’ll be approving all new members who join.
However, there will always be a couple of spammers who manage to slip through by appearing normal at first.
If you see someone post something that resembles spam, send them a direct message and let them know that what they’re doing is against the group rules. If they continue to abuse the rules, kick them out.
It takes a little bit of monitoring to keep your group enjoyable for all, but it’s well worth it in the end. To make your rules really obvious, I recommend creating a pinned post that explains all of the rules in detail.
Then there’s no excuse for people not knowing how to behave in your group.
You could even mention of the rules in the description so that people know this information even before they join.
Here’s an example from Ryan Stewart again with his group rules.
If you do happen to ban someone, it might be a good idea to provide a public explanation as to why you took that course of action with a specific user.
This will let people know that you were being fair, but it will also serve as a warning to other people who might be thinking of acting in a similar manner.
If you really want to crack down on spam, you might want to make it so that each and every post within the group is approved by an admin before it gets posted publicly.
You can adjust this setting on the ‘Edit Group Settings’ page.
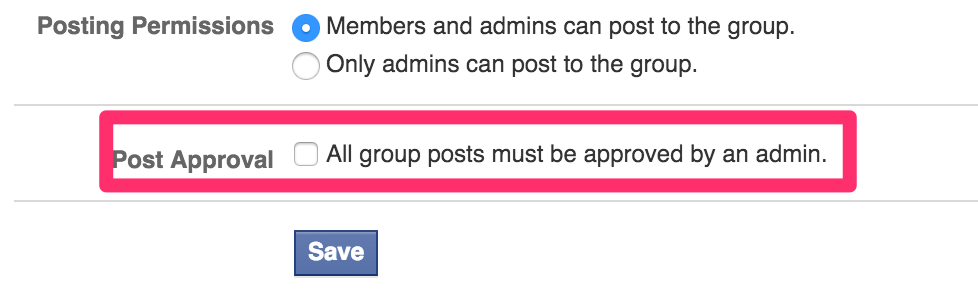
This may sound like a good idea, but it could be more trouble than it’s worth.
Potentially engaged users may find it offputting to have to wait for their post to show up, and monitoring and approving every single post is going to take up a lot of your time.
Having to approve every post stops the free flow of conversation that groups are meant to establish.
Eventually, you can hire a moderator who can take care of the admin side of things for your group if you choose to.
More often than not, there will be someone within the group who will be happy to do this for you for free because they see it as giving themselves authority within the group by helping out.
A good example of this is the recent phenomenon of “Buy & Sell” or Bidding Wars groups.
These are hyper-local groups, often covering just one neighborhood or city, where members can post items for sale and bid on items to buy. Kind of like a new age garage sale.
Groups typically operate on 24-hour bid lengths. So, a user posts an item for sale and group members have 24 hours to bid on it. The member with the highest bid at that time wins.
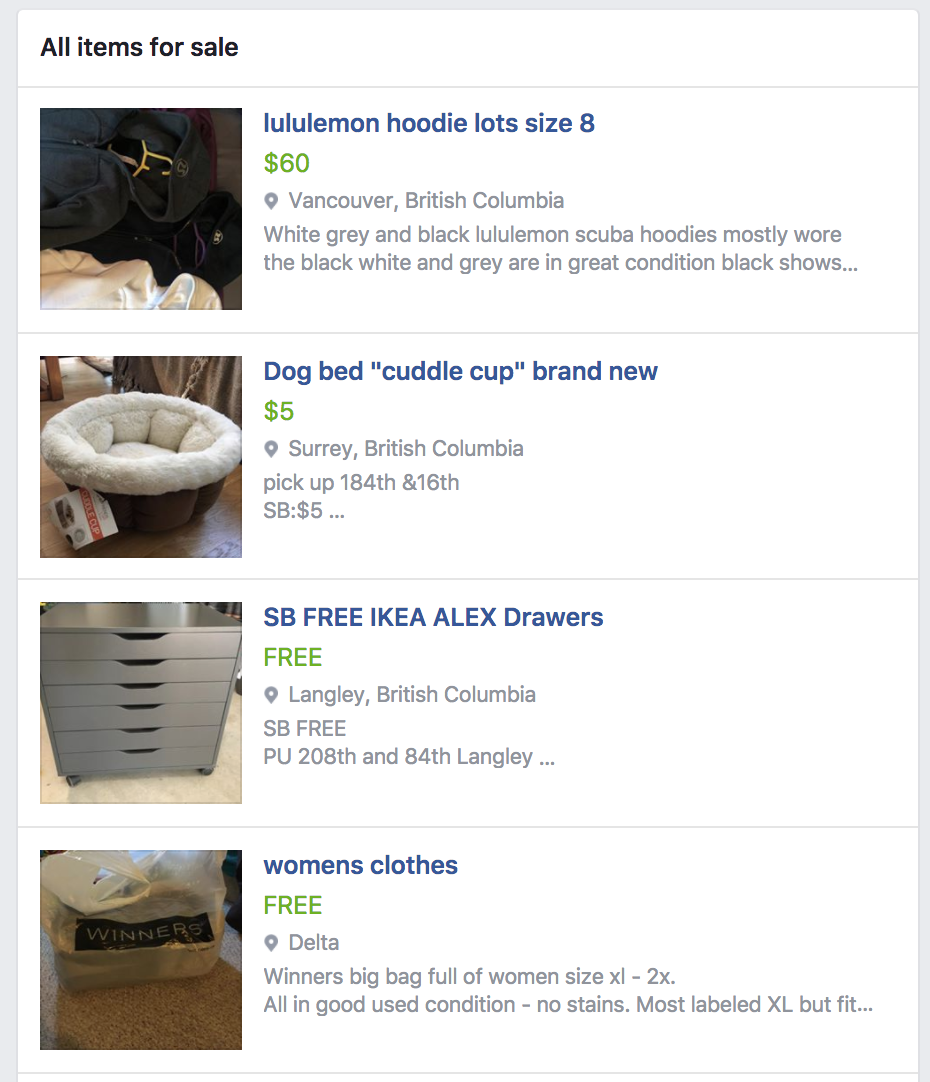
These groups sprung up organically by people looking to sell and buy items. The popularity of them caused Facebook to introduce the official “Buy & Sell” group type, which gives groups additional features like prices and for sale listings.
Most groups have clear rules about posting items and are quite strict in order to keep the page fair for everyone.
There have been cases of people trying to cheat the system, like deleting their post if they didn’t get as much money as they wanted for an item.
To combat this, large groups often have 20 or more admins monitoring posts and keeping things fair. These large groups, often with 50,000 members or more, function like small cities, and the admins are the court justices and police officers keeping them running.
Finding at least one person who is able to help you moderate a group is a good idea once the group gets to a certain size, usually around 1,000 members.
Freeing up your time managing it will allow you to be more active in conversations and creating useful content.
Other than dealing with spam, there are other actions that you’ll need to take to ensure that your group is a place worth hanging out in.
An important role you have as a group owner is to encourage interaction and participation.
You can do that by asking some questions that help you engage with your members. If you know your niche well, coming up with great questions shouldn’t be too hard.
However, if you’re dealing with a new niche, you might need some help when it comes to forming engaging questions that will get your group members talking.
Once tactic you can use is a simple Google search.
Search for a question relating to your niche, but make sure to use words like “why,” “how,” or “are” at the beginning.
Here’s an example of how that can work.
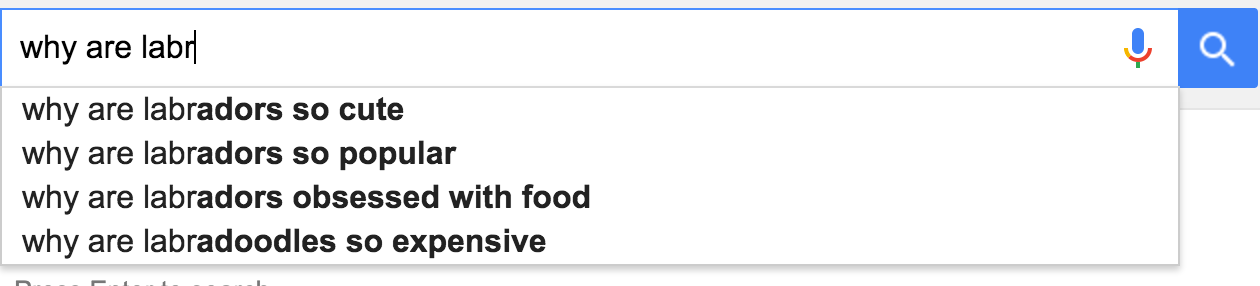
Here’s what came up when I used the word “are.”
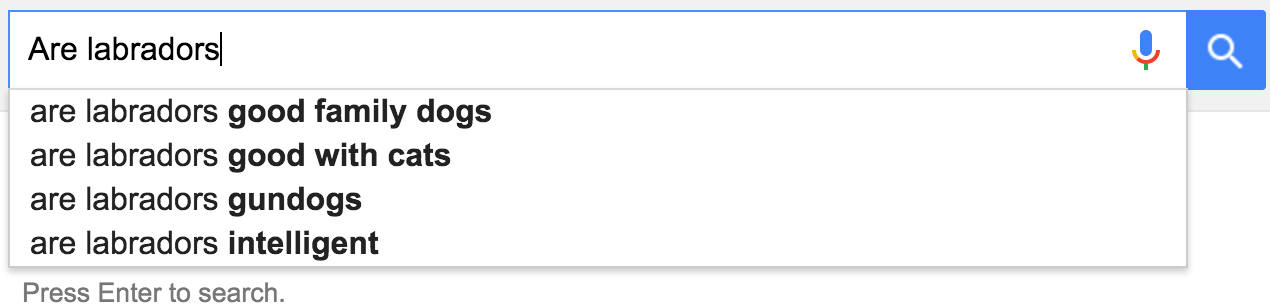
As you can see, there are some interesting topics here that I can use to prompt discussion in my group.
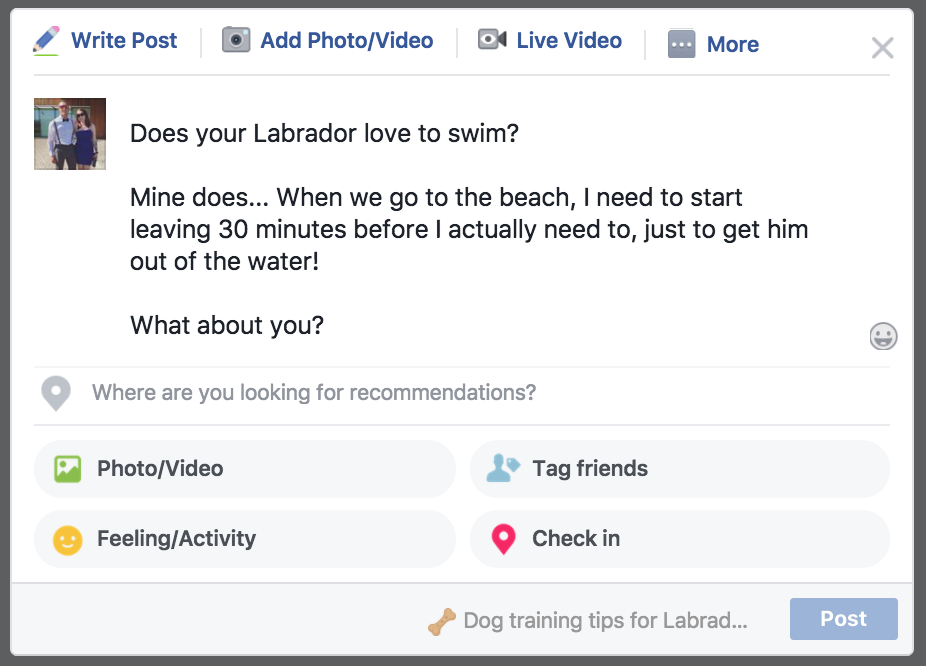
One of my group goals is to get people telling personal stories.
For instance, I could ask my group members, “What’s the most intelligent thing your Labrador has ever done?”
Or, “Do you have any funny stories about your Labrador obsessing over food?”
When doing this, share some of your own stories to get the discussion going.
By encouraging discussion, you’ll increase the odds of the group becoming self-sustaining as people begin to know each other better.
You can even create some ‘Polls’ using the questions you find in your Google searches.
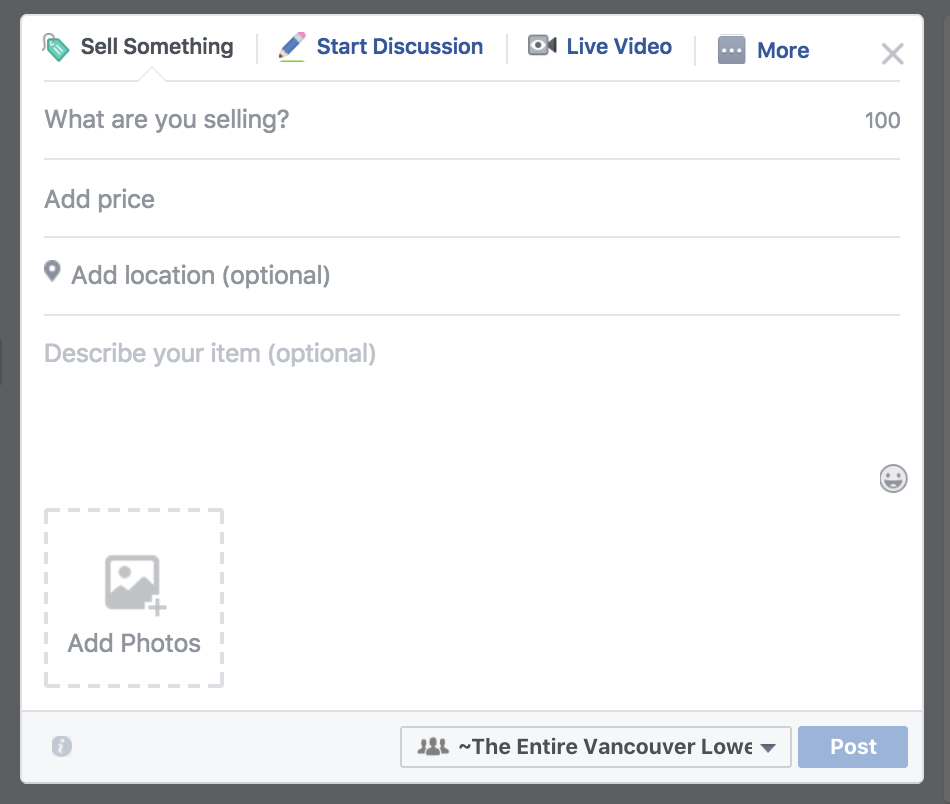
To do that, start a new post on your group and hover over the ‘More’ text, then choose Create Poll.
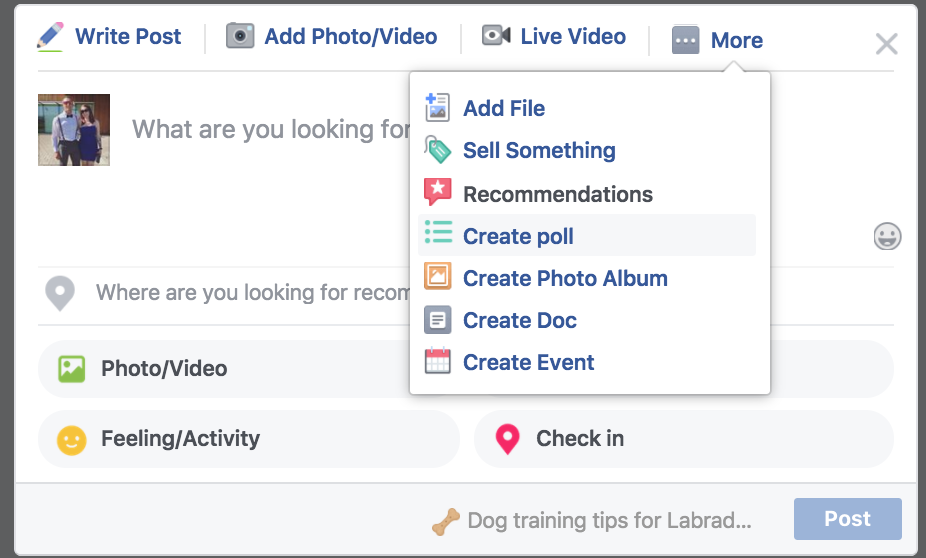
Then go about asking a question and providing some options.
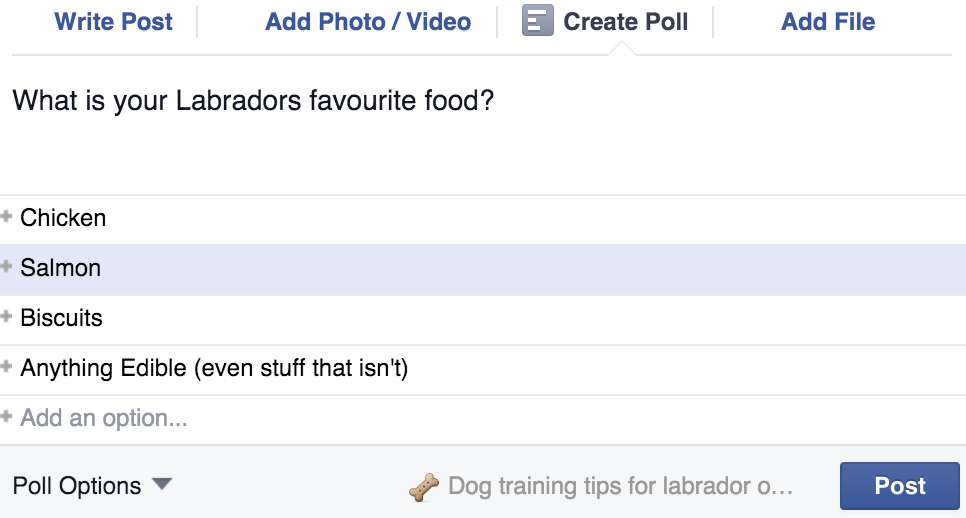
And then once it’s done, you’ll see the following.
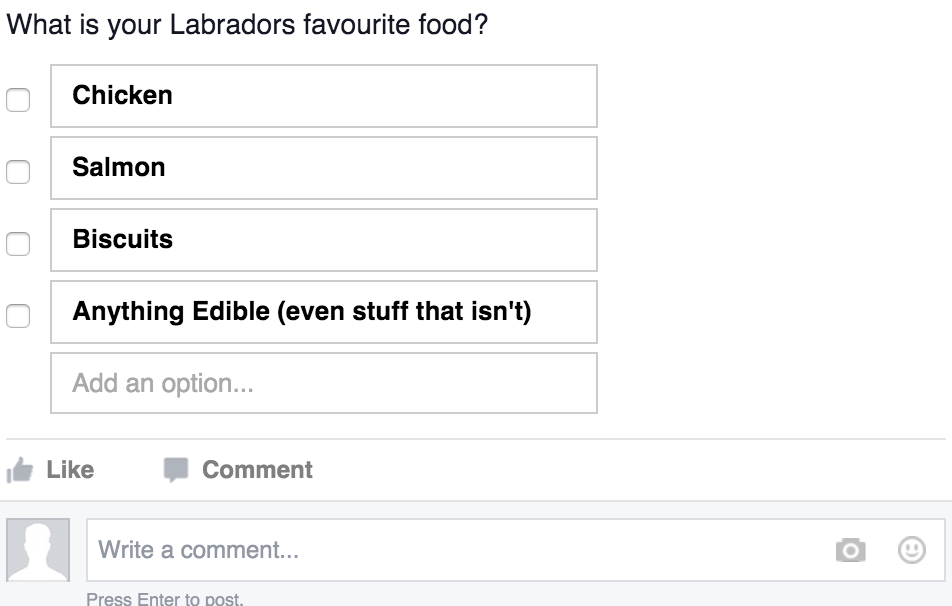
Your members can click an option to answer the poll, or leave a more detailed comment on the post.
You may also want to introduce each of the members that have joined the group that week and request that they share some information about themselves.
For my Labrador Group, I might ask that people share a picture of their beloved Lab when they join. People love sharing photos of their pets, so it’s a pretty easy thing to ask them to do.
You can also encourage participation by having themed days in your group.
These are posts you make on the same day of the week about a certain topic. In the post, encourage users to weigh in with their thoughts or contribute in another way.
In the popular writing group, The Copywriter Club, the group admins have set Tuesdays as a promotional day and called it “Tuesdaytacular.”
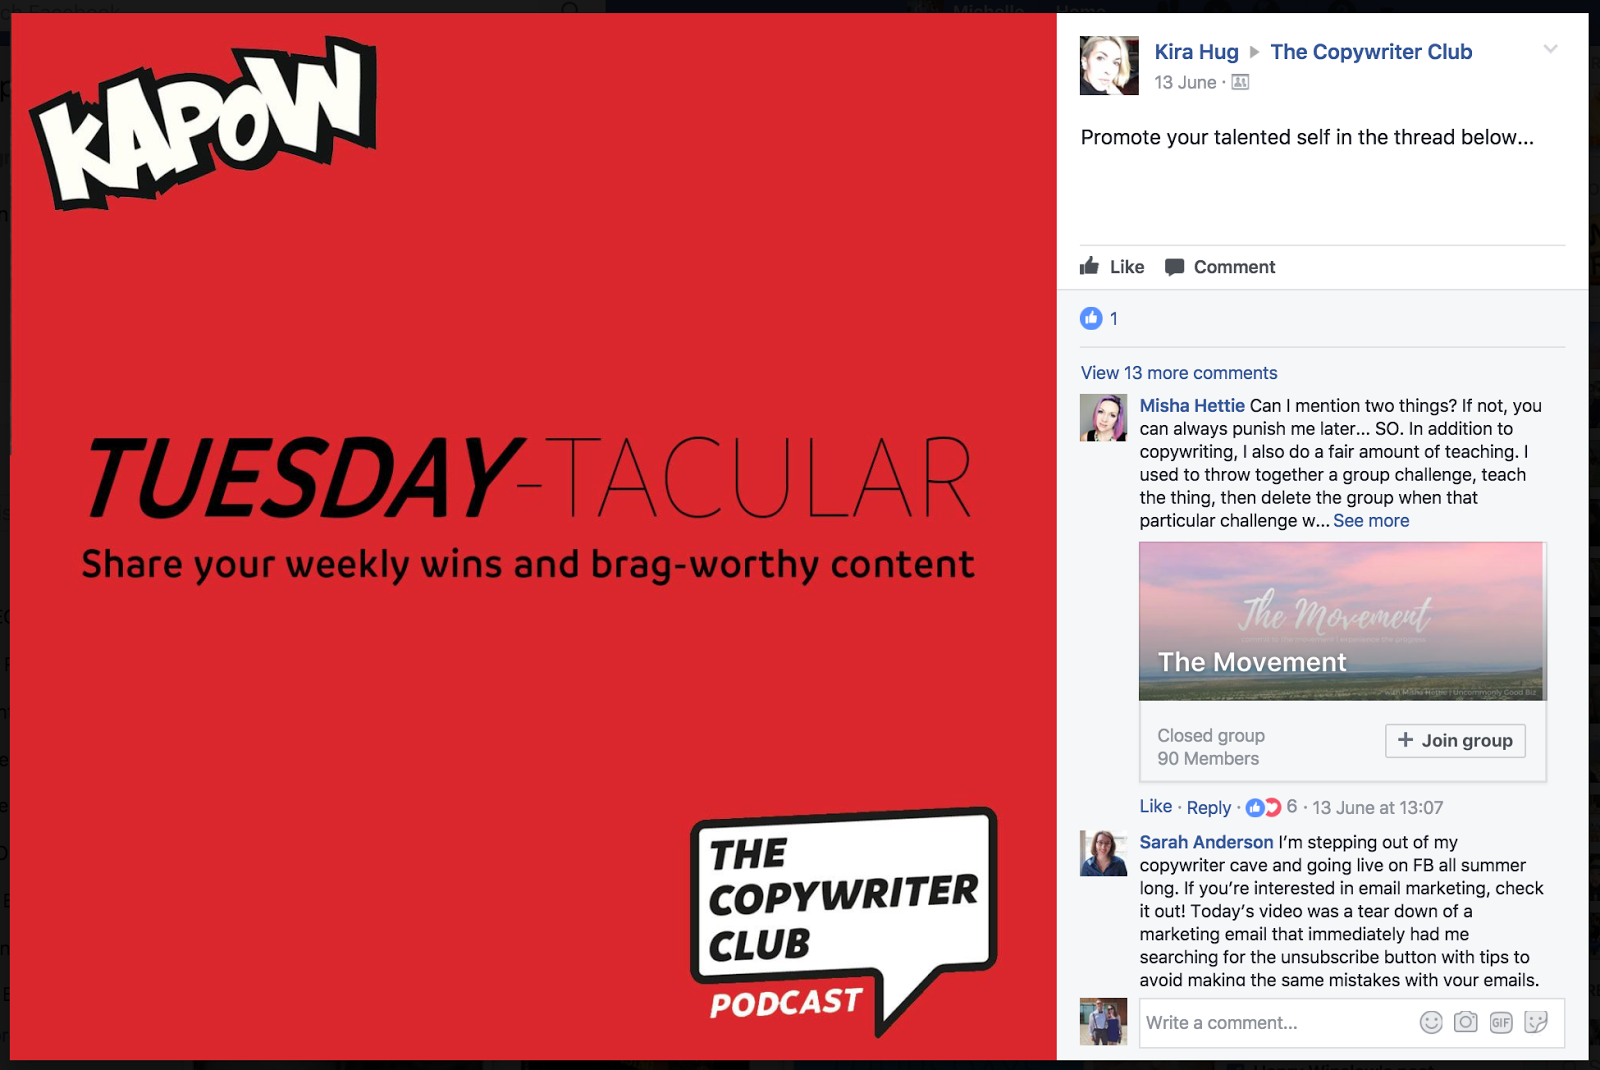
Having a weekly theme gets your members into a routine. They know that they’re allowed to share self-promotional stuff on Tuesdays, so they’ll save up content to post on that day.
Some groups even have a theme for every day of the week!
Themed days may not work for every niche, but it’s worth trying out to see how your members respond.
Another way to encourage participation in your group is to offer exclusive content.
This is similar to the approach you’d take with gated content that I mentioned earlier. However, instead of having a post that leads to your group, you’re producing content to improve retention within the group.
The goal is to retain and engage existing members, not attract new ones.
That doesn’t mean that the same kind of content can’t be used to do both jobs at the same time.
Exclusive group content could include PDF guides or free eBooks that you’d otherwise charge for but are giving away for free in your group.
If you’re struggling to come up with good ideas for content, why not just ask people within the group what they’re struggling with? Create a poll for your members to answer.
Then, create content based on the answers people tell you.
There’s really no better way to find ideas for content than to just ask the people you’re creating for. It sounds simple, but it works.
Videos in your group are also an effective way to drive engagement, which I’ll cover next.
How to grow your Facebook group engagement with live video
Facebook introduced live videos in April 2016 and it’s taken off extremely well since then.
Known as Facebook Live, it allows anyone to start broadcasting live video on their Facebook profiles, pages, and in groups.
An interesting statistic is that users watch live videos 3x longer than they would watch a recording, signaling that people get really invested in what’s happening ‘in the moment’ and want to find out what happens next.
If your Facebook group is for your business, live video is the next big thing to use to attract new leads and clients.
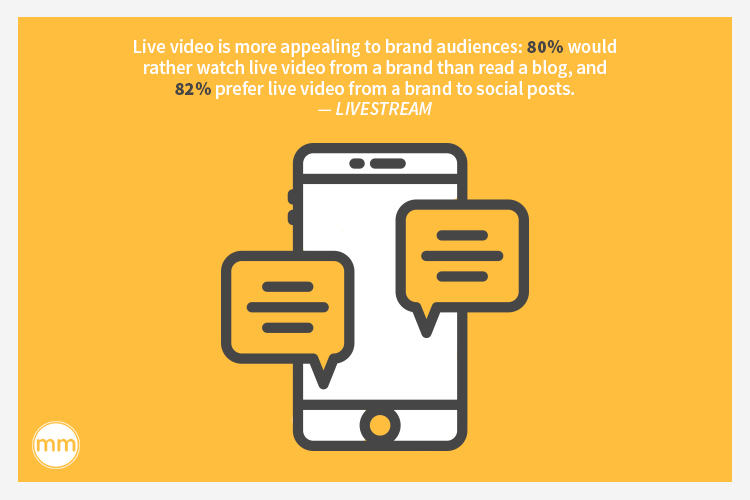
A study found that 80% of users would rather watch a live video than read a blog post.
Maybe I should make a video about live streaming instead of writing this, huh?
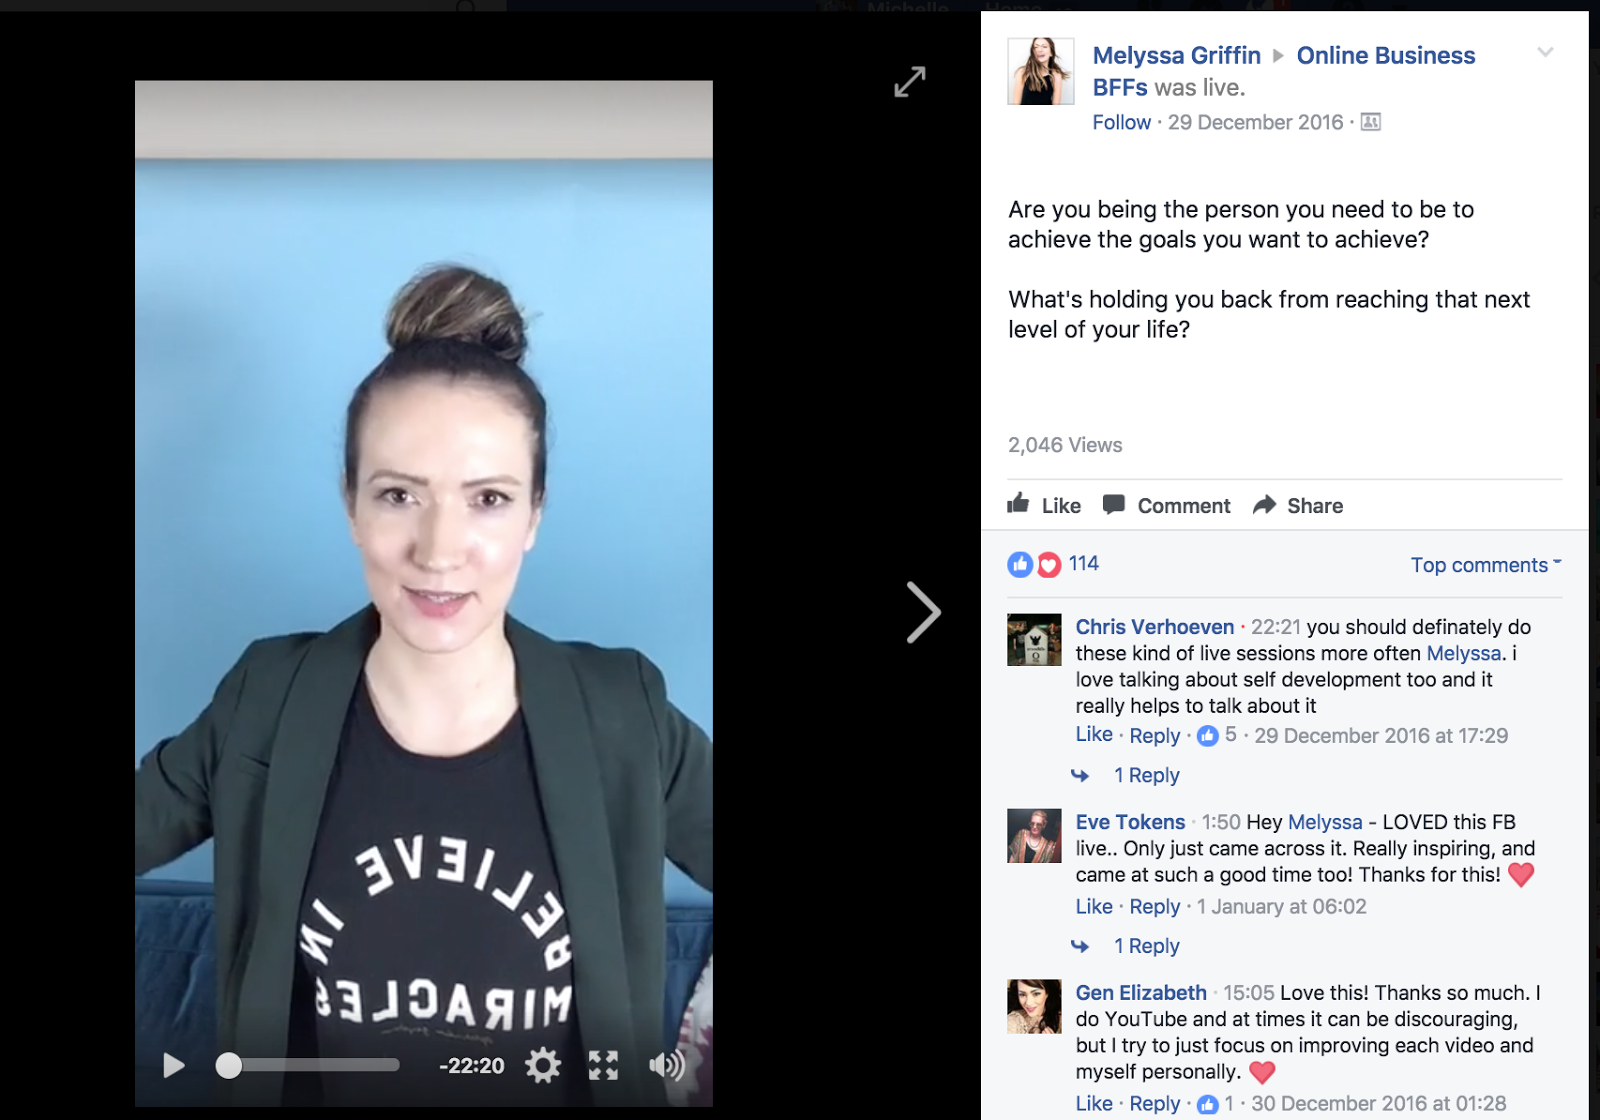
Melyssa Griffin, a popular business blogger and teacher, uses live video a lot in her Facebook group for entrepreneurs, Online Business BFFs.
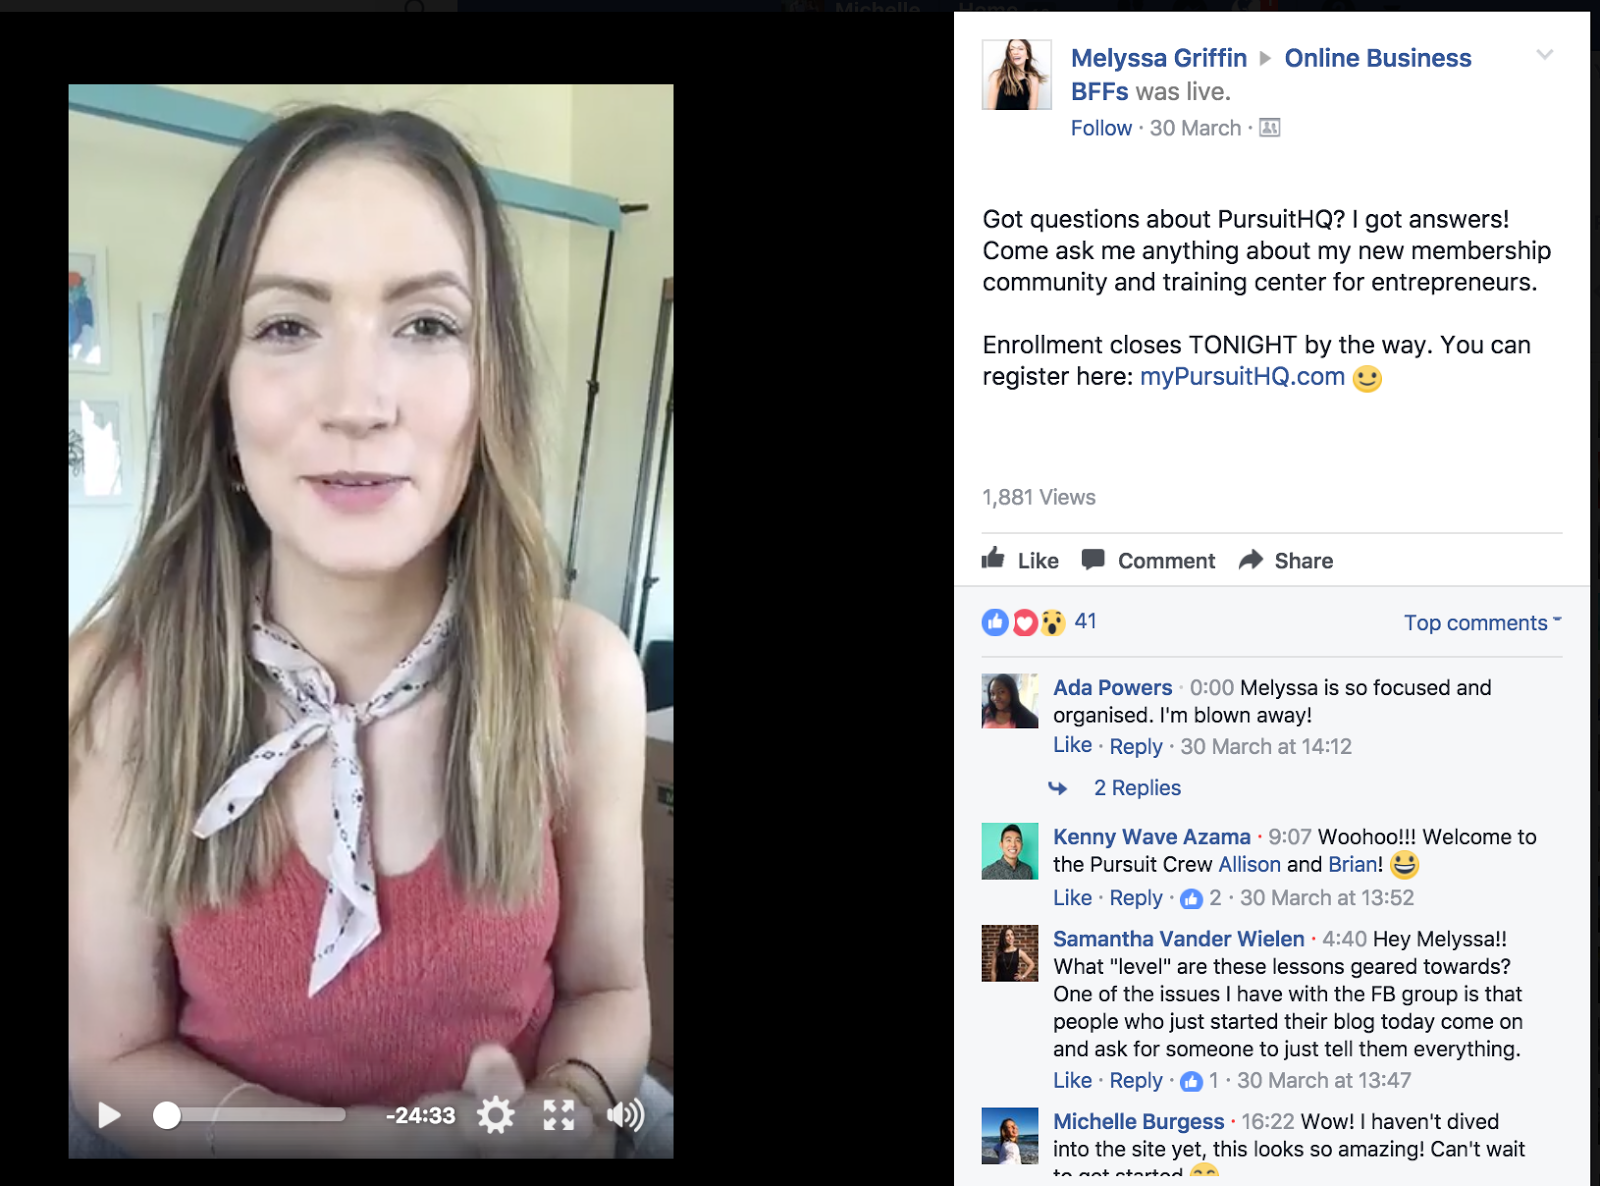
Melyssa runs a membership community called PursuitHQ and frequently promotes it in her group by using live video.
She delivers valuable content, with many videos exceeding 20 minutes in length, and answers her members’ questions in real time. She also does a good job of linking over to her website to encourage new registrations.
Live videos don’t always need to be about pushing a product or service though. You can use them just to build good rapport with your members and encourage discussions.
Melyssa also does a lot of that by sharing some of her personal stories about entrepreneurship without selling anything.
These videos are simply to engage with her very loyal audience and inspire them.
Video goes a long way toward establishing trust. When your audience can see you, especially live, they are much more inclined to connect with you and see you as a credible and trustworthy person.
24% of survey respondents in a recent Digital Marketing Magazine poll said that video was the most trustworthy form of content.
44% of respondents said videos promoted authenticity, and that encouraged 39% of them to learn more about the company behind the video.
Video marketing is definitely here to stay and Facebook has changed the game by allowing anyone to create live, authentic videos for their pages and groups.
Conclusion
Running a Facebook group can provide a great source of leads for your business, or just be a fun place to connect with other like-minded people, depending on your goals.
If you’ve always wanted to build an online community but weren’t sure how, a Facebook group is the answer.
However, you can’t just create a Facebook group and then expect it to automatically thrive. You can’t expect leads to roll in immediately, or thousands of members to join in.
You need to work hard to market it in the beginning to get it going.
Once you can be easily found in Facebook’s search and become known for providing exclusive content, your group will start to grow organically without a lot of effort.
Even once your group is off the ground, you need to keep it running with high-quality conversation.
Engage your members, respond to their posts, provide real and insightful answers to their questions.
Maintaining a group can take just as much time as marketing it in the beginning. You’ll have to deal with approving members, monitoring and deleting spam, and enforcing group rules.
Eventually, you will be able to hire someone who can take care of all of these duties for you. This will free up your time to create awesome exclusive content for your group members, ensuring they remain loyal fans.
From reading this post, you now know everything you need to start a successful Facebook group. So get out there and create one!
Do you already have a Facebook group? What have you found to be the best strategies to grow your members and engagement?
Comments (226)