
When it comes to advertising online, Facebook is one of the best places to do it.
From a sheer audience perspective, it makes sense. There are more than two-billion monthly active users on the site.
It’s the largest social media network ever created and it continues to grow every day.
But with all of Facebook’s diverse features and large user base, it can take hours to monitor and optimize.
And I’m guessing you don’t have hours of extra time each day to devote to Facebook advertising.
You’ve got other things to do.
But that doesn’t mean you can neglect your Facebook ad campaigns. They still need to be optimized if you want to see a positive return on your investment.
It can be a huge money maker for your business.
So how do you cut time and still optimize your campaigns?
You automate it.
Thankfully, Facebook’s advertising platform allows us to optimize and automate tons of different processes.
This means we can spend less time on the platform and more time doing other tasks.
And the best part? It’s easy to do.
Here’s the ultimate guide to automated Facebook ad campaigns.
Set up custom audiences for funnel stages
The first step in setting up any Facebook ad campaign is to focus on audience targeting.
Facebook’s platform is top-notch when it comes to audience targeting in the advertising space.
You can target anything from occupation to income to hobbies and interests.
But the goal of this section is simple, so don’t get lost in the targeting rabbit hole. Simply create three audiences based on this simplified form of a buyer’s journey:
Creating these audiences based on the buyer’s journey will help us simplify and automate the process.
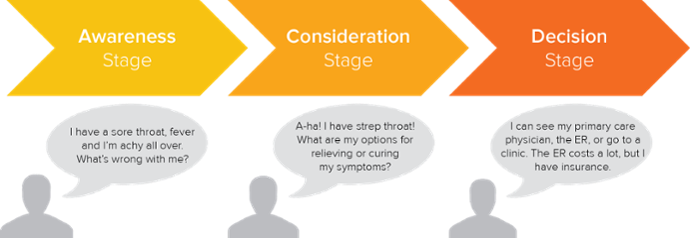
The buyer’s journey is a basic outline of the decision-making stages a typical user goes through.
Awareness: They’re aware of their problem, but they’re not sure how to fix it.
Consideration: The buyer is now searching for different methods (products or services) to fix this problem.
Decision: The buyer has now figured out the best option to solve their problem.
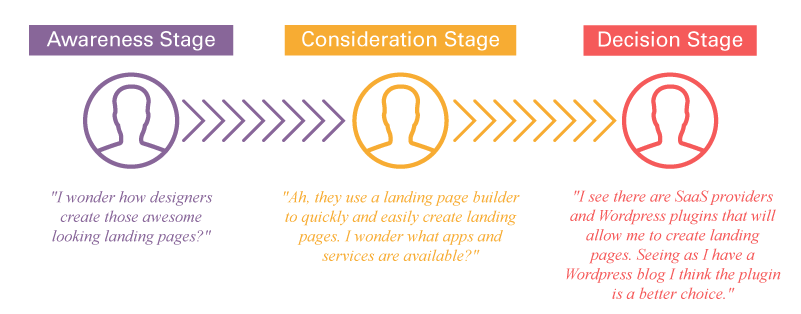
Pretty simple, right? Here’s another example for a SaaS product decision:
The whole goal of the buyer’s journey is to help marketers like us understand that people won’t convert on the first visit.
They’ll most likely ignore the initial ad they see.
You can’t simply target a cold visitor with a huge purchase-based ad.
It won’t work. They aren’t ready.
So instead of continually creating new audiences, we can create three audiences and populate them with users based on engagement, traffic, and more.
Once we’ve set up these audiences, we won’t have to do it again for a long time.
Here’s how to create audiences for each funnel stage.
Awareness audience
As I mentioned before, the first stage in the buyer’s journey is the awareness stage.
Here, users are aware of their problem, but they haven’t begun to search for solutions just yet.
So the goal in this stage is to target a wider audience to grab their attention and hopefully begin to funnel them through each audience level.
To start, open Facebook’s Business Manager and navigate to your dashboard. From there, click “Audiences” under “Assets.”
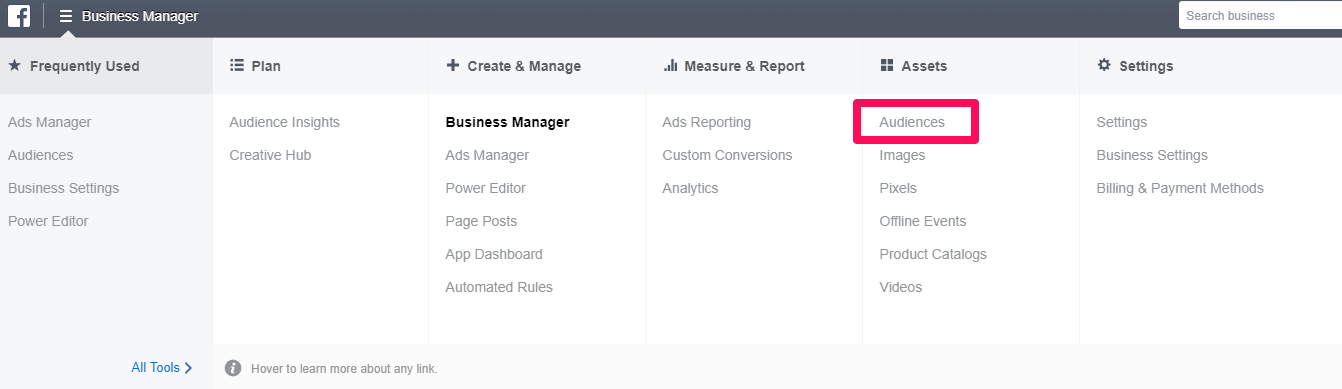
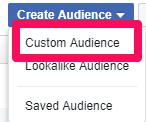
Next, we want to click “Create Audience.”
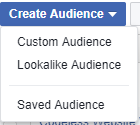
Here we have three options.
The option you select will depend on two things:
- Whether you have any existing Facebook Custom Audiences.
- The growth and development of your business.
For example, if you already have a Custom Audience that’s working or a business with a large number of clients, you can create a “Lookalike Audience.”
The “Lookalike Audience” will match your existing customer file or “Custom Audience” to a similar group of people with the same interests and demographics.
If you have the ability to use that option, select it.
If not, you can create a “Saved Audience.”
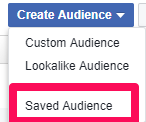
A “Saved Audience” is generally broader and less focused on targeting.
It seeks to grab attention by casting a wider net.
Then, you take those engaged users and push them down the funnel.
Here’s what a “Saved Audience” screen will look like:
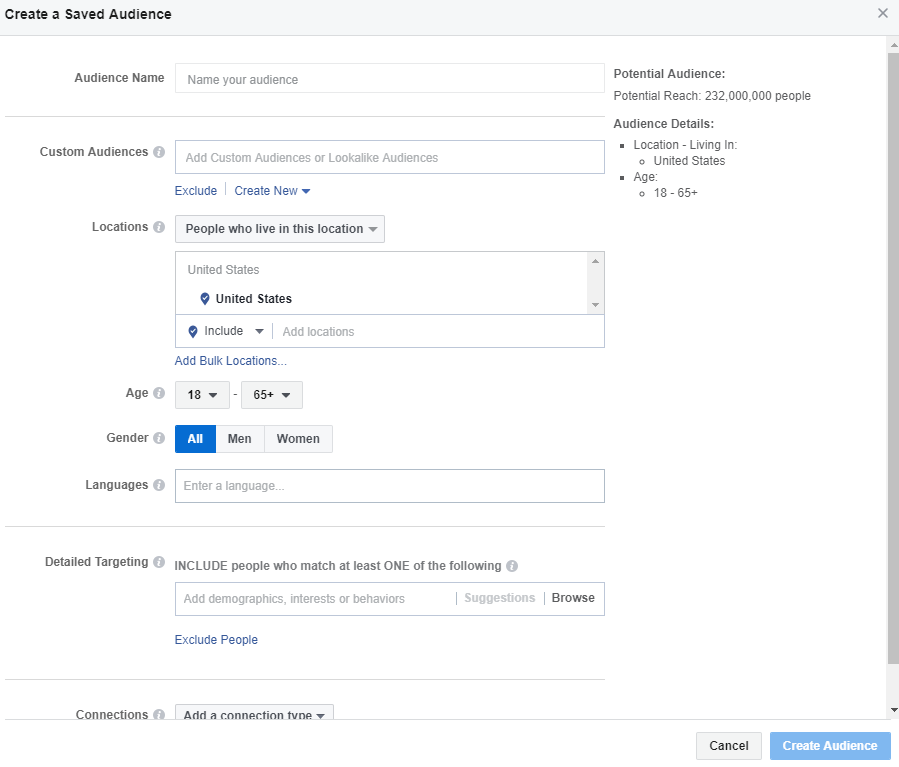
Next, you need to start filling in the information.
Start by naming this your Awareness audience.
Next, fill in the basic information of your ideal customer demographics.

Add information for the location, age, gender, and language.
This is the broad-based targeting information.
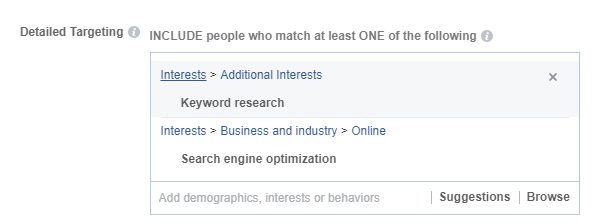
Once you’ve nailed down the demographics, you can start to narrow your Awareness audience with interests and exclusions.
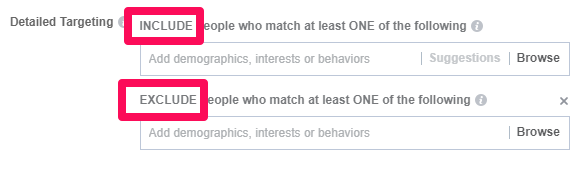
The idea here is to select interests that match your product or service.
For example, if you sell search engine optimization services, you’ll want to put SEO as an interest.
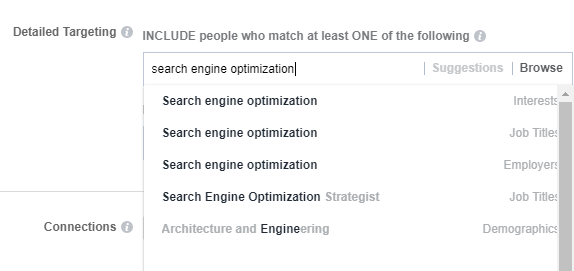
Maybe you also sell a tool for keyword research. You can easily add that, too.
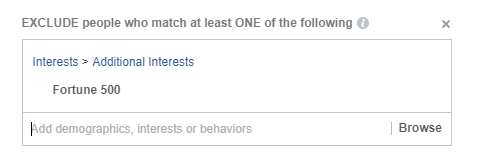
Now it’s time for the exclusions. This is the step where you want to blatantly exclude people who you know won’t convert from seeing your ads.
For example, let’s say you’ve never sold SEO services to Fortune 500 companies. They simply don’t want your product.
And that’s fine. But you want to make sure to exclude them so you aren’t wasting any money on sales that simply won’t close.
Once you’ve narrowed down a few interests and exclusions, you should aim for an audience size around 500,000-700,000.
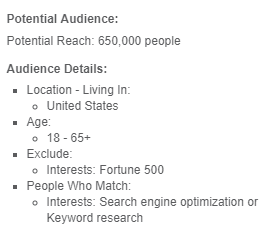
That’s an ideal range to focus your efforts on casting a wide net without over-reaching and risking huge, wasted ad spends.
Now that you’ve got an awareness stage audience set, it’s time to create an audience for those in the consideration stage.
Consideration audience
The consideration stage is exactly what it sounds like: the buyer is considering their options to fixing or solving their problem.
They’re starting to browse different vendors to see who’s going to help them.
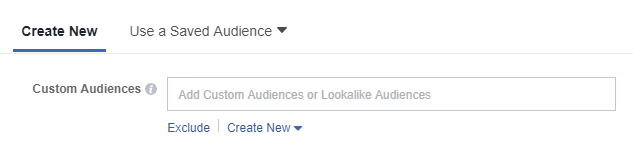
Since we’ve created an awareness audience and driven tons of high-quality visits to our page or website, we can now create a new “Custom Audience.”

We have multiple different options to choose from for creating a “Custom Audience.”
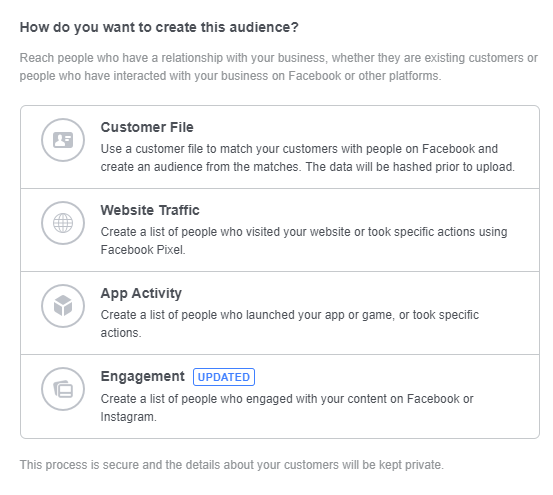
My personal recommendations for this would be Engagement or Website Traffic.
Your awareness stage ads have the goal of bringing in new visitors. These are visitors that weren’t aware of your brand, product, or service.
The “Consideration Audience” will focus on sending more ads to people as they move through the funnel.
For example, if they engage on your site or Facebook page, they’re interested in what you have to offer.
They’ve started to consider your product or service and a single ad targeted to them might push them to convert.
For this example, we can select Engagement.

This makes sure the audience is specifically targeting users who are considering products and services and showing interest in your page.
We have tons of different options to choose from.
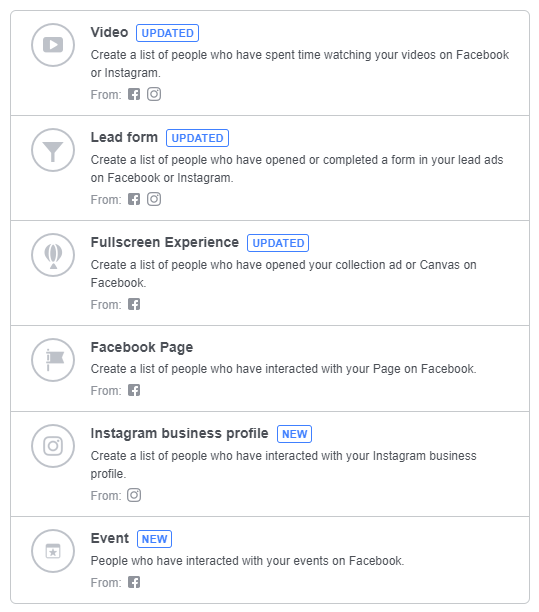
This will all depend on your existing Facebook ads setup.
For example, did you run an event? Do you have an Instagram business profile? Did you use lead forms or video?
If you drove your “Awareness Audience” to your Facebook Page, you can select almost any of these.
To keep it simple, we can select the “Facebook Page” option.
Here, we can target a diverse string of options and interactions.
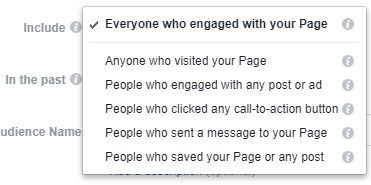
For this, select people who have engaged with any post or ad, or select the CTA-based option.
Make sure to select the following options, too:

Name your audience Consideration and be sure to select 365 days to keep funneling users in without making new audiences.
Once you’ve set this up, you can move on to the final audience.
Decision audience
Now that you’ve successfully set up audiences for building awareness and consideration, it’s time to seal the deal.
Close the sale by targeting these users who have moved down your audience funnel.
At this point, you’re dealing with people who are primed and ready to buy when they reach your audience.
In awareness, they saw your brand. In consideration, they engaged with your page. Just before making a decision they will most likely inspect your product page on site.
Here’s how to target for that specific event.
Create your third audience, the “Custom Audience.”
This time, select “Website Traffic” as your option.

Next, as our defining value, we want to select specific page visits.

Here’s what this custom audience should look like:
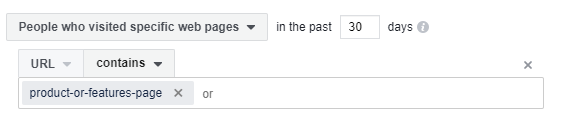
You want to focus on targeting your product and features page toward users who are close to making a final decision.
By using the product and features page as your specific URL, it shows that these people are heavily interested in your product and might be convinced to buy it.
Now that you’ve got all your custom audiences setup, you can begin to build ads for each stage.
This will allow you to automatically move audiences through the funnel as they progress to each step of engagement and website visits.
Set up multiple ad sets for funnel stages
So, let’s build specific ads for each stage of the funnel.
Doing this will allow you to stop the current cycle of making tons of ads and tweaking them daily for success.
Instead, you can simply push users through each ad set until they convert.
And with those custom audiences, they will automatically keep flowing in.
What type of content works for each stage of the buyer’s journey?
Here’s a good reference point:
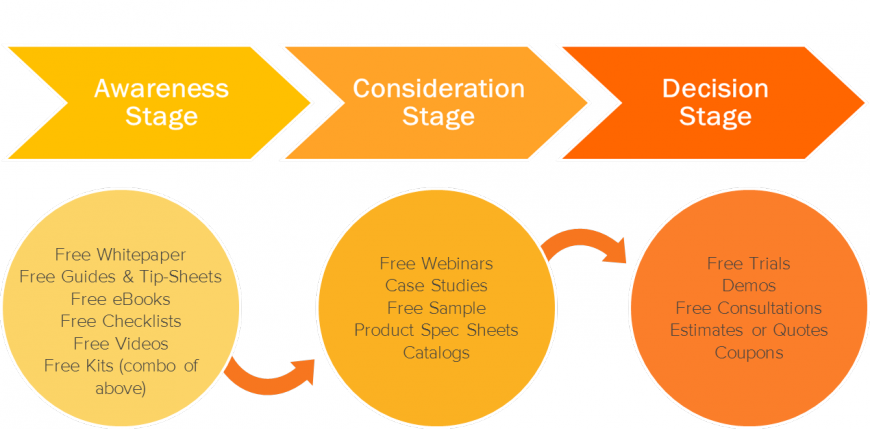
Awareness stage ads should always be low-profile lead magnets that don’t cost anything.
These could be free e-books or whitepapers.
Content should get increasingly more valuable to match intent as customers move through the buyer’s journey.
Awareness ads
People who are in the awareness stage aren’t going to buy your product yet.
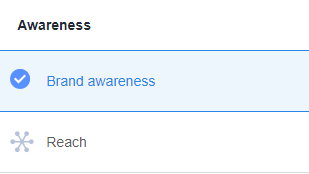
So start simple.
A great jumping-off point for awareness ads is using the “Brand awareness” option in the Facebook Ads Manager.
Next, scroll down to your audience section and be sure to select the “Awareness Audience” you created earlier.
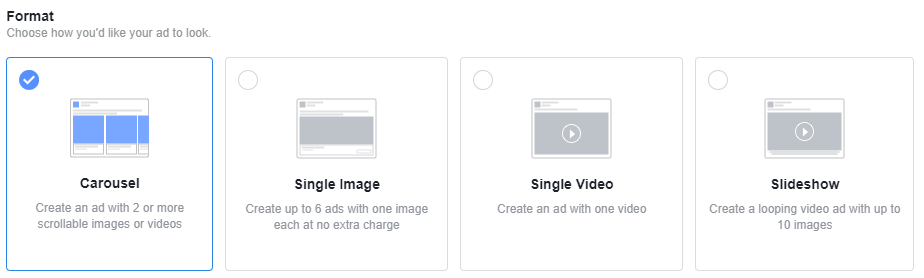
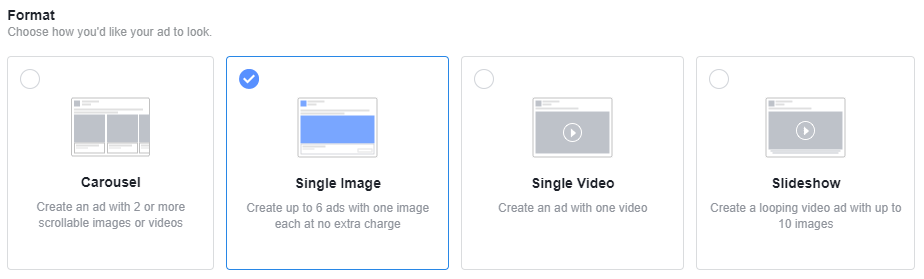
From here, you can start to choose your ad format.
Remember, the goal with this ad is to drive engagement on your Facebook page to funnel these users into the next audience.
With that goal, you need to be careful in getting them back to your page to build brand awareness.
A great way to do that is by using video format or a carousel.
These visual-based ads will be sure to build brand awareness and stand out in the midst of a user’s page.
Consideration ads
The next step is to target ads to your “Consideration Audience.”
In the setup example, we created an audience based on Facebook engagement.
Here, we want to deliver an ad that isn’t offer-based (like asking them to buy) just yet.
We want to ease them into the final decision stage before asking for a conversion.
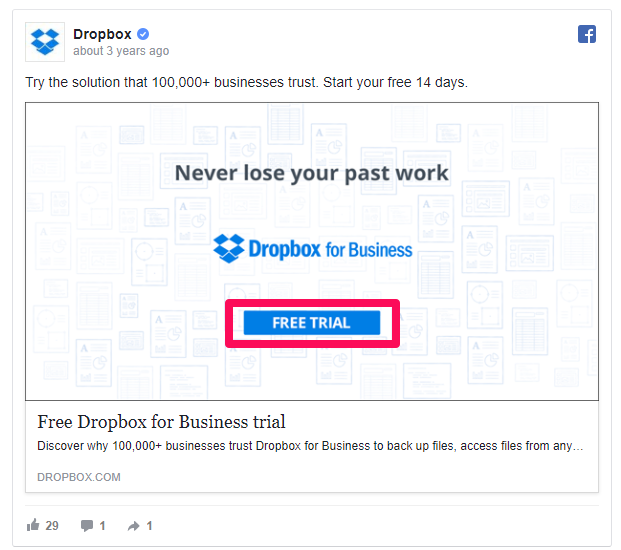
A great way to do this is by running a single, image-based ad.
You want to focus on driving traffic to your site with an enticing offer like a free trial or webinar.
The entire goal of this stage is to educate the audience before pushing a final conversion-based ad.
Here’s a prime example of a consideration stage ad from Dropbox:
Once you’ve nailed down your consideration ad, it’s time to get that conversion.
Decision ads
Decision ads are simple.
They need to drive conversions.
And you’ve automated everything so far.
People flow into each audience based on their interactions with your ads, and then they automatically see the next ad as they move through the buyer’s journey.
Amazingly simple, right?
The final step is to drive it home.
As your final objective, select “Conversions.”
For the ad format, we want to keep it simple.
I recommend using either a carousel-style ad or a single-image ad.
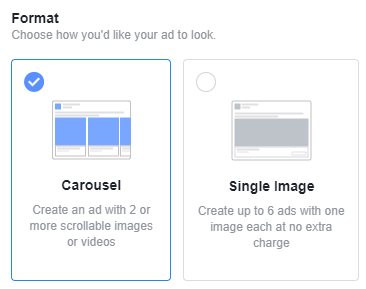
These will be the best ways to highlight your product in a simple, yet effective way.
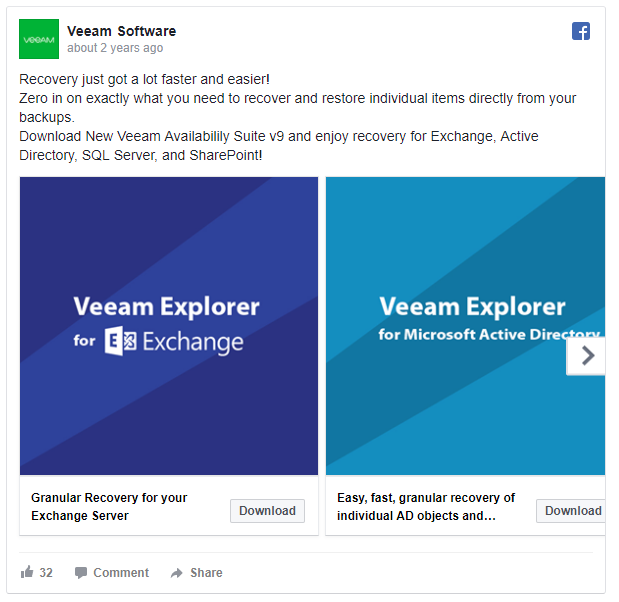
Here’s a prime example of a decision-stage ad (from Veeam Software) that drives conversions.
Once you’ve set up your ads and audiences, it’s time to automate everything else.
Automate the details with rules
Facebook’s automation rules are a gift from the heavens for marketers.
Instead of checking your Facebook ads every day to make sure your ad spend is normal, or that costs per engagement aren’t fluctuating, you can set up rules and notifications.
Let’s say you noticed you’ve had major fluctuations in cost per action or acquisition. You’re probably thinking it’s time to bust out the spreadsheets and calendar reminders.
What would you say if I told you that you could automate it all?
Here’s how.
Go to your Ads Manager and click “Create Rule” from the dashboard.
From here, we can create diverse automation rules on just about anything.
For example, you can limit the frequency at which someone sees your ad.

Is your cost per result too high? You can automate that, too.

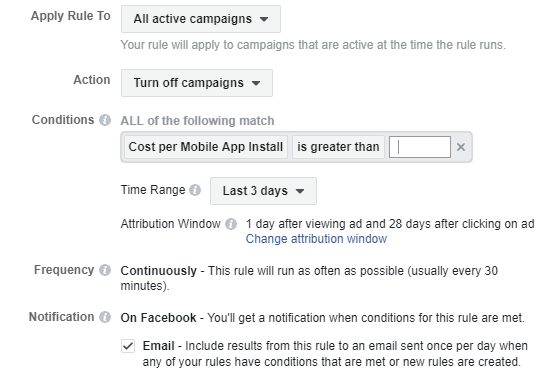
Let me give you a finished example of a rule you can use. Remember, you can customize these rules to fit your objective in almost any way possible.
You can also create unlimited rules.
But here’s one I use often:
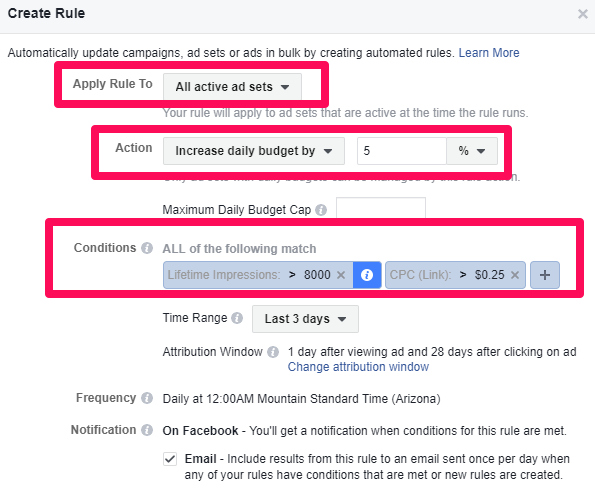
Let me break it down for you: Condition = the trigger.
If that condition is met — in this case, if my CPC raises over 25 cents — it will trigger the action.
My current action is to increase the daily budget by 5%.
This will then be applied to all active ad sets.
So here’s the full, one-line explanation:
If my CPC is greater than 25 cents, increase my daily budget by 5% on all active ad sets.
Make sense?
Use these rules to optimize and automate just about anything and everything you can think of with your Facebook ads.
They’re extremely useful for driving conversions and tweaking campaigns without actually having to sit there and do the work.
All you have to do is set up a few rules and let Facebook take care of the rest.
Conclusion
Facebook’s advertising platform is hands down one of the best places to advertise online.
It’s an opportunity to put your product in front of an audience of billions.
And there are a ton of Facebook ad customization options for you to target your specific audiences.
But with all of those users and such diverse tools, it’s no wonder you can spend hours trying to optimize your campaign every day.
As online marketers, we can’t risk putting all our eggs in one basket.
You need to be able to spend less time on the platform, yet still get the same ad-optimization benefits.
So how do you do it?
Automate everything you can.
Start by setting up custom audiences for every stage of the funnel.
By doing this, you’ll continually populate users into these audiences without having to make more.
Next, create ad sets to match those funnel stages.
Continually run these, and you can target each stage with specific ads.
Lastly, take advantage of Facebook’s rule optimization tool to automate tedious, time-sucking tasks.
Managing Facebook campaigns doesn’t have to take up your entire day.
What are your favorite ways to automate your Facebook ad campaigns?
Comments (8)