
If you’ve just launched an ecommerce business, you might be on the lookout for ways that you can boost sales.
For many people, the most obvious option is to hit the display network and run some Facebook Ads, as that’s what a lot of other marketers are doing at the moment in order to improve their conversion rate.
However, there is also the option to use AdWords as a means of generating sales for your ecommerce business.
If you’ve always wanted to use AdWords for your ecommerce store, but didn’t know where to begin – you’re in luck.
That’s because today we’re going to explore the AdWords tactics that you can use, not only to up your conversion rate but also to generate sales for your ecommerce store.
By the end of this post, you’ll know everything that you need to know, when it comes to generating sales using AdWords.
Let’s begin!
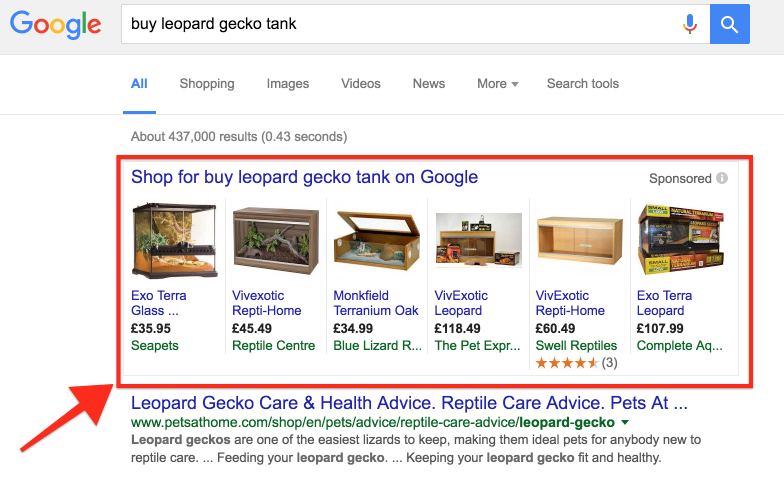
Google Shopping Ads
Google Shopping Ads are normally triggered when the search engine giant Google thinks that you’re searching with the intent to buy something.
Here are some Google Shopping Ads –
Google Shopping Ads aren’t utilized by many ecommerce business owners and that’s often because setting them up can seem intimidating at first.
However, setting them up is a lot easier than you might think.
You’ll first need to create a Merchant Account with Google.
Creating a Merchant Account is important, because it allows you to provide Google with a ‘Product Feed.’
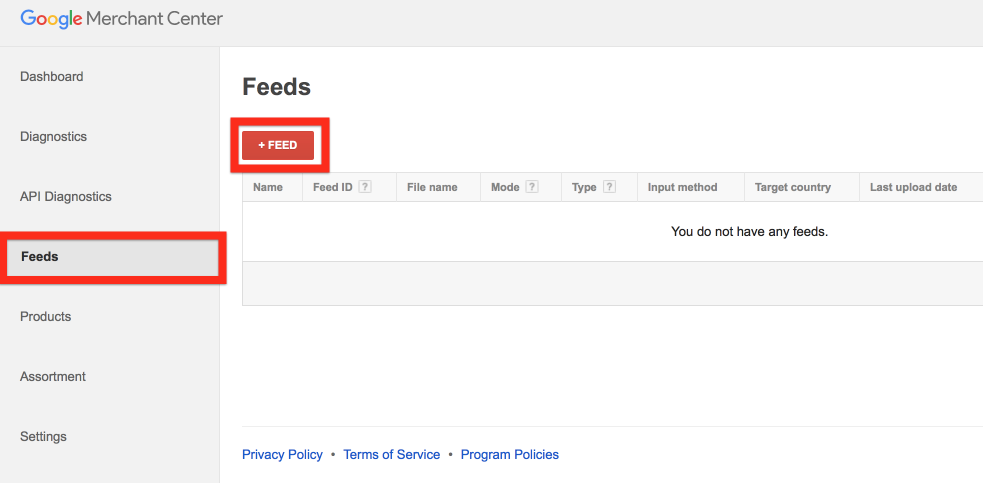
After you’ve created a Merchant Account, you can provide Google with a Product Feed, by clicking on ‘Feed’ in the left sidebar and then clicking on ‘+Feed.’
If you’re not sure how to create a Product Feed, don’t worry.
If you’re using a platform like Shopify, you’ll be able to use a plugin to help you get the job done.
Even if you’re not using Shopify, you can reach out to the company running your ecommerce platform and they should be able to help you get the job done.
If you’d like to learn more about creating a Product Feed, you can take a look at Google’s Guide to creating a Shopping Feed.
In any case, once uploaded, the keyword planner AdWords will use the Product Feed to decide what products should be shown when certain keywords are entered into the search engine– should you create an ad campaign.
Note: You have a lot less control over the way that you target your Google Shopping Ads for an exact match, when compared to other forms of keyword planner tool (AdWords) advertising.
You can’t pick the keywords or the negative keywords that will trigger your ad rank. Google will automatically display products within your product feed, based on it’s own ad group keyword and conversion data.
That might sound like a disadvantage, but Google has a lot of data about when your ads are most likely to boost your conversion rate in relation to specific search terms. Because of this, you can trust Google to decide when your Shopping Ads need to be shown.
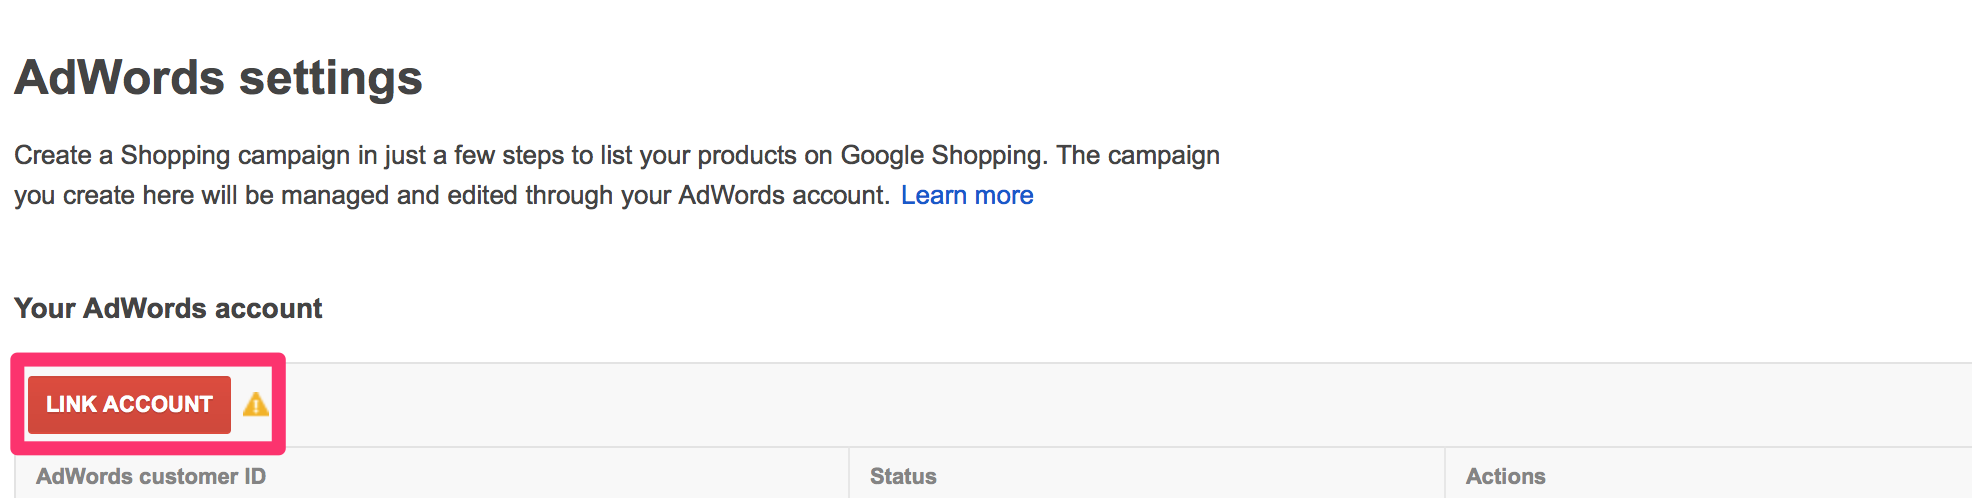
If you want to launch a Shopping ad campaign, link your Merchant account with your keyword planner (AdWords) account.
Just select the AdWords option, within the Settings section.
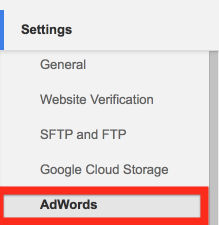
You then have the chance to link the accounts.
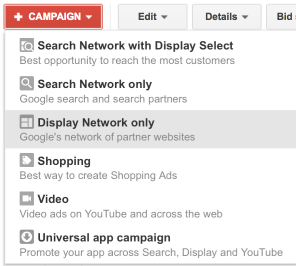
You then need to go to your keyword planner (AdWords) account, click on ‘+ Campaign’ and select the ‘Shopping’ option.
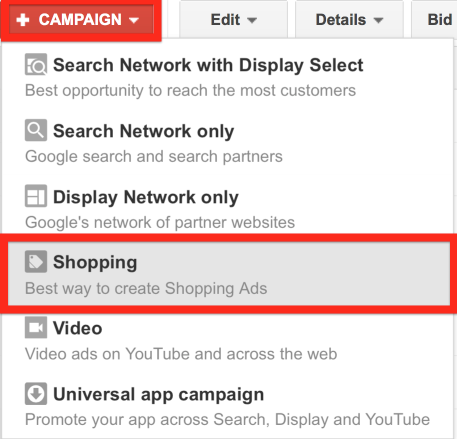
You’ll then have the chance to input some basic information for your ad campaign.
There are a few things that you’ll want to pay attention to.
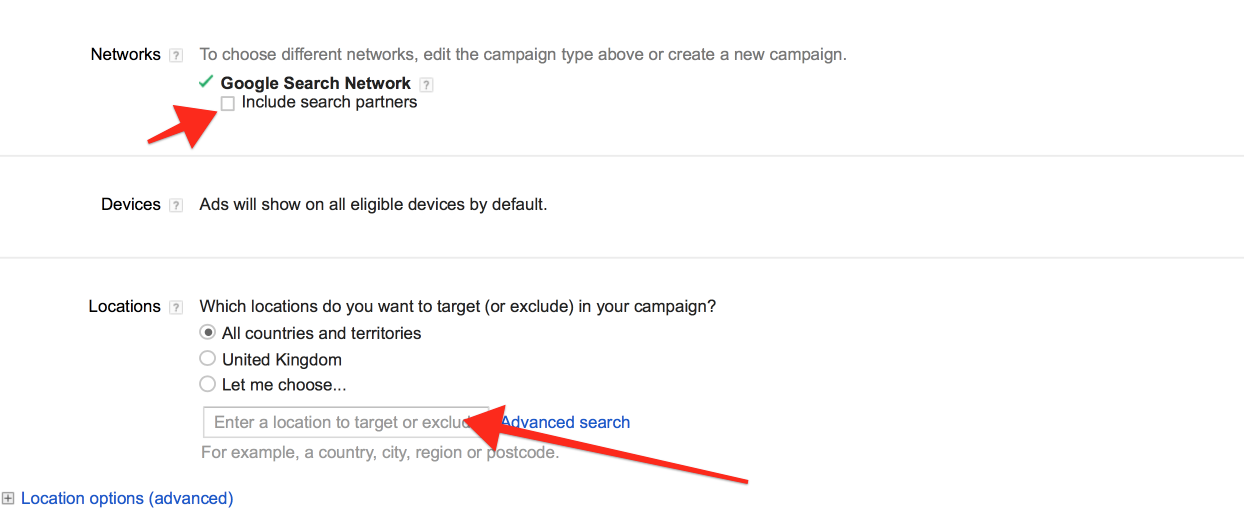
The first is to make sure that your country is an exact match for the country used in your Product Feed – or else your ad campaigns won’t be triggered.

The second is to make sure that you’ve deselected ‘Include search partners.’

Note: If you want to have some control over which products are going to be advertised, you can click on the ‘Shopping settings (advanced).’
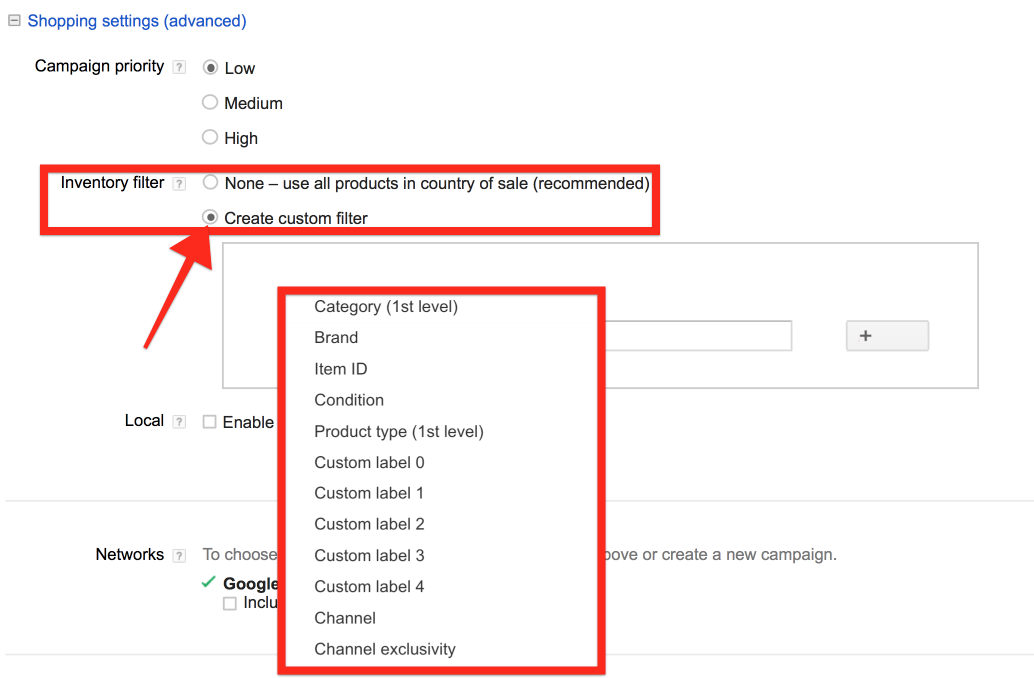
Here, you can pick how you want to filter the products that are going to be shown for this ad campaign.
Once you’ve completed the set up process for your ads, they should start running shortly.
Search Ads
You don’t have to rely on Shopping Ads for your ecommerce store. You can also run some ‘Search Ads.’
It’s worth mentioning that since Shopping Ads are so rich, in terms of their ability to display images and prices, you should try and use them first, especially because they convert to mobile devices so well.
If, after using them, your conversion rate and ad rank results are poor and you’d like to try running some search ads, you can use the tips we’re going to cover.
The key to success, with a Search campaign, is setting everything up so that your ad rank is triggered by keywords that will generate a high conversion rate.
You can find these ‘high converting keywords,’ by using the Google Keyword Planner tool.
Because you want to find keywords, even if they aren’t an exact match, that will generate buyers, place the word ‘buy’ in front of a generic keyword that covers what your ecommerce business sells.
Keep in mind, though, that the generic keyword can also be based upon a certain product range – for example, ‘Buy running shoes.’
You also need to make sure that you’ve gone into the ‘Customize your search’ option and selected ‘Only show closely related ideas’ from the ‘Keyword options’ box.
For the sake of this post, let’s say that I want to boost the sales of ‘fish tanks’ for my pet store.
As a result, I use the keyword ‘buy fish tank.’
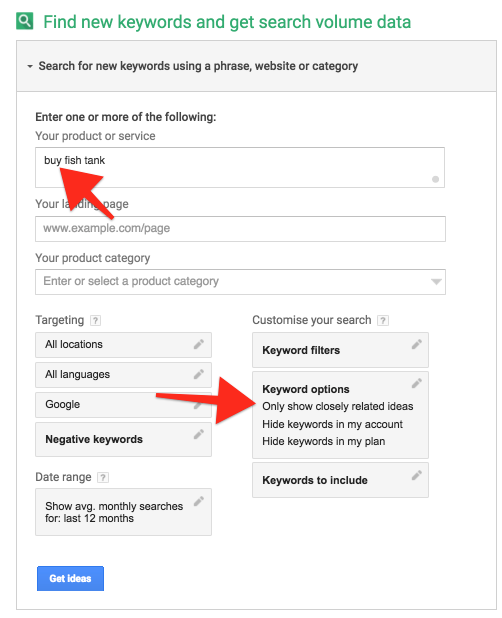
Once I click on ‘Get ideas’ I’m presented with a list of keywords that are likely to generate a high conversion rate.
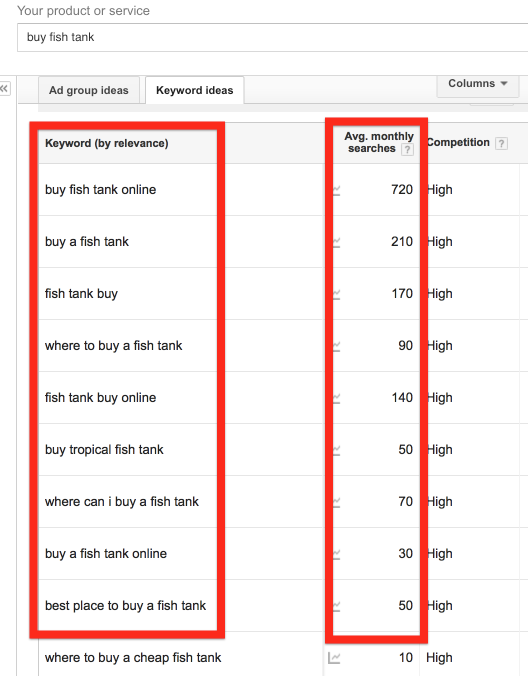
I’m also notified of the monthly ‘Search volume’ for each keyword, letting me know what volume of traffic I can expect.
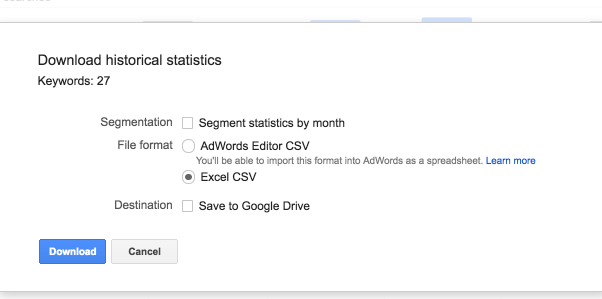
If I want to download these keywords, I can do so by clicking on ‘Download.’

Here, I can select how I want the data to be saved.
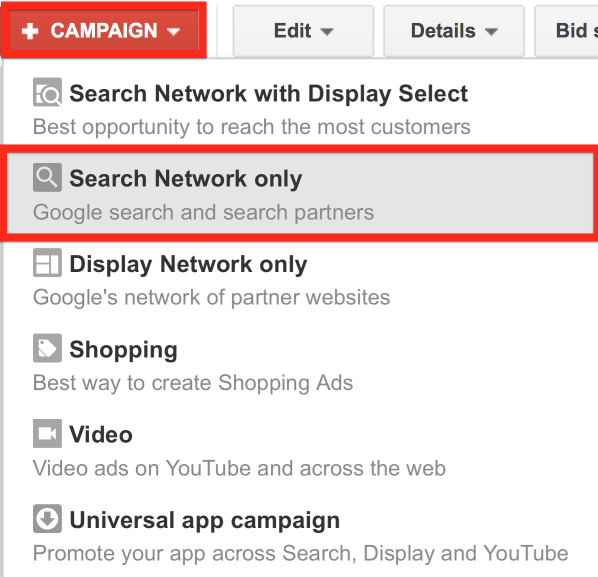
Now, let’s look at creating an actual Search campaign.
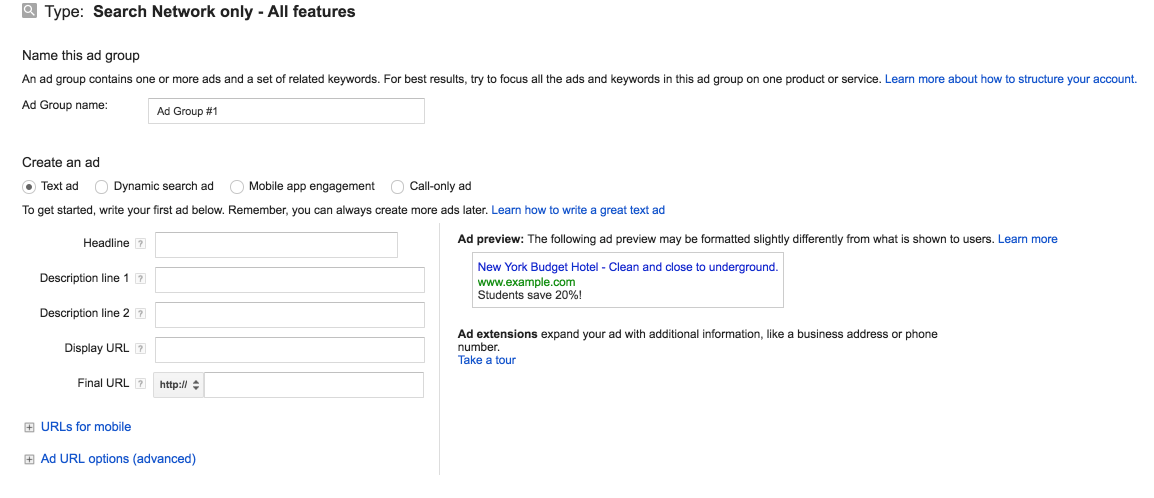
You can create a Search campaign by clicking on ‘+ Campaign’ and then selecting ‘Search Network only.’ rather than searching the display network.
The process of setting up your Search Network Ad is pretty easy.
Give your campaign a name and select the ‘All features’ option.
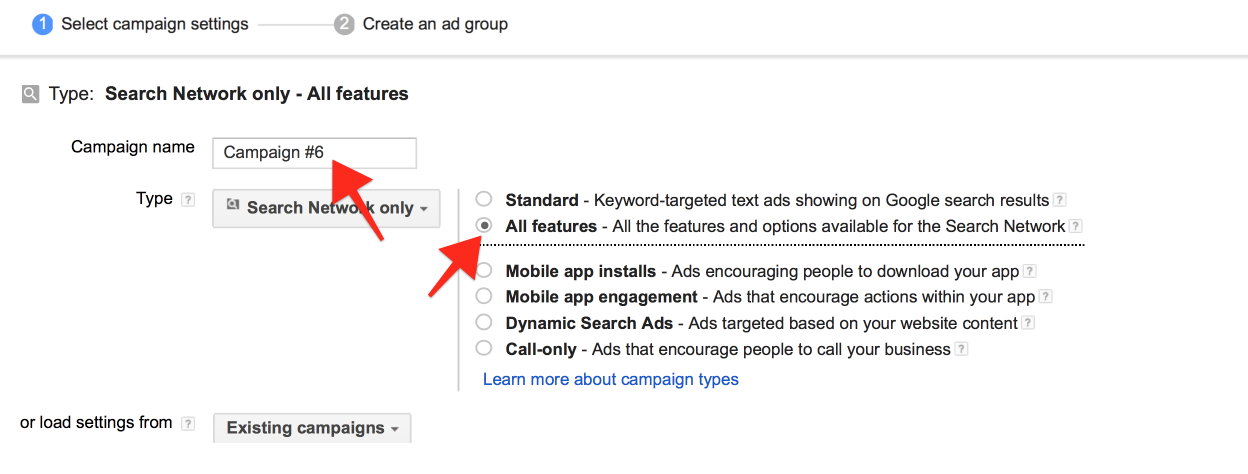
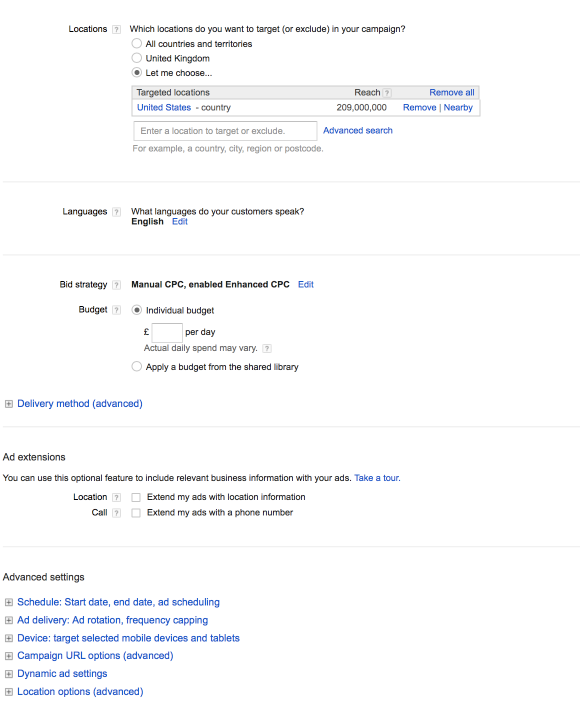
Deselect the ‘Include search partners’ option and pick the location where you want your ad to be shown.
You then have to set up the bidding for your ads.
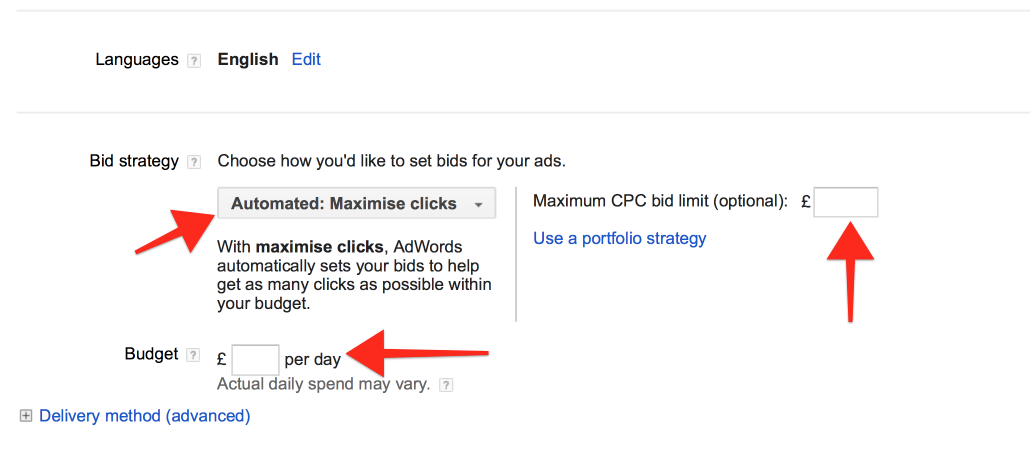
What you cost per click bid here is going to be determined by the estimates that were provided to you when you were using the Keyword Planner Tool.
However, feel free to start somewhere small, say around $0.1.
Then, if your results are lackluster, slowly raise the figure upwards until you’re generating enough of a click-through rate and impressions.
The daily budget option will protect you from spending too much. So, even if you want to bid high, just to see what happens, there’s little risk of ‘breaking the bank.’
As you might’ve noticed, there is also a ‘Bid Strategy’ option. This will decide how AdWords will handle your bidding.
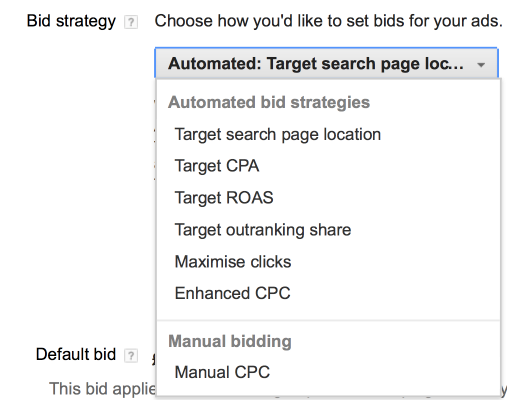
There are a lot of cool features here, but you’ll want to leave it as it is, for now (Maximize clicks), or else you may unwittingly sabotage your campaign.
What’s really exciting about Search Network Ads is that you can make use of ‘Ad extensions.’
I’ve highlighted some of the key ‘Extensions’ that you might want to pay attention to.
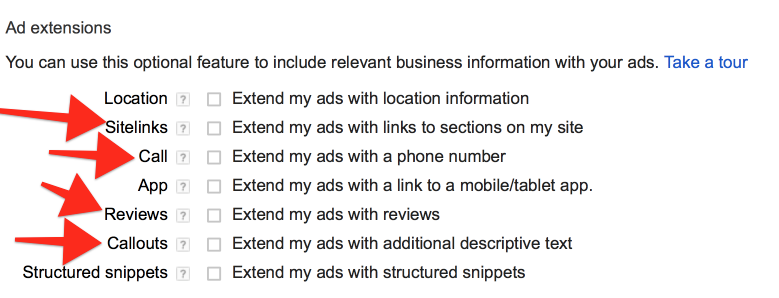
In particular, you might want to focus on ‘Callouts’ and ‘Sitelinks.’
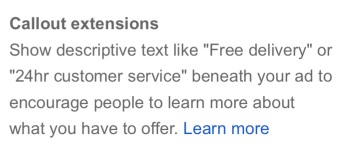
Here is a description from Google that explains how Callout extensions work.
Here is an example of an ad with Callout extensions.
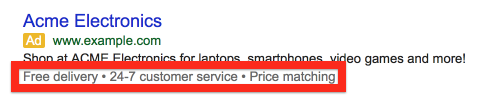
Callout extensions are beneficial, because you get to highlight aspects of your ecommerce business that will separate you from your competitors.
Though you could mention these aspects within your ‘ad copy,’ doing so would use up your word count, making it hard for you to mention other important features of your offer.
Below is an example of what an ad with ‘Sitelinks’ looks like.
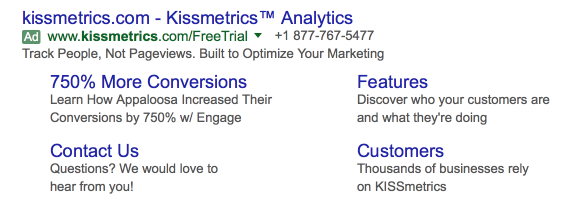
Sitelinks are important, because by using them, you can let people know that you have a lot to offer. By providing several links, you can show people that you’re a specialist and that you have a variety of options available. You can also highlight the benefits of your offering by linking to case study pages, too, This, can make your ad more appealing.
Keep in mind that even if you set up Ad Extensions, there is no guarantee that they will be displayed when your ad is triggered.
Google will decide whether or not it is worth displaying the Ad Extension.
Here’s an explanation, from Google, that explains how Ad Extensions are triggered.
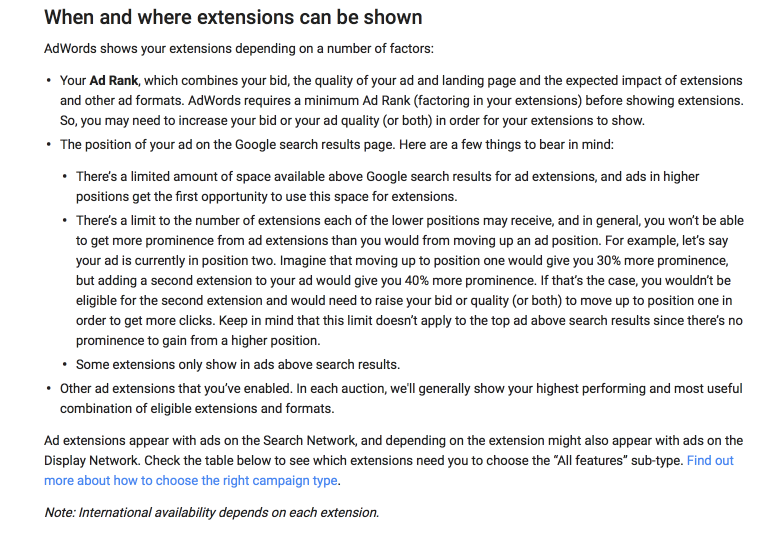
Needless to say, you should still go ahead and implement them.
Moving on, you then need to write the ad copy for your ads.
Writing ad copy is something that we could discuss for a long time. Thankfully I’ve covered the topic here and here.
In essence, when writing your ad copy, make sure that you focus on the benefits of your product.
Study what is working for other marketers and try to emulate their ads.
You then need to add the keywords for your campaign.
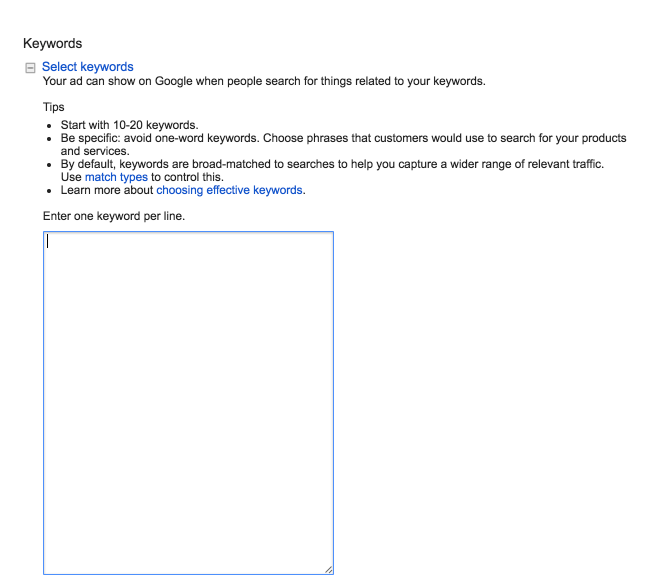
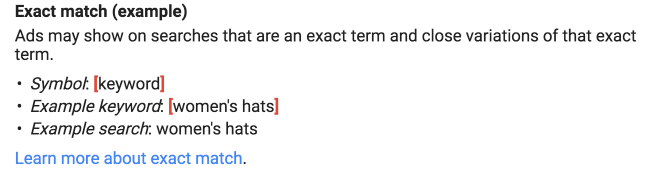
When you are adding the keywords, it’s a good idea to start with ‘Exact match keywords,’ first.
You can opt for exact match by placing your keywords in ‘straight brackets’
Once you’ve entered in your keywords, you then need to wait for AdWords to approve your ad. Shortly, it will start running.
Remarketing
Another AdWord tactic that you can use to generate ecommerce store sales is remarketing.
Remarketing allows you to ad rank and show them to people who’ve already visited your store.
If you want to run remarketing ads on the Google network, you’ll first need to install a ‘Remarketing tag’ on your site.
You can do that by clicking on ‘Shared library’ and selecting the ‘Audiences’ option.
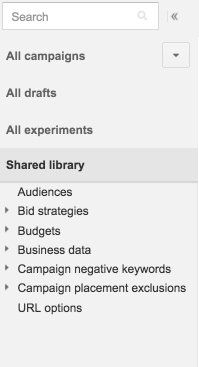
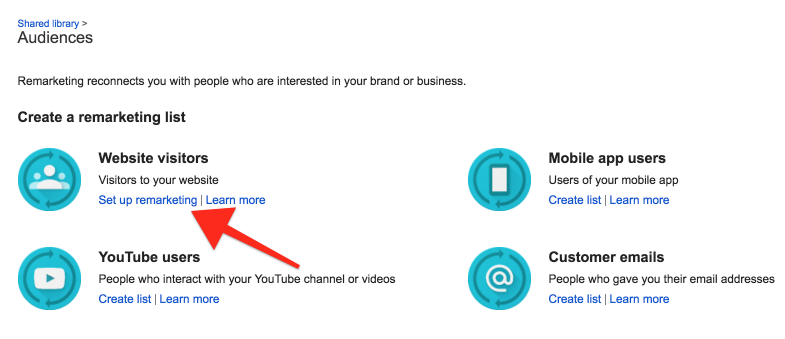
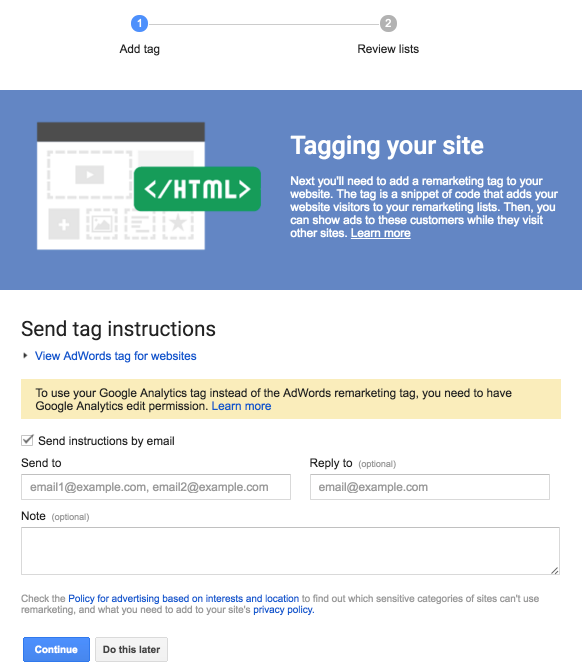
You are then shown a screen that let’s you know what your tag is and how it needs to be installed.
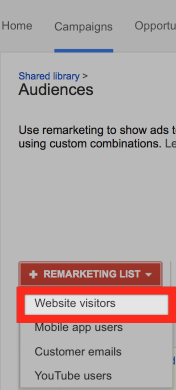
Once you’ve set up your remarketing tag, you can then create specific ‘Remarketing lists.’
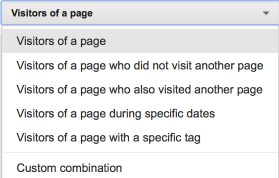
To create a Remarketing list, based on people who’ve visited your website, click on ‘+ Remarketing list’ and select ‘Website visitors.’
Bear in mind that you can’t run a website visitors remarketing campaign right away.
AdWords needs to gather data on the people who are visiting your site. This ensures that the you’ll have a pool of people to remarket to, when your ads are ready to run.
It is up to you what traits this ‘pool of people’ will have. Therefore, you need to decide the parameters which will signify whether or not someone will join a specific remarketing list.
Let’s imagine that I want to remarket to people who’ve visited my pet store and have taken a look at ‘beginner fish tanks.’
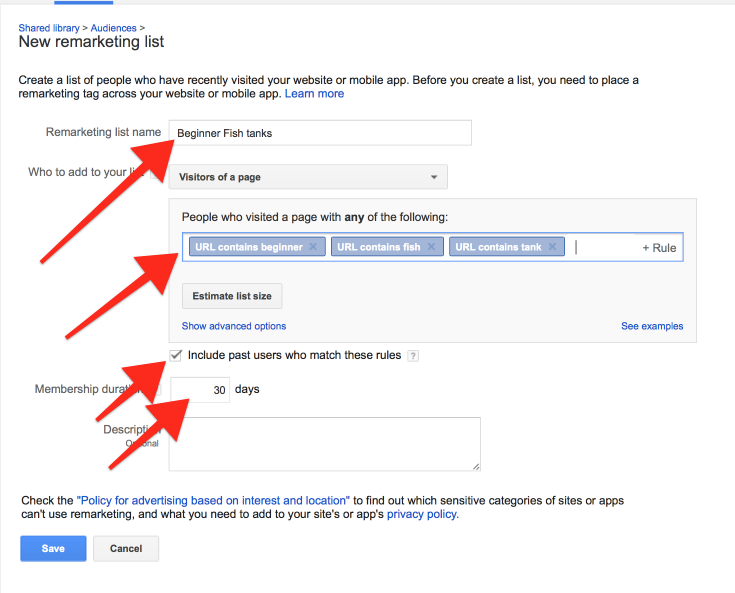
What I need to do is select the right URL (people who visit this URL will be remarketed to) and tell Google ‘Who to add’ to the list.
Note: After you’ve used AdWords for a while and you have a lot of experience with remarketing, you can use some of the more advanced options –
If you’re new to remarketing, it’s a good idea to just remarket to people based on a web page that they have visited.
It is important that you are clear about your goals here.
Otherwise, you won’t be able to get the full benefits from a remarketing campaign.
Now, let’s quickly take a look at how you can set up a remarketing ad.
Note: What we’re going to cover also applies to Display Network ads, another valuable form of advertising.
Go to the AdWords Campaigns section and select ‘+ Campaign.’
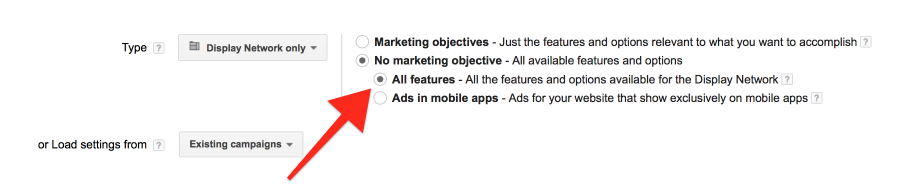
Then, select the ‘Display Network only’ option.
Make sure that you select ‘All features.’
You then need to enter some basic targeting and bidding information.
You’ll then decide the targeting for your Display ad.
If you want to reach people on your Remarketing list, click on ‘Interests & remarketing’ and then pick ‘Remarketing lists’ from the drop-down menu.
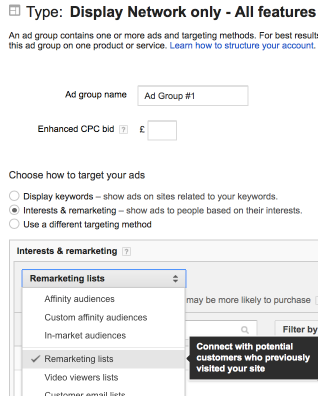
Upon doing so, you can select the Remarketing list you created earlier.
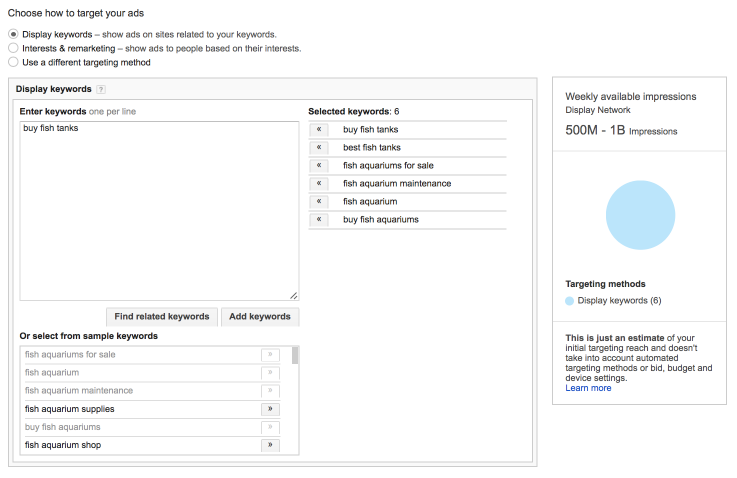
If you don’t want to create a Remarketing Display ad and you just want to create a normal Display ad, you can still set up the targeting for your ads here.
You can target Display ads based on certain keywords, meaning that your Display ads will appear on sites that contain these keywords.
You can do that by selecting the ‘Display keywords’ option.
Or, you can choose to show your ads on specific websites.
You can do that by selecting ‘Use a different targeting method,’ and choosing ‘Placements.’
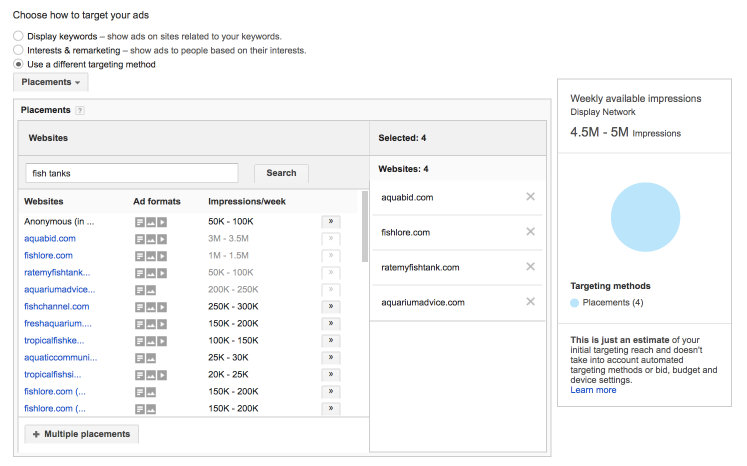
This will allow for you to display ads on sites where you know your target market is spending their time.
When you’re done setting this up, you then need to create the actual ad.
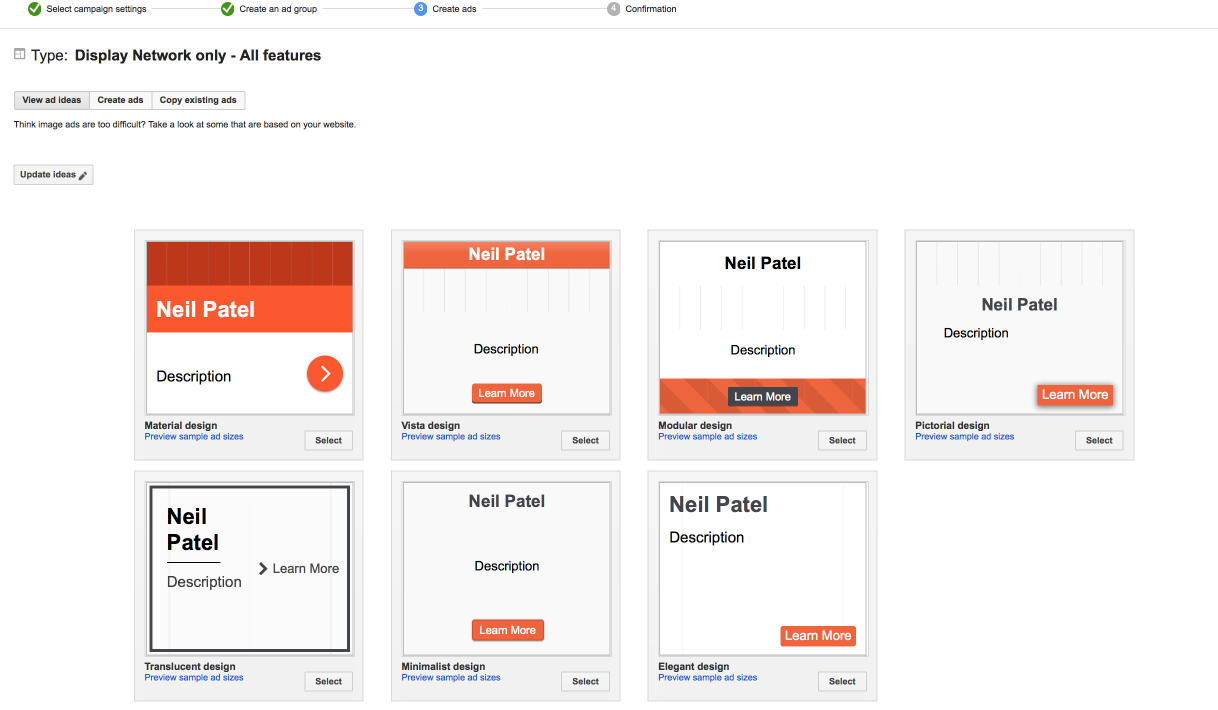
The easiest way to do this is by letting AdWords create the ad for you.
You can do that by clicking on ‘View ad ideas’ and then entering your URL.
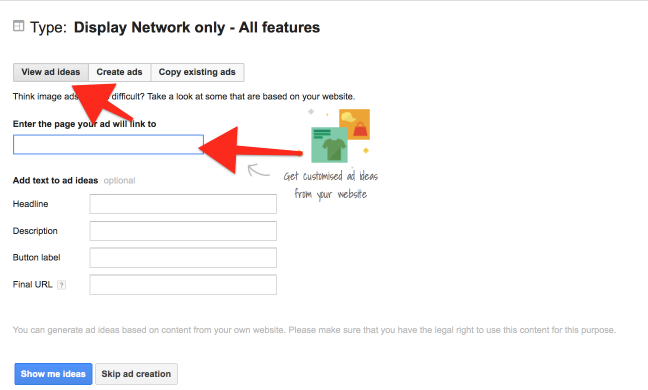
Then, all you have to do is select a format that you like and make some edits to the copy and design, so that it matches your needs.
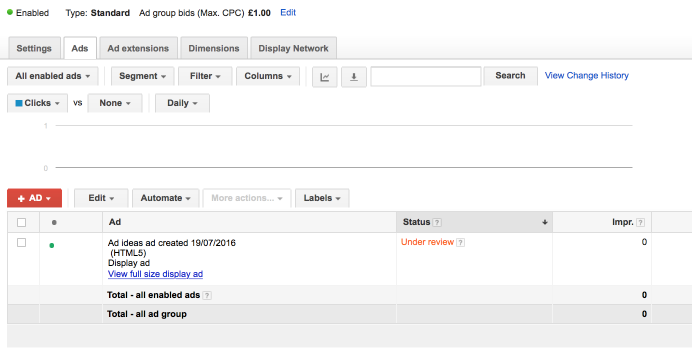
Once you’re done creating your ads, wait for AdWords to approve them.
Conclusion
AdWords is powerful, once you know how to use it.
In this post, we’ve explored how you can use the platform to generate sales for your ecommerce store.
You might feel a little bit overwhelmed at the moment, so take a breath and then give this post another read.
Pick one option and then go deep with it.
Once you find some success, consider moving onto another option that we’ve covered in this post.
If you do this consistently, there’s a good chance that you’ll be an AdWords pro (with a successful ecommerce store to boot) in no time!
Do you have any AdWords tips that you can share, for those who are running ecommerce stores? Please share below!
Comments (19)