You’ve definitely watched a live sporting event or an awards show, but have you watched a live broadcast on a social network or via the web?
If you haven’t, you’re missing out.
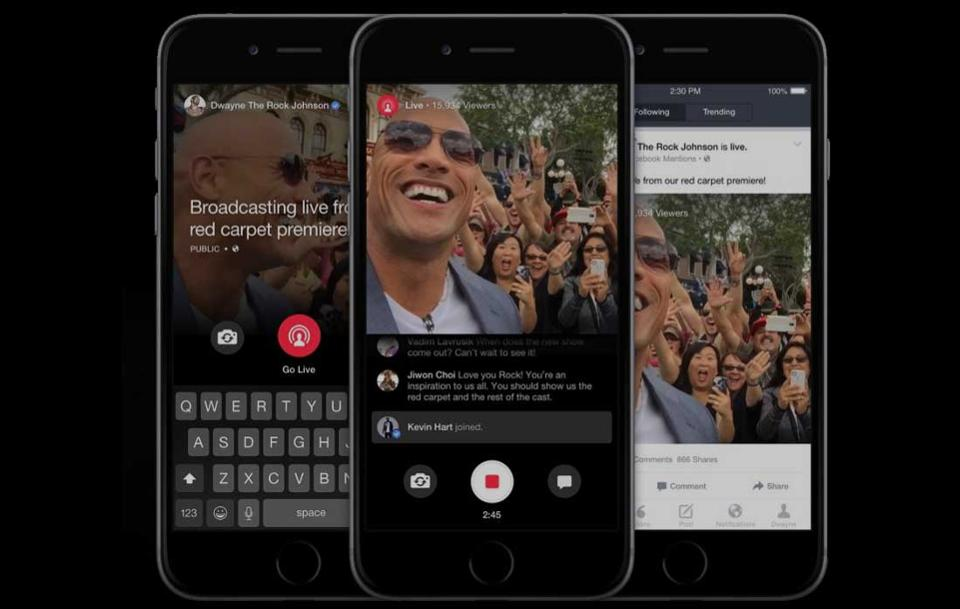
Live video has been growing over the last few years thanks to a rollout of live broadcasting features on the major social networks.
It’s easy to see why. Live video provides an even more instant and intimate portal into the lives of our friends and the people we follow.
But it’s not just individual people. Brands and companies are also using live video to bring their customers closer into their worlds.
You no longer need to have complicated video systems and powerful broadcasting tools to connect with people in real time.
All you need is a phone, a good data connection (preferably on Wi-Fi), and something interesting to say or do.
Live video isn’t only about gaining subscriptions on YouTube or likes on Facebook.
Live video can also be a serious traffic driver to your website.
The rise of YouTube Live
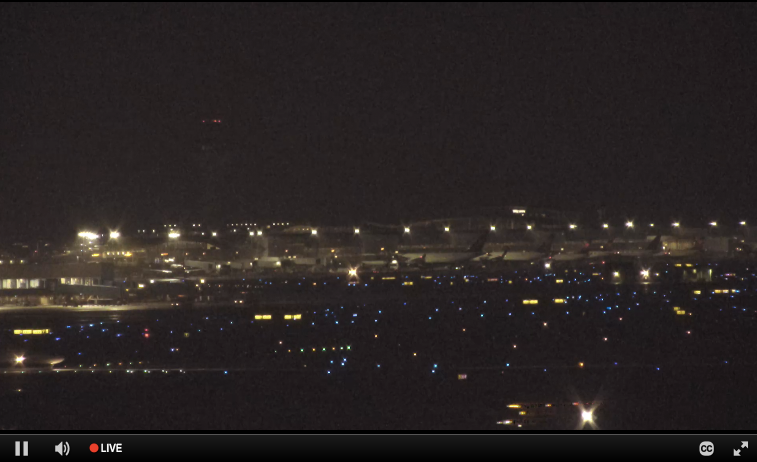
Live video has always sort of existed on the Internet. You could watch live webcam streams since the early days.
Those videos were often grainy views of interesting places like a national monument or a view of an airport for checking the weather.
Many factors came together to improve the ability to work with live video on the Internet.
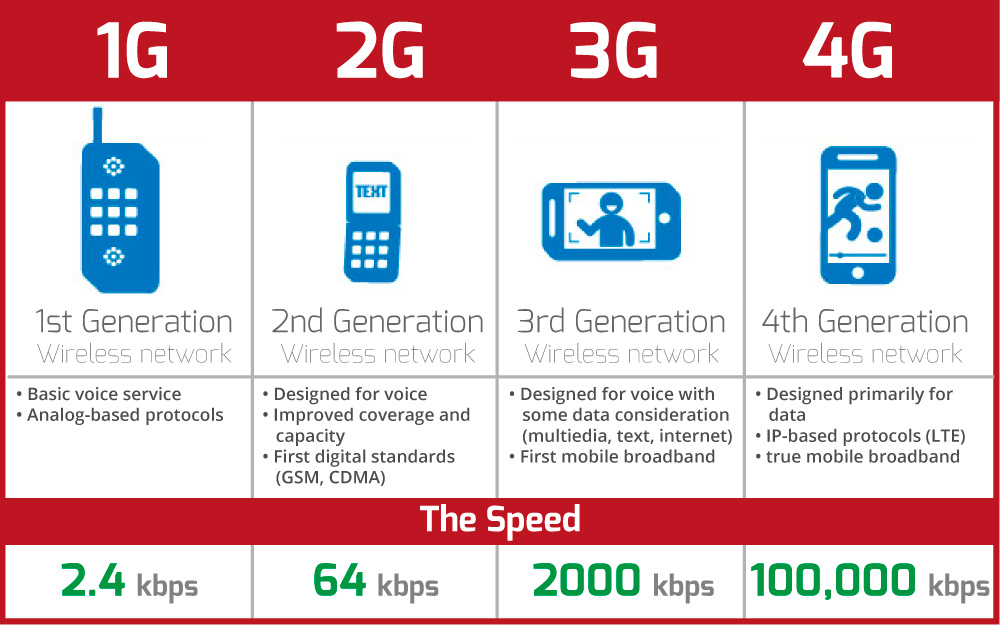
First, connections got better with the advent of 3G and 4G. Before, it was impossible to have a strong enough connection when you were out and about to be able to stream a live video in real time.
It was difficult enough to watch an HD video from YouTube.
Now with 4G LTE connections, you can stream up to 50 megabytes per second.
The jump in mobile download speeds is beyond exponential.
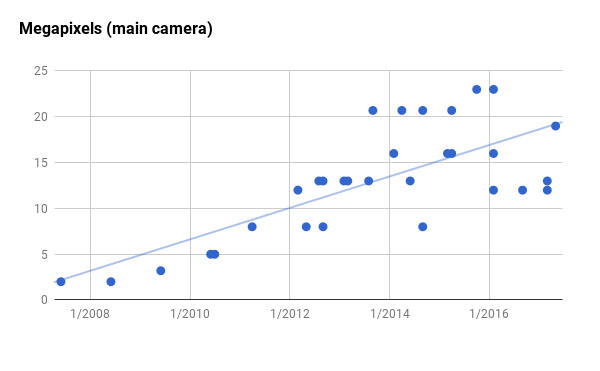
Second, the cameras in the phones in our pockets and purses got much better, enabling video recording and then video in HD.
If you wanted to make a quality broadcast or video before, you had to have expensive camera gear that was not connected to the Internet.
Some phones today even offer video recording in 4K.
Third, platforms came out which were focused on delivering live video to people who follow you.
In 2015, there were Meerkat and Periscope, two apps that let you start broadcasting what you were doing live from your phone in the click of a button.
You could share those streams to Twitter and Facebook to drive people to watch it. Twitter, which is always focused on what’s happening right now, loved the idea so much that it bought Periscope to add the live streaming feature directly to its platform.
It wasn’t long before Facebook and Instagram also launched live streaming functionalities to their respective platforms.
And then, of course, there’s YouTube.
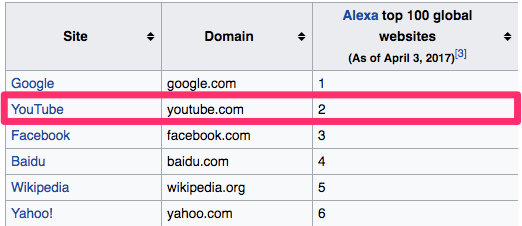
YouTube is the second-most-used website in the world, and their statistics of usage are off the charts.
- YouTube counts over 1 billion users
- It has nearly 5 billion unique visits per day
- And over 1 billion views on mobile per day
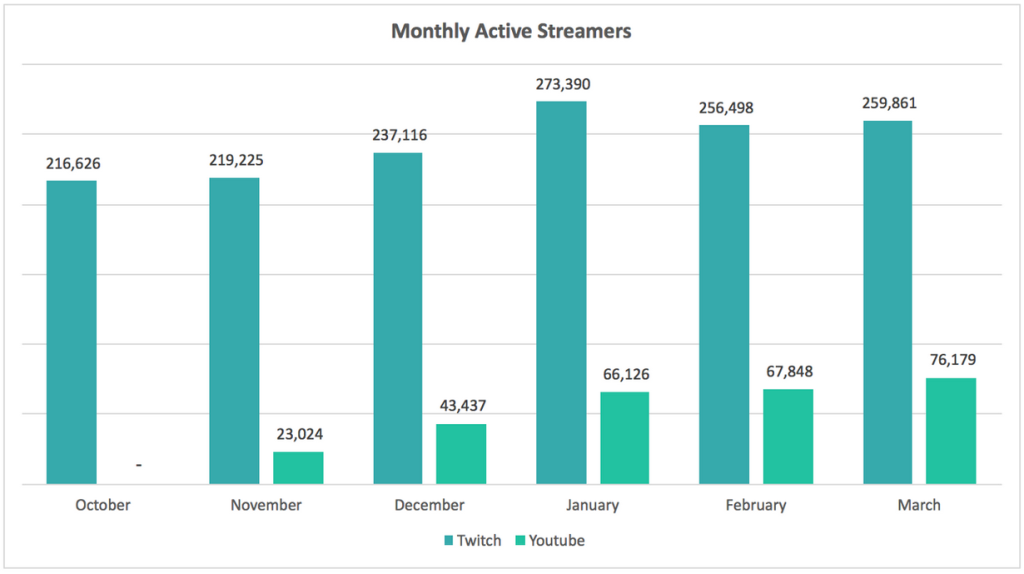
It makes sense that YouTube would transition to enabling live video, which it has done with great success, topping 75,000 monthly active live streamers as of March 2017.
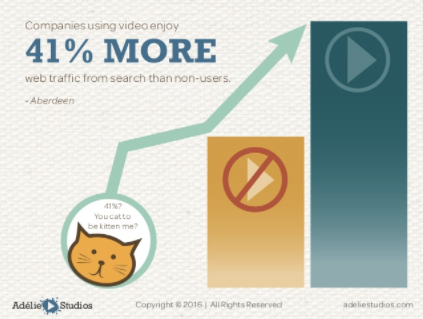
A strong content marketing strategy should include a video component. The popularity of video on the web today is impossible to ignore.
About 55 percent of Internet users watch video every single day.
Videos are a key component for showing up in Google search results.
But YouTube is the second largest search engine in the world all by itself.
You simply cannot afford to miss out on your part of that. You have to treat YouTube as its own search engine, and optimize your videos to show up at the top of YouTube search results.
So in addition to make videos and creating your YouTube channel, YouTube Live is a great way to augment your video strategy and capitalize on a rising trend.
How do you do that?
I’ll show you.
How to Use YouTube Live
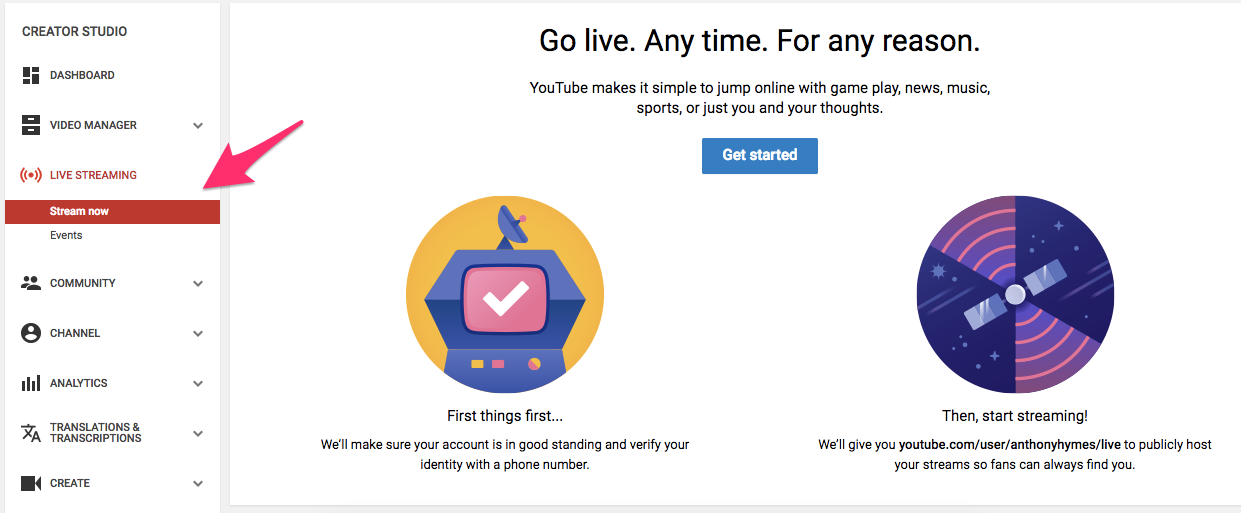
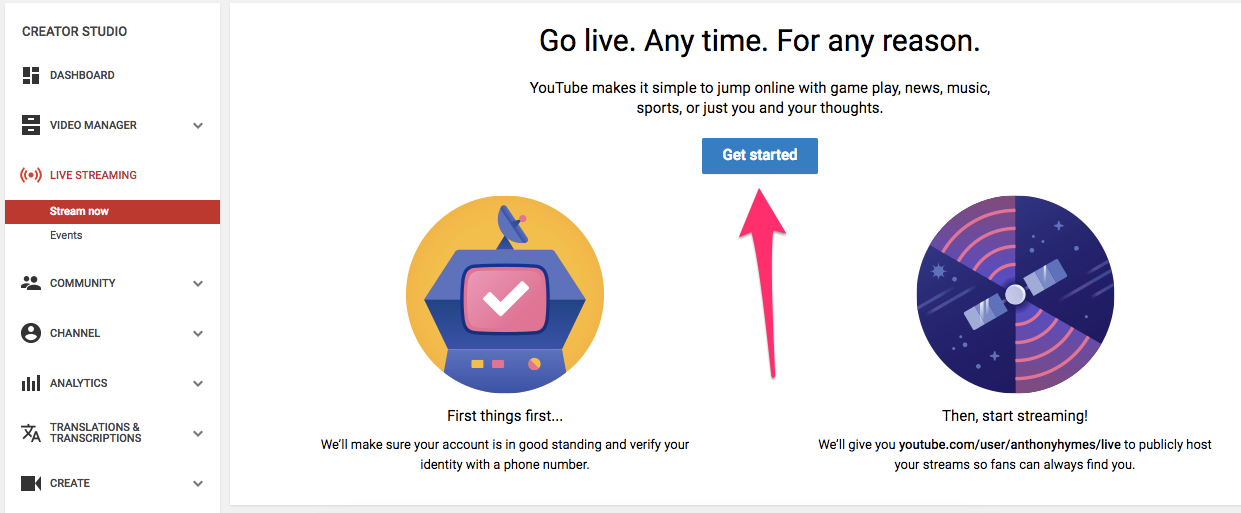
Go into your YouTube account’s Creator Studio and click on the menu option “Live Streaming.”
If you’re not sure where to find that, just Google “YouTube Live” and click on the link.
You will see this view.
Live video is a very powerful tool. YouTube doesn’t want a bunch of fake accounts out there or people broadcasting all kinds of illegal things (like rebroadcasting Game of Thrones, for example).
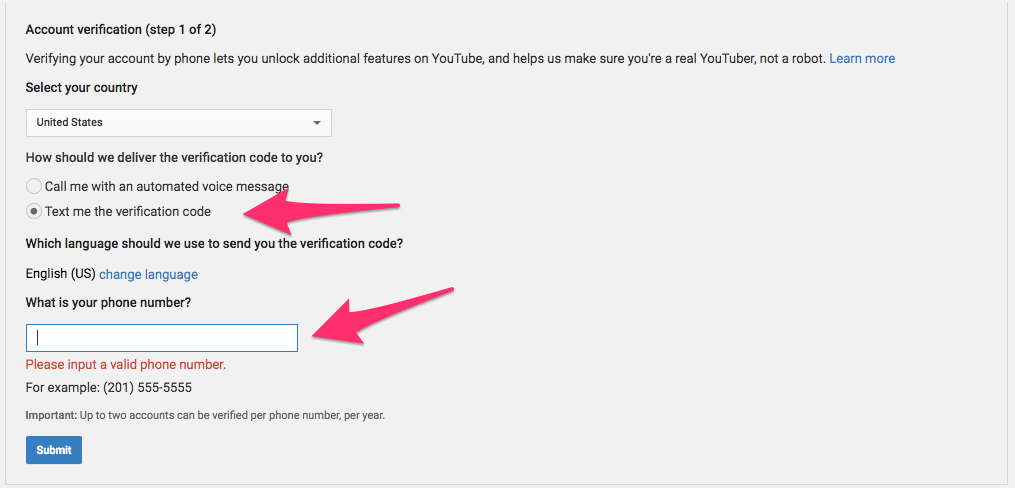
So they will ask to verify your account with a phone number before you can start streaming.
Click on the blue “Get started” button.
You need to select your country and how you would like to receive your verification code. You can select to have them call you with an automated message or send you a text with the code.
Then put in your phone number.
Enter the code when you receive it. Once you do, you will see the confirmation screen.
Click “Continue” to get started.
There are two main ways to stream YouTube Live, from your desktop computer via a camera setup (i.e. your webcam), or from your mobile device.
Let’s start with the desktop setup first.
YouTube Live streaming from desktop
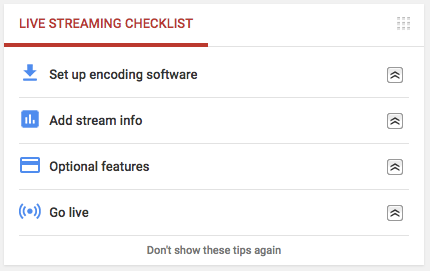
The first thing to see is the little tips menu on the right. Live streaming — although much easier today than ever before — is still a bit technical.
YouTube will help you understand the steps you need to go through to be able to do it.
The “set up encoding software” part is the most difficult to do.
You need to find encoding software, download it, and link it to your server’s URL to be able to stream live from your desktop.
If it sounds really difficult, don’t worry.
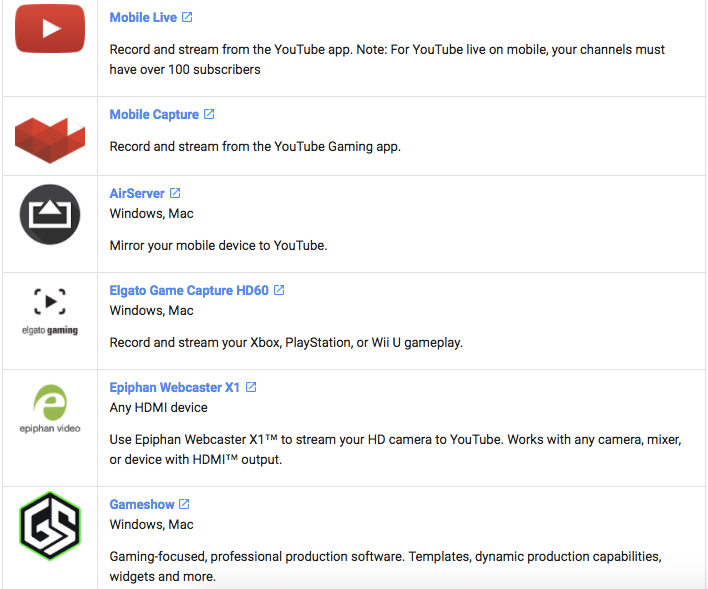
Google provides a list of verified encoders here.
And the list goes on.
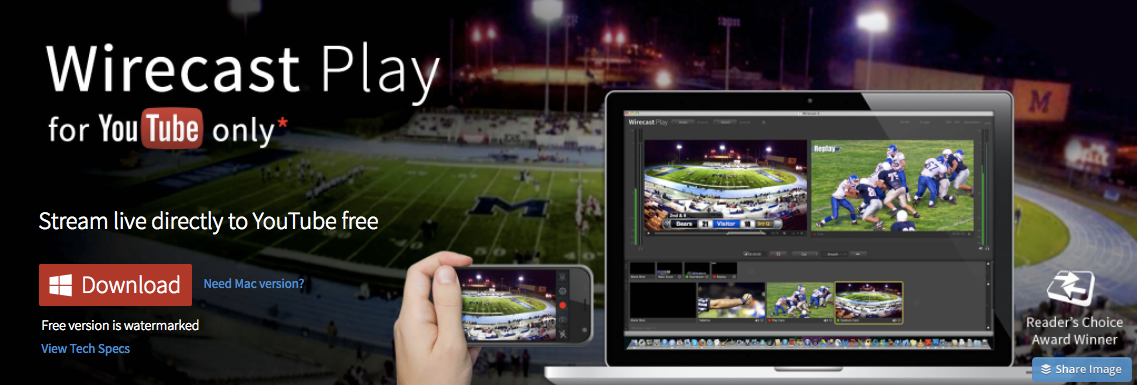
For desktop, I’m going to use Wirecast Play because it has a free version.
I’d like to point out that the free version of Wirecast Play does have a watermark on the video screen. If you want that removed, you need to pay about $10.
To download Wirecast Play, you have to add your information and select whether you want the Mac or Windows version.
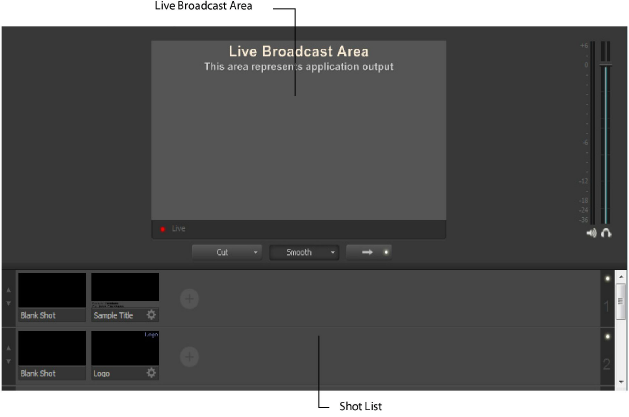
Then, install the software. Wirecast Play is actually fairly robust in terms of managing content for your live stream.
The interface is broken into two halves. The top part is what people who are watching will be seeing. The bottom part is your look at the available streams to choose from as well as the layers you can add on top of your video, like your logo.
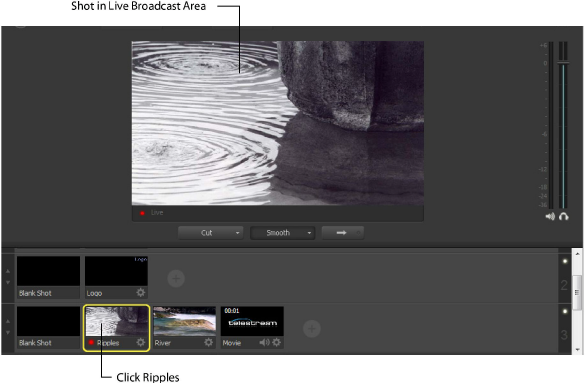
When you have multiple live streams to choose from, it looks like this:
When you open a project, you will see your webcam come up as one of the options to stream on the bottom.
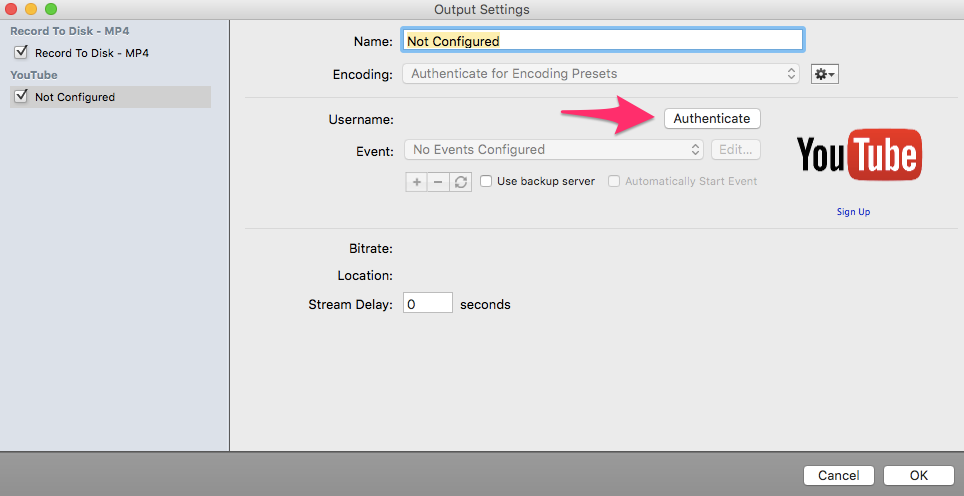
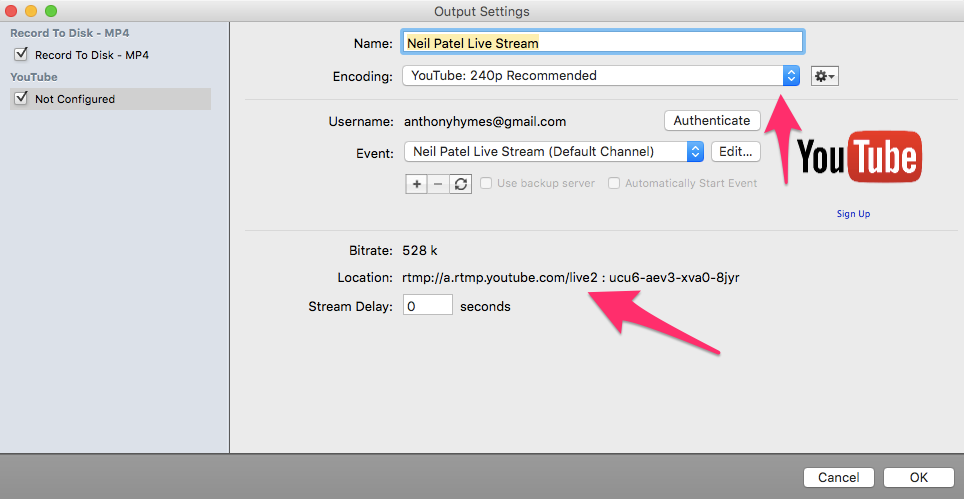
To connect Wirecast Play to YouTube, click on “Output” from the top menu. Then, click on “Output Settings.”
You will need to authenticate your YouTube account. As soon as you do, your live settings will automatically be filled in.
The encoding settings are important. It’s basically the resolution (or the quality) of the video you’re going to be broadcasting. Depending on the materials you’re using, you can select a higher or lower resolution.
Wirecast Play has three categories for each level of resolution: recommended, minimum, and maximum. Each setting changes the latency.
The latency is the time it takes for a frame to get from the camera to the viewer. When you are watching a live event, you want the shortest latency possible.
But when the latency is low, you risk having a choppy video experience for people who have slower connections.
The best thing to do is to use the recommended setting.
Once your encoding software is set up, go back to YouTube.
It’s time to fill out the information for your live stream.
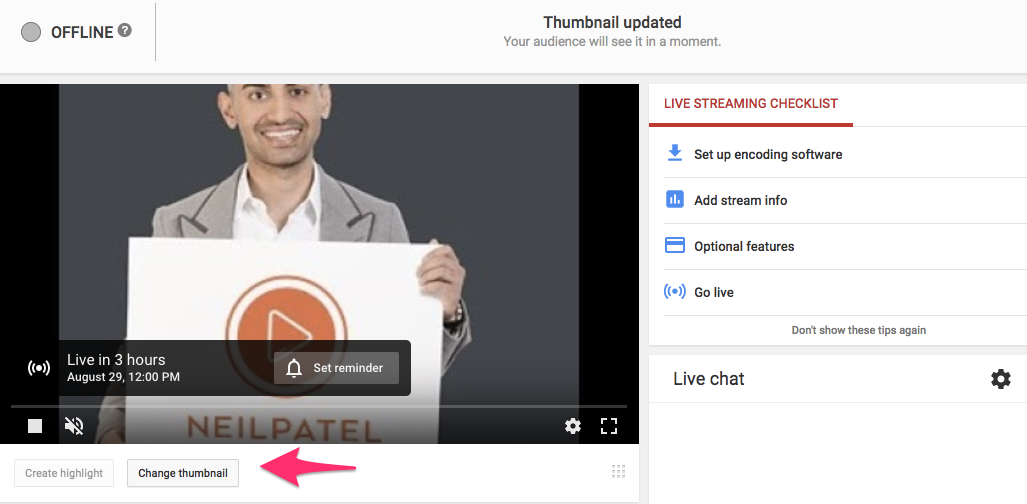
First, add a thumbnail for your event. This is the static image that people will see when they come to your live stream page before and after the live stream.
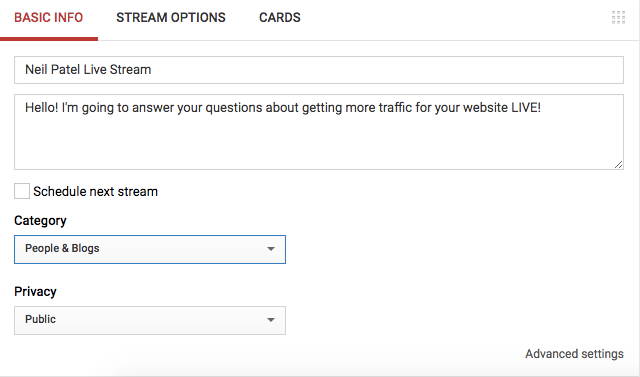
Then, fill in the basic information.
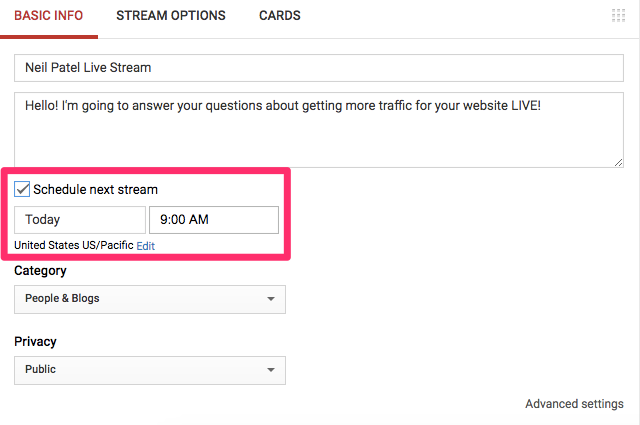
This is where you tell people what your stream is about. If you click on the “Schedule next stream” option, you can set the time so people know when it’s going to start.
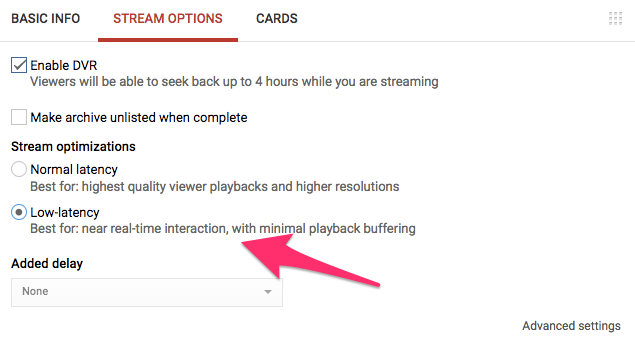
Then you can modify your stream options. This is where you can decide whether you want people to be able to DVR your live stream and the latency for the different type of broadcast.
If you’re creating a high-quality broadcast of an event where the interaction between the viewers and your content is minimal, you can opt for the “Normal latency.”
When you do this, you can create an added delay of either 30 or 60 seconds so people see what’s happening just a little bit after it happens.
This is what most major broadcasts do on TV to make sure things go smoothly. If there’s a need to cut anything out (like profanity or a bad surprise), they can do that without interrupting the live experience.
If you’re just doing a Q&A or giving a talk about one of your areas of expertise, you will want to do low-latency so you can answer the questions that people ask you via the chat in real time.
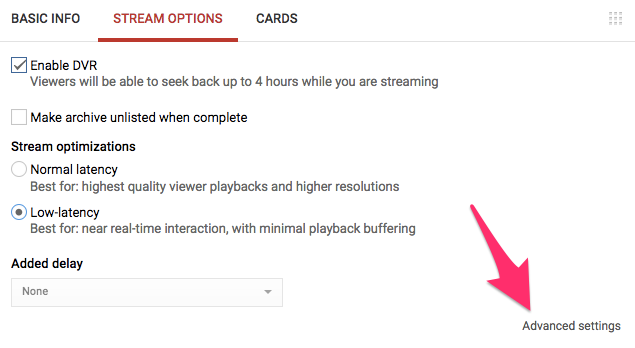
Then, you should go into your “Advanced Settings” to make sure that everything is set up properly.
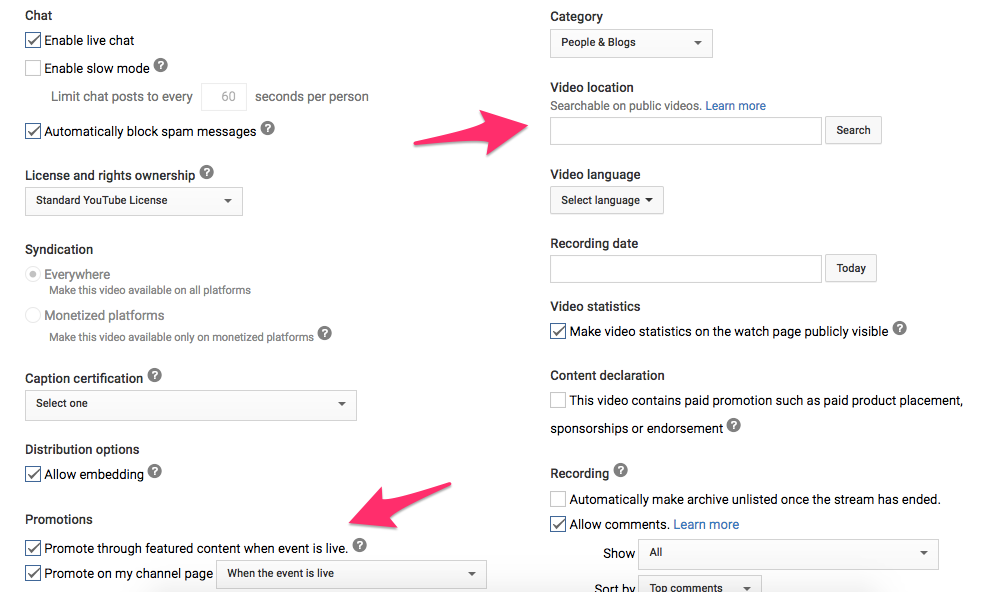
There are all kinds of settings you can adjust. Since the focus of this article is to drive traffic via YouTube Live, I want to direct your attention to two different options: “Video location” and “Promotions.”
First, for the “Video location,” it helps to add where you are so people looking for things in that area have a chance of stumbling upon your video.
If you’re an international brand, you could leave this blank. But if you’re streaming an event in the Hamptons or a fashion show in Paris, you should fill this out so people searching for those things can find you.
The Promotions settings are even more important, since this is how people will know when to tune in.
You can set it to promote your event either a few hours or even a few days before you go live.
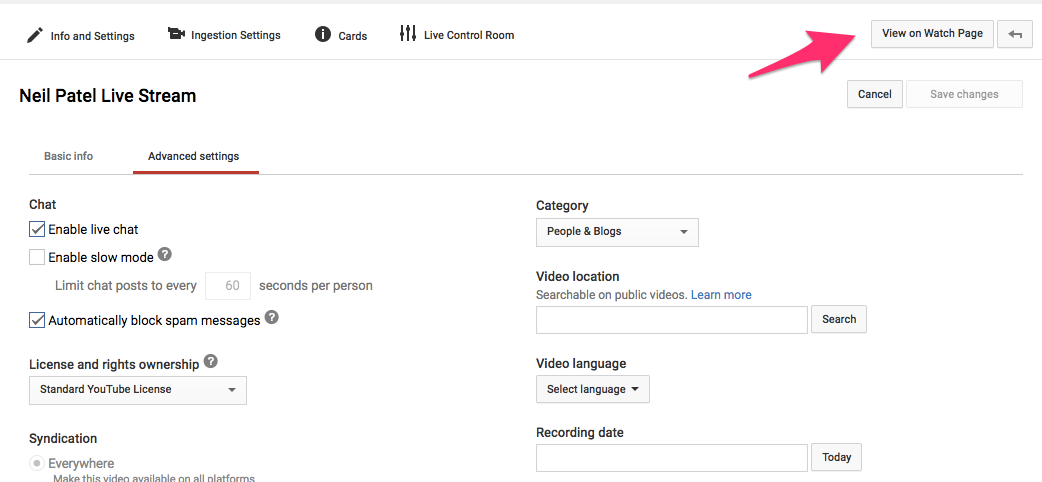
Make sure you save your changes. Then, before you start to stream, click on the “View on Watch Page” option to see how everything lays out.
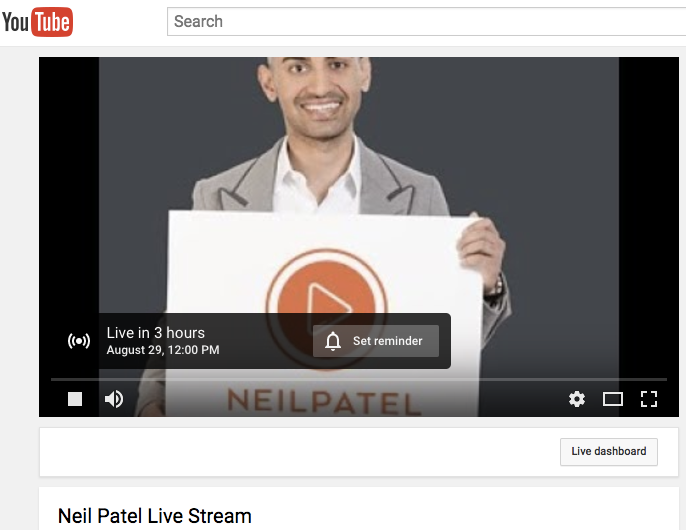
This is how people who will view your content will see it.
Alright, now you’re ready to stream.
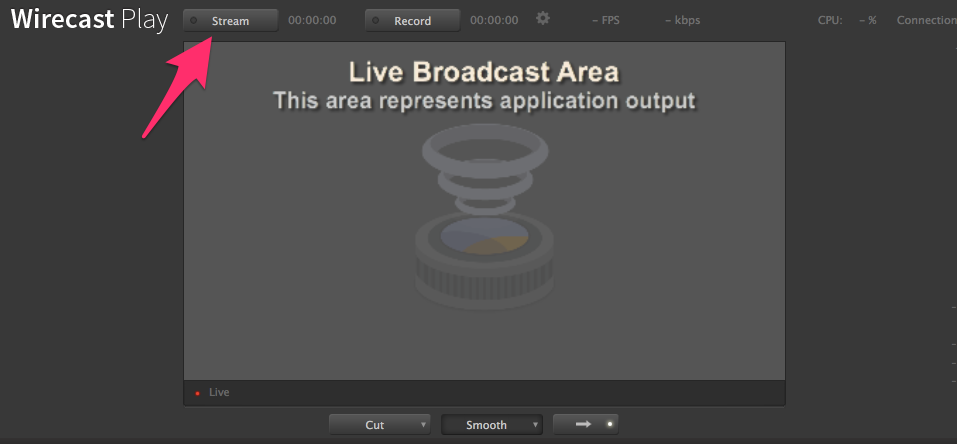
To start your live stream, go back to the encoding program. In Wirecast Play, click on the “Stream” button at the top.
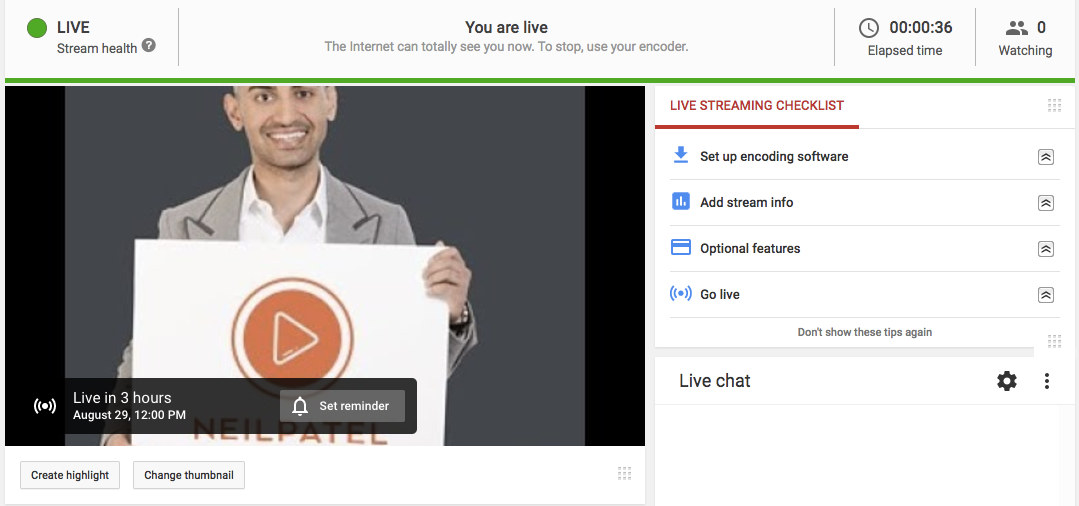
The stream will automatically start on YouTube.
Your YouTube Live link is an extension of your YouTube account. The format of the link is:
https://www.youtube.com/user/YourUserName/live
You can also scroll down your dashboard page to the Share box to share the link directly to your social networks.
YouTube Live streaming from mobile
Streaming live video from mobile is much easier than desktop. But it’s also much more limited in terms of functionality. You won’t have the option of adding multiple inputs and professional equipment.
But it can be a very intimate experience that can connect you directly to people who follow you.
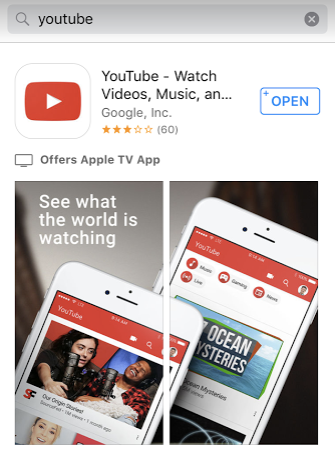
To stream YouTube Live from mobile, download the latest version of the YouTube app.
Connect your YouTube account.
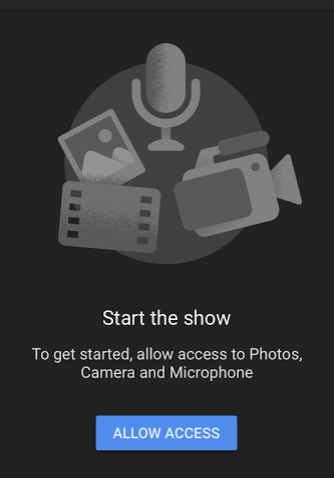
Then grant access to your camera, photos, and microphone.
It’s as simple as that. When you click on the camera button at the top of your interface, you will have the option to Go Live.
There is a catch though.
While you can stream live video from desktop encoding programs with any number of subscribers, YouTube only allows you to stream live from mobile if you have more than 100 subscribers on your channel.
If you don’t have at least 100 subscribers, you will not see the Go Live option in your mobile app. You can still create videos and post them to YouTube, just not with live.
So now that you know how to go live on YouTube, how can you use this powerful new communications channel to drive traffic to your website? Let’s take a look.
How to drive traffic with YouTube Live
YouTube is already a great way to gain attention. The best part, however, is when you can close the loop and turn those viewers into visitors.
You can add a link to your website in the caption of a description. That link will be clickable when people visit your live page.
Having a link in the caption is a must-have addition.
But the caption is not the most effective place to get people to click. It’s often hidden underneath the text, so people need to see “show more” before they find the link.
That’s adding extra steps between them and your site.
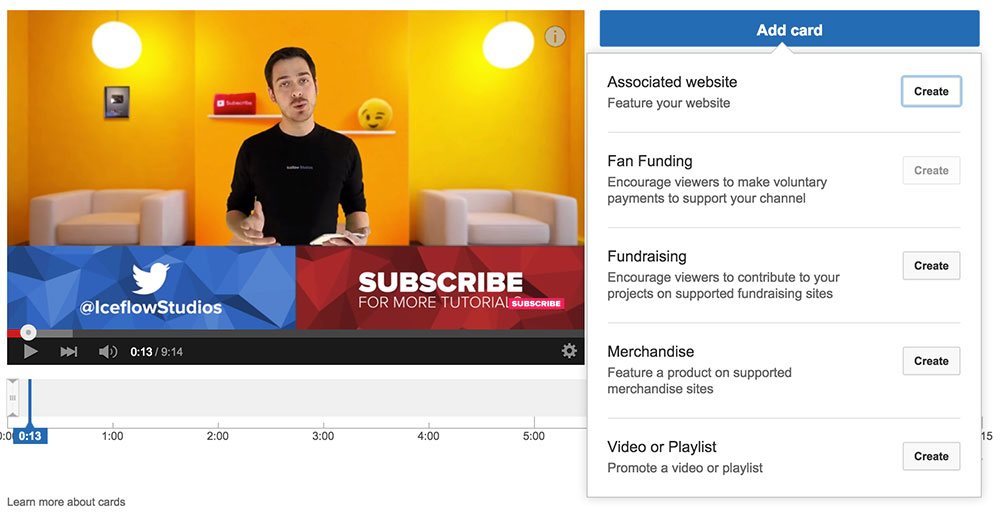
The best way to engage viewers is directly in the video box. You’ve probably seen the overlay content encouraging people to take different actions while they watch a video on YouTube.
Here’s an example:
They’re nearly impossible to ignore because they come up over top of the video.
The best part?
You can make them clickable so people can go directly to your site.
Here’s how you add a card to your YouTube Live broadcast.
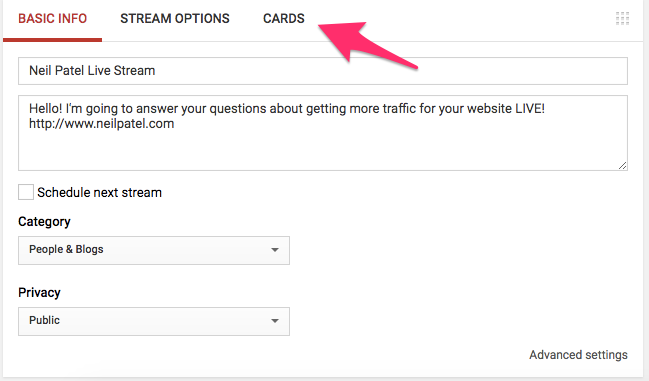
First, click on the “Cards” tab in the menu below the video player in your dashboard.
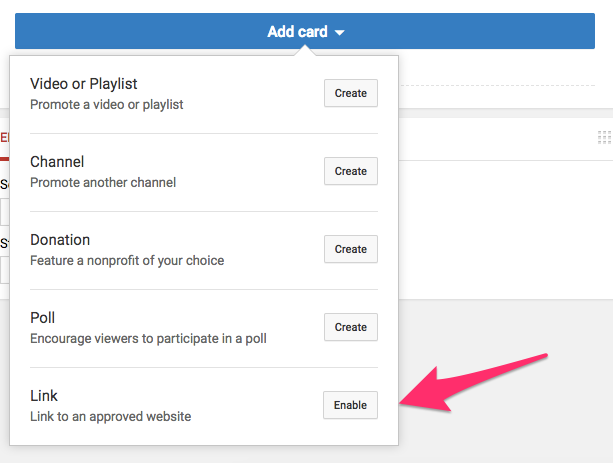
Then click the blue “Add card” button. You can’t miss it.
There are five different types of cards you can add depending on what you want to do. A popular option is to have a card pop up to drive people towards another one of your videos or your channel in general.
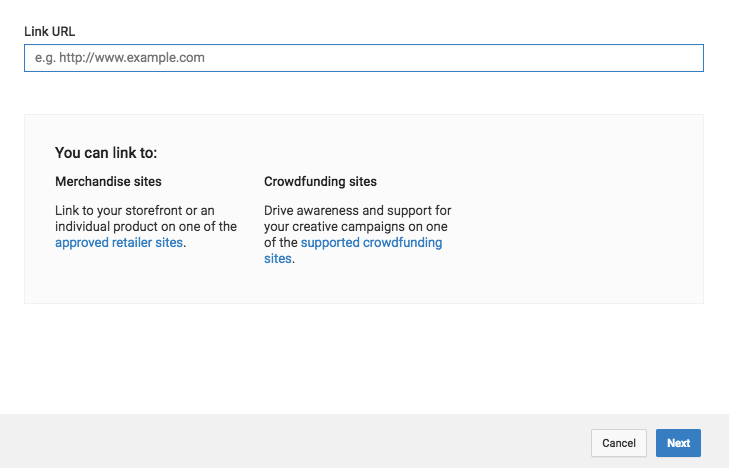
We’re concerned with driving traffic, so you need to select the bottom option, which is “Link.”
You have to enable this option since YouTube doesn’t want people posting tons of links to link farms or blacklisted sites.
Once it’s enabled, you can click “Create.”
If you haven’t already added and verified your website with your Google and YouTube account, you won’t be able to add the link here. The only links you can add like this are to approved merchandise or crowdfunding sites.
If you haven’t added your website to your Google account, don’t despair.
Here’s how you do that.
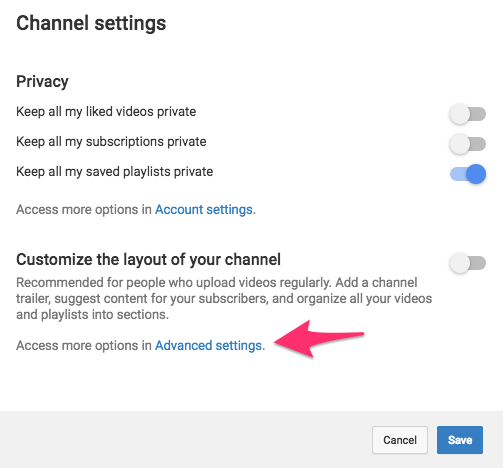
Go to your channel. You will see the settings icon next to the “Subscribe” button on the right, below your header image.
Here is what the settings popup looks like.
You’re going to need to go to your Advanced settings.
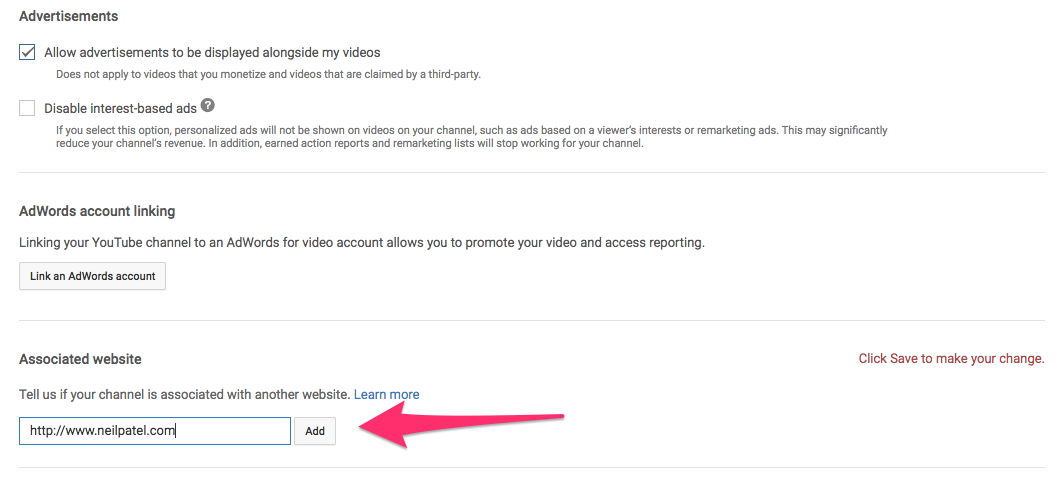
Scroll down a little bit until you see the associated website.
Type in your URL and click “Add.”
You’ll get a pending icon.
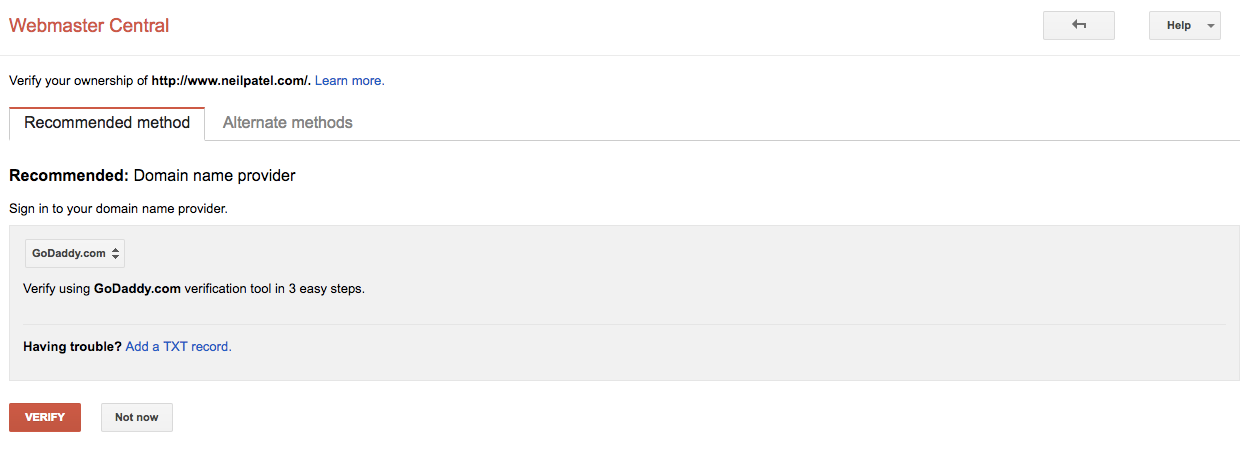
To add your website, you’ll need to verify it.
There are a couple different ways to verify your website. You can either do it through your domain name provider (like GoDaddy) or by adding a bit of HTML to your website that Google can go check to make sure it’s really you.
What you do here depends on how technical you are. If you’re running a WordPress site and don’t have access to your code, you’ll need to go through the domain name provider steps.
If you’re a programmer or at least comfortable adjusting a bit of code, you can add some to your HTML.
I you have a Google Analytics or Google Tag Manager account, you can use those directly.
If you’re not the owner of your website, you can click the Request Approval option and YouTube will send a request automatically to the webmaster.
If you’re managing video marketing for a major company, you will probably have to take this route since they won’t let you tinker with their site.
Once your request is approved, you’ll be able to see your website in the dropdown menu in the “Create a card” page.
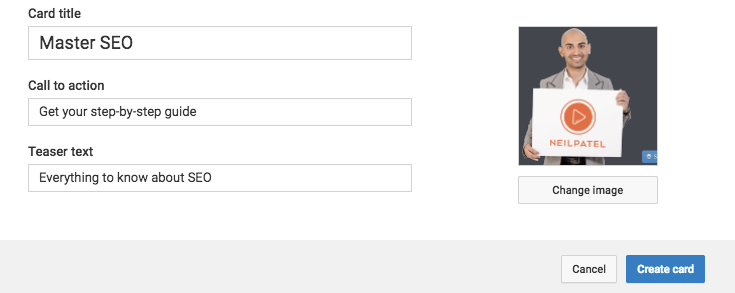
From there, you add your call to action, teaser text, and you can upload an image.
Great calls to action are ones that are short, concise, and powerful. Examples are things like:
- Click here to learn more
- Get your step-by-step guide
YouTube limits the call to action and the teaser text to 30 characters each. So you have no choice but to be precise.
Then click “Create card” when you’re ready.
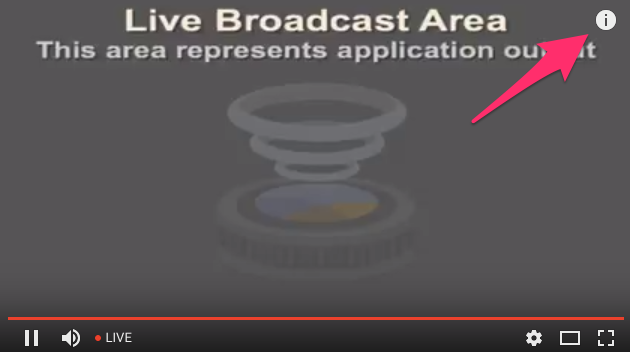
When you’re live, your viewers will see a little “i” icon in the top right corner.
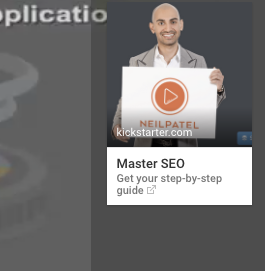
Periodically, as people watch your live page, that will expand. Viewers can also click to see your card.
Clicking that will open up a new tab or window to your site.
Now that you know how to get your link into YouTube, how can you draw people to your YouTube Live stream to begin with?
Best practices for promoting your YouTube Live broadcasts
It would be great if traffic automatically flowed to your YouTube Live broadcast.
But you know that’s not the case.
Roughly 300 hours of video are uploaded to YouTube every minute.
With so much content going up all the time, attention is at a premium.
You’re going to have to use your current audience as a springboard to attracting new people who don’t know about you yet.
Fortunately, the Live format creates an urgency for people to share immediately so their friends and contacts can benefit from seeing the broadcast.
Follow these three best practices and you’ll be able to drive a substantial amount of people to your YouTube Live broadcasts.
Promote beforehand
This one might seem obvious. People need to know not only what is coming, but when it’s going to be Live. It’s rare for someone to drop everything to tune into a Live broadcast the moment it starts.
That’s unreasonable. We’re all living our lives.
Communicating the start time and the duration are equally important to attracting people. When someone knows how long it’s going to take, they can set aside the time to watch.
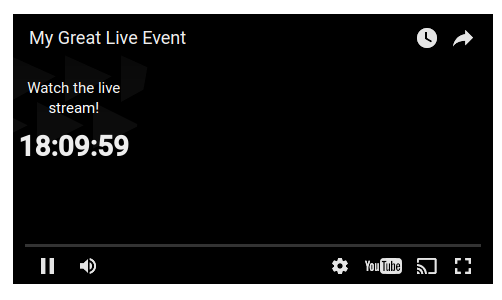
You can even enable a countdown to add to the promotion period.
You need to make sure the timing of your YouTube Live broadcast corresponds to a time and time zone when your audience can tune in.
Not many people will wake up at 3 a.m. to watch your YouTube Live broadcast.
Give people at least a week’s notice before the broadcast and follow up every few days with reminders.
Tease
When you’re telling people when the broadcast is going to happen, you also need to pique their interest.
A great way to do that is by creating snippets of content, maybe a short video or a blog post, outlining the questions that your broadcast is going to be addressing.
You don’t need to go over the top with sensational content like a lot of the top YouTube stars. After all, you’re probably pursuing a YouTube Live strategy to complement your content marketing and to create success for your business.
Just give people reasons to tune in like some people do with webinars.
People who have asked themselves the same questions will be much more likely to tune in. The fact that it’s in question format also makes it more conversational, which is more natural and easier to pull off than trying to deliver a “10 tips for X list” in live video format.
Offer something of value
Those questions I was just talking about? Make sure the answers you are giving provide actionable insights that people can use to succeed or make their lives better.
Don’t just talk to talk.
Provide people with something concrete. When you do, that’s when the magic happens, because that’s when people share your live broadcast.
You can add this to the other hacks I’ve suggested for increasing social sharing.
Like I said before, the YouTube Live format creates urgency because it’s happening right now.
When people receive information of value, they will share it. Instead of bookmarking it to check out later, people who see that shared content will watch it right now, or else they might miss out on that valuable knowledge.
Once those new viewers come on board, you can wow them with your great content. Then, they will naturally click through to your website.
You will have just generated a bunch of new traffic with YouTube Live.
Conclusion
Live video today is only the tip of the iceberg.
The conditions I talked about at the beginning, from better connections to better cameras, will continue to improve people’s habits and expectations of seeing things live.
Brands, leaders, and companies that don’t leverage live broadcasting capabilities will be seen as colder and more distant.
While those who are pushing hard with live video will automatically be closer to their customers and communities.
YouTube Live on desktop takes longer to set up than on mobile. If you’re going for the quick live broadcast — say from an event — you can choose the mobile option.
I only discussed the setup of YouTube Live from desktop. Programs like Wisecast let you build-in all kinds of content so you can combine previously shot content with live video while narrating over everything and putting your logo in the corner.
It might not look like the CBS Evening News at first, but with practice and persistence, you can reach out to audiences in ways that were never possible before.
What are your experiences with live streaming?






Comments (15)