If you’re looking for a quick way to generate online sales, Pinterest is an effective place to sell your products.
On average, Pinterest users spend more money per order than users on any other social media platform. Their average order is $50.
Two million people pin product pins each day, which is 20 times more than the number of daily shoppers at the Mall of America.
That means you can’t afford not to be selling your products on Pinterest.
Better yet, Pinterest’s Buyable Pins feature lets Pinterest users buy your products without ever having to exit out of Pinterest.
And Pinterest won’t take a cut from your sales if you use the feature. Plus, you can promote Buyable Pins so that more people can discover them by turning them into Promoted Pins.
Here’s how you can use Buyable Pins to drive Pinterest sales without customers ever having to navigate to your website.
But first, what exactly are Buyable Pins, anyway?
What are Buyable Pins?
Promoted Pins allow businesses to guarantee that users see their pins.
Buyable Pins, on the other hand, allow users to directly buy a product from a pin without ever having to leave Pinterest.
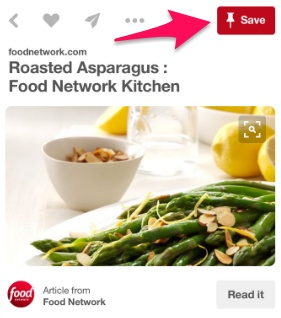
Here’s what they look like:
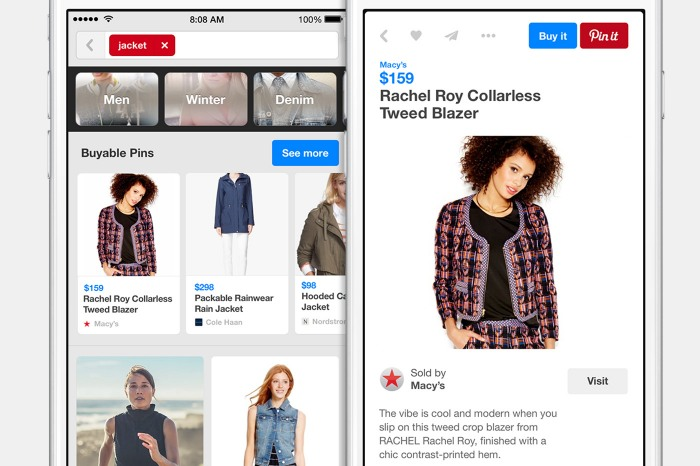
Buyable Pins allow users a simple, secure, and quick way to buy without the site redirecting them somewhere else.
The main difference between Buyable Pins and regular pins is that they have a blue “Buy It” button next to the red “Pin It” button.
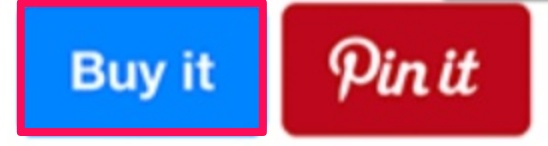
Users can see the item’s price, its seller, and its description. If they click “Buy it,” they go right to a checkout area within the Pinterest platform.
This is great for impulse buyers because they don’t even have the time to think twice about whether they should make a purchase.
As they’re browsing through pins, creating wishlists, or searching for DIY ideas, your Buyable Pins will show up right in their feed. They can buy with the click of a button and continue pinning their next recipe.
The checkout process is swift, secure, and optimized for mobile users. Users can buy products with a card or via Apple Pay.
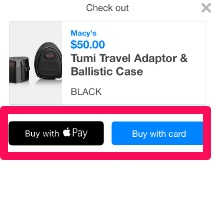
To take things a step further, users can even close out purchases with Touch ID. That means they can buy your products with just their fingerprint.
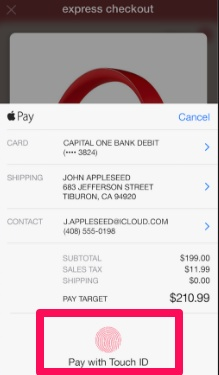
Pinterest doesn’t store buyer information, which keeps their privacy secure. Plus, the platform won’t take a cut of your sales. There’s no commission fee.
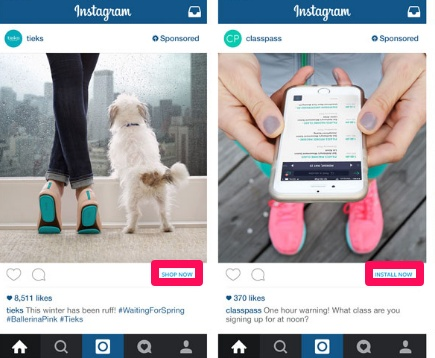
Instagram offers similar “Shop Now” and “Install Now” buttons, but Pinterest is the true innovator of buyable posts.
With Pinterest, you can generate 67% more conversions than you already have.
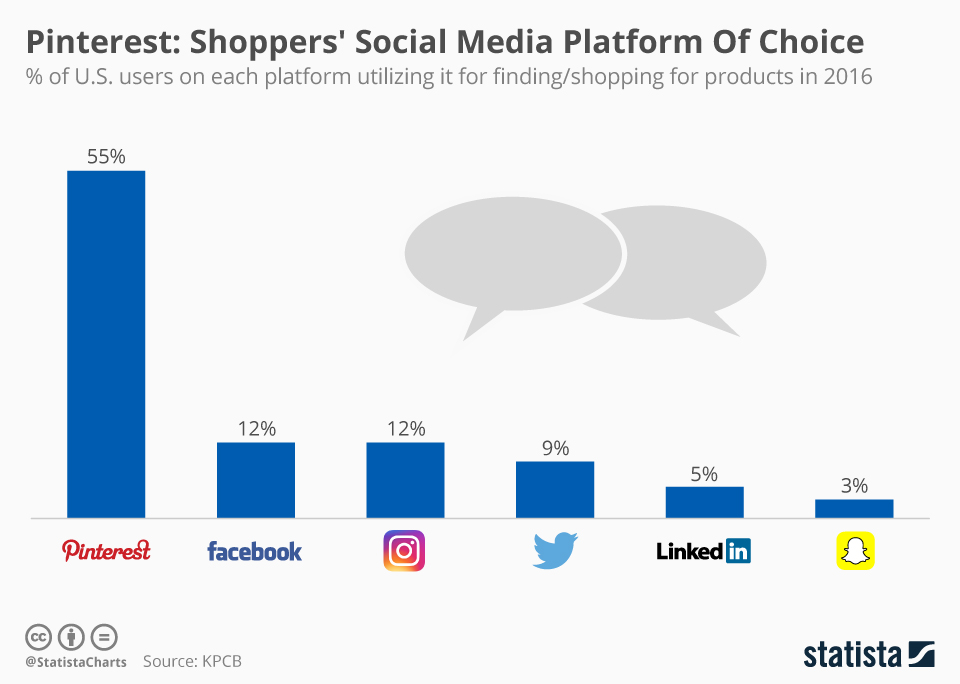
According to Statista, it’s also the shoppers’ social media platform of choice.
Here’s how you can get started creating Buyable Pins.
How to create Buyable Pins
Right now, only a few choice merchants support Buyable Pins. Supported platforms include Shopify, BigCommerce, Demandware, and Salesforce.
If you already use a supported platform, you should be good to go.
Apply for Buyable Pins on your e-commerce platform first. Then, create an account with one of these platforms if you don’t already have one.
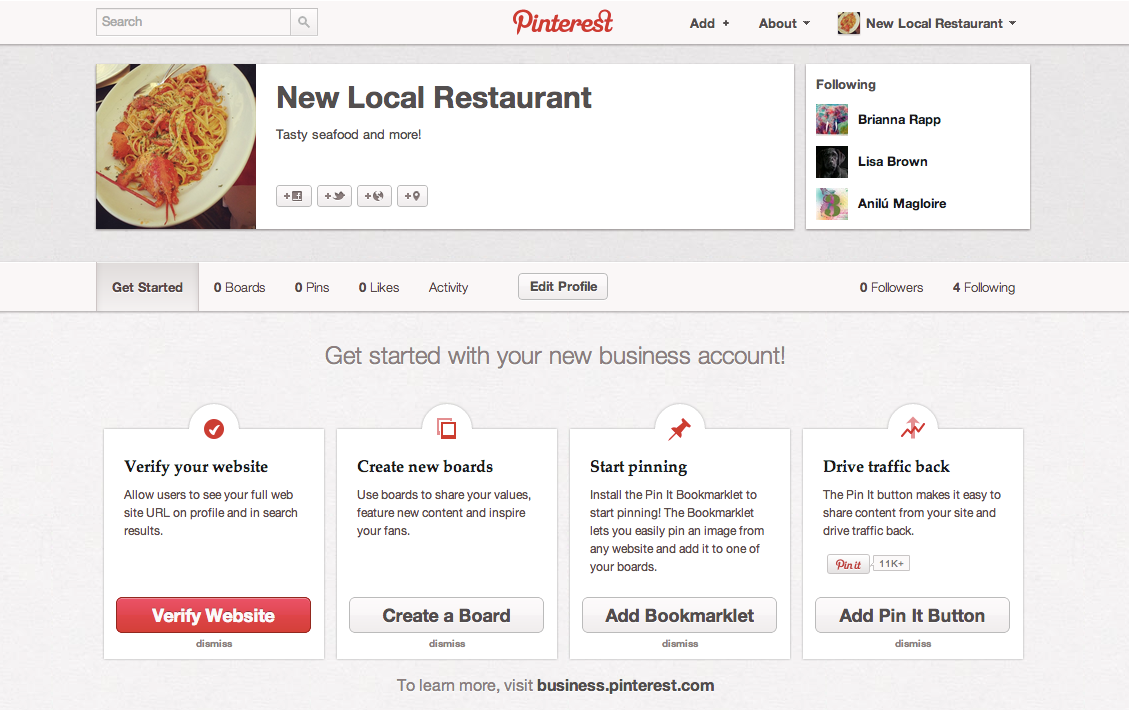
From there, review Pinterest’s policies to find out if your business is eligible to sell on their platform. If it is, create a Pinterest business account or convert your personal account into one.
Here’s what your business account will look like:
Be sure to sell only appropriate products, fill out your entire profile, and offer customer service links somewhere on your profile.
Once you get approval for your application to use Buyable Pins, you can start adding them.
Add them to a protected products board, which is invisible to public view. Only you can access it. You can find this board at the following URL:
pinterest.com/YourUsername/_products
If you don’t see a protected products board when heading to this URL, make sure that the website listed on your Pinterest account matches the domain of your e-commerce store.
Pinterest also says that it can take up to three to five days for your pins to show up as buyable.
The simplest way to get started adding product pins to your Buyable Pins board is by using Pinterest’s save button.
Even though customers can’t see your protected products board, pins that you add there will show up in home feeds, category feeds, and search results.
When you add new products to your store, the board should update every few days and add these products to your protected products board.
Once you get them added, you can track and promote Buyable Pins with Pinterest Analytics.
Track and promote Buyable Pins
To take advantage of all of the marketing tools Pinterest has to offer, you should sign up for the analytics platform.
You can view the number of views, repins, impressions, and clicks for each pin. You can also check out demographics like languages, gender, and interests.
If you want to optimize your Pinterest account and your Buyable Pins, you have to track data.
You should also promote Buyable Pins by turning them into Promoted Pins. To track current Promoted Pins, click on the “Ads” tab next to the “Analytics” tab.
From there, you can view traffic, engagement, and more.

Promoted Pins put your pins in front of your desired audience. To create a promoted pin, head to the Pinterest Ads Manager at ads.pinterest.com.
Be sure to turn off ad blockers on your browser to visit Ads Manager.
Then, click the + button and select “Create Ad.”
You’ll then be able to select whether your goal is to boost engagement (which will charge by views, clicks, and repins), build brand awareness, or increase web traffic.

Once you choose a campaign goal, you’ll be able to enter a campaign name, select a daily budget, and more.
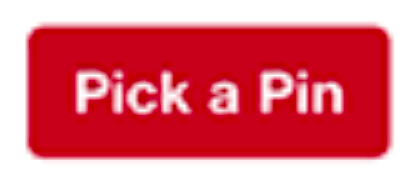
You’ll also need to pick a pin to promote. To do this, click on the “Pick a Pin” button.
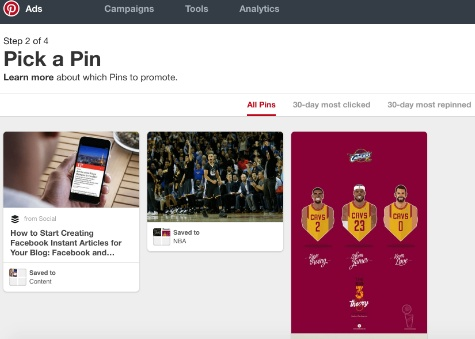
On the next screen, you’ll be able to choose the pin that you’re going to promote. You can search for a pin by URL or keyword or simply scroll through your past pins.
You can view all pins, the most-clicked pins in the past 30 days, or the most-repinned ones in the past 30 days.
Be sure that the pin you select is a previously-posted buyable pin.
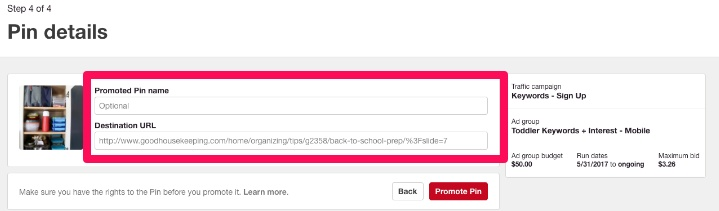
Next, you’ll give your promoted pin a name. You can also enter a destination URL.
Then, you’ll be able to select the audience you want to target.
Target audiences for more exposure
The next step requires you to pick a target audience that you want to push your ads to.
You can select different interests to target your Buyable Pins to by entering interests relevant to your product or industry.
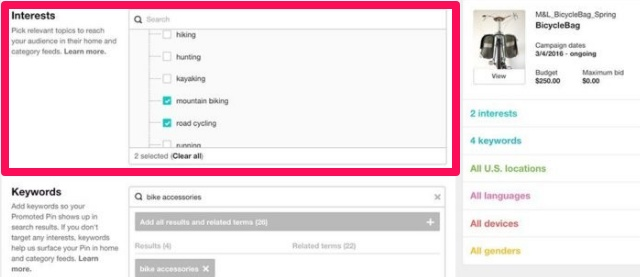
Then, you’ll need to choose keywords. This is one of the most important steps to creating a promoted Buyable Pin.
The keywords you pick will determine the words that users will have to enter for your pin to appear to them.
Pinterest suggests some related keywords based on previous information you provided about your pin, but you can also add your own.
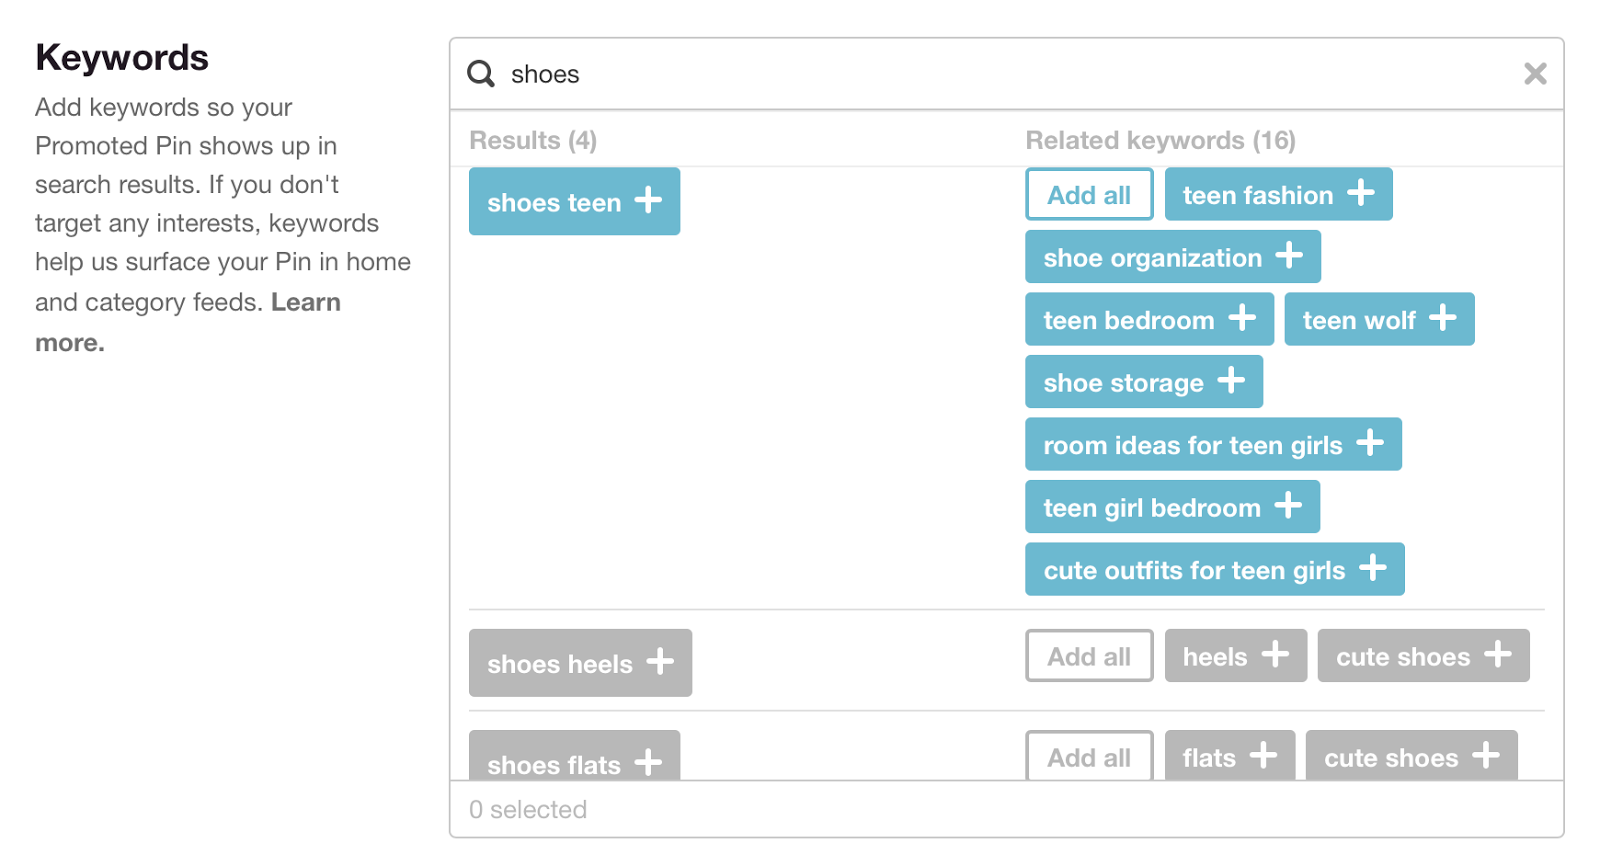
To add a keyword, just click on it. It’s best to add anywhere from 20-30 keywords for each pin you promote.
In the next section, you can choose which locations, languages, devices, and genders you want to promote your pin to.
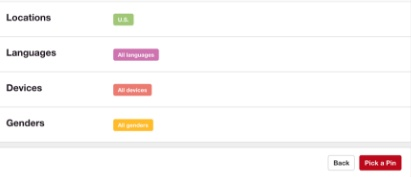
If you’re selling a product that’s just for men, change the gender from all genders to men. If you don’t provide support to languages other than English, select “English” under languages.
The same goes if you don’t sell outside of the United States. Make sure that you select the U.S. as your location.
Once you’ve finished all of this, you can finalize your campaign.
Finalize or edit a campaign
In this final stage, you can set a maximum CPC bid.
This is the amount of money you’re willing to pay for a single measure of engagement.
The amount you enter can’t be lower than $0.10, but Pinterest will tell you what other advertisers are bidding, so you’ll know if your selection is too high or too low.

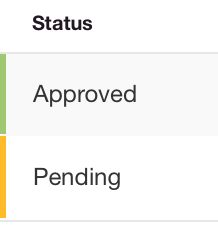
From there, you can submit your campaign. However, Pinterest has to approve it before it can run. To view your approval status, click on the Engagement or Traffic campaigns tabs.
If you ever need to edit your campaign, just select the name of the campaign you wish to edit. This is good news if you ever want to target a different audience or change your selections.
After you’ve clicked on your campaign, select “Edit Promoted Pin” in the top-right corner. That should take you to a page that looks like this:
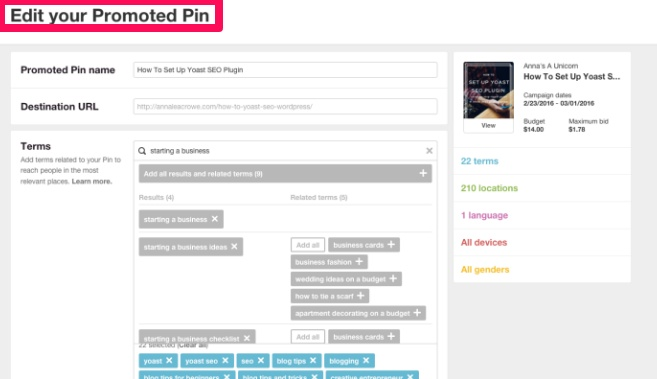
You can change your maximum CPC bid, add more targeting information, change your keywords or add more keywords, and pause your campaign.
If you pause a campaign, you can resume it at a later date.
Three additional tips to optimize Buyable Pins
At this point, you know exactly how to create Buyable Pins. You know how to track them, promote them, and target audiences for more exposure.
We’ve covered how to finalize and edit campaigns.
But there are a few more tricks you can use to make your Buyable Pins more effective.
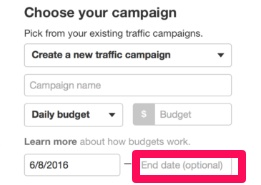
The most important is using end dates on your images.
1. Add end dates to images
It’s important to add end dates to images on your Buyable Pins if you have products that you’re only going to sell for a limited time.
This will let users know that the product is only available for a certain window of time and prevent it from circulating when you’re no longer selling it.
When choosing a campaign, add the end date underneath the daily budget.
It can also be helpful to explain that your item is only available for a limited time in the description.
Rich Pins can also help keep Buyable Pins that are no longer available for purchase from appearing like they are.
2. Use Rich Pins
A large issue with Buyable Pins is that users can continue to share them even if the product is old or out of stock.
There’s usually no time stamp on a buyable pin, or any pin for that matter, that lets users know when the user originally posted it.
And if a user reposts an old pin, it will show up as a fresh one in their followers’ feeds.
One easy way to prevent any issues from users reposting old products is to delete Buyable Pins that contain products you’re no longer selling.
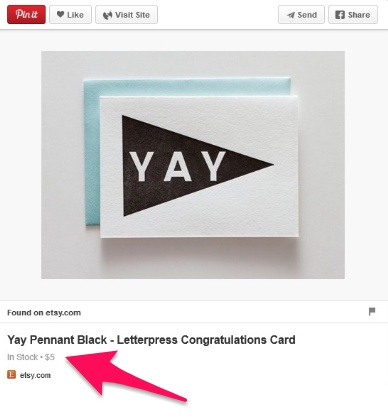
But another way to show users what you do or don’t have in stock is to use Rich Pins.
If your product is in stock, your Buyable Pins will automatically say “In Stock” at the bottom next to the price.
Here’s what that looks like:
Rich Pins work by syncing to your website and automatically updating information like prices and inventory as they change.
This ensures that all of your pins contain up-to-date information, and it keeps angry pinners at bay who want to buy a product off of a buyable pin only to find that the item isn’t available.
Plus, Rich Pins always show the correct, live price of an item so that a buyer isn’t disappointed or surprised when they head to the checkout area only to find that their item costs more money.
Once you’ve synced your pins, you won’t have to worry about updating any of this information manually.
There are several kinds of Rich Pins, including App Pins, Place Pins, Article Pins, and Product Pins. Product Pins are the kind that you should use for Buyable Pins.
To add Rich Pins, add Open Graph or Schema.org markups between the <head> </head> area within the HTML code for each web page you want to add Rich Pins to.
Here are the HTML codes for each Rich Pin markup:
Open Graph markups:
<meta property=”og:title” content=”YourProductTitleHere” />
<meta property=”og:type” content=”product” />
<meta property=”og:price:amount” content=”YourPriceHere” />
<meta property=”og:price:currency” content=”USD” />
Schema.org markups:
<div itemscope itemtype=”https://schema.org/Product“>
<meta itemprop=”name” content=”YourProductTitleHere” />
<meta itemprop=”url” content=”https://shop.famsf.org/do/product/BK5160” />
<div itemprop=”offers” itemscope itemtype=”https://schema.org/Offer“>
<span itemprop=”price”>YourPriceHere</span>
<meta itemprop=”priceCurrency” content=”USD” />
<meta itemprop=”availability” itemtype=”https://schema.org/ItemAvailability”
content=”https://schema.org/InStock” />
</div>
Be sure to change “USD” to your country’s currency on the currency line if it differs.
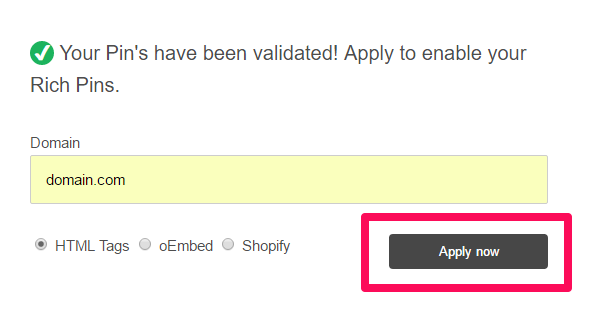
Then, you’ll need to use Pinterest’s Rich Pins Validator to make sure that the Rich Pins data is visible.
Once Pinterest validates your pins, click “Apply now.”
If Shopify, Etsy, Teachers Pay Teachers, or eBay hosts your website, you won’t need to add any kind of markup.
For Shopify users, head to the Rich Pin validator page and paste your product link. Add “.oembed” to the end of your link and apply for Rich Pins.
For Etsy, Teachers Pay Teachers, and eBay users, new pins from your sites will already have product information included within 24 hours.
Another easy way to boost Pinterest sales with Buyable Pins is to take advantage of the “Shop the Look” feature. Here’s how.
3. Use the “Shop the Look” feature
The “Shop the Look” feature is an add-on to Buyable Pins that lets users find the individual items in all of your images.
This is an easy way to post more than one product in an image, which means more sales. As of right now, larger brands like Target, Macy’s, and Wayfair are dominating this feature.
The “Shop the Look” feature looks like this:
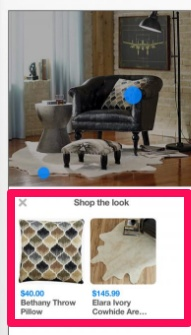
Each product you’re selling features a blue dot. In the “Shop the Look” section underneath your pin, users can see the product names of each item along with the prices.
Pinterest is directing all businesses interested in using this feature to contact Curalate or Olapic to get started.
Conclusion
Pinterest generates the most online sales out of all social media platforms.
And Buyable Pins are one of many unique features that make Pinterest an effective place to make sales.
They allow Pinterest users to make purchases without ever leaving the app, which is convenient and fast.
You’ll need a business account to get started with Buyable Pins. You also need to be using an e-commerce platform that Pinterest supports, like Shopify.
Create Buyable Pins, track them by using Pinterest Analytics, and promote them out to Pinterest users by turning them into Promoted Pins.
Target the audiences most interested in your product for the best results. Don’t forget to finalize your campaign by picking a maximum CPC.
You can always edit your selections like max CPC, keywords, and audience selections later on.
Add end dates to images so that they aren’t in circulation after you discontinue a limited-time product.
Use Rich Pins so that Pinterest will automatically update your pins according to your inventory and pricing.
Finally, be sure to try out the “Shop the Look” feature to push more than one product at a time.
How do you use Buyable Pins to boost your sales?
Comments (8)