
Millions of posts are written, seen by a few people and then discarded into the blog post graveyard.
This is a colossal waste.
If you’re not driving traffic to your old blog posts, you are slashing your ROI dramatically.
It doesn’t make sense to spend lots of hours or hundreds of dollars creating a new blog post and then letting it die, once it rolls off your front page.
Your content marketing should still get search results and search engine optimization from older posts. In fact, a seasoned blog post can generate organic traffic.
Think about it this way: If a new visitor stumbles upon your latest blog post and likes it, they haven’t seen the other 99% of your blog posts. Do you think that they could benefit from those posts?
Assuming they’re good posts, of course, they would like them.
It not only makes good financial sense to make the most of your old content, but it’s best for your new readers as well.
I’m about to show you 5 different ways that you can drive traffic to old posts on your blog. But, before I do, there’s one more thing I want to ask you:
What’s more valuable, a new blog post or an old blog post?
Not how much you’ve spent, but which one is more valuable. The answer is an old blog post.
Why? Because it has matured over time. The value in a blog post isn’t the few thousand visitors you get right away, it’s the tens or hundreds of thousands of visitors that you get over the next few years from search results.
When I look at the traffic stats of any of my blogs, the vast majority of traffic each month goes to old posts. They’ve been shared more over time, have attracted more links and attract a lot of organic search traffic.
Your old posts are the key to growing your blog and taking your business to the next level.
Does that make sense?
Before we start, do this first
It’s crucial that you don’t randomly apply the tactics in the rest of this post. If you do, you won’t be maximizing your results and that will cost you thousands of dollars in the long run.
It’s important to start by creating a content inventory.
Essentially, you need a list of all of the old posts that you have on your blog, as well as a quick look at how they fit into your business.
Not all blog posts are the same. Some are worth more, for a variety of reasons:
- more in-depth
- more shareable
- higher conversion rate
- resonates with readers more (typically better time on page, bounce rate, etc.)
You don’t want to treat all old blog posts equally. Instead, you want to strategically plan which blog posts you should direct your efforts towards for the best search results.
Step 1 – Make a list of all of your posts:
The first step is to get the URL or title of all of your blog posts.
The simplest way to do this, by far, is with your analytics software.
If you’re using Google Analytics, navigate to “Behavior > Overview”:
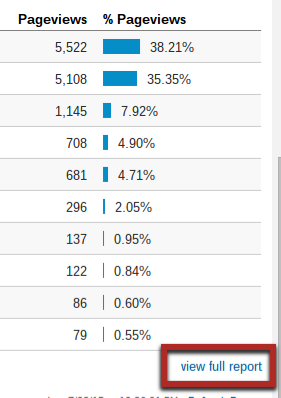
You’ll see a list of your top posts on the right. Click the “view full report” link in the bottom right-hand corner.
This will show you a more detailed list of your posts. However, there will still only be the default list of 10 posts.
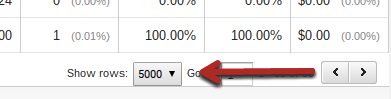
Scroll to the bottom and change the “show rows” option to 5,000.
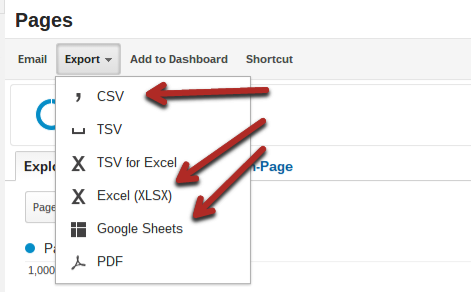
Then, go back up to the top of the page and click “export.” Pick one of the spreadsheet options in the drop-down menu:
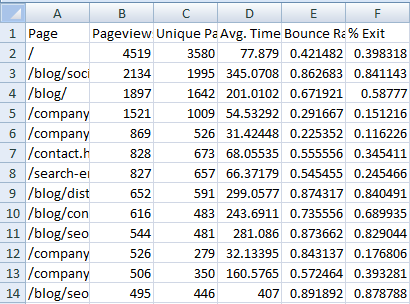
When you open up the spreadsheet, you’ll see all of the data from Google Analytics in a more convenient table.
Step 2 – Add any other relevant metrics: Now that you have your list of posts, you need to make sure that you have all of the data you need.
The final step in this process will be to pick the posts that make the most sense to drive organic traffic to. Here, you need to determine how you will make that decision.
The most common metrics to use are:
- goal conversion rate (usually email list sign-ups)
- time on page
- bounce rate
- social shares
- backlinks per 1,000 visitors (or per any number of visitors)
Ideally, you should have already had goal conversion tracking in place in Google Analytics, so you’ll have that data available in your spreadsheet, as well as time on page and bounce rate.
To get social share counts, if you’d like, you can use any one of a number of social share counting tools. Just Google “bulk social share checker,” and you’ll see that there are a variety of options.
Most, unfortunately, have a limit on how many URLs you can check at once. If you have a particularly large site, I’d recommend using these custom functions in Google Sheets, so that you can get them all at once.
Also, backlinks can be something that you’re after. By finding the posts that have attracted the most links in the past, you can send traffic to them and hopefully get more.
If you’ve gotten most of your links from reaching out to site owners, this metric wouldn’t be too useful. I would recommend any of the other ones that I mentioned earlier.
However, if you’re set on trying to get a few extra backlinks, use a tool, like Majestic’s bulk backlink checker, but you will need a paid account.
You paste in your URLs, just like the social checker and then you’ll get a spreadsheet with your link stats for each URL. You can export this and then add this data to your main table.
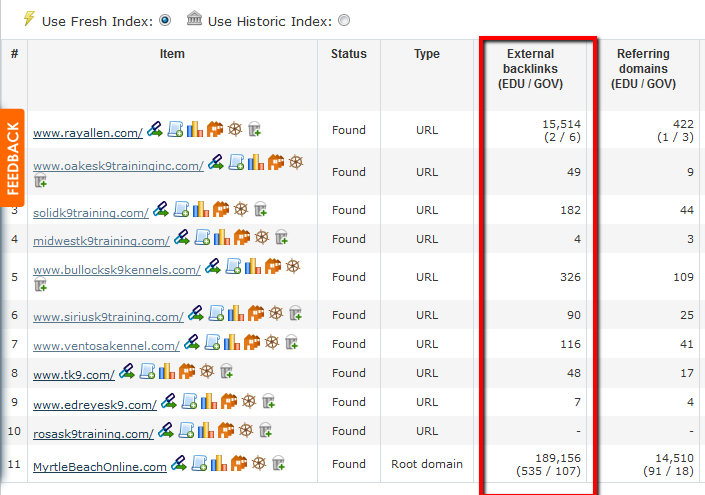
Then, simply divide the number of backlinks (or linking domains) to each URL in your spreadsheet by the number of visitors that you’ve had for each. This will give you a “backlink/visitor” metric that you can use to compare them.
Step 3 – Decide which posts to prioritize: Now’s the easy part. You need to identify the many or the few old blog posts that have had the best impact on your business.
Most of the tactics we’re going to go through give you control of which posts you will send extra traffic to. The more posts that you pick to focus on, the less traffic will go to each individual post, so try not to pick too many posts (I’d say pick 30 max).
You can either copy these posts into a more handy text file or spreadsheet, or you can simply highlight each blog post you plan to focus on.
I’ll be referring to these “important old posts,” throughout the rest of the article.
1. Email and social are in your control
Some sources of search engine traffic are mostly or completely out of your control. But, your email list and your social accounts are in your control when it comes to content marketing.
You control what you share, when you share it and how you share it with your followers.
In general, there are 3 major opportunities to increase traffic to old posts with social and email marketing.
Option #1 – Include links in autoresponders: Chances are that you have at least a basic autoresponder set up for any new email subscribers.
The first email welcomes them and then subsequent emails tell them important things about you and your business that will help you build a relationship with them.
The one big opportunity that most businesses miss is including links to their old content in an early autoresponder email.
The first few emails to a subscriber get the highest open rate, so it’s important to make the most of them.
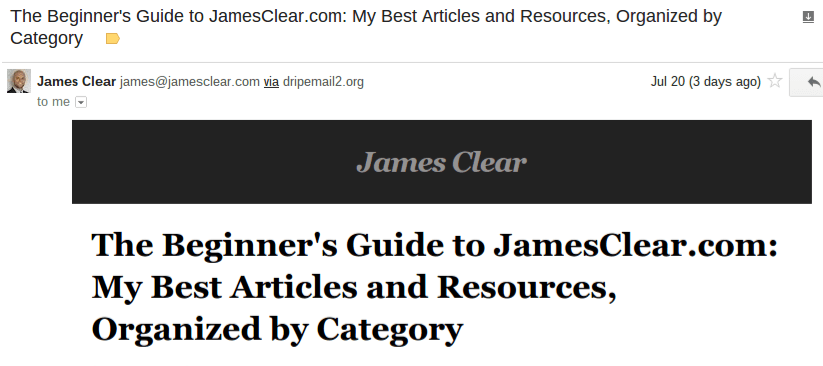
One great example of this is James Clear’s email newsletter.
He’s primarily a productivity and entrepreneurship blogger and he has built a very solid list of subscribers over time.

The first email that he sends you in his autoresponder series contains a free copy of one of his books, which is his main lead magnet.
However, a few days later, he follows up with another email that is all about the best content on his site, using the most of his content marketing opportunity early in the subscription.
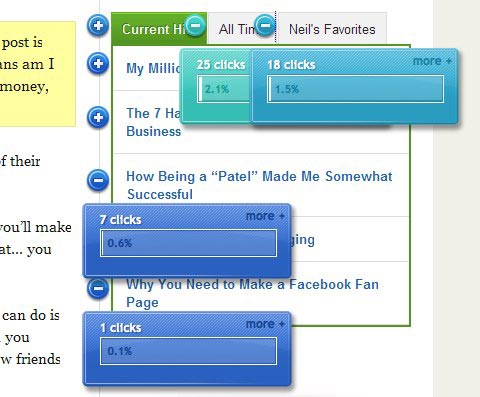
After the introduction of the email, he has a large list of links to his best content. Below is just a portion of the links.
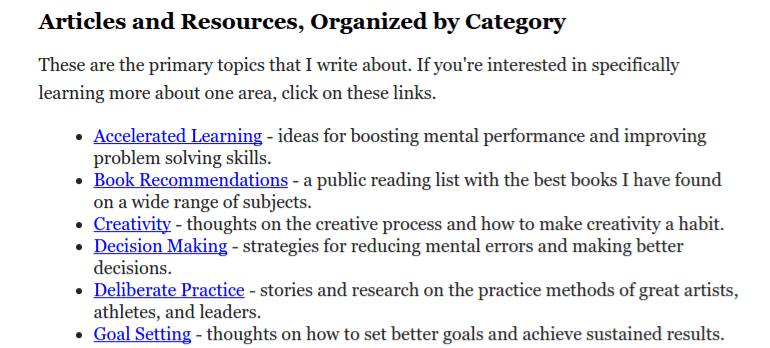
A new reader probably spends hours going through these and I would guess that they visit at least 10 pages on average – not bad for one email.
Option #2 – Link to content during sales campaigns: Very few sales campaigns work best on absolute newbies to your niche. Part of the reason why you should write blog posts is to educate your visitors.
Here’s the thing, though. You might think that you’ve taught your readers something in the past from a blog post that you read. However, a large portion of your list will have never seen that particular post.
Maybe they are a new subscriber, or maybe they just didn’t have the time to read it. It doesn’t matter what the reason is.
The point is that you should always provide some educational material before making a pitch to a prospect.
Take Brian Dean’s latest launch, for his SEO course, as an example. In one of his first emails in the sales campaign, he includes links to the most important posts that he’s written in the past.
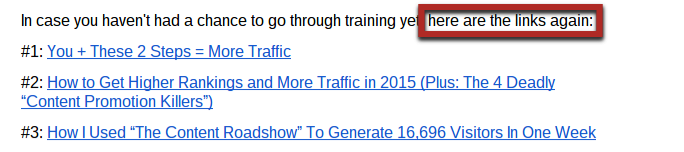
Some posts aren’t only valuable because of the search engine traffic or shares that they generate, they can also help you sell your products or services.
After he gives readers the chance to get educated in that email, he then closes it off by briefly mentioning his course.
Option #3 – Regularly share old content on social media: A part of any good social media marketing plan is sharing content on a regular basis.
But, unless you’re pumping out an extremely high volume of blog posts, you likely don’t have that much of your own new content to share.
The solution? Share your old blog posts.
There are basically 3 approaches to doing this.
The first way is the manual way. You’ll have to keep a spreadsheet schedule of when you want to share old posts and then schedule them every week or month. This is very time consuming, but the plus side is that you have the most control over which posts are shared.
The second approach involves using a tool, like Buffer (free). It allows you to schedule social media posts, in advance, simplifying content marketing consistency.
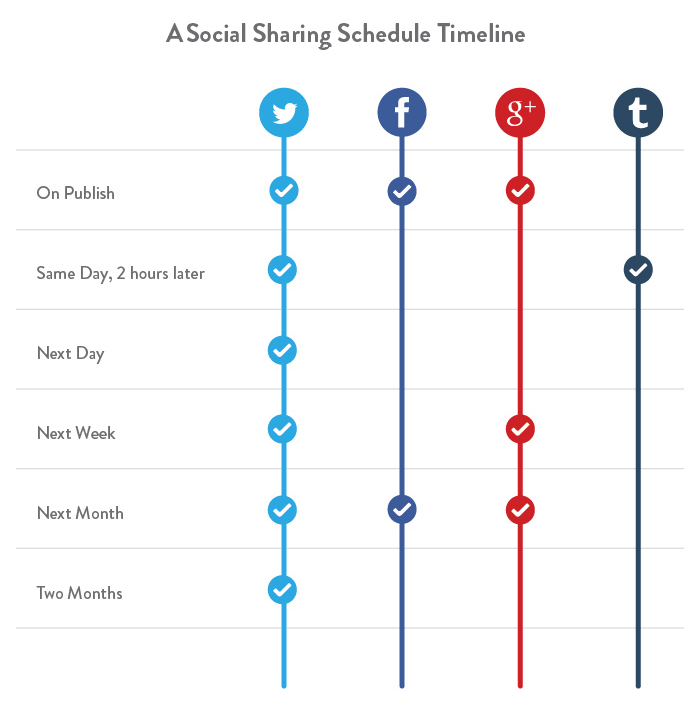
When you publish new blog posts, you should schedule them to be shared multiple times.
If you’re using Buffer, this is really easy. When you click on a Buffer link or extension in your browser, you’ll get a little pop-up. Click on the “power scheduler” tab and you can quickly share a post multiple times, in the future and on multiple networks.
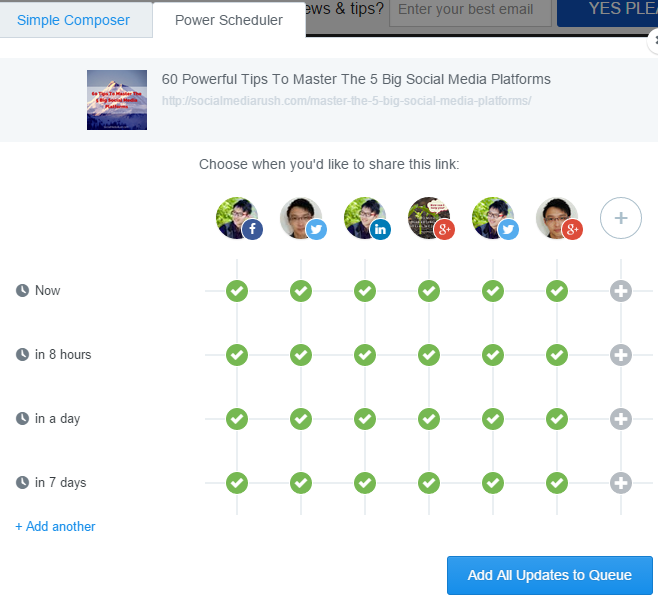
As you can see in the image, you can click, “add another” to add more sharing times. This is not only quick, but you control which posts are shared and can share to multiple networks. You can combine this with the manual method, to save some time.
The final approach is to use a WordPress plugin, like Evergreen Post Tweeter. This plugin will automatically share old posts on Twitter as long as you have it activated. This takes no time on your part, other than the initial set-up.
To use it, install the plugin and then go to the plugin settings. You’ll have to set a minimum age for the post (i.e. start including a post to be shared, once it’s over 30 days old).
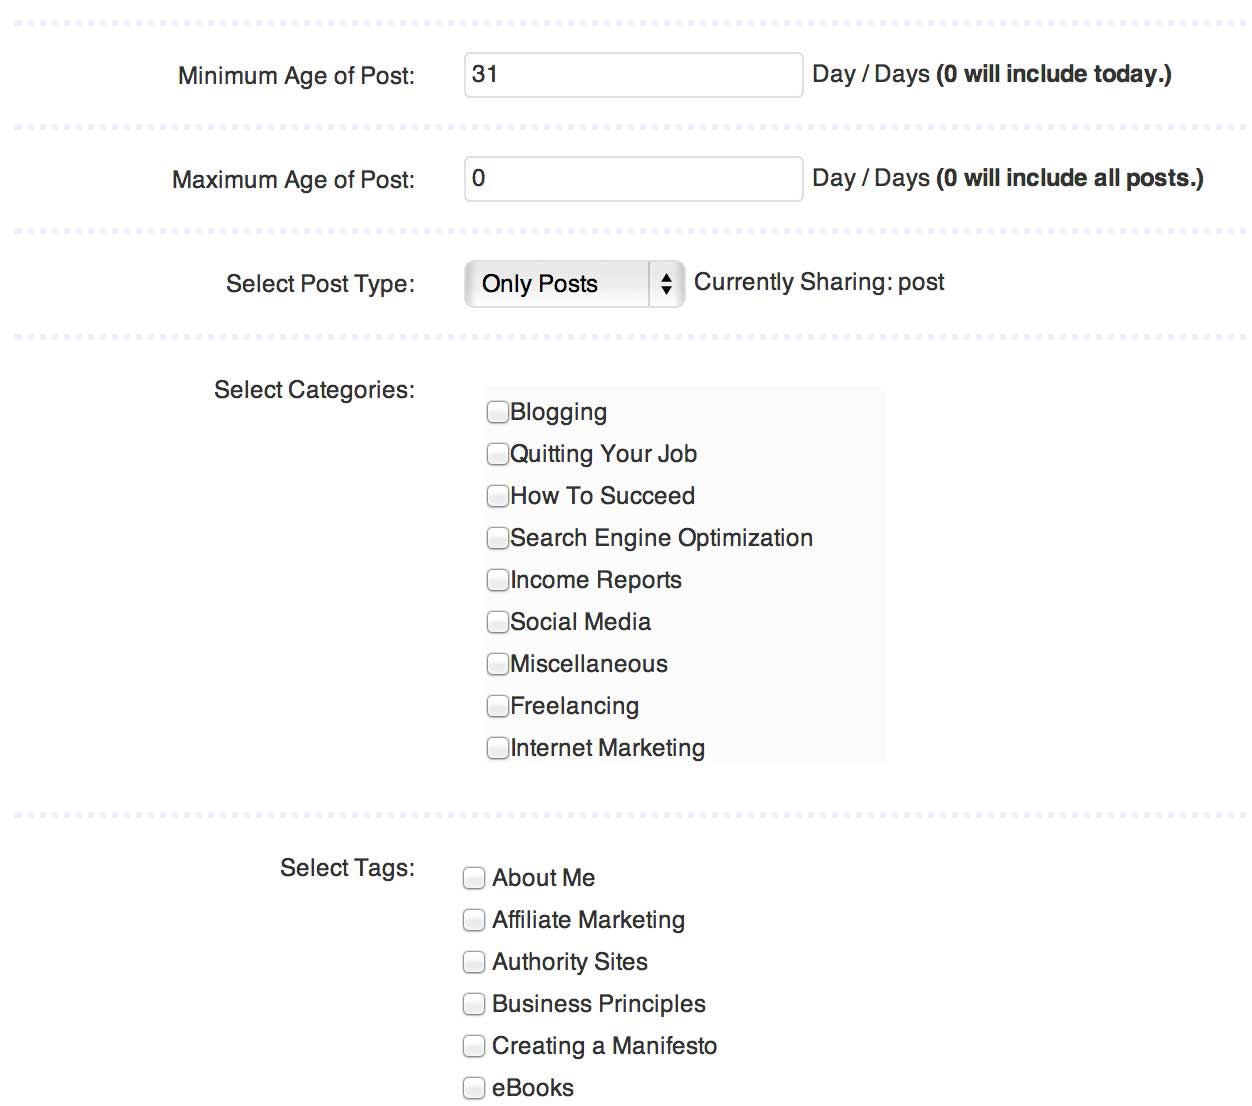
While you can’t pick exact posts to share, which would be ideal, you can pick categories or tags. I’d recommend picking your most popular ones from search engines.
Finally, you can schedule tweets similarly to Buffer. You can tell the plugin how many times per day to tweet an old post and at what times.
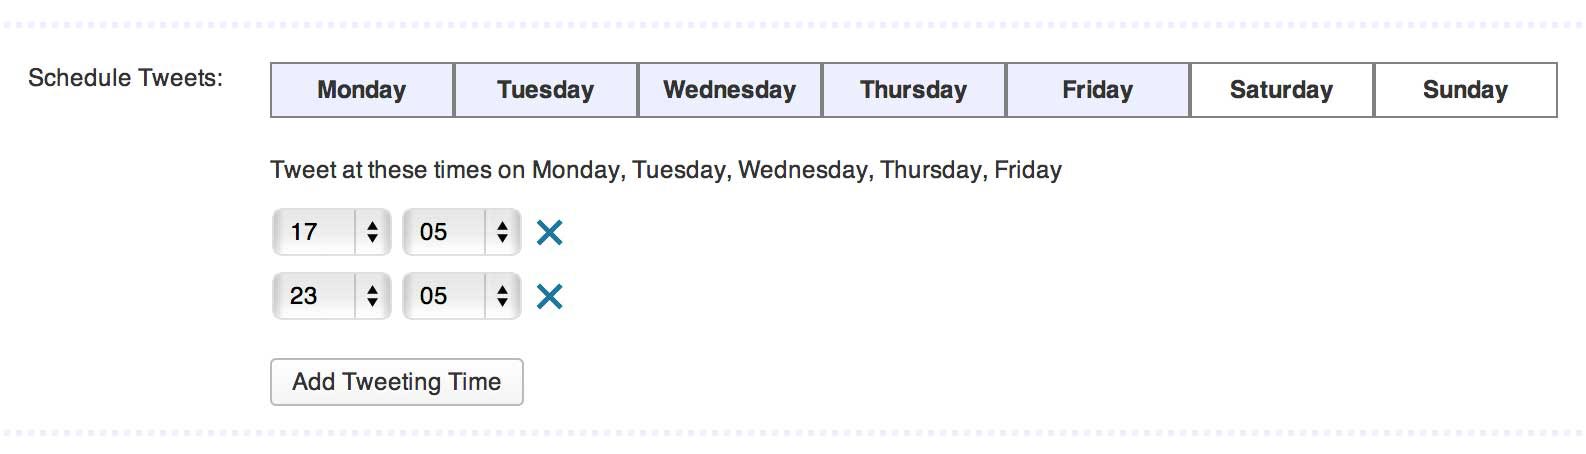
Posts will be shared on a random basis. Essentially, you’re giving up control over which particular posts are shared, in order to save time.
2. Internal linking is on-going maintenance
One of the absolute basics of SEO is internal linking.
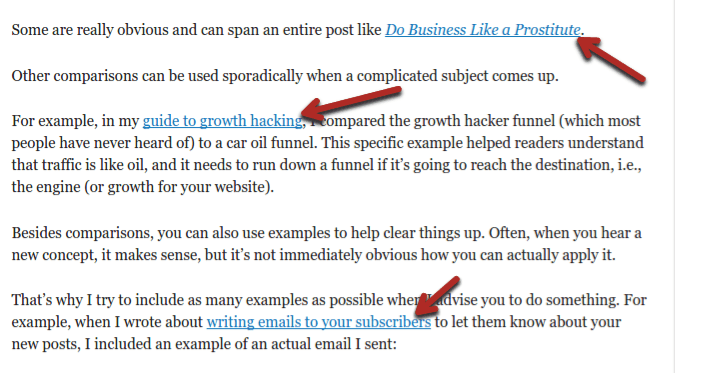
Internal linking can help improve search rankings but also improves the user experience. You can use internal links to funnel readers to relevant content (to the post topic) that they would likely be interested in.
Since the reader gets to pick if they do or don’t follow a link, it makes for a pleasant user experience. The anchor text you use can also influence a click through.
If you’ve read any of my past blog posts, you know that internal linking is something I take very seriously. Each post has at least a dozen internal links in it, often more.
Step 1: Link often when creating posts: The first step to effective anchor text linking building is to do so while you’re writing a new post.
This would probably be a good time to note that you shouldn’t link for the sake of linking. Do it because it helps prove a point or is valuable to the reader. Not because you seek search engine optimization.
The reason that I’m able to include so many internal links in my posts, is because I have over 500 blog posts on Quick Sprout. There’s always at least a dozen relevant and useful posts that I can link anchor text to.
Before you finish each new post, from this point on, make sure to take extra time to refer to the list of important old posts (that you made earlier) and see if it makes sense to link to any of them.
Step 2: Create a list of your most important posts: I’m guessing that you only write about a few topics on your blog – that’s a good thing.
What you’ll also notice, when you’re paying attention to internal linking while writing blog posts, is that you’ll start to create anchor text links to the same old posts over and over. These are usually your best posts that cover important topics in your niche in great depth.
Some of these might be on the list that you made earlier, but some may not. What you want to do is to list the different categories that you write about and determine the main posts that you’ll be regularly linking to. Having these links on hand will save you a lot of time.
Directing visitors to these important posts will ensure that they have the best experience possible. Because of this, they should be more likely to convert, down the line.
For Quick Sprout, I’d have the following categories:
- Social media
- Entrepreneurship
- SEO
- Branding
- Blogging
In each of those categories, I would record my most impressive past posts for search engine optimization and engagement.
For example, in social media, I might write down:
- Stop Guessing: Here’s a Social Media Strategy That Works
- How to Create The Perfect Social Media Post
Step 3: Regularly go back and add internal links to older posts: Many blog owners get the first 2 steps right, but forget this one.
Any new post has very few (depending on your navigation) anchor text links, by default. Over time, you’ll start linking to that post that you just published in new posts that you write, but you could do it sooner if you wanted to.
I recommend scheduling time, every 5-10 posts that you publish, to find other related previous posts that you can add an internal link to.
This gives your “new” post an instant rankings boost and a trickle of secondary traffic from those other old blog posts.
Let me give you an example, to clarify.
This post that you’re reading right now is about driving organic traffic to old blog posts.
It makes sense to add internal links in older blog posts that are about similar topics.
So, what I would do is search Google for:
site:quicksprout.com old blog posts

This brings me a list of relevant posts on Quick Sprout in search engines.
Now, I can go into 5-10 of those posts and add a link to this post (that you’re reading), just after I publish it.
3. Revisit your keyword targeting
In almost every niche, long-term search traffic will make up a large percentage of your blog’s traffic.
While you should try to get things right the first time with your keyword targeting, we all know that things don’t always work out as planned, when it comes to Google.
There are often easy opportunities to significantly increase your search traffic with very little effort.
Interested? Go to “Search traffic > Search analytics,” in Google Webmaster Tools:
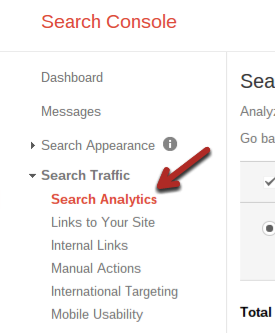
This will show you a graph of your search activity for the last 30 days, plus the queries that you rank for on search engines.
Click the “download” button in the bottom left of the screen (scroll all the way down). It will give you a spreadsheet of all of your queries, along with their individual stats.
Open it in Excel or Google Docs and highlight the top row of titles. Then, click the filter button:

This allows you to sort and filter the data in each column.
What we want to do: The goal is to identify keywords with decent search volume that you’re not specifically targeting, but still ranking fairly well for.
To do this, click on the filter arrow that’s beside the “position” heading. Then, click “filter by condition” and choose “is between,” from the drop-down menu.
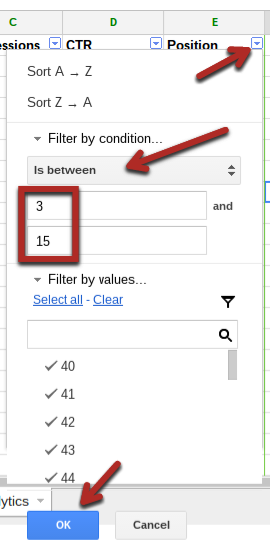
Again, you want to find queries that you’re ranking pretty well for so that you can optimize your old posts to rank even better for them. Obviously, if you already rank #1 or 2, there’s not much of a point to optimizing the posts for a higher search result.
So, I suggest starting with “3” on the low end and picking a high end of 15-20. If you go any higher than that, it’s going to be hard to rank highly (top 3 spots) for that keyword, just by conducting search engine optimization on the page.
There’s one more filter that you need to put in place now.
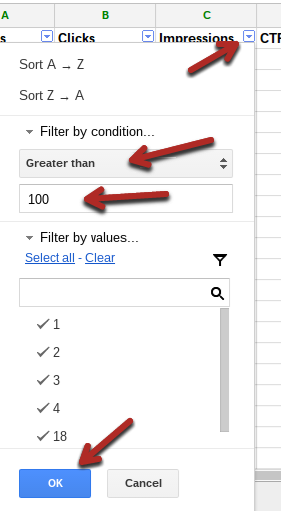
Click the down arrow for “impressions” and click, “filter by condition” again. This time, however, you need to pick “greater than” from the drop-down.
You want to make sure that there are a significant amount of people searching for the term. You can pick any number you want, but I recommend starting on the high side (~200) and then lowering it, if there aren’t enough results left.
You should now have a list of queries that have solid potential.
Next up, find the page that ranks for that term, by just searching it in Google.
There are 2 things that you can do to make it rank better:
- Basic on-page SEO – Make sure that the keyword or phrase appears in the title, once or twice in the article and once or twice in subheadlines.
- Make it more clickable – You can re-write the meta description and title (make it enticing) to increase your CTR. This will directly give you more organic traffic, but could also improve rankings.
Update the title and meta description for every query in the list, then track the results.
4. You also control your navigation
Some of the areas that you control most are your navigation areas.
You have a few different options here.
Option #1 – Links in the sidebar: While not all blogs have sidebars, some do and it’s a good place to include links.
You don’t necessarily need to include a lot of links, but it makes sense if you have a lot of content.
If you include links to posts that aren’t that interesting for your average visitor, you’ll get a bad click-through rate.
However, if you include the right posts, the ones that are the most interesting and valuable, you’ll get a decent level of engagement and increased search engine optimization.
One thing that you can take advantage of, with your sidebar, is that you control exactly what shows up.
Option #2 – Links in the menu: The second navigation area that pretty much all sites have is the header menu.
It’s the first thing that people see when they load your page. If you don’t have a sidebar, it stands out even more.
If you go to James Clear’s website, you’ll see that he only includes his most important content in the header menu.
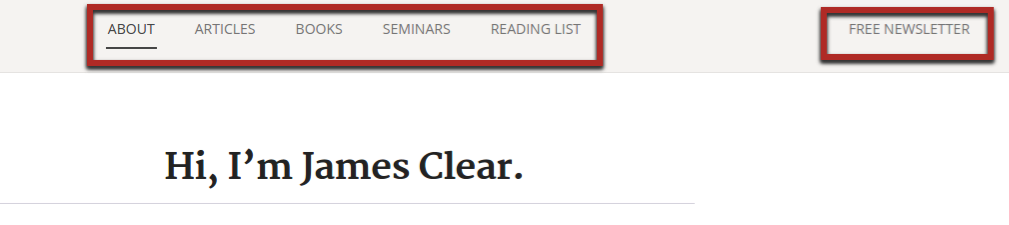
There’s a link to some of this most popular content (his articles and reading list), but also a link to his lead magnets (“books”) and free newsletter.
You should mix the links to your top content and to lead generation pages because this is valuable space.
The “About” page, in particular, is 1 of 3 big leaks that most websites have, when it comes to conversions.
All websites should have an optimized About page, with at least one opt-in form.

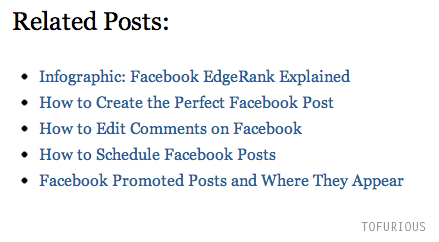
Option #3 – below the post: A final option for linking to old posts is after any post. There are many related post plugins for WordPress, that will automatically display as many related posts as you’d like.
With that being said, the end of a post is very valuable space, so make this decision carefully. You may be better off collecting opt-ins, rather than sending visitors to read more.
5. If all else fails, update and republish
This final option isn’t about funneling traffic to a certain page on your website, it’s about increasing the value of your old posts so that people will go out of their way to see it.
Like always, there are a few different options to choose from.
Option 1 – Republish an old post: This option is best if your blog has grown a lot over time. Refreshing the content will improve search engine optimization.
A great example of this is Jon Morrow’s post, “How to Be Smart in a World of Dumb Bloggers”.
He originally wrote it when Boost Blog Traffic was a smaller site and it’s a really good post.
While it got a good response the first time around, many of the new readers to the blog hadn’t seen it before.
In order to give it more exposure, as the blog editor felt it was one of the best posts published in the past, it was republished earlier this year.
Option 2 – Create a completely new, updated post: You can’t just republish some posts, because they lose value over time. In some cases, they lose a lot of value.
For example, a blog post on Moz was published in 2012:
Updated for 2012: The Beginner’s Guide to SEO
Guess how useful a guide to SEO for 2012 is in 2019? Yeah, not so useful. I bet its traffic declined significantly, starting in 2013.
Instead of republishing that guide, Moz instead created a new and better guide:
SEO: The Free Beginner’s Guide From Moz
In addition to making a much better guide, they also made it evergreen, by not including dates. As long as they keep it updated with new information, it’ll stay highly relevant in search engine optimization results.
This tactic doesn’t always drive traffic to the old post, but you can re-use a lot of the original content to cut down on content costs. In addition, sometimes you’ll be able to link to the old post, early on in the new post, by including a line like:
“Since (link to old post) was so popular, we decided to give it an update.”
Option 3 – just update it: What happens when a visitor stumbles upon an old blog post? If it doesn’t look updated, they leave. They won’t share the content and they won’t stay on the page long. If you were ranking for keywords, they might decline over time.
By updating a blog post once in a while, you make sure that it retains its usefulness. In most cases, you don’t need to completely overhaul it, just update a few small aspects, once or twice a year.
Conclusion
I hope, by now, that you realize how important your old blog posts are.
They represent a significant amount of your content and marketing investment when it comes to overall search engine optimization and results.
If you invested in a house, would you just let it sit there? No, of course not. You would maintain it and actively try to increase its value.
If you use the 5 suggestions that I outlined in this article to drive traffic to your old blog posts, you will see a fairly quick increase in overall traffic and conversions.
I’d appreciate it if you could take a minute to tell me which of these ways you’re going to use, in order to drive more traffic to your old blog posts. Just leave me a comment below. I’d love it if you also came back later and let me know what the results were.
Comments (134)